Revision [646]
This is an old revision of OM606BrokenGlowPlug made by WebMaster on 2009-01-20 16:34:47.
Broken Glow Plug Removal
on the 1999 E300TD (OM606)
by leszek
1/19/09
Thought I would give back a bit to this forum. I recently did a glow plug job and all 6 broke. I managed to come up with a pretty good system to get these out without removing the head.
In a nut shell, the steps go as follows (greater detail below)
1. Of course attempt to first remove the glow plug. If it breaks follow the rest of these steps
2. Unscrew the little nipple from the end of the glow plug.
3. With a Dremel tool cutoff wheel cut the end of the GP as flush as possible
4. With a pilot drill or very small drill bit, drill as close as you can to the center.
5. Step up drill sizes larger and larger until you see that you are interfering with threads - don't drill threads out.
6. Using carbide Dremel bit, grind in around base of the threaded portion of the GP to separate it from the shaft.
7. grind one small groove into the threaded portion of the head to enable the removal of the threaded portion of the GP.
8. Remove the threaded portion
9. Screw in the sacrificial GP drill guide (explained later).
10. Drill in about 1.5"
11. blow out the hole with compressed air and then tap the hole with 5/16" tap
12. screw the threaded rod into the taped hole, slide a socket over the rod, then a few washers and a 5/16" nut.
13. tighten down on the nut and the remains of the glow plug with pull straight out.
Tools needed:
1) Drill
2) A good set of drill bits
3) Dremel Tool
4) Dremel cut off disk (the very thin breakable fiber ones have the best finesse)
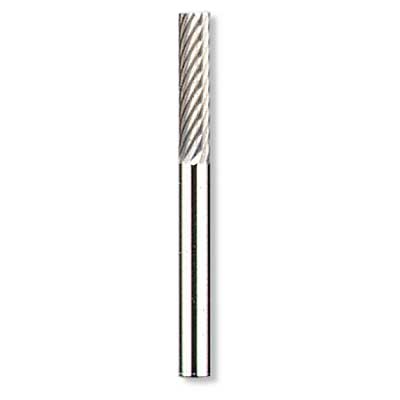
5) Dremel tool carbide cutting tool 9901
6) 5/16" hardened thread rod about 4" long or a 5/16 bolt with the head cut off
7) a couple of 5/16 nuts
8) 5/16" drill and tap set - I believe the drill is 0.271"
9) A sacrificial glow plug - preferably bosch as that is the one I know definitely works (I am not certain of the Beru inner Diameter so I don't know if it will work as well for the purpose it will be used for)
Now for the detailed instructions with illustrations:
1. Unscrew the little nipple from the end of the glow plug.
2. If the GP broke, you should be able to yank the head off of the GP and you will have a bit of the electrode sticking out. If you stripped it, then you will of course have a bit more drilling to do since you will be starting a bit further out on the GP.
3. Cut the end of the glow plug off to get a flat surface. It should look something like this after you cut the tip off if it broke. If you stripped the head it should look like the second picture after you cut it.
4. With a center drill or very small drill bit, drill as close as you can to the center. Drill down about ¼†inch or so.
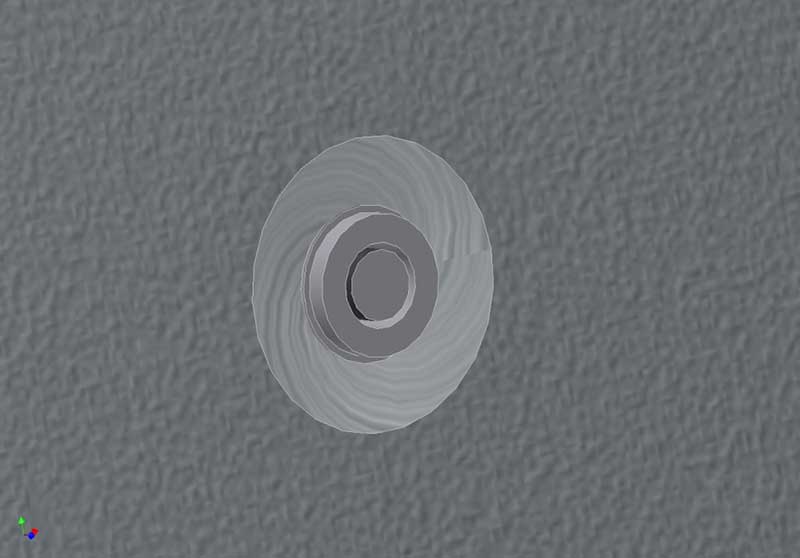
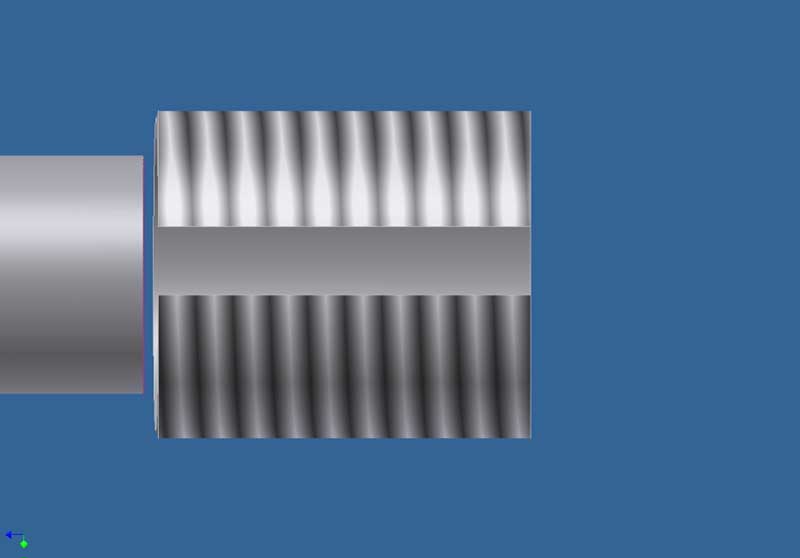
5. In about 4 or 5 steps, carefully go larger and larger in size with drill bits until you start to see the striations because you are starting to touch the threads. The goal here is to drill just barley past the threaded portion of the GP and eventually separate the threaded portion of the glow plug from the rest of the shaft. You will most likely wind up going slightly off center as you go up in drill sizes, but that is not necessarily a problem, just try not to go too far off center.
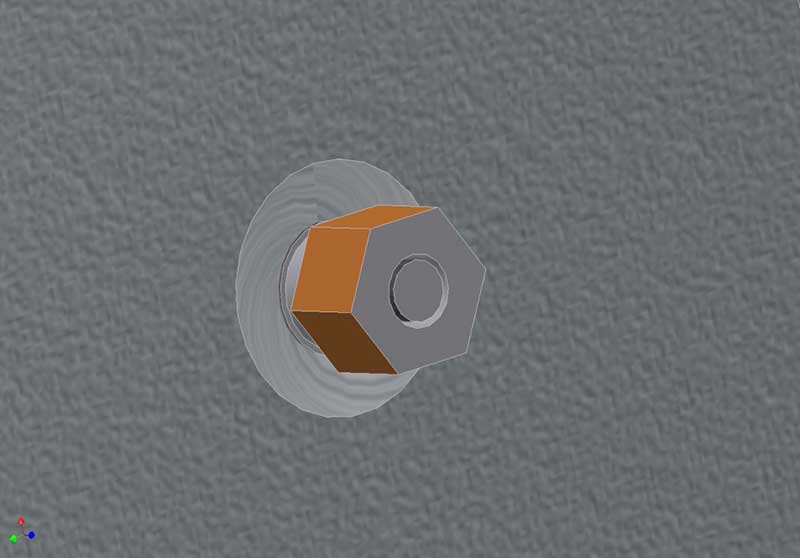
6. The idea is to wind up with something that looks like these next two pictures. The first one shows what you will see, the next few illustrations after that show how the glow plug would look if it were not in the head. You may wind up cutting away the threads just a tiny bit on one side, but as long as you do not cut away too much, there is still more than enough holding power left on the remainder of the untouched threads.


7. If by chance you happened to stay very centered with your drill then you have to stop drilling before you actually completely wipe out the threads in one small area to avoid removing too much thread. If this is the case, then you will use the carbide Dremel bit to grind a small groove into one very small spot across the threads in order to allow you to remove the rest of the good threads. The reason we are creating this one small damaged area is to allow us to get what is left of the threaded portion of the GP out leaving behind plenty of good threads.
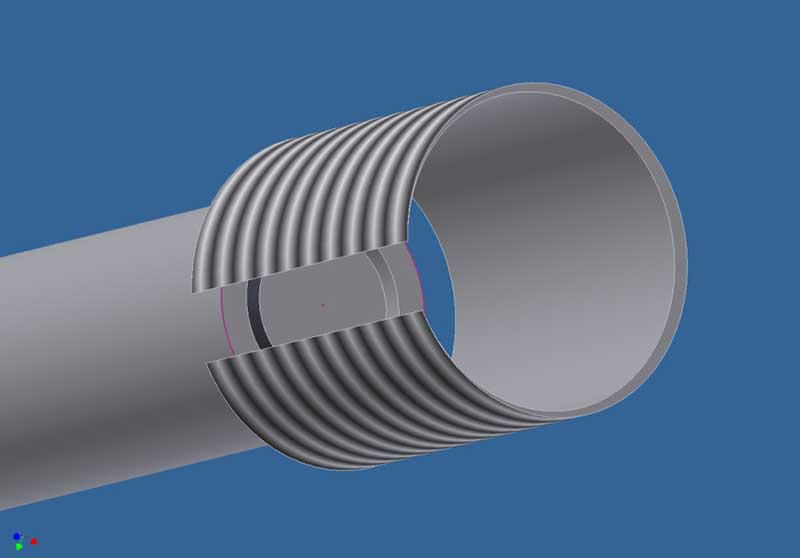
Note: See this illustration above. You will notice that the threaded portion is no longer connected to the rest of the GP. This must be accomplished to enable us to remove remainder of the threads and then the rest of the GP separately. You will more than likely have to go in with the Dremel bit #9901 to dig away a bit at the back of the threaded portion to make sure you have this separation. I used a good digital camera set on macro to take some photos of th hole. It was much easier than looking with the naked eye.
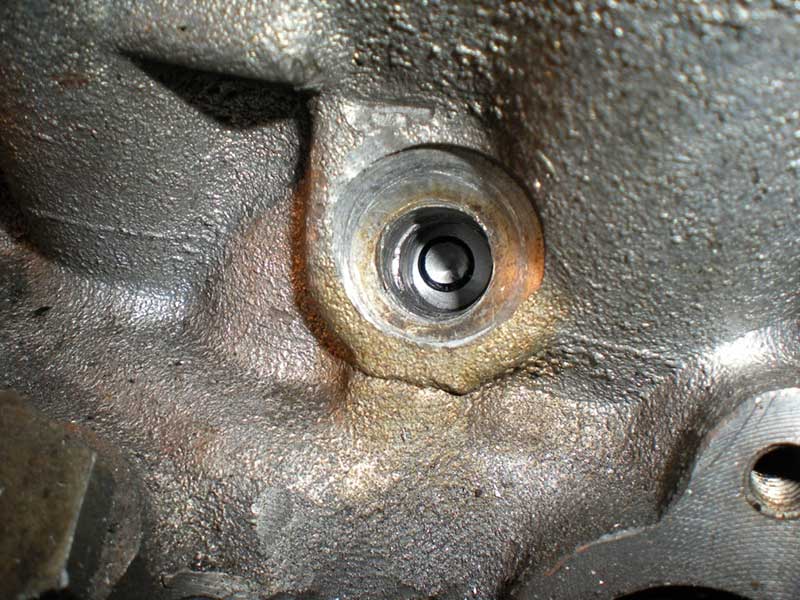
8. In this first photo below you can see an example of one that has had the threaded portion drilled out, but needs to be ground back at the base in one area to fully separate it from the rest of the GP. In the second photo, you can see it is no longer attached.

9. Now you will need to remove whatever is left of the threaded portion of the GP. It will be a very thin piece or pieces of threads – almost looking like a broken spring.
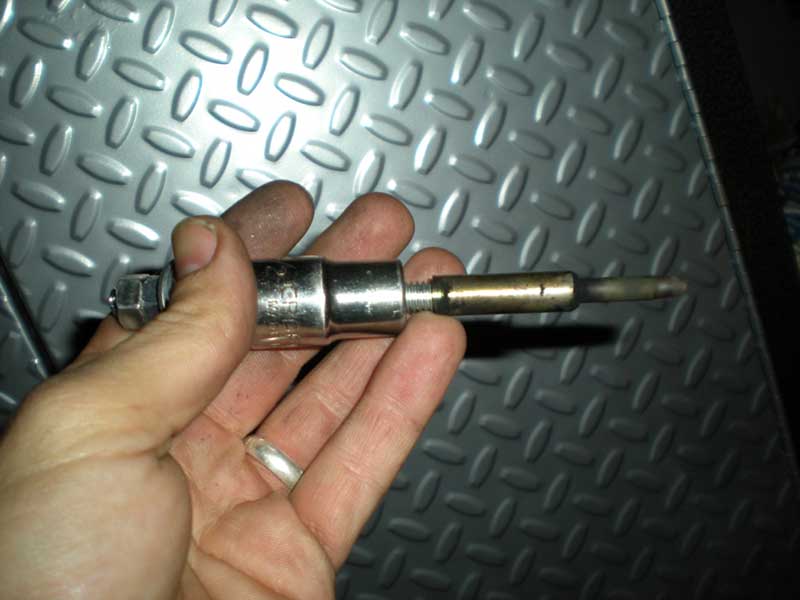
10. Once the threads from the old GP are removed you now take a sacrificial Bosch GP, cut it just past the threaded portion and pull it apart. What you are left with is a perfect drill guide for your 5/16†drill and tap.

11. Turn this drill guide into the hole and drill into the GP about 1.5â€
12. Remove the drill guide and tap the hole with your 5/16†tap.
13. Blow the hole out
14. Insert the 5/16†hardened threaded rod, slide a socket over the threaded rod, then at least three washers, and then a 5/16†nut.
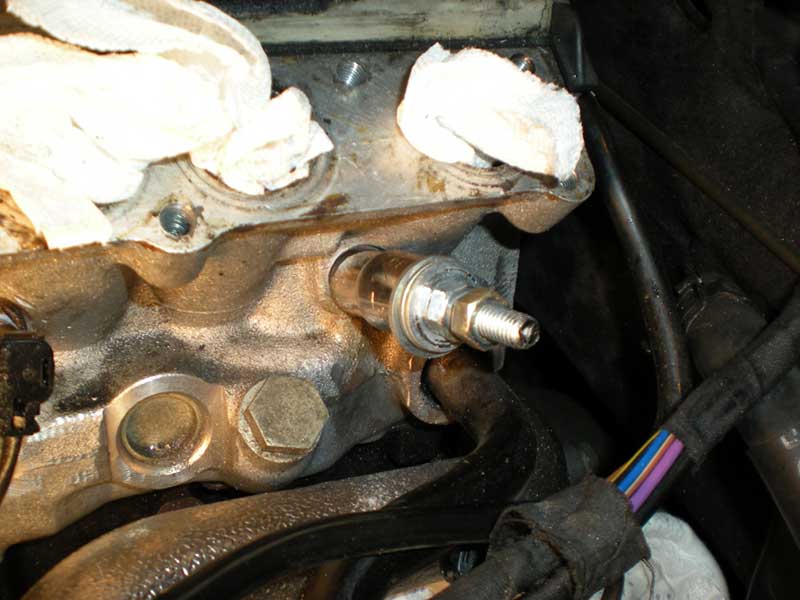
15. Tighten the nut and the rest of the glow plug should come out surprisingly easily. It will look just like this.
Discuss this DIY here.
-leszek
CategoryDiy