Replacing the Turbo Drain Tube
on the 1984 300SD Turbo (OM617)
by bodyart27
11/25/07
Tips & Pics - 617Turbo oil drain, check valve, oil pump pickup boot/strainer, sealing
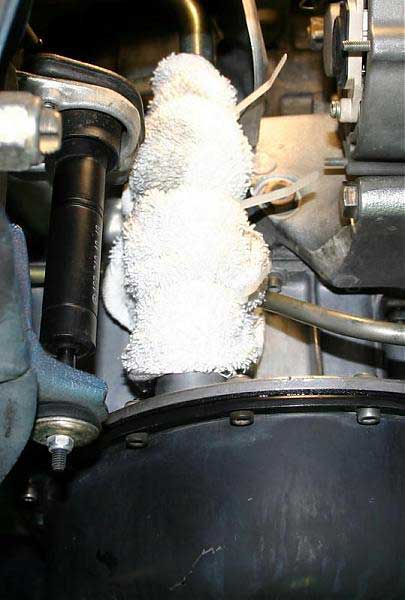
Sometime after the first annual Mercedes Shop / Fastlane Get together, my 84 300sd sprung a leak. I was on my way to work when my wife called saying she spotted oil on the garage floor. I quick check at the oil pressure and a banzai move into the first parking lot with the hood popped as I came to a halt revealed nothing major. The turbo oil return line had started leaking – top o-ring. Until I could get the parts I made a make-shift diaper out of a shop towel and zip ties
I decided to do a couple of additional jobs as preventative maintenance since I would have the pan off to do the drain. First was the check valve after reading Dave Morrison’s excellent write up
Second was to replace the strainer and boot that is at the bottom of the oil pump pickup. There is a post somewhere on the forum (can’t find it at the moment) showing a broken / torn boot.
Tips on the oil drain tube:
This is a royal PITA job. It took me hours of struggling to get the darn thing back in. I replaced the gasket under the turbo, both o-rings, the grommet at the oil pan and the straight oil drain tube
First tip is to cut away the big grommet where the straight tube enters the oil pan. That will allow the tube to rock back and forth giving you the angles you need to get the tube out.
Second tip is to remove the heat shield that sits just in front of the turbo under the plastic air intake elbow. You will need all the wiggle room you can get to maneuver the tubes back in place
Taking out the shield
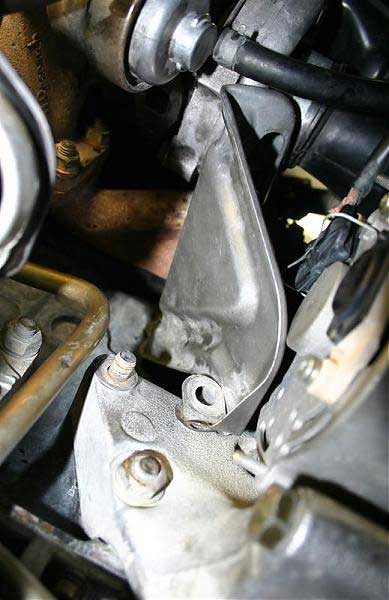
More room!
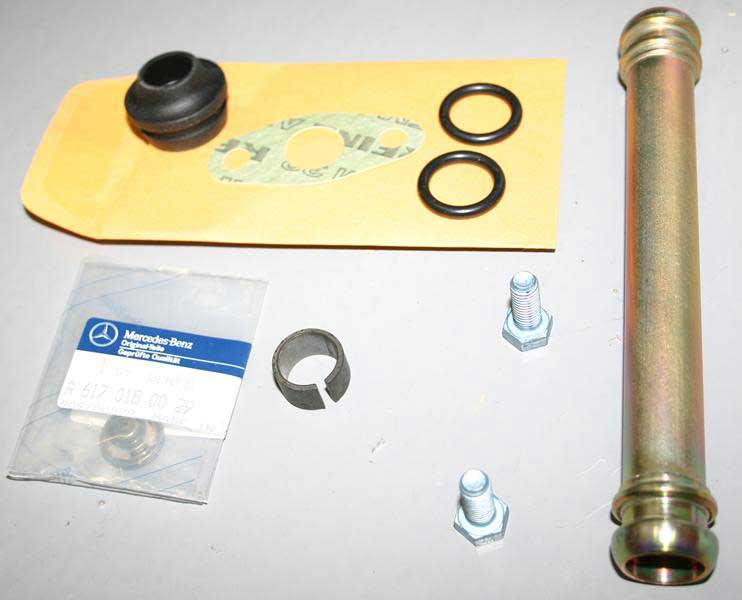
Part Numbers (for an '84 300SD - yours may vary!):
617-014-01-80 - oil pan gasket
617-187-10-01 - oil drain tube (straight - not the elbow)
617-187-01-85 - rubber ring (grommet)
004-997-53-48 - seal ring (o-rings x 2 qty)
603-187-05-80 - gaket turbo
007346-020001 - pin (believe this is the collar for the check valve)
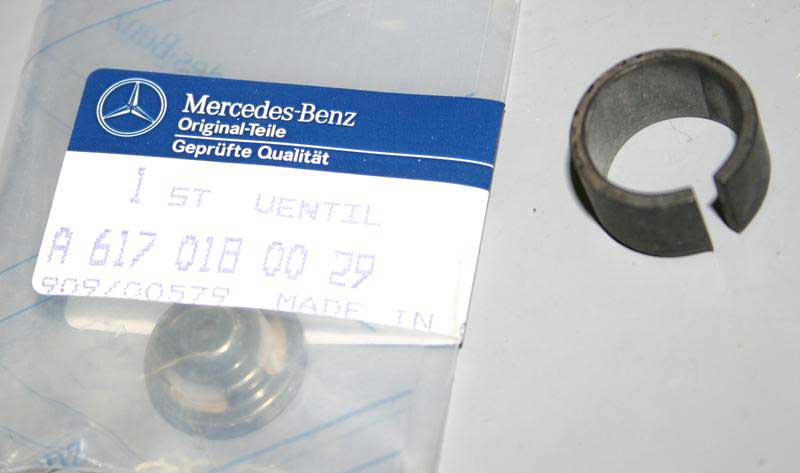
617-018-00-29 - check valve
123-010-00-28 - oil pan
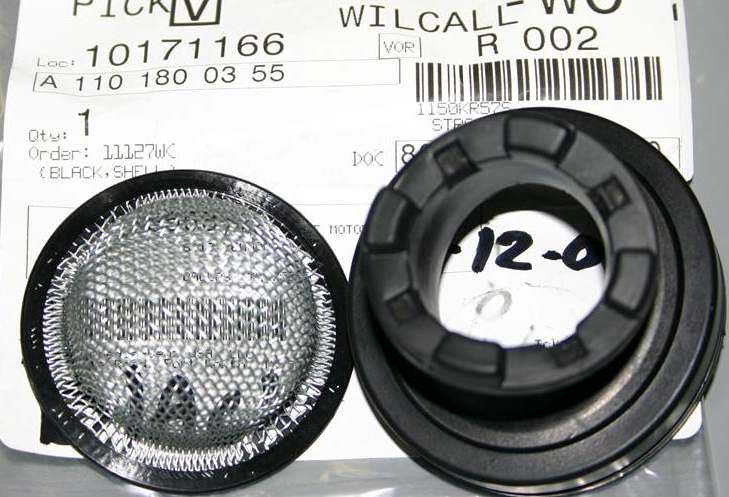
110-180-03-55 - strainer
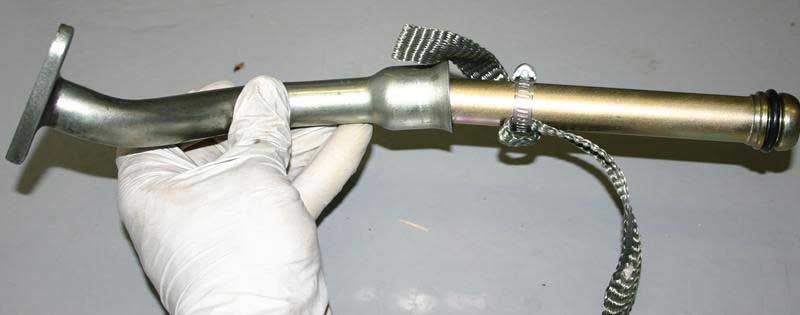
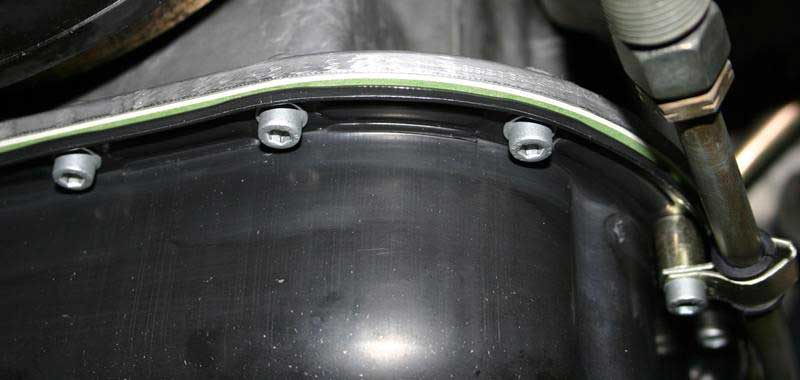
Third tip – getting the tube pushed down into the grommet. This is the PITA part. Best I can tell you need to have the grommet in the pan first, get the tube started into the hole with the new o-ring, then pull down like hell. I first tried a strap method.
That was a good start, but I couldn’t yank the strap down hard enough to get the tube completely seated. The straight tube with the elbow on top will get jammed up under the turbo until you can get the drain tube to slide into the grommet. You’ll know when the tube is completely seated as the top elbow piece will then align perfectly under the turbo providing just enough gap to slide the gasket in place.
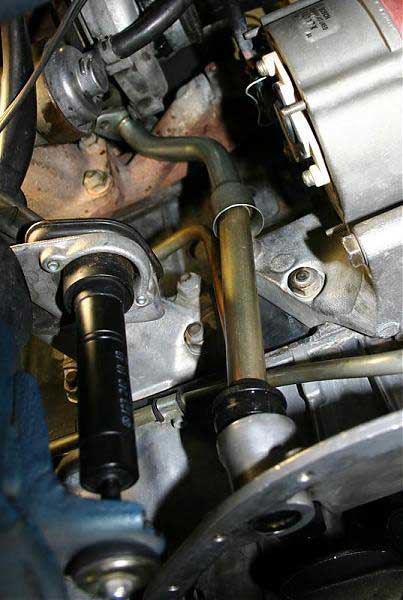
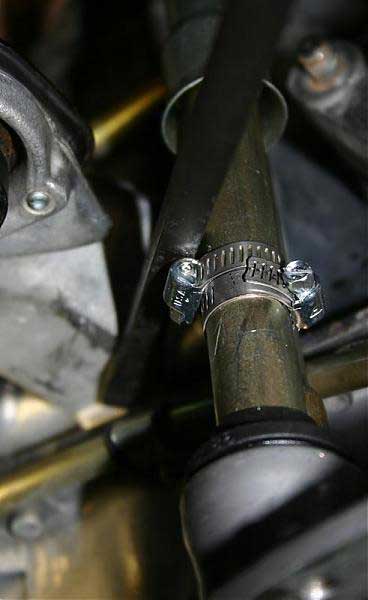
To get the tube pushed in I used a pry bar and two hose clamps. You’ll pry down against the top hose clamp, the second clamp is there to not allow the top clamp to slide down the tube as you pry. I’m prying against a big piece of metal (I forget – it goes to the engine shock or engine mount – it’s a super beefy arm). In my opinion, this is THE TECHNIQUE to get that puppy pushed down and seated.
Dave’s write-up says it all in terms of procedure – I’m just adding some additional pics.
This is the part number
The old valve in place
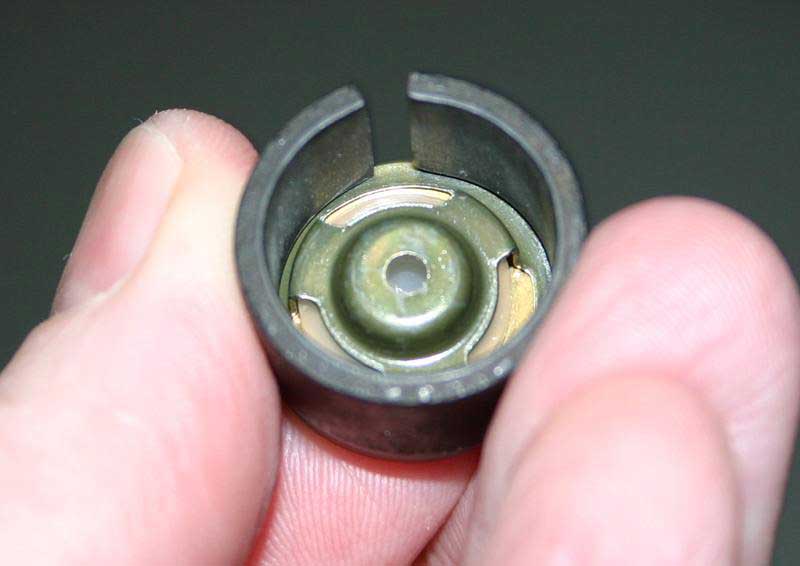
Some close ups of the valve
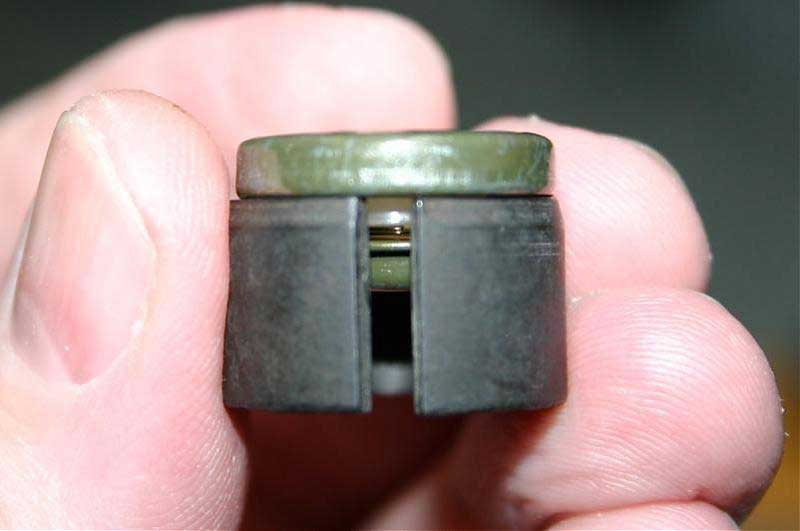
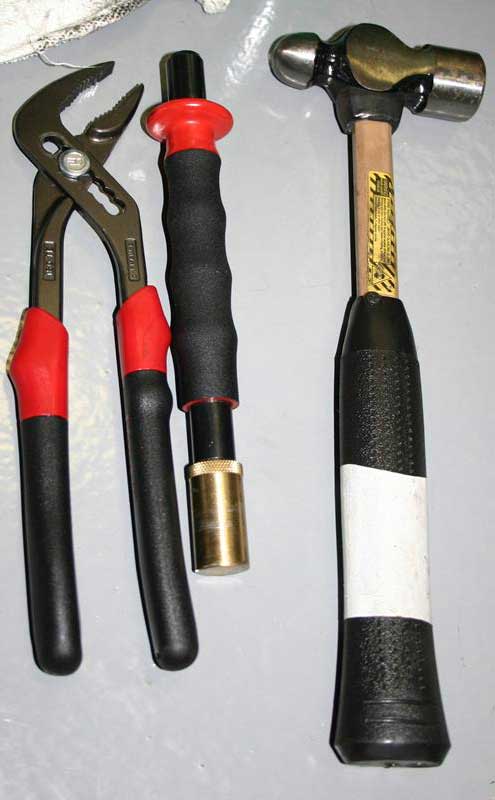
The tools I used – Facom / SK punch if you wanted to know…
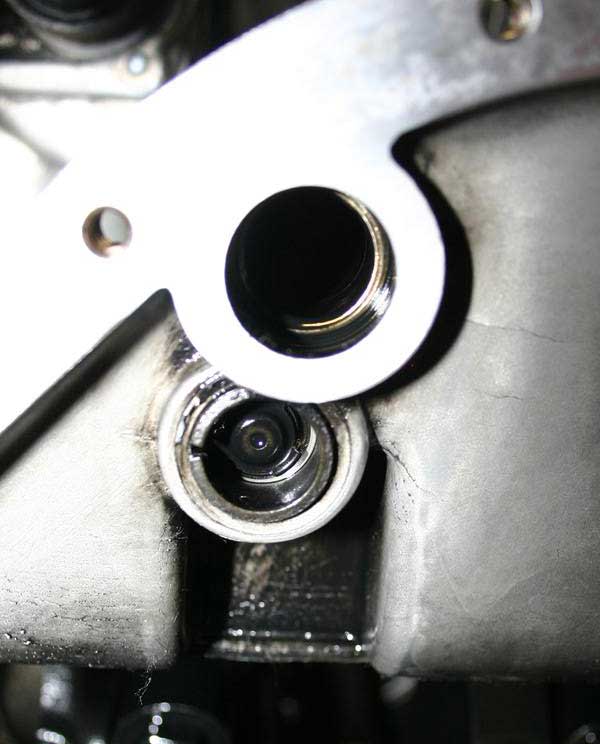
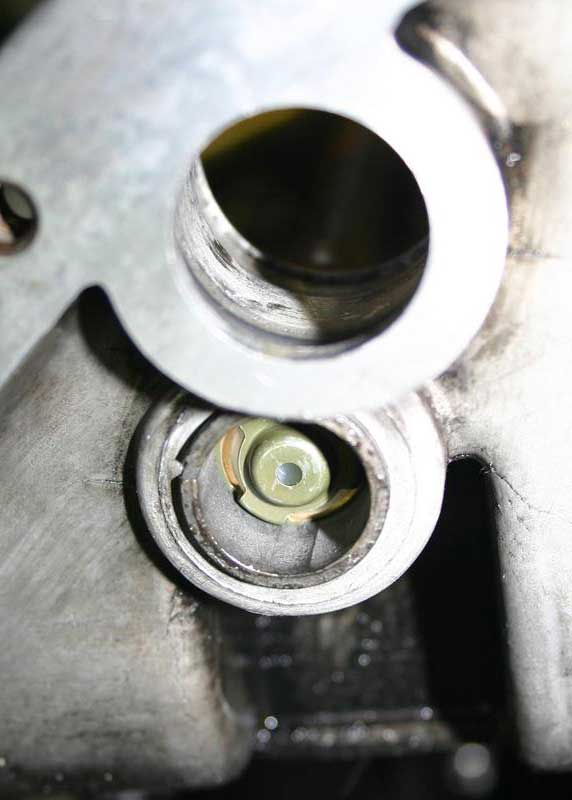
The valve removed – notice the inner brass ring – that’s the nipple that goes inside the return tube that snakes it way up underneath the air filter. In this pic the turbo drain tube has also been removed (the hole right next to it)
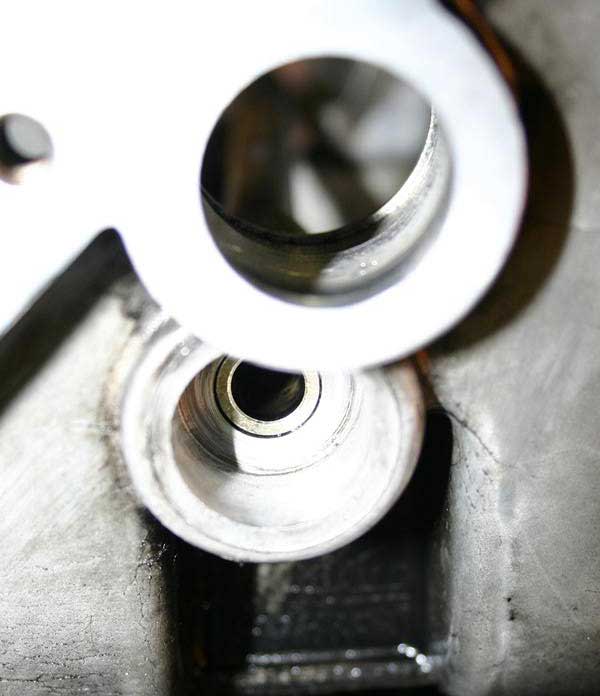
The valve in place having been seated by the punch. I think the condition of my original was fine – just preventive maintenance
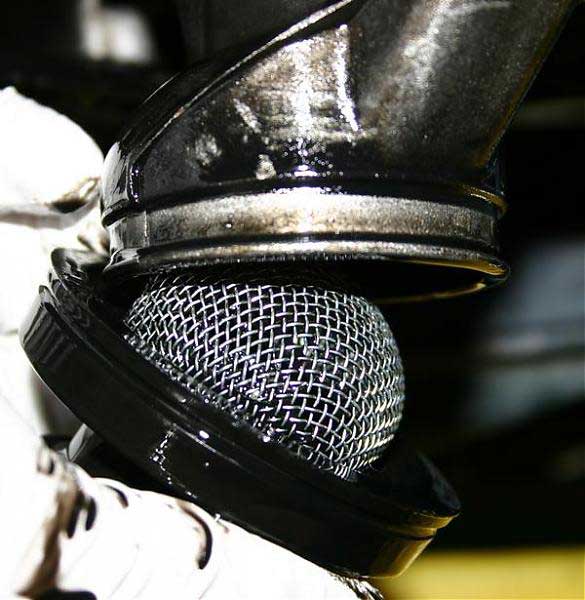
Sorry I can’t find the original post that showed one of the rubber boots torn / deteriorating. When I replaced mine I thought the rubber was still in good shape and probably would have lasted the lifetime of the motor. I will say that is not a bad idea if you ever drop the pan to at least inspect the pickup to see if anything has been caught in the screen.
Removal is very straightforward, it just peels off the lip around the bottom of the pump – notice the orientation of the screen’s dome.
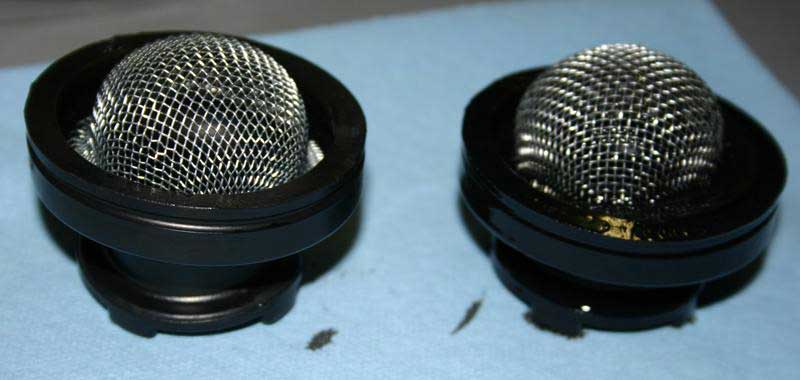
A side-by-side of the old and new part – you can’t see any visible wear or indicators as to the condition of the rubber boot. It was still pliable and good condition. (pic)
New one in place

As you probably read in my other posts, the first time I tried to put the pan back on with a new gasket it leaked. I got a new pan and gasket and applied a thin layer of Permatex # 2 gasket sealant on the gasket to ensure a leak-free seal. Below is the technique I used.
I laid the gasket on a glass table top (easier to clean-up later with a razor blade) and applied a layer of the gasket sealant to the side of the gasket that mates to the oil pan. I used a plastic putty knife to spread the goo thin across the gasket. I then flipped the gasket on top of the oil pan and used two of the 5mm hex bolts to keep the gasket centered on the pan while I repeated the goo application and spreading with the putty knife on the side of the gasket that mates to the bottom of the engine.
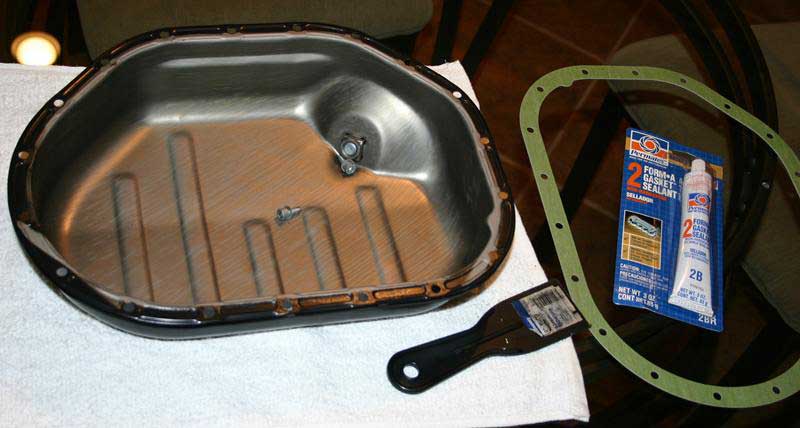
That’s all the goo you need – just a thin layer. Torque to 10nm (all 19 bolts) and you are done.
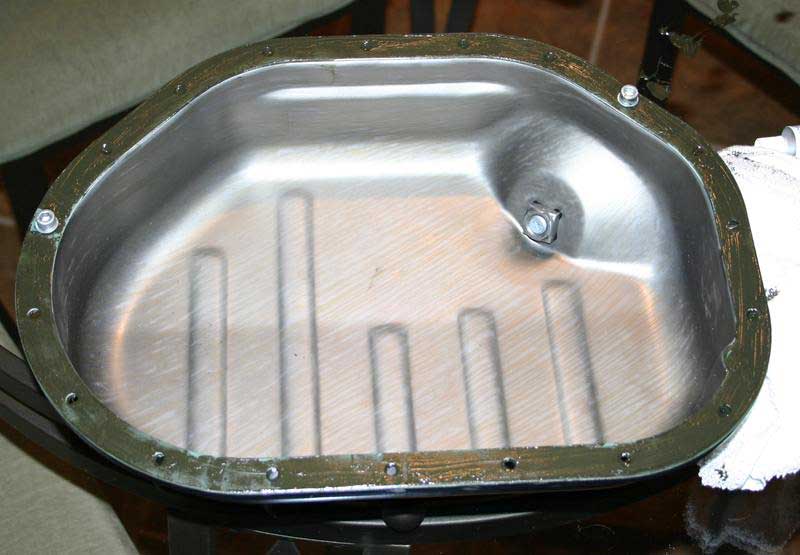
I took this additional pic of the oil pan as it shows the extra long bolt and spacer that holds the transmission line that runs down the driver’s side of the engine on the way to the transmission cooler.
Discuss this DIY here.
-bodyart27
CategoryDiy