Revision [416]
This is an old revision of W123Evaporator made by WebMaster on 2006-06-18 17:46:21.
Replacing the A/C Evaporator
on the 1983 240D & 1982 300TD (W123)
by dmorrison
6/17/06
Photo step by step post showing a W123 evaporator removal (1983 240D and 1982 300TD) (LARGE FILES)
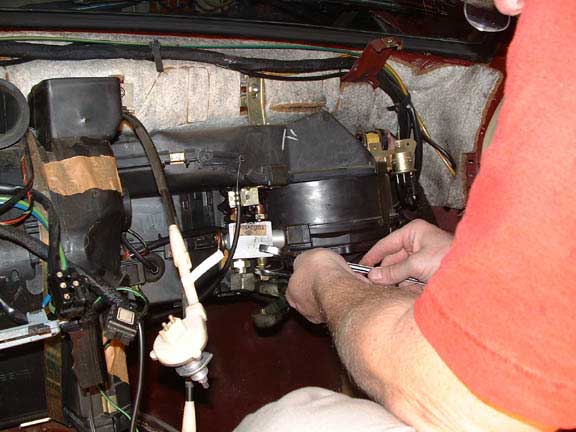
These pictures are from replacing the evaporators in my Daughters 1983 240D and my 1982 300TD. Not every little step is included. As you progress you will figure things out. This is not a terribly difficult job. Just time consuming. AC knowledge is required for this job and a 609 license is worth while. Not mandatory but preparing for the test teaches you a tremendous amount about the AC system.
Notice some pictures are labeled 300TD, 240D and 300TD/240D. I am trying to show pictures that are specific to the model listed. IF I have not listed a car then it applies to both. What is specified for the 300TD will apply to the 300D and 300CD usually. This is for a “Automatic Climate Control III” for the 300TD as specified in the Mercedes Service Manual. And the “Heating/Ventilation and Air Conditioning I” as specified the Mercedes Service Manual for the 240D. The only difference in the 240D system is the car has the R-4 compressor not the York unit shown in the Service Manual.
Of course disconnect the battery, drain the radiator and you will have to recover any freon in the AC system.
Any recommendations for this post will be appreciated.
Dave
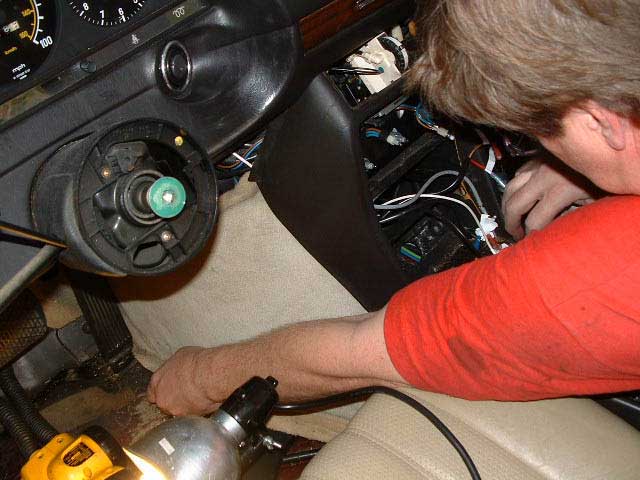
001 Remove Mercedes symbol

002 Peel the horn cover off
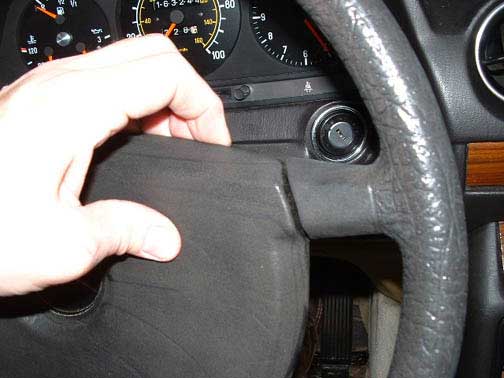
003 Pull the center of the cover off hub
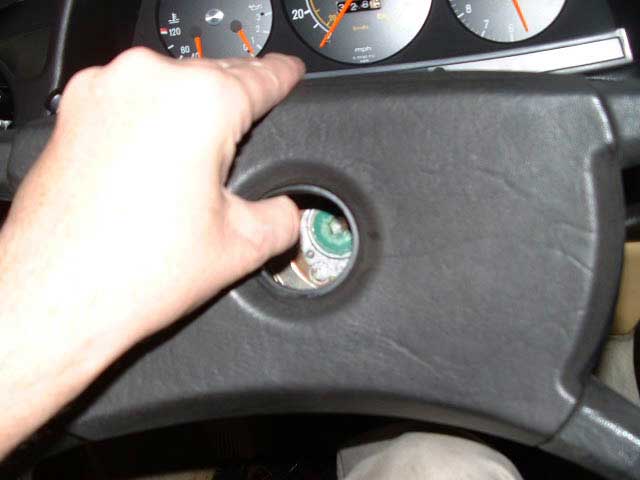
004 After removing bolt, Mark the shaft wheel relationship with a punch.

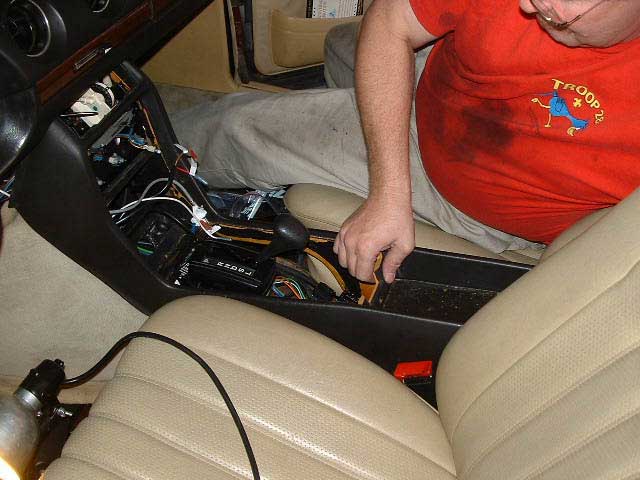
005 Remove ashtray
006 Remove center consol carpet and remove screw
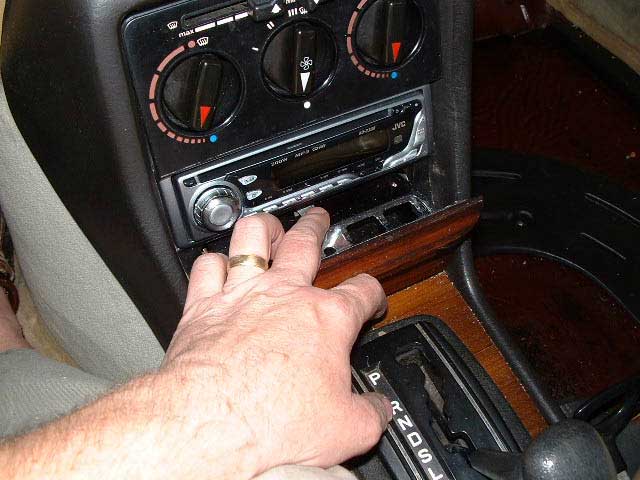
007 Remove ashtray bracket mounting screws
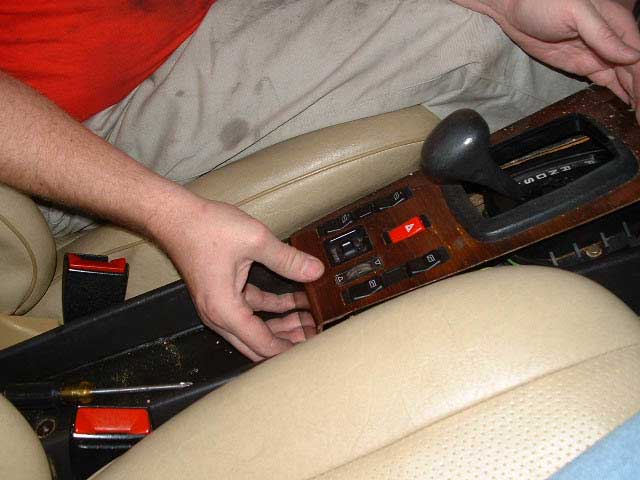
008 Lift front of wood trim above shifter and slide to the rear to remove
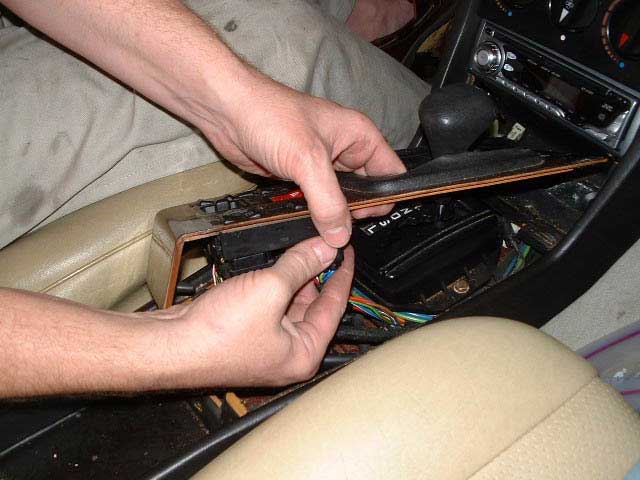
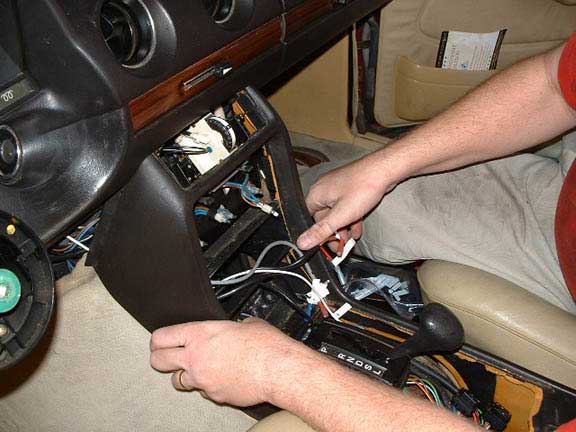
009 Disconnect wires
010 Slide towards tear to protect the pin, disconnect switch wires
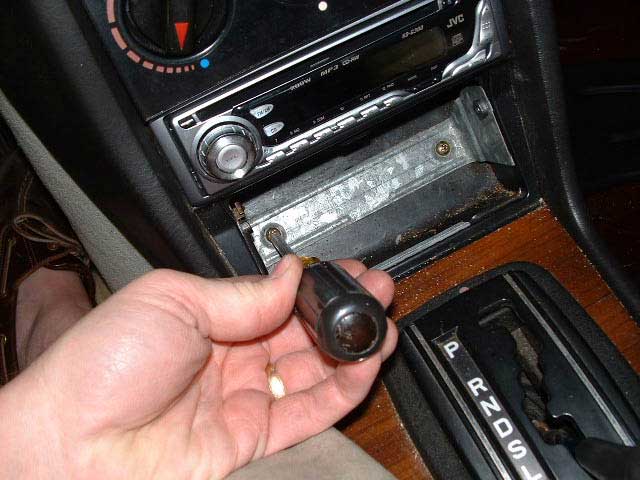
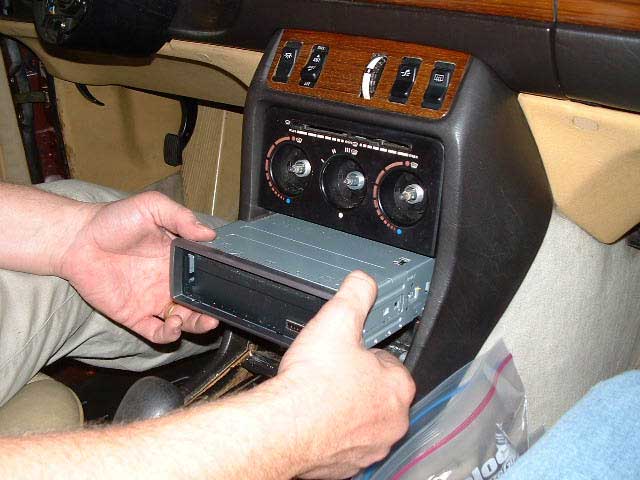
011 Pull radio
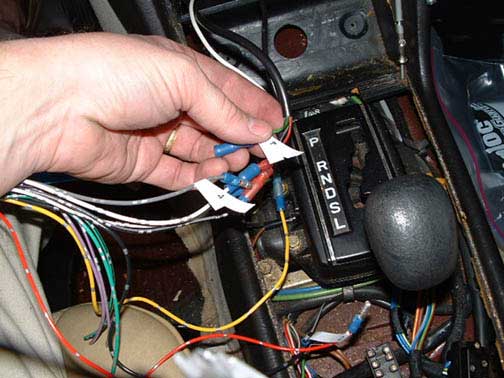
012 Label radio wires
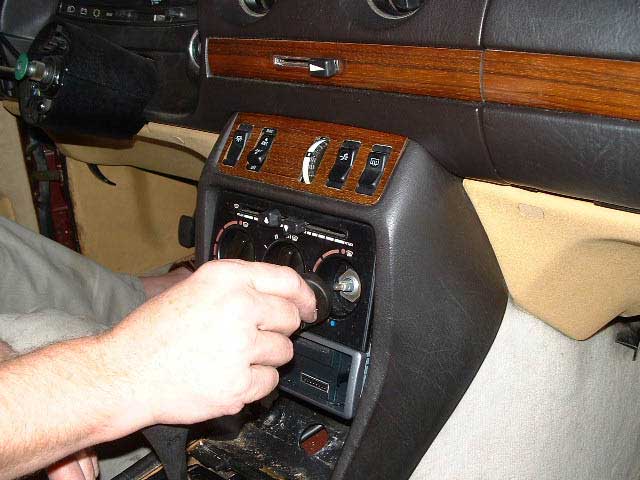
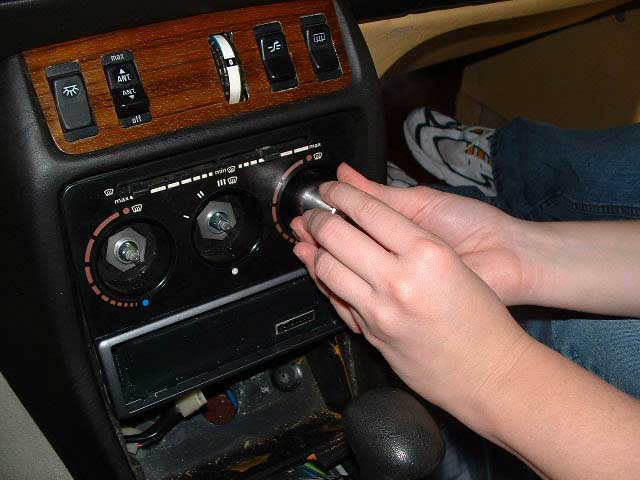
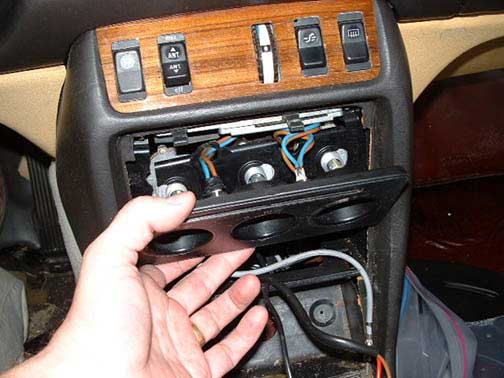
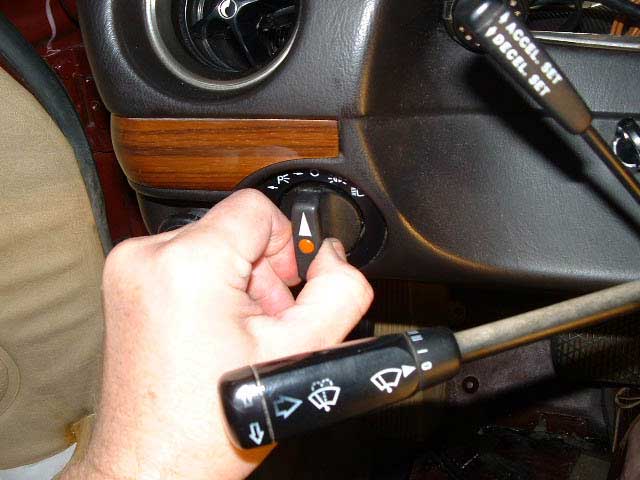
013 Pull off AC control knobs
014 Use socket to remove AC control nuts
015 Pull AC panel and disconnect light units
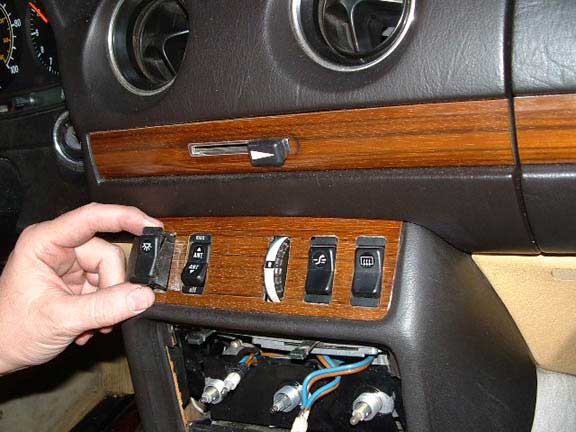
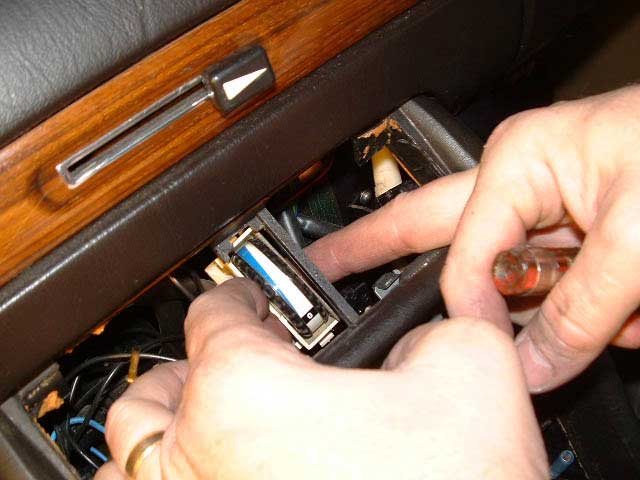
016 Pull switch out from the rear

017 Pull all switches and remove the wire harness
018 Using your fingers in the outside holes, push the wood trim out from behind
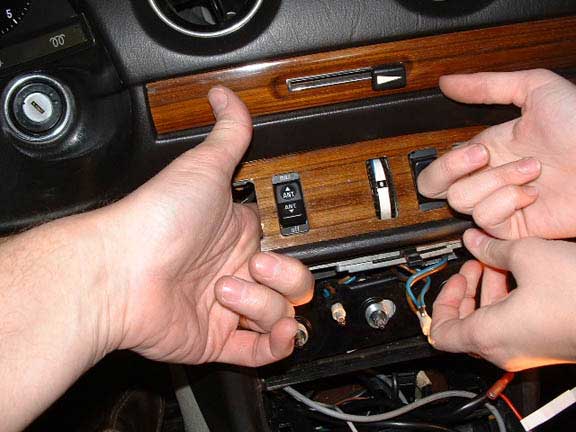
019 Wood trim lifts at bottom first then out
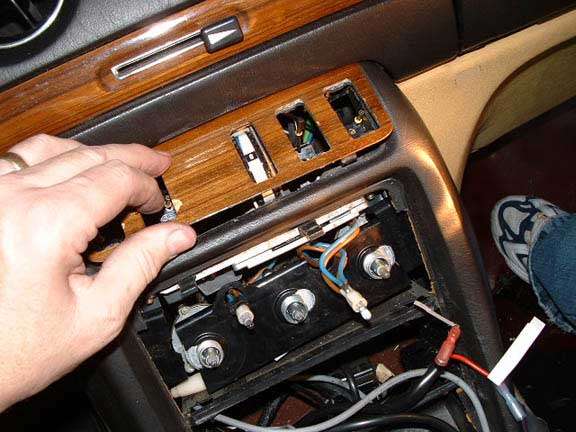
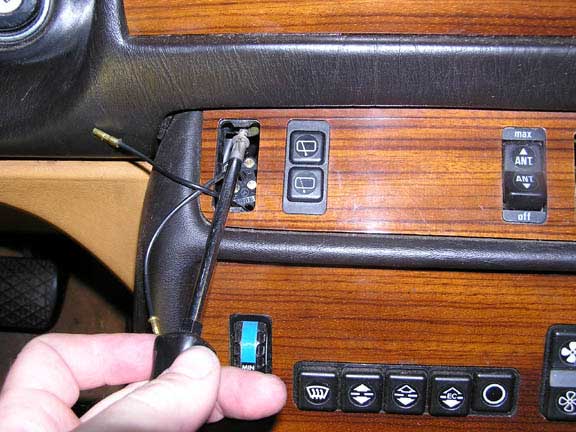
020 Disconnect the temp dial wires using your fingers. 2 harnesses

021 Push in the top tab and remove the dial by pushing the unit into the consol
022 300TD/240D. Remove the outboard switches to remove the screws
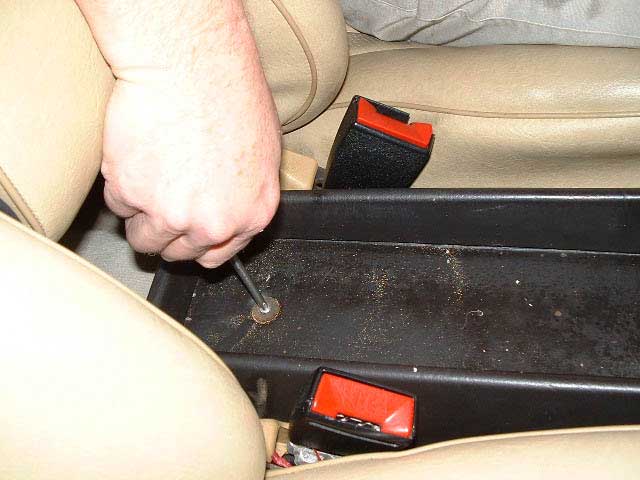
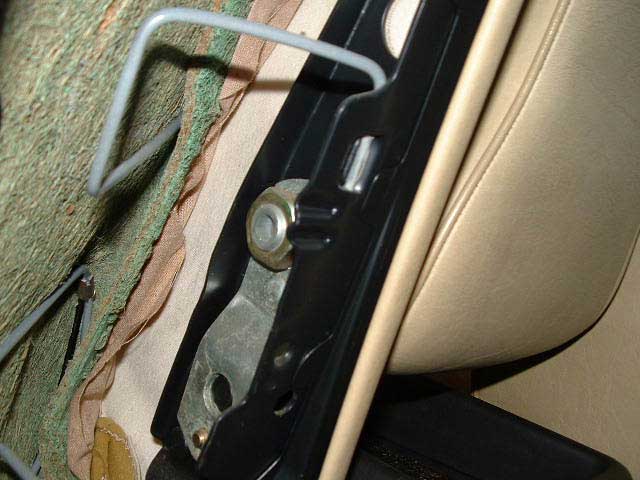
023 Remove both front seat inboard slide bolts in rear tunnel
024 Remove drivers seat back panel. Unscrew it then slide the panel down. Or remove the entire driver seat.
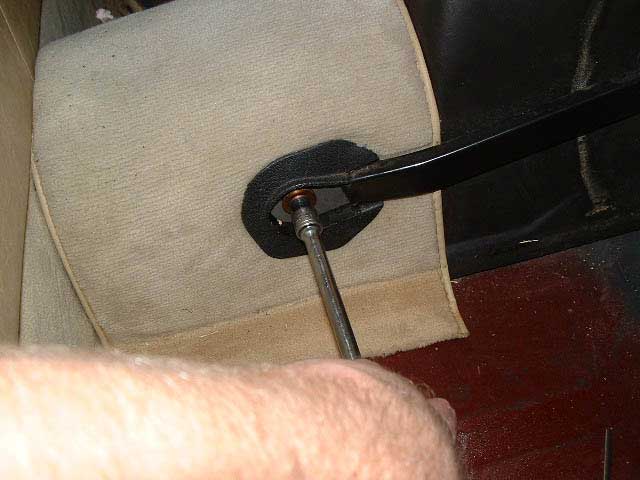
025 Remove the bolt holding the drivers seat armrest
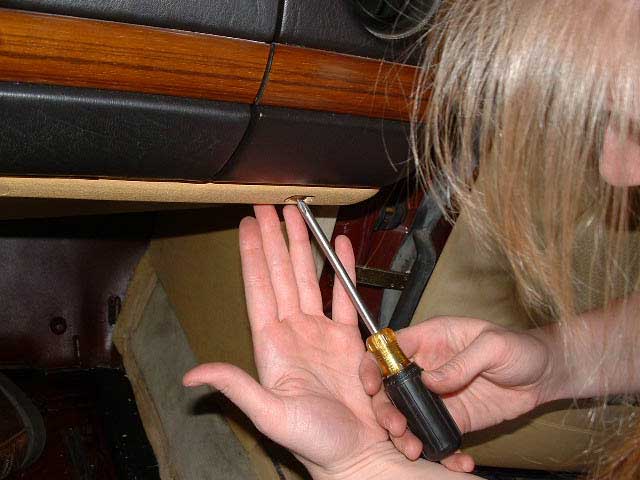
026 Remove screw covers on both under dash panels

027 Remove screws
028 Remove under panel side screws

029 Remove under dash panels
030 Drivers side under dash panel, side screw

031 Remove center consol carpet screws
032 Lift center consol from the rear. Watch top center of consol and dash clearance.
033 Guide center consol carpets while lifting.
034 Guide center of consol over shifter.
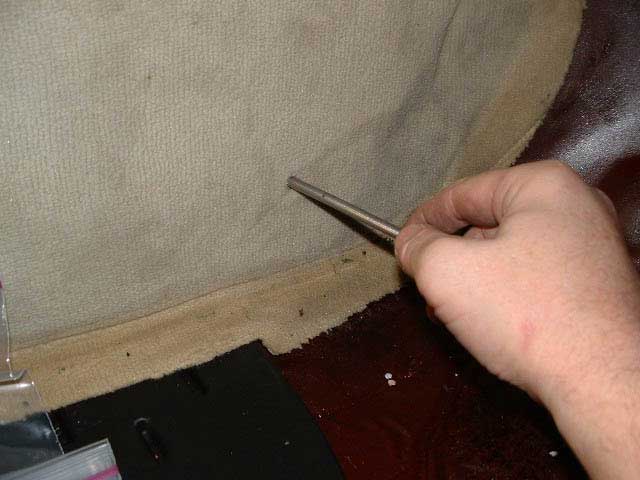
035 If you can’t remove the center consol. Disconnect the tabs holding the carpet, 4 total ( Note: The manual does call for the driver seat to be removed. For the removal of the center consol, the side carpets are the reason)
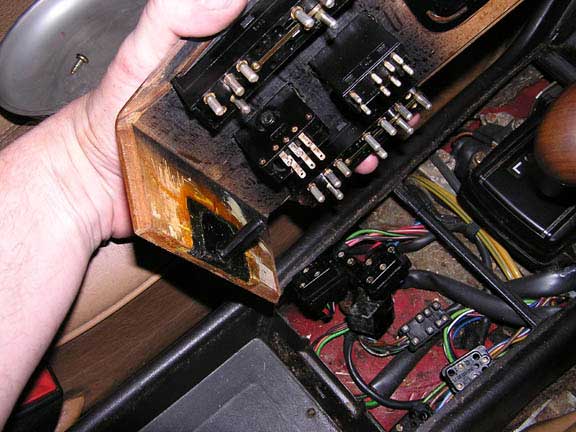
036 Center consol removed. The AC control panel is broken on this car.( I glued the unit together, A new unit has to come from Germany)
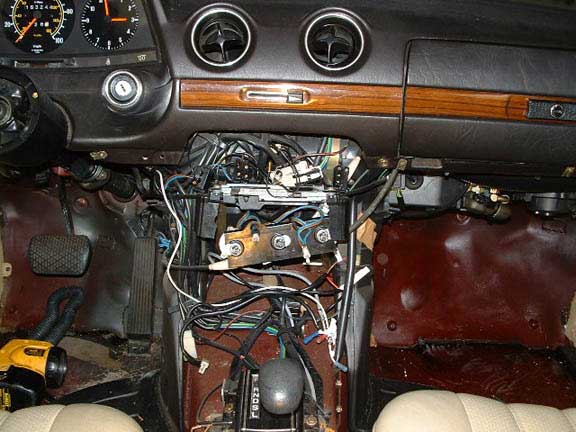
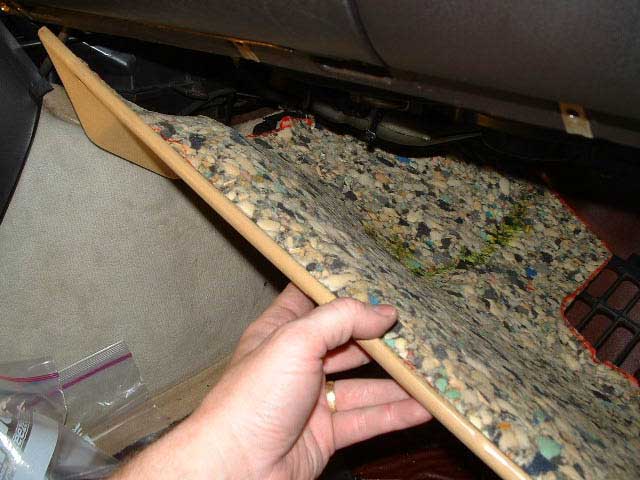
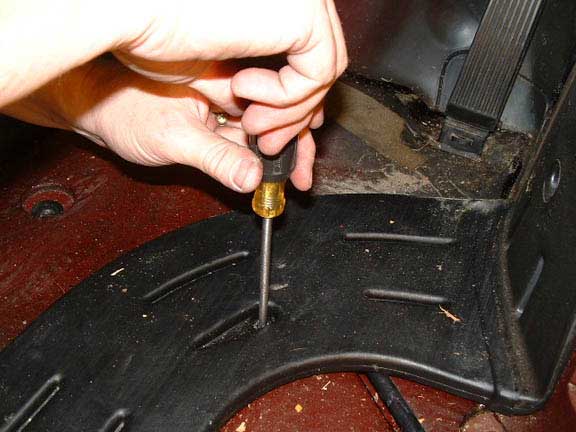
037 Remove the floor heat dust under the drivers feet
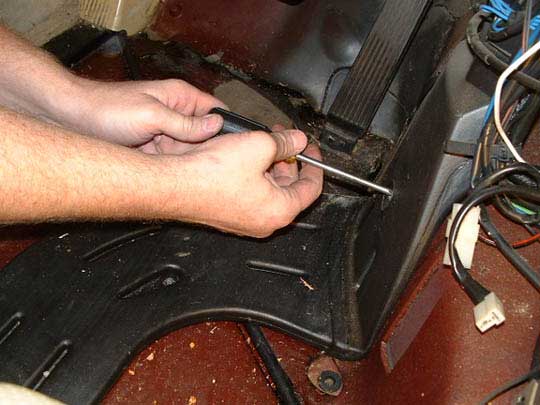
038 Removing the floor duct, drivers side , continued.
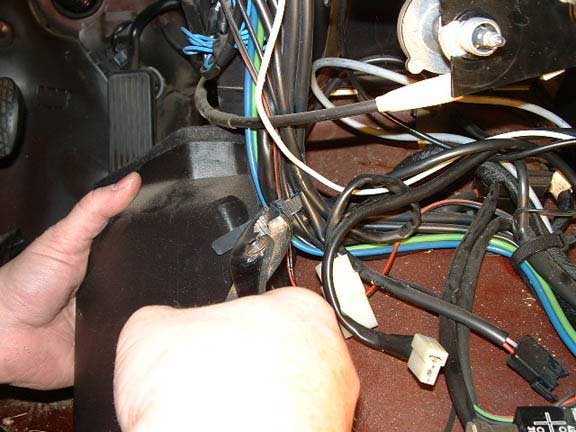
039 Remove the cable harness on the drivers side of the floor duct
040 More center consol pictures
041 Removing AC control bracket, (this will not normally be removed, it is pop rivited to the evap box. Switches must be removed from the panel)
042 ID wire harness to switch connectors
043 ID wire harness to switch connectors, continued
044 Remove bulb spider for center consol lights
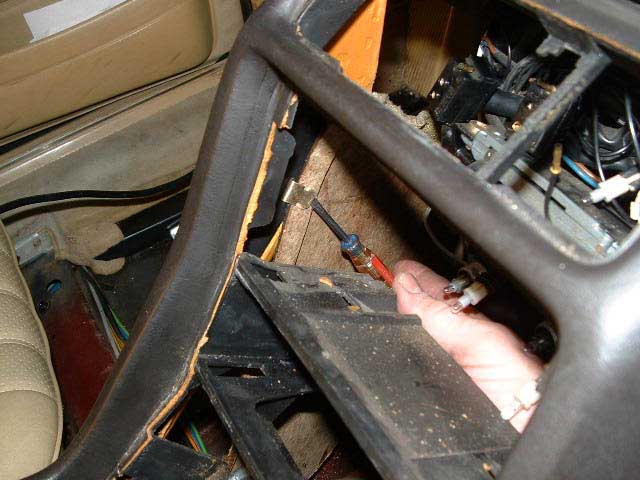
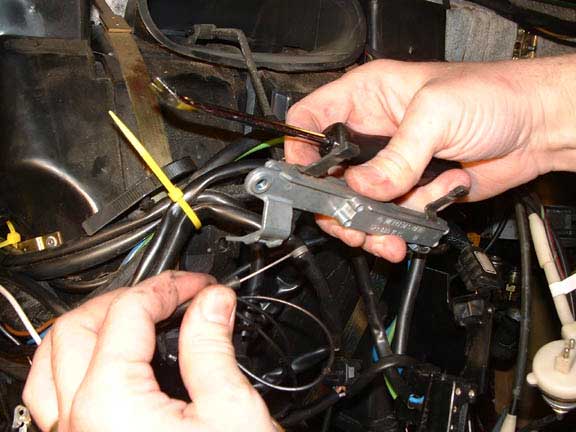
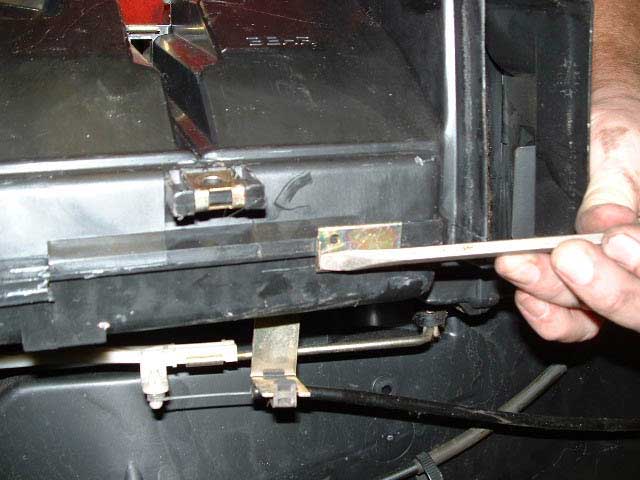
045 Clips that hold the Bowden cables to the side controls
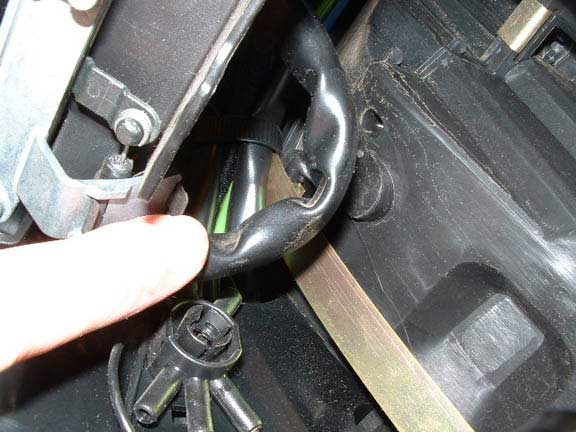
046 Plastic panel on Bowden cable mechanism. Positioning picture for repositioning after unbolting mechanism

047 Wire harness to control

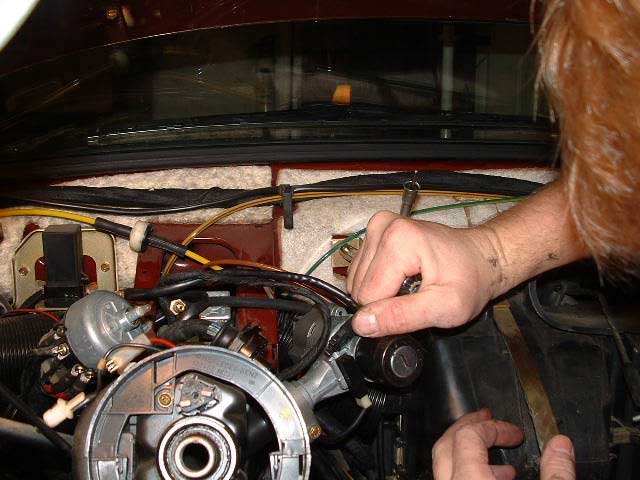
048 Remove oil line and loosen speedometer cable in engine compartment so you can pull out instrument cluster far enough to remove speedometer cable. Remove wires
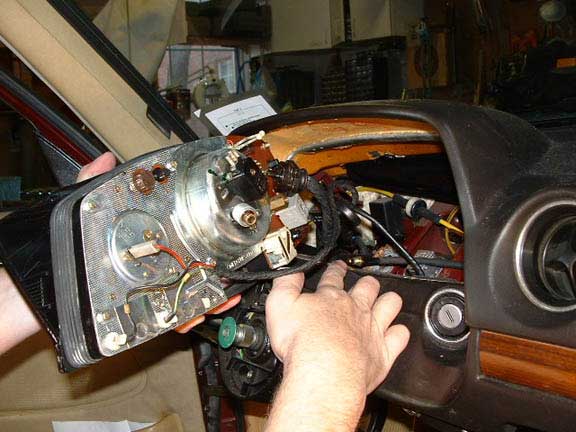
049 Pull off light switch
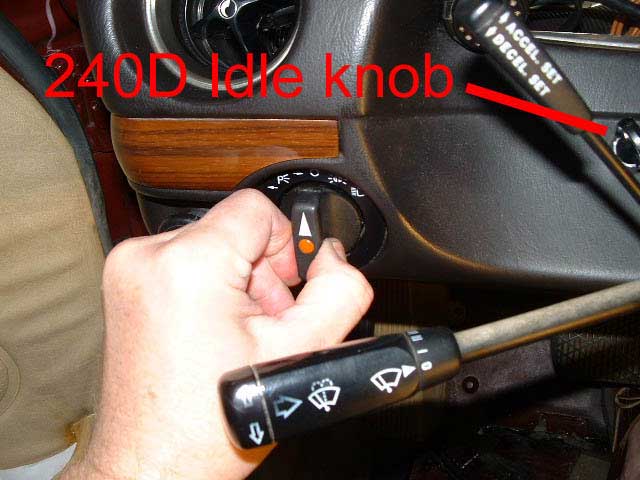
050 240D idle knob. Pull knob off straight back ( it’s hard) and unscrew chrome ring
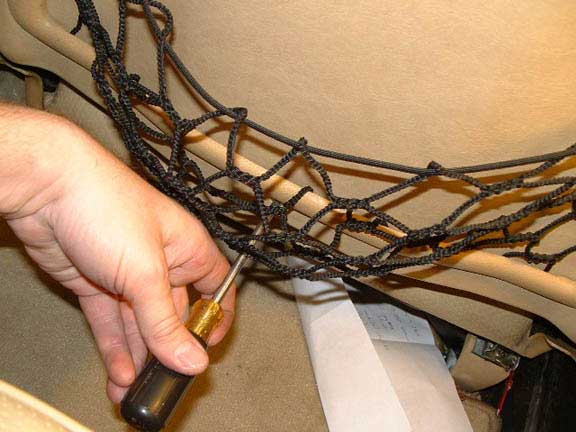
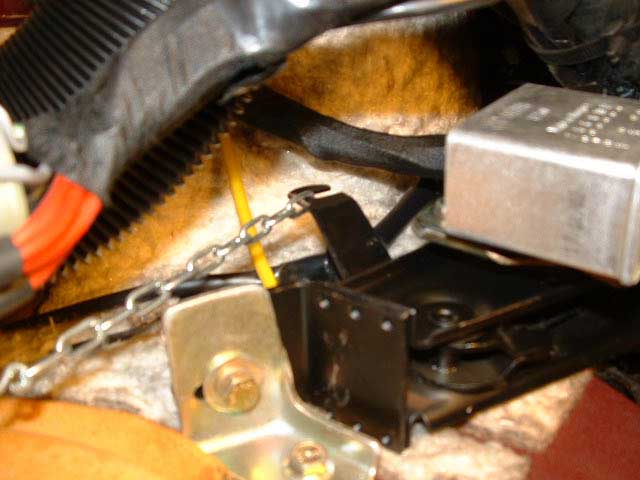
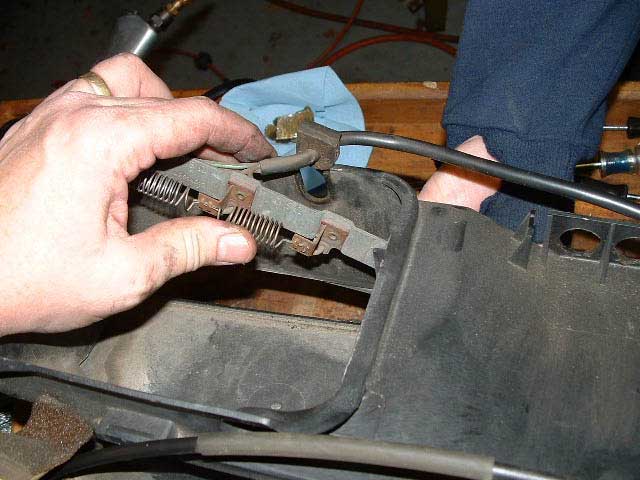
051 Unhook parking brake cable chain.
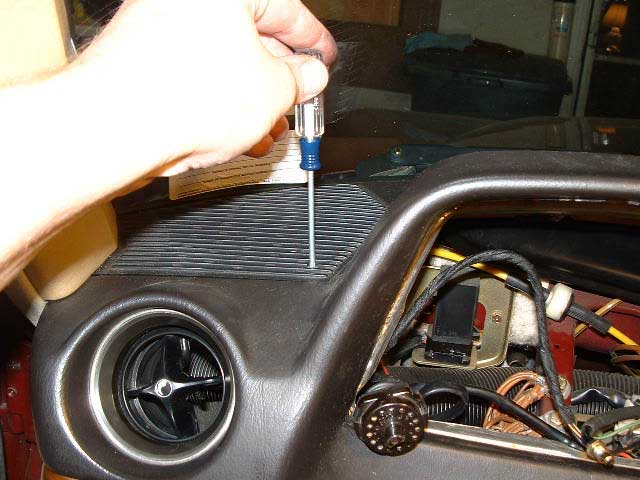
052 Unscrew speaker grill screws on both speakers and remove grills
053 Remove push clips center pins then base. 3 on bottom and 4 on top
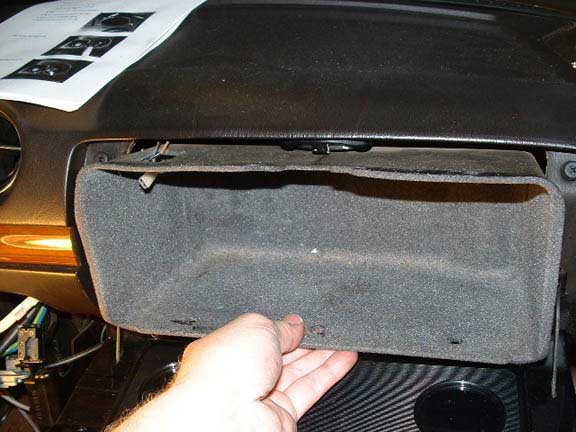
054 Remove glove box light and disconnect wires
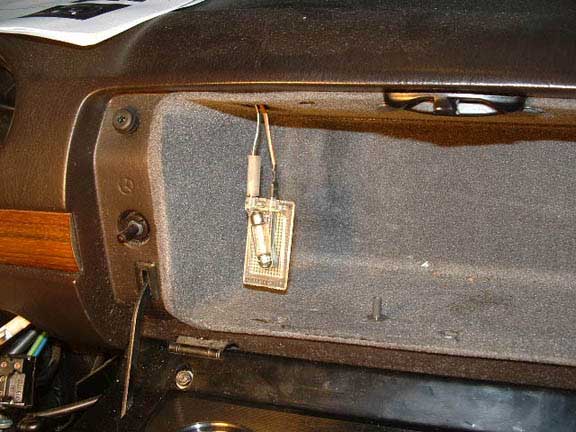
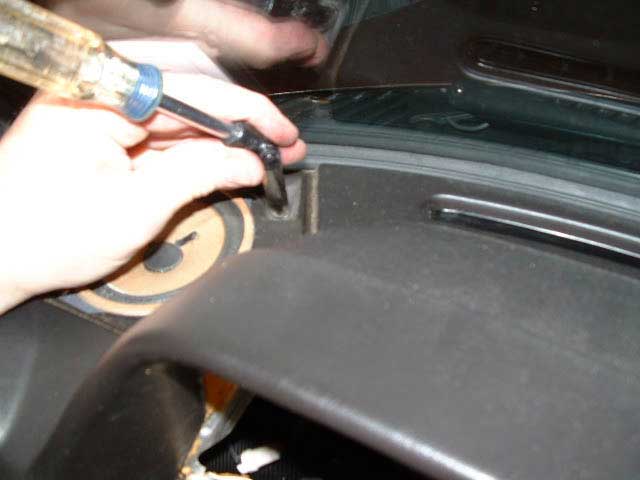
055 Remove glove box. Pry the top below the striker plate. Then remove the light wires
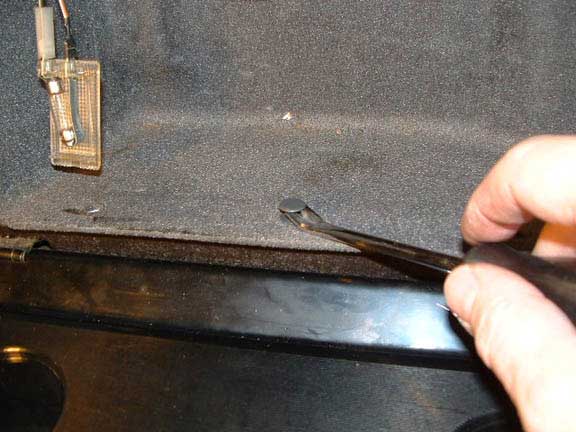
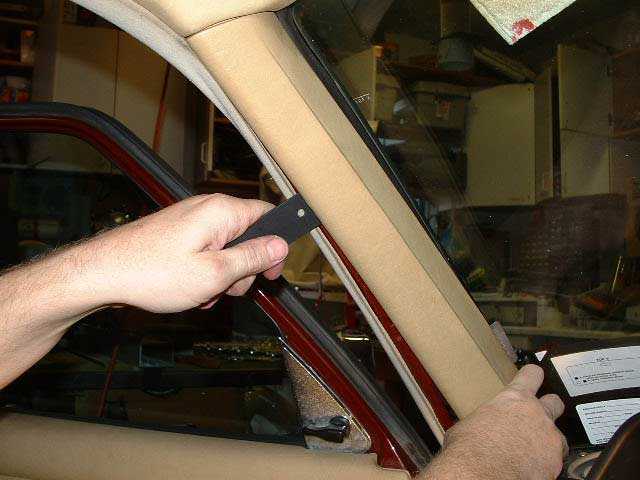
056 Pry the A pillar molding off the A pillar Use a wide metal or plastic tool. Pry at the bottom then the top

057 Pry at the top then move the bottom of the trim towards the center of the car. Watch out for the speakers.
058 Remove the speaker mount bolts and speakers
059 240D Disconnect the center vent cable from the vent mechanism.
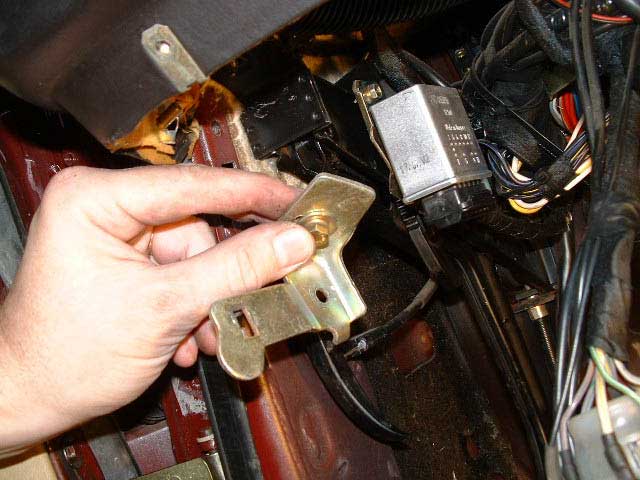
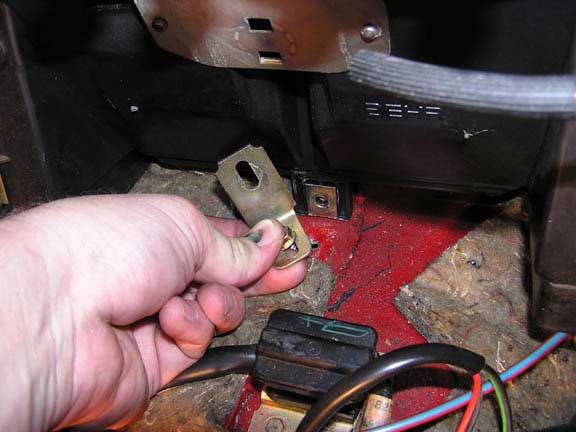
060 Remove the drivers side lower dash mount bracket completely. Note the screw washer combination and orientation of bracket
061 Remove the passenger side lower mount bracket. Note the same info as above
062 Disconnect both speaker wires from the dash.
063 Remove the center support bracket completely so it does not hit the evap box
Remove the dash from the passengers side first and move it out the passengers door. You will have to lift the dash off the defroster tubes on the evap box. Once lifted off them, it will come out. Watch the turn signal stick. Don’t break it. Don't twist the dash as this may cause cracking.
One word about reinstalling the dash. As you install the dash, the lip of vinyl at the front of the dash next to the windshield will curl up and make it difficult to get under the windshiled rubber. Using the same flat tool used to remove the A pillar moldings works well. Hold the dash in position and slie the lip under the weather strip.
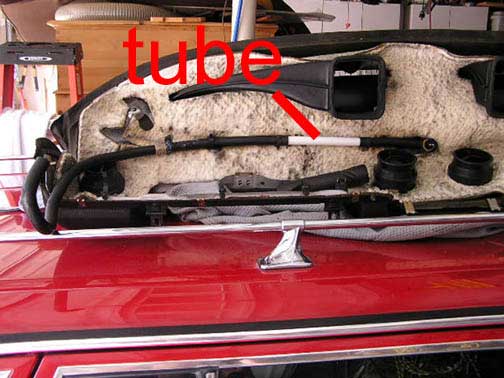
064 300TD Replace the foam tube under the dash, I used a plastic unit
065 300TD Move the amp wire harness
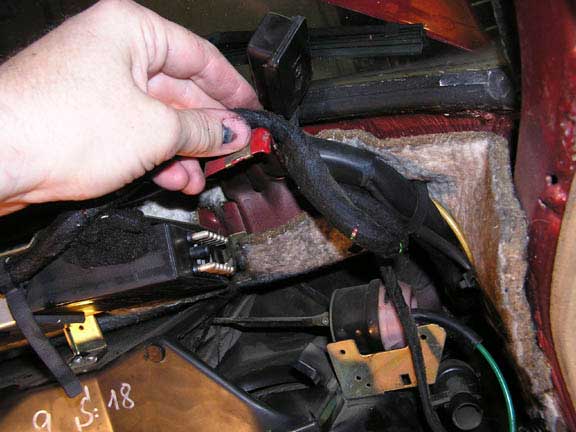
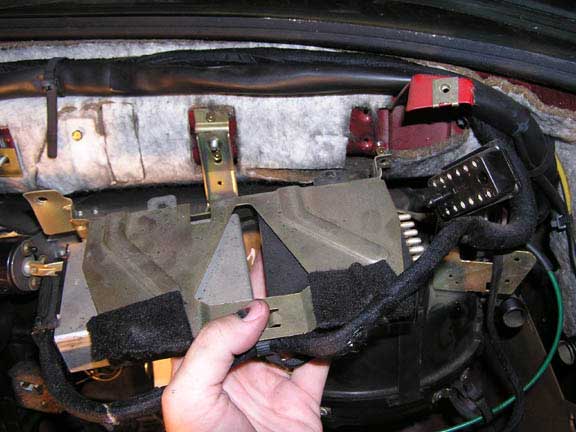
066 300TD Remove the amp setup to allow the evap box to clear
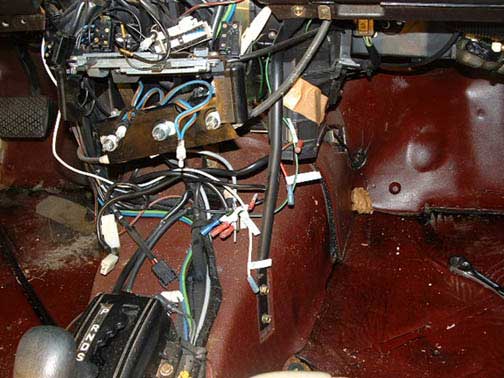
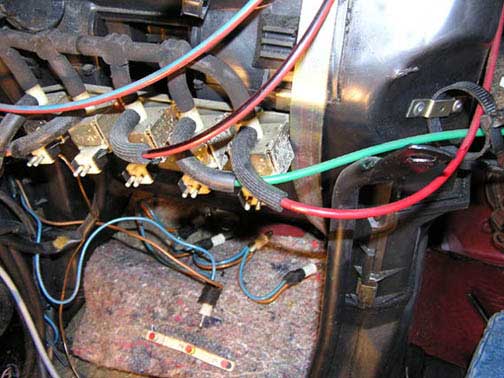
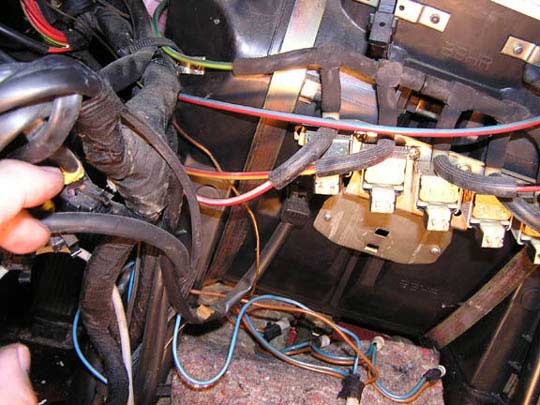
067 300TD Center consol area.
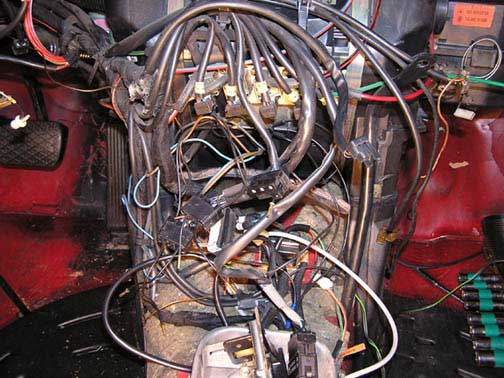
068 300TD Center consol area upper section

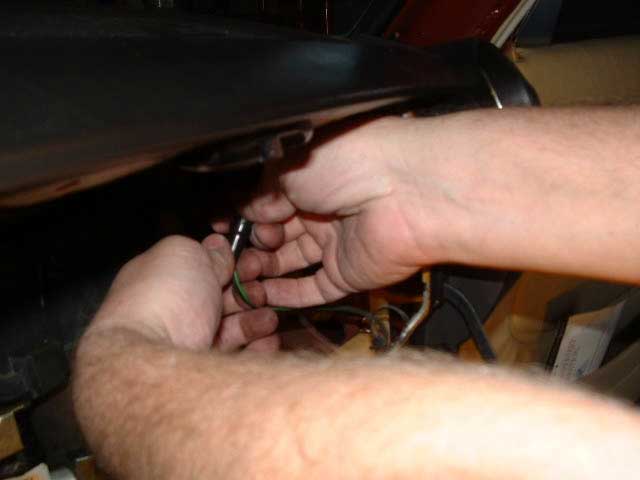
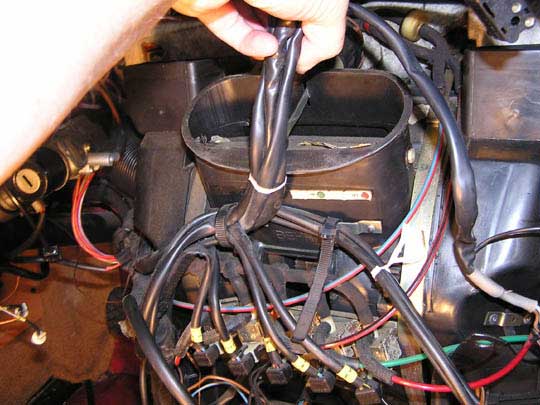
069 300TD Holding the center area wire harnesses

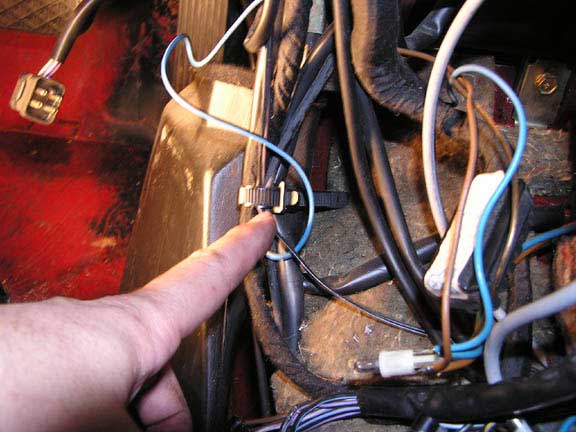
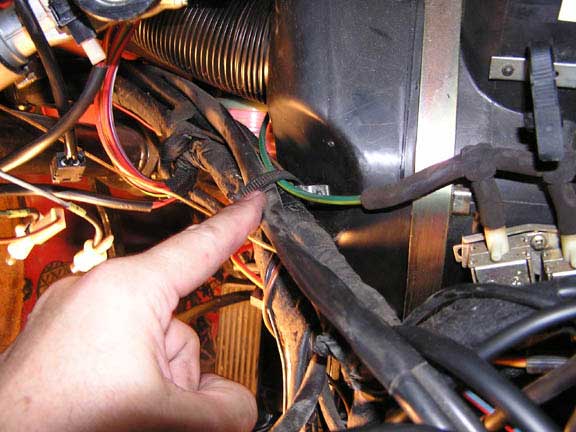
070 300TD the center consol area switches going though the wire locking strap
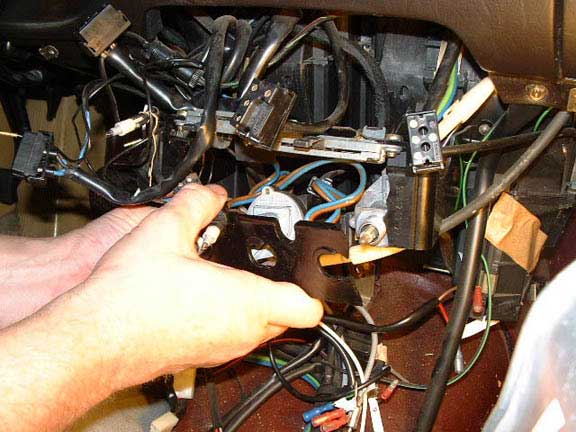
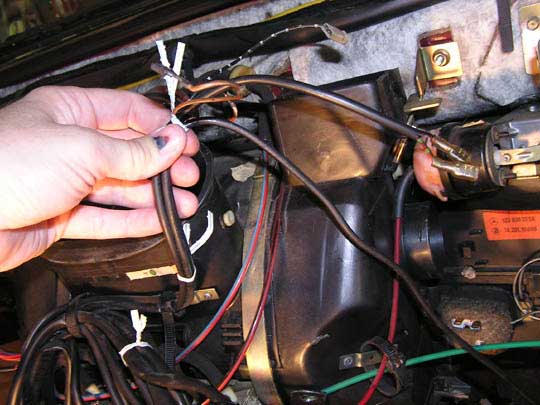
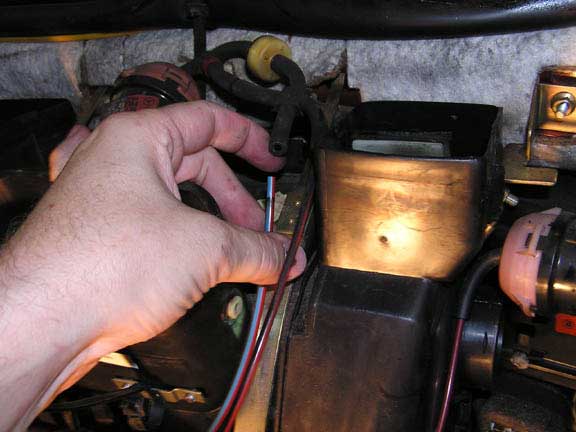
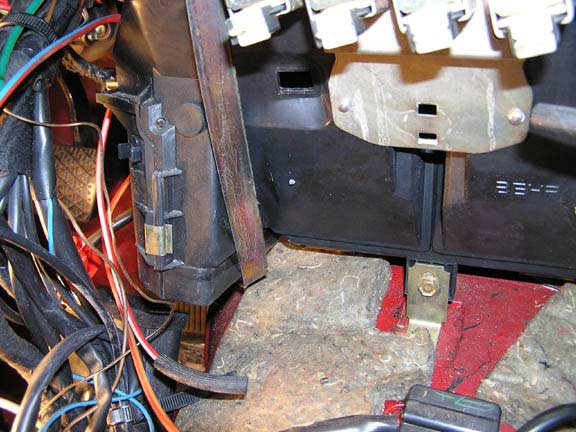
071 300TD Right side wire harness holder
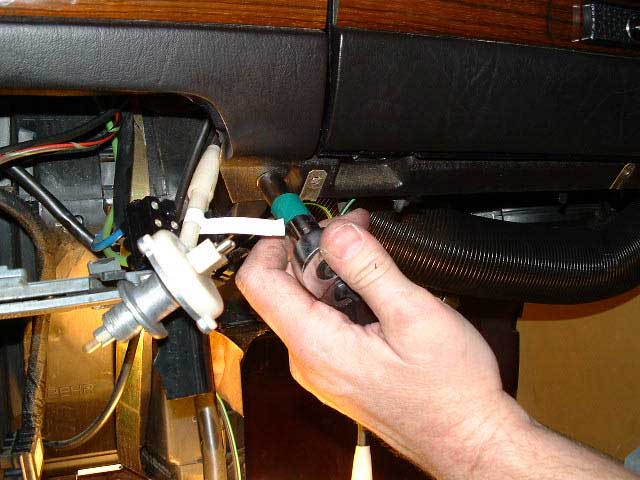
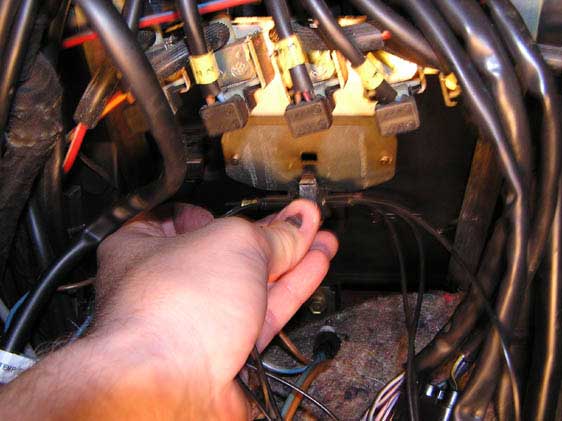
072 300TD Remove the center connection under the vacuum switchs
073 300TD Picture for identifying plastic tubes color codes
074 300TD Picture for more plastic tube color ID
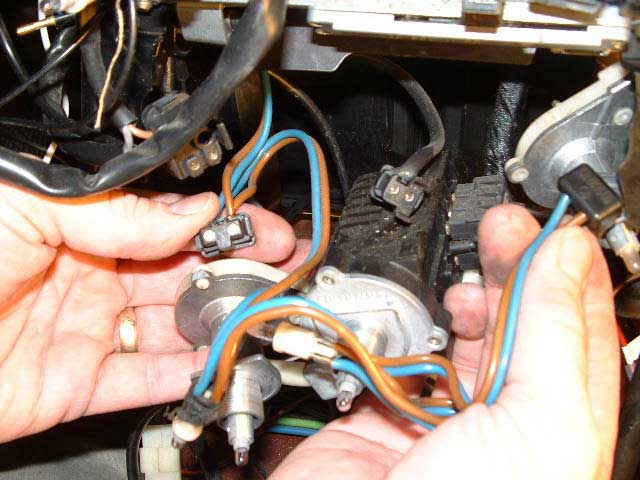
075 300TD Vacuum tubes to center vent element

076 300TD Disconnect plastic tubes to center vent element
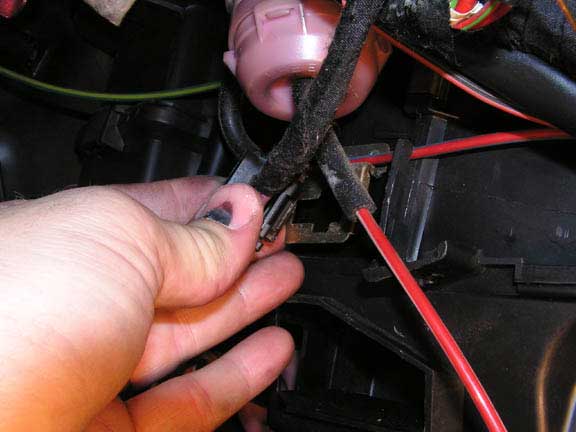
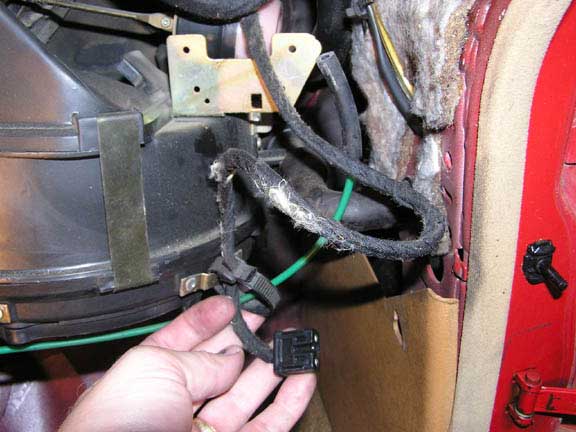
077 300TD/240D Uncouple the wire harness at the driver side floor vent
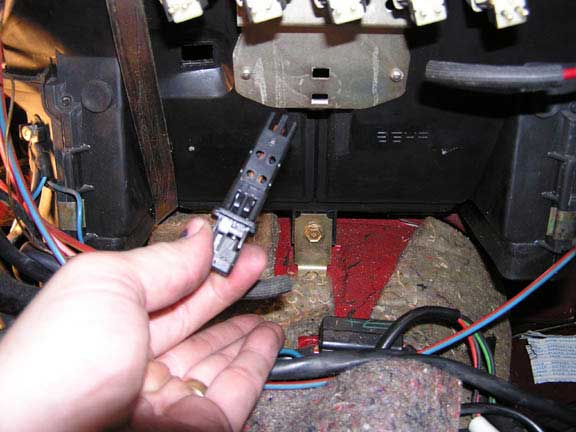
078 300TD/240D Uncouple the wire harness at the drivers side of evap box
079 300TD Remove the ETR sensor
080 300TD Unclip the connector base on the drivers side case
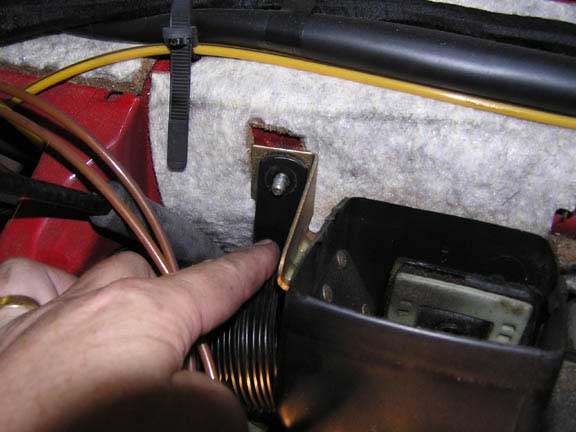
081 300TD/240D Unbolt and pull out both left and right support straps
082 300TD/240D Unbolt the top bolt of the support straps, note the order
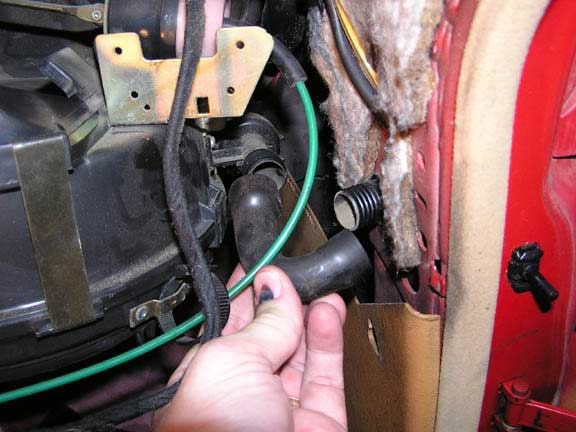
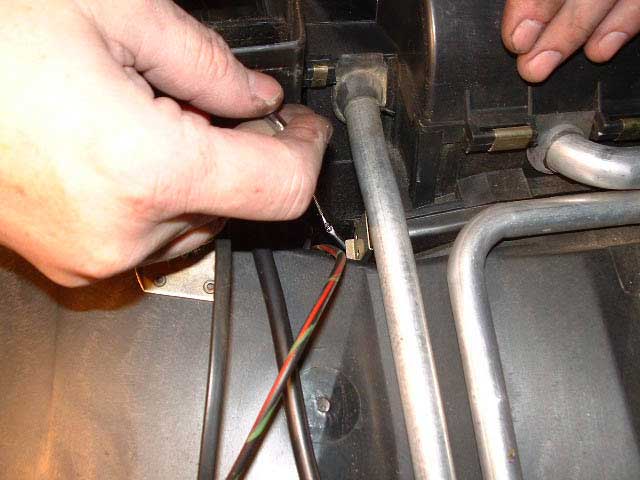
083 300TD/240D Remove the heater core hose form the drivers side and passenger side (shown, see below for drivers side on the 240D))
084 300TD/240D Note the positions of the clamp screws for reinstallation
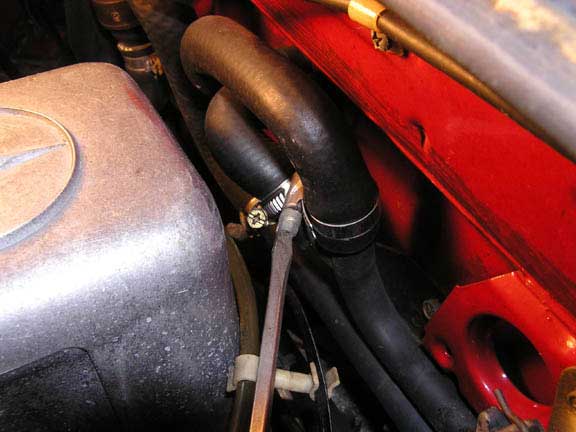
085 300TD/240D Tape over the heater core tubes to prevent water from dripping while removing
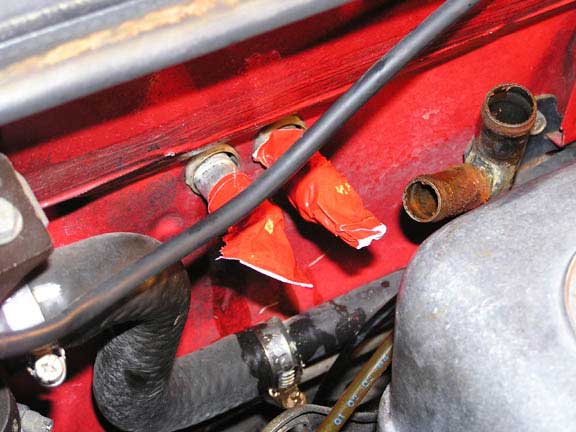
086 300TD Remove the interior passenger side tube
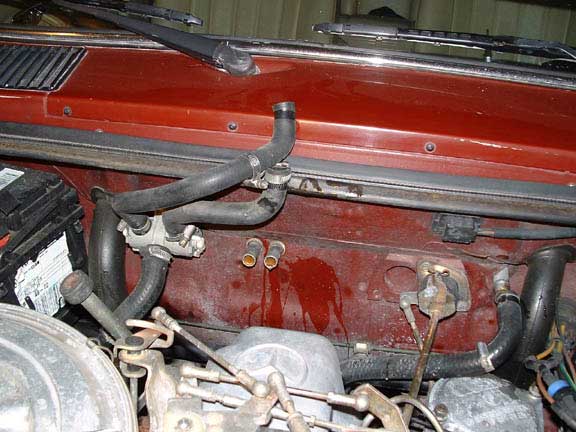
087 240D Disconnect the drivers side heater hose
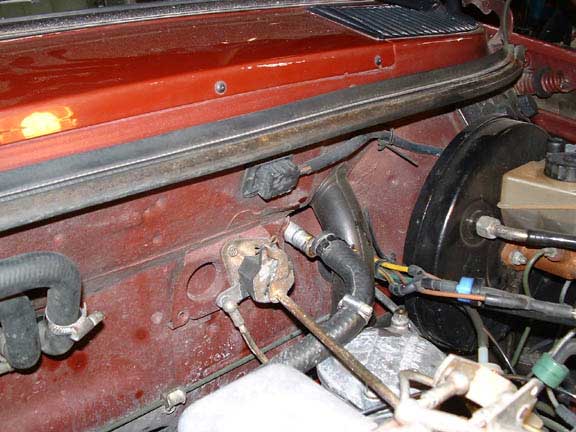
088 240D Remove the 2 passenger side heater hoses
089 240D Move the heater hoses up above the vent area to prevent drips
090 Evacuate the Ac system of all freon. Disconnect the Ac hoses at the expansion valve
091 Unscrew the wire ground on the drivers side of the evap box

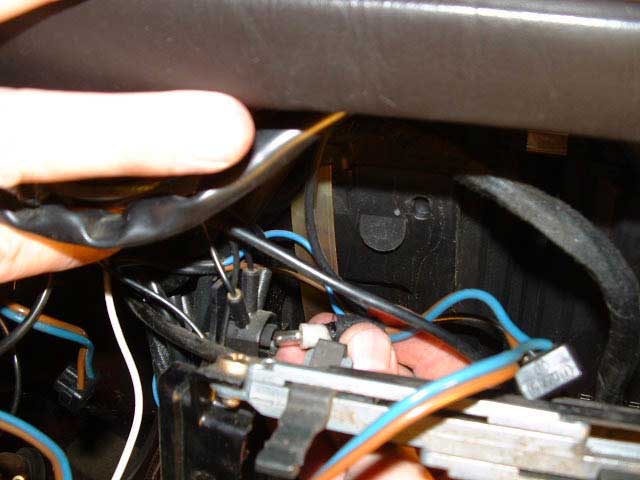
092 Unzip the wire bundle lock on the drivers side of the evap box

093 240D Either disconnect the Bowden cables or route all wires out of the bowden cables way for removal ( Again this panel was broken. You would normall disconnect the bowden cables)
094 240D Pull fiber optic spider from AC control bracket
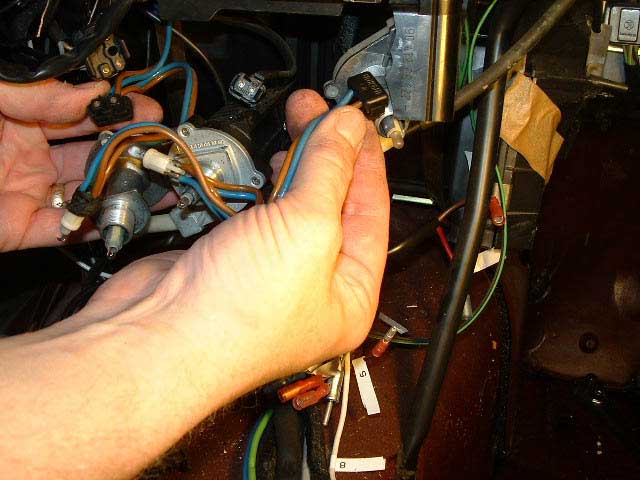
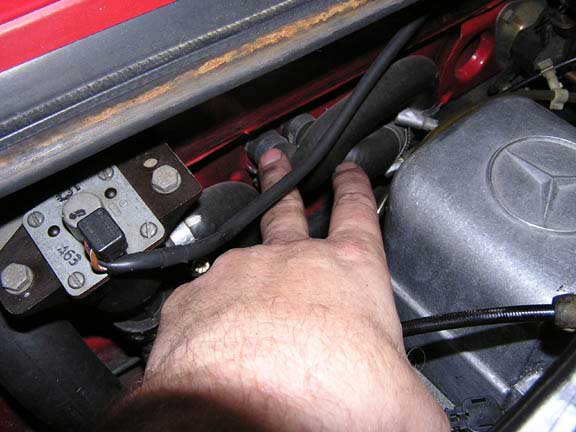
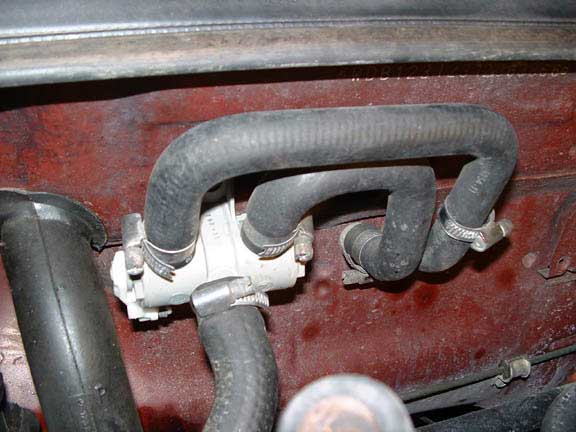
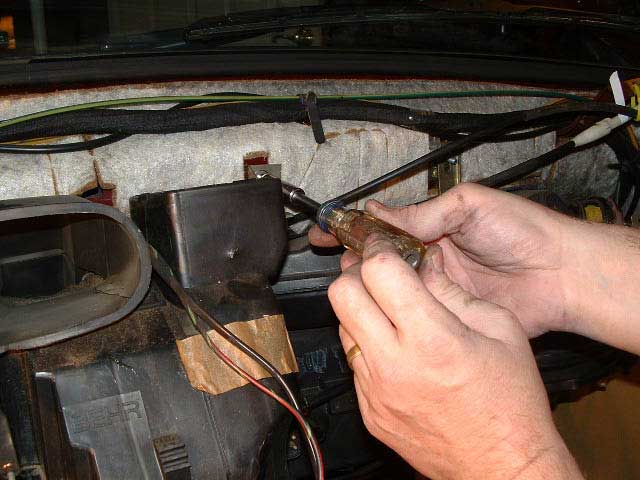
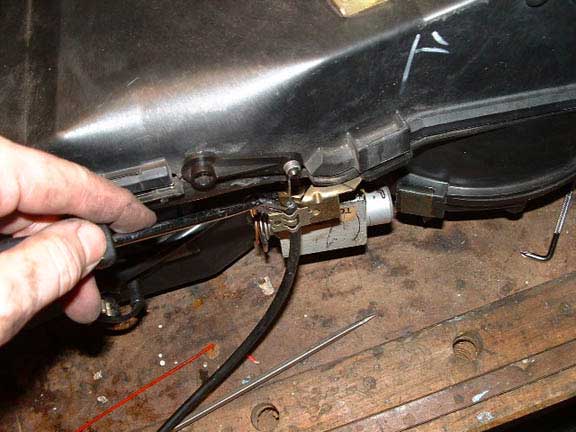
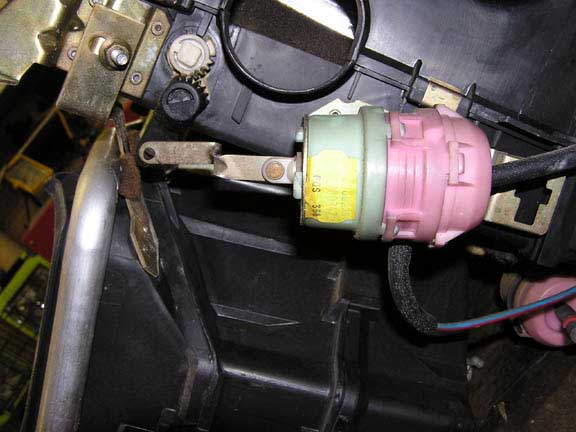
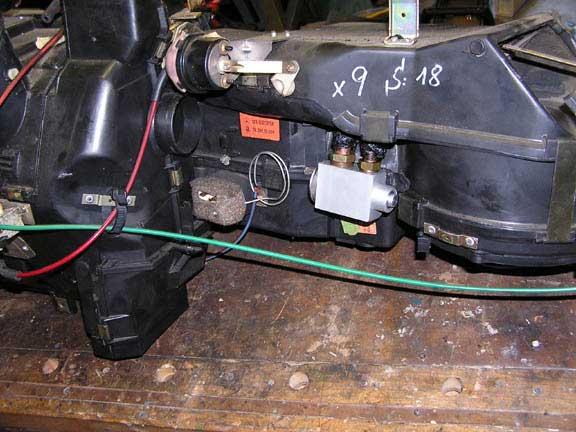
095 Unbolt the switchover valve from the mount
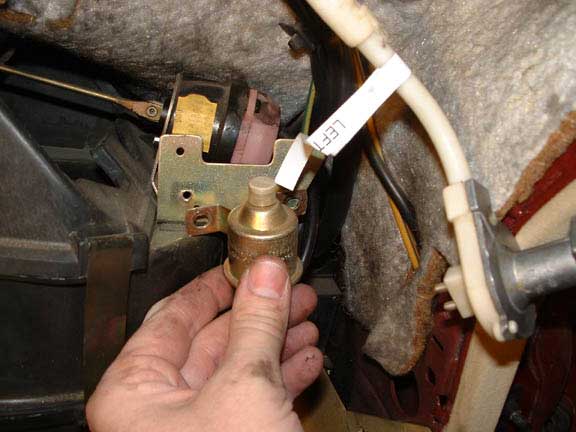
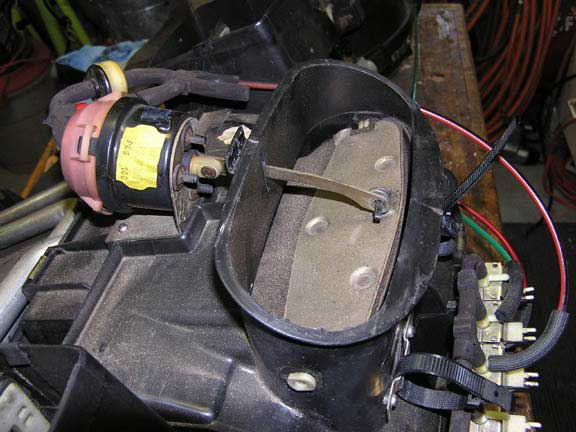
096 Disconnect the vacuum hose from the fresh air element

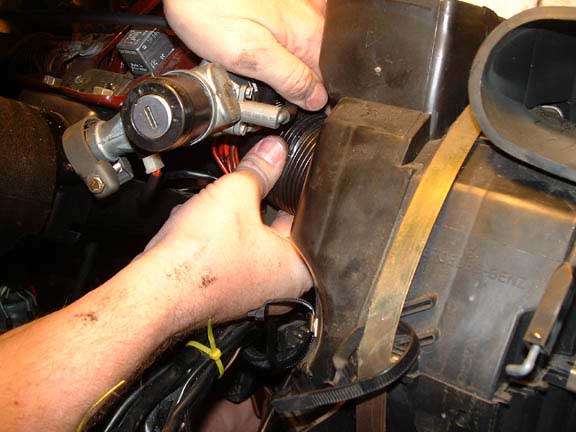
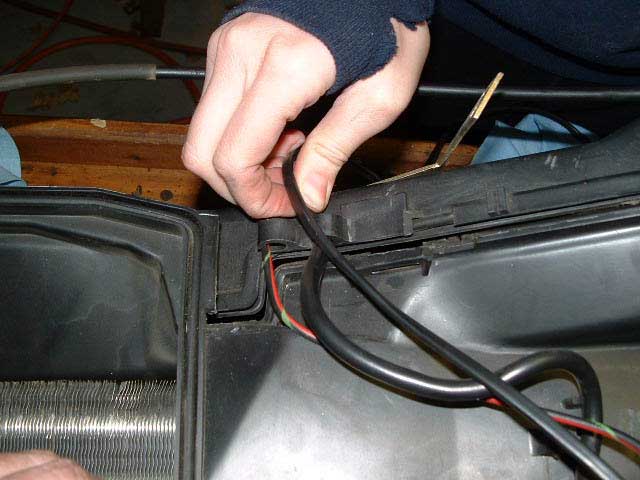
097 Pull the flex hose from the drivers side and passengers side
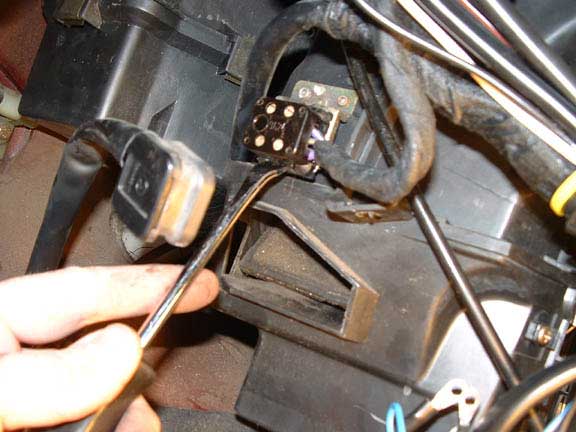
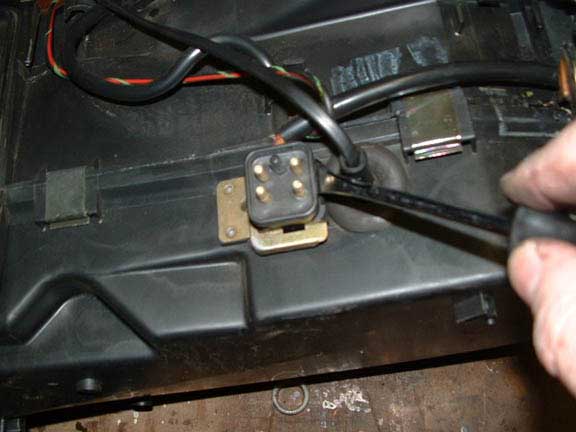
098 Detach the wire harness socket from the evap box
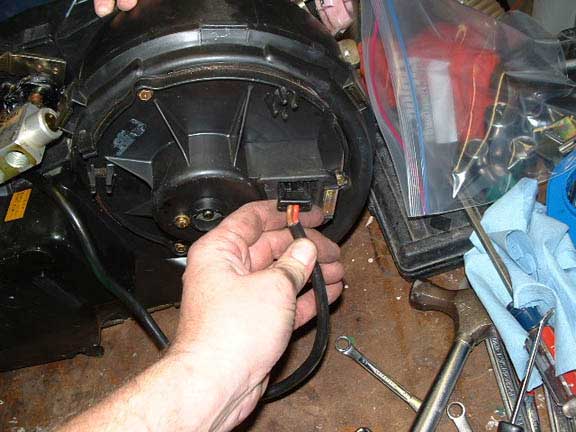
099 Passenger side disconnect the fan wire harness
100 Unbolt both mounting strap bolts at transmission tunnel. Do not unhook at the top. They are difficult to reinstall. Just place aside

101 Unbolt passenger side top mount nut

102 Unbolt middle section top mount nut
103 Unbolt drivers side top mount nut
104 Unbolt lower mount bolt

105 It is best to completely remove the lower mount bracket so you don’t hit the evap box
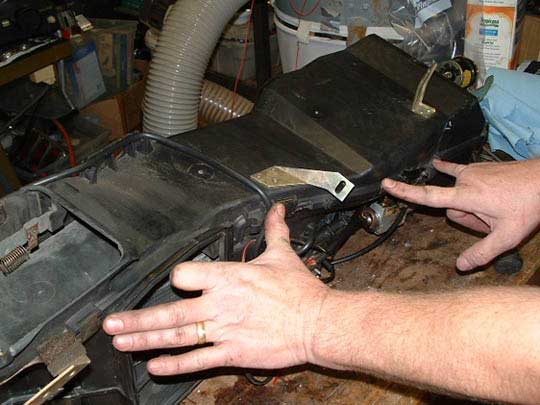
106 Remove the passenger side of the box first and pull towards the passenger door. Just like the dash. Watch for water leaking out of the heater core tubes

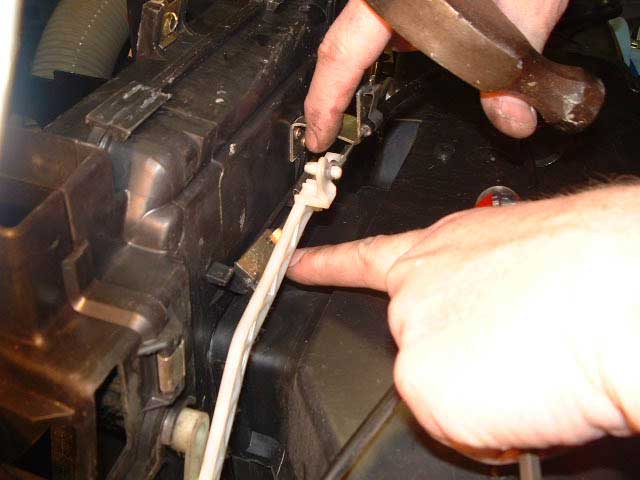
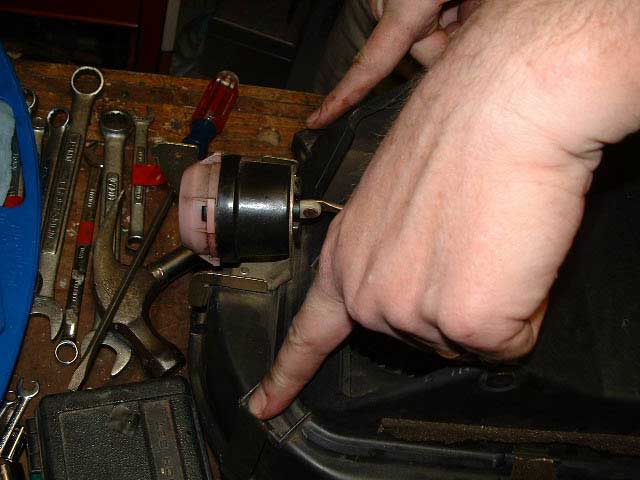
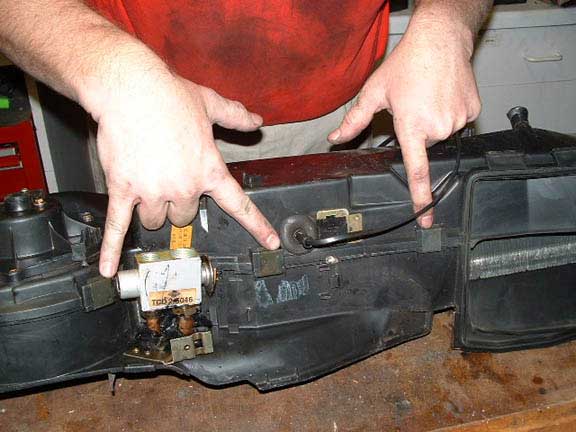
107 Separating the heater box from the evap box. How to push the tabs
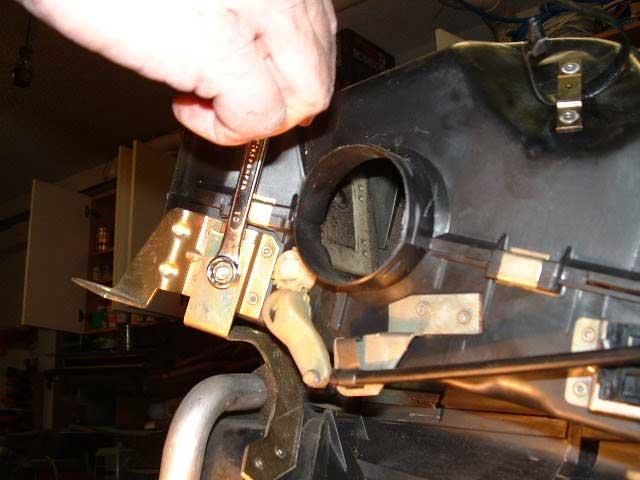
108 Remove the tabs to separate the heater box. This tab and the opposite one on the box
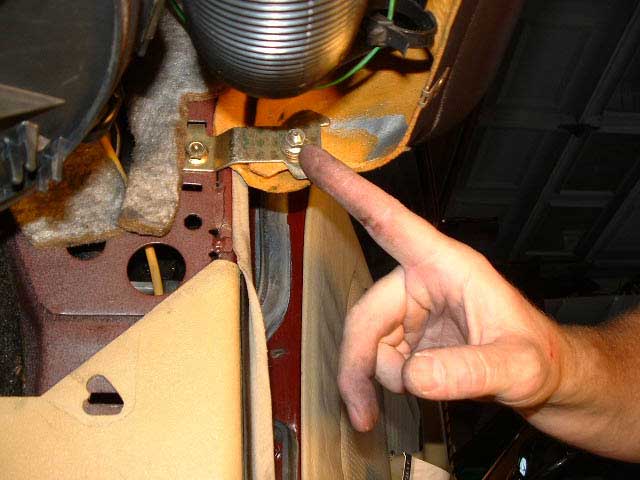
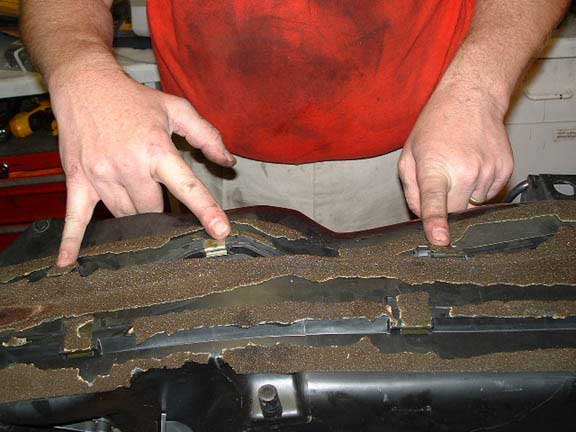
109 Remove the 2 tabs I’m pointing at to separate the heater/evap box
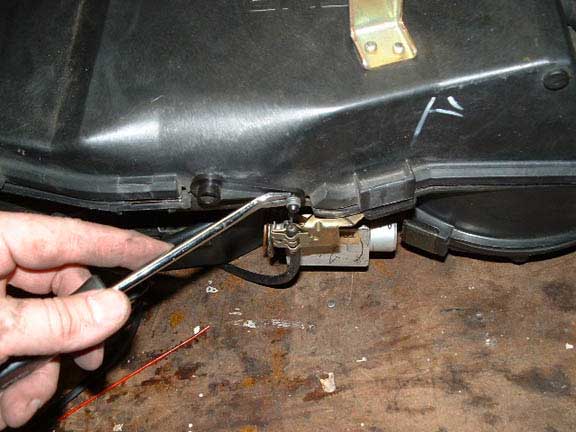
110 Remove the left side heater box bolt. Save all parts

111 Remove the right side heater box nut. Save all parts. Now separate the heater and evaporator box sections
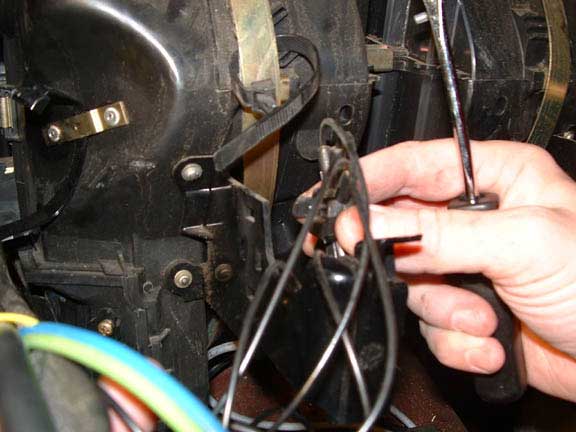
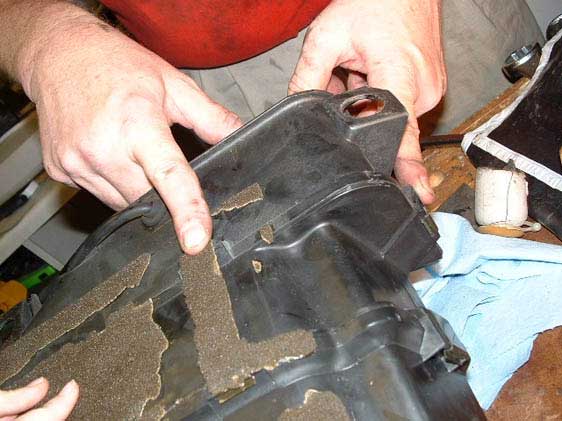
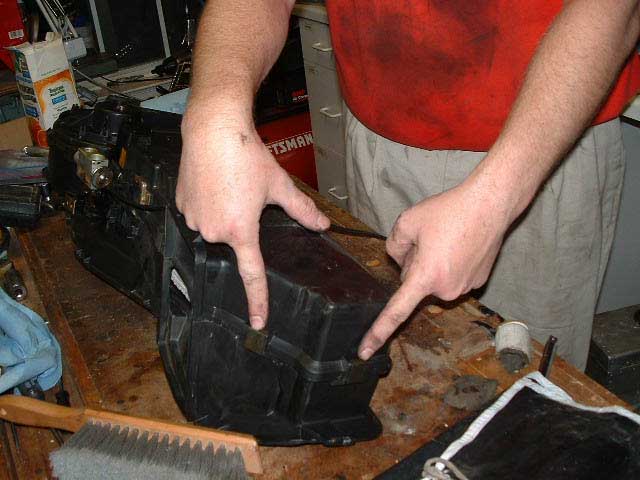
112 Separating the fresh air section from the evap section. Remove these 4 clips.
113 Separating the fresh air section. Remove these 2 clips (6 total)
114 Separating the fresh air section. Remove these 2 clips (Now 8 total)
115 Separating the fresh air section. Remove these 4 clips (Now 10 total)
116 Separating the fresh air section. Disconnect the element shaft from the door
117 240D Separating the fresh air section. Either unhook the cable or unclip the cable housing from the mount
118 240D Separating the fresh air section. Remove the clip that holds the cable
119 Separating the fresh air section. Unplug the fan wire harness
120 Separating the fresh air section. Remove the wire harness from the base mount
121 Separating the fresh air section. Unhook the wire harness form the box
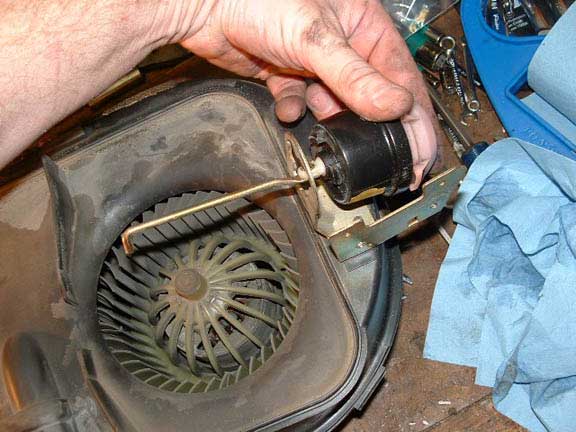
122 240D Separating the fresh air section. Remove the blower motor resistor unit from the evap box
123 Remove and replace the fresh air element while you’re here
124 Separating the evap section. Remove these 3 clips
125 Separating the evap section. Remove these 2 clips (5 total)
126 Separating the evap section . remove the foam and these 3 clips (8 total)
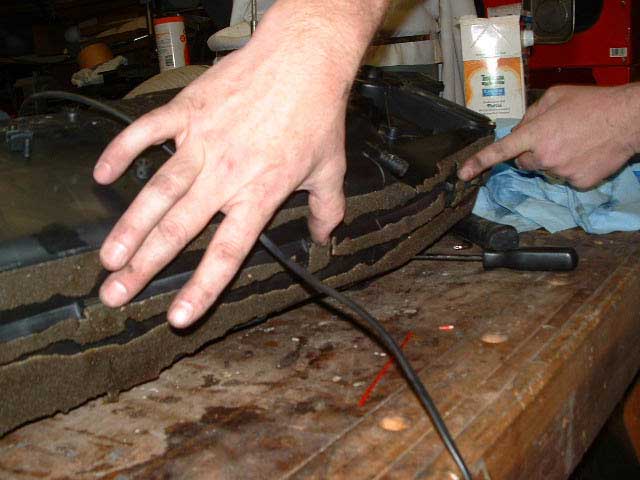
127 Separating the evap section. Slide the upper case off the evaporator
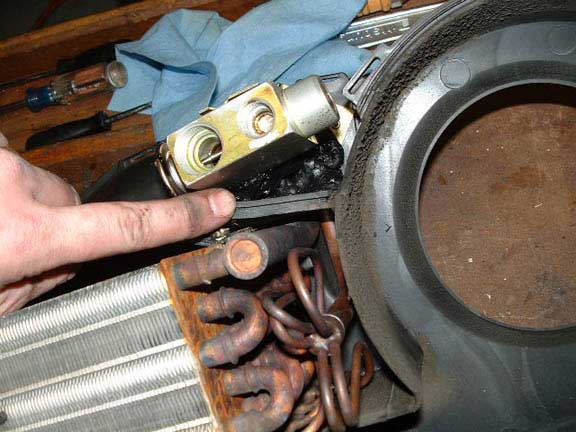
128 Note clearance of expansion valve to evap box. Critical when reassembling unit. You may have to bend the copper tubes of the evap to install the new unit

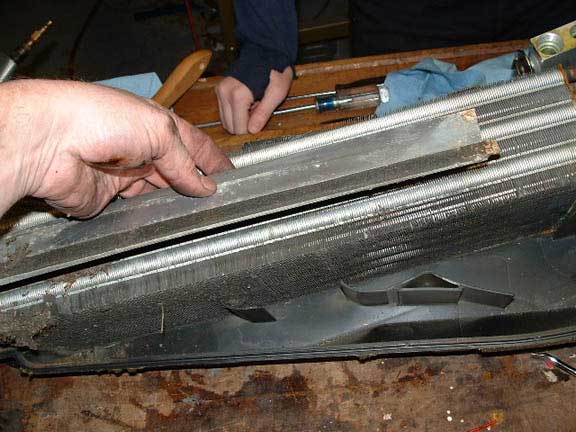
129 Note the position of the sheetmetal piece and foam. Foam also on the bottom
130 Remove the black tar sealant from around the expansion valve. Note rubber sealing wall. Remove the rubber wall with the evaporator
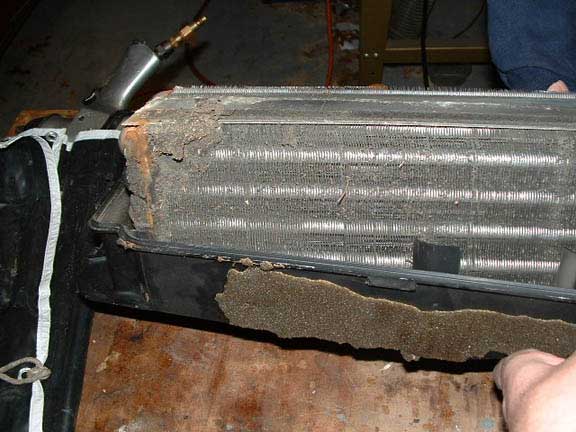
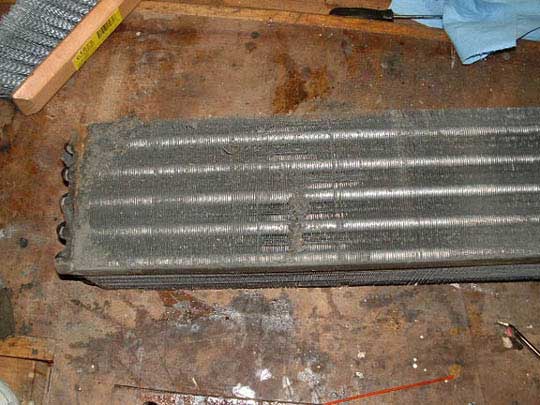
131 Note how much dirt is in the fins of the evaporator.
132 300TD fresh air element
133 300TD Heater core tubing
134 300TD Close up. Fresh air element
135 300TD Close up. Center vent element

136 300TD Center vent section
137 300TD Drivers side defroster element
138 300TD Center section of evap box

139 300TD Left side of evap box

140 300TD exp block and center actuator
Some thoughts on this job.
The first car done, the 300TD, took a while to do. I did a lot and was a little lazy doing the job. The second car, the 240D took 3 days to do. We took lots of pictures and check everything over. I also spent a couple of hours re-gluing the AC control panel unit. I had ordered one and I eventually got it, but my Daughter needed to get back to school. I have it and will probably never install it I probably could have gotten the job done in one long day, but I don't like to work that way.
While your there. Consider replacing the following
All vacuum elements.
All vacuum connections
Of course the evaporator
Possibly the heater core ( this could be fixed with leak stop, I would not do this job JUST for a leaking heater core.)
All light bulbs
Check all the plastic vacuum tubes for damage.
Check the condition of the evaporator box and epoxy any weak areas.
Air temp foam tube, consider replacing it with a hard plastic tube
Evaporator box drain tube. I used a garbage disposal to sink drain adapter tube. ( make sure you install your tube before installing the evap box in the car )
Rebuild the instrument cluster, its out
Check all the vents in the dash for broken tabs where they mount. They use 4 tabs integrated in the vent to hold it in position, these break
Time to really clean up the mess under dash and center console
Here is the post I did that is just a word description of the evaporator installation. It has some lengthly considerations posted. This post along with the one below should be adequate for anyone doing this job.
Dave
-dmorrison
CategoryDiy