W124 Stereo Removal Process
PeachParts would like to thank Shop Forum Senior Member, John Elliott ( JCE ), for contributing the text and pictures for this excellent Do-It-Yourself article. If you have any questions or comments regarding this process, please post them in the Car Audio section of the Shop Forum. John will do his best to reply to you there.
Disclaimer: These instructions apply to removing the stereo system from an EARLY W124 chassis 300E (1987). Later models had some changes in shift lever surround trim, console design, wiring, speaker location, and stereo model. Check yours out carefully before proceeding. Also, the car engine should be off, and the key out of the ignition before working on the stereo. As you remove screws, it is a good idea to place them in labeled plastic bags for when you do reassembly of the components.
Step 1 - Dash Speaker Removal
The grills for the front dash speakers are held down by 2 screws, which are hidden by a plastic strip. This strip must be pried up from the front. The plastic strip is thin, with a downward protruding hook that must be released. Take care not to damage the dash vinyl ? better to break the strip in the removal process than to cut or puncture the dashboard!
Once the strip is removed, the grill area exposed shows the 2 screws that had been concealed by the strip. One screw is vertical at the front of the dash, the other nearly horizontal at the rear (closest to the windshield). After these are removed, the grill can be lifted up by the strip area and pulled out by moving it toward the center of the car. There is a thin strip of foam on the outside surface of the grill edge by the windshield pillar ? usually the glue is old and the foam will fall off, but can be easily re-attached later.
After the grill is removed, the dash speakers are exposed to view. The speakers are not screwed into the dash. They are held in place by a tab and 2 spring clips attached to the speaker. The two spring clips are identified by little markings that look like a box with a circle in the center. . The area with no marking is where the fixed metal tab is located. If you are saving the speakers for some reason, removing the speakers requires a very thin screwdriver inserted at one of the marks, to compress the spring clip, and prying up at the two marks to lever the speaker out of the dash. If you no longer need the speakers, tear out the cone material and grab the speaker frame between the two marks to pry it out of the dash. NOTE: the speakers can be held in the dash quite firmly. Stereo installers have told of amateurs breaking their windshields by the sudden release of the speaker, and recommend putting several layers of towels or padding between the speaker and windshield before attempting removal. The speaker is an odd size, slightly larger than 4 5/8? (119-120 mm).
The wiring to the speakers can be clipped off with wire cutters, or, a short distance from the speakers behind the dash there are euro plugs for each speaker wire.
Figure - 0
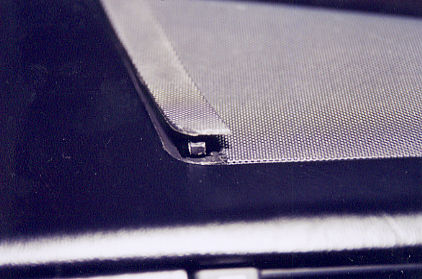
The strip on the part of the grills closest to the center of the dash must be removed to expose the grill screws. This is done by prying up the front of the strip.
Figure - 1
The strip is held to the grill by a tab in back, friction plugs in the center, and a hook at the front.
Figure - 2
Once the strip is removed, 2 screws hold the grill in place. The one closest to you is mounted vertically, the one closest to the windshield is horizontal. Once these are removed, the grill can be lifted at the edge where the screws are, and slid towards the center of the dash for removal.
Figure - 3
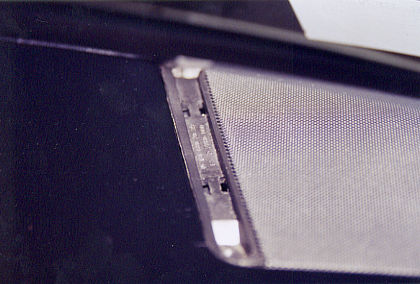
The front speaker is held in the dash by one metal tab and two spring clips.
Figure - 4
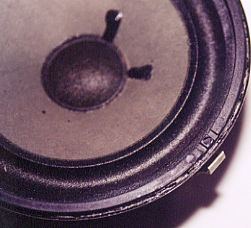
The location of the spring clips is marked by symbols that look like boxes with circles in the center. The metal tab doesn?t have a marking.
Figure - 5

The speaker is pried out of the dash at the spring location with thin screw drivers, or the paper cone may be removed and the speaker removed by pulling up on the exposed speaker basket between the spring clips. Padding and care should be employed to avoid damaging the windshield when the speaker pops out!
Step 2 - Rear Speaker Removal
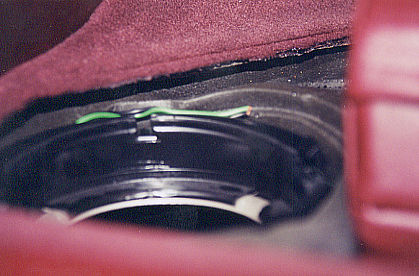
The grills for the rear speakers are not held on by screws, but by clips on the grill edge closest to the rear headrests, and by plastic tabs at the outside (headliner) edge of the grill. The plastic can become brittle with age, so a certain degree of care must be used in removal. Rather than prying them off from the front, Mercedes has thoughtfully provided holes in the metal of the rear shelf where the securing clips can be accessed from below. Looking in the open trunk, it is easy to view the speaker grill through the rear window and see the hole in the metal parcel shelf inside the trunk. Get in the trunk, and with a flashlight and screwdriver you can see the underside of the grill and the metal clip. Gently push slightly up and towards the center of the car on the metal clip from below. This will free up one corner of the grill. Then get in the back seat and gently pry up the front corner of the grill, by the headrests and seat back (The headrests should be up while you are doing this). Once the headrest edge of the grill is loose at front and rear, the grill can slide towards the center of the car, allowing the plastic tabs to be released from the headliner area.
Speaker removal is literally a snap. Several plastic tabs hold the speaker in a plastic frame. Releasing the tabs releases the speaker. The speaker wires are similar in layout as in the dash, with euro connectors a short distance from the speakers. This speaker is also an odd size - 5 1/8. 127 mm.
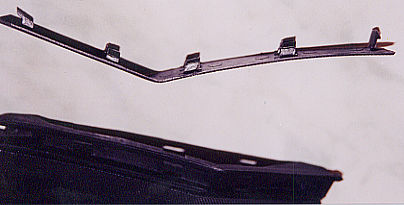
Figure - 6
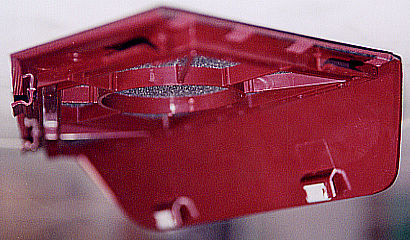
This is a rear speaker grill as seen from the bottom. A number of plastic tabs and 2 metal reinforced tabs hold the grill on the deck. The easiest way to remove the grill and avoiding breaking the brittle plastic is by pushing up on bottom of the metal tab shown in lower center. This is best done from inside the trunk.
Figure - 7
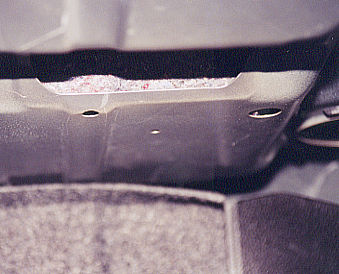
From inside the trunk you can see the bottom of the speaker at the upper rear corners of the trunk. A small hole is visible in the sheet metal where it curves toward the speaker well. Using a flashlight and screwdriver, you can push up gently on the bottom of the grill tab until it moves up about ??. Then, from inside the rear seat area, the grill edge can be tilted up, and the grill pulled out toward the center of the car for removal.
Figure - 8
The rear speaker is held in a plastic frame by flexible mounting clips, no screws or springs.
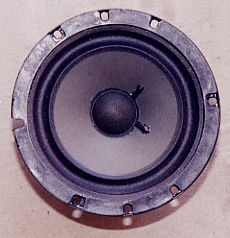
Figure - 9
This is a view of the rear speaker mounting frame with the speaker removed.
Step 3 - Head Unit Removal
To remove the head unit, it is first necessary to remove the ashtray. To get the ashtray out of the way, it is best to remove the wood consol shift panel that surrounds the window and mirror switches and shift lever. On older W124 cars that have a carpeted convenience tray between the seats instead of a hinged cover console. You start by removing the small carpet pad. It is held in by friction under the edges of the console, and pulls right up. This exposes a tab that is secured by a screw that must be removed.
Some directions on the internet discuss removing the plastic and rubber trim that surrounds the shift lever. DON?T DO THAT!! Several versions of surround trim exist. If you try to remove the plastic and rubber version, you will wind up buying some replacement parts. This rubber and plastic trim does not need to be removed, and is destroyed if you try to remove the rubber!
Having removed the screw from the tab at the end of the wood trim closest to you (furthest from the dash), there are no other screws holding the wood in place. Instead, the fader switch and passenger mirror switch snap connect to the back of the wood to hold it down, and there are 2 hooks at the ash tray end of the wood holding it in place. Slowly lift up the wood at the end furthest from the dash. There will be some resistance at first ? this will be the mirror switch and fader switch unplugging from the chassis switch frames. It helps to place a finger on the center of one of the rear power window switches while pulling up on the wood, as they are attached to the chassis and not the wood. Only the power mirror switch and fader control are attached to the wood and plug into the chassis. Continue lifting up at the end closest to you as the wood starts to move freely. Keep lifting until the wood section is nearly vertical, with the tab towards the ceiling and the front of the wood still in contact with the ashtray wood. This will free the hooks from the ashtray area. The wood section can be pulled back and up over the shift lever and set aside. This exposes the center console wiring and switch frames. If you have a bad power window switch, now is a good time to replace that switch. If you are going to be using the car before you complete the removal or installation, and want the use of the mirror switch, it can be un-snapped from the wood trim and plugged back into it?s socket ? it is keyed, and only goes in one way.
The center console fader switch is a device that will probably be bypassed on your installation. The early Becker Grand Prix was a 2X20watt head unit that was split by the fader switch to drive 4 speakers from 2 channels of amplifier. Most aftermarket head units have 4 channels of amplification and an integral fader, so the one in the center console should not be used in the new installation. If your head unit has an Auxiliary input, or a subwoofer output that you aren?t using for something else, the switch can be modified to make a nice center console RCA or Mini-stereo jack connector that retains a stock look and doesn?t leave a useless rotary switch in the center of your console.
To remove the Ashtray, open the wood ashtray door and remove the chrome insert. There are 2 screws on each side at the bottom. The ashtray will lift out partway, and his attached to 2 electrical wires. One is the light, and the other is the power to the lighter. The lighter power is actually 2 wires in parallel. Do not loosen these connections or allow the bare wire to show, as shorts in this area can cause different fuses and lights to blow out.
The head unit may now be removed. On the older Becker Grand Prix, you will need a short section of coat hanger wire with a ?? right angle bend at one end. The bent end is inserted into the cassette door of the head unit on the upper right (passenger) corner. The bend in the wire should be rotated to the passenger side, so that it is not grabbing the push buttons above the cassette door, just the faceplate (see picture). The faceplate is pulled with the coat hanger wire until it separates from the plug on the head unit. The head unit chassis is now exposed.
At the lower right and left edges of the chassis are two openings in the chassis, through which 2 black plastic tabs protrude. Firmly depress both tabs simultaneously while pulling on the head unit chassis, and the radio will come out of the dash. The connectors on the back are then unplugged, and wrapped with tape to insulate them until you are ready to install the new head unit. (The console and ashtray removal were necessary because those 2 plastic tabs wouldn?t depress with the ashtray in place, and the ashtray wouldn?t come out without removing the console!).
Figure - 10
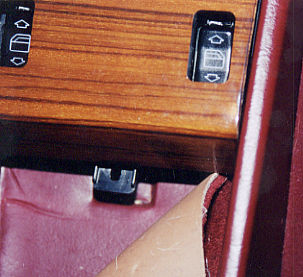
In order to remove the head unit, it is easiest to remove the center console trim and the ashtray. This is done on early model w124 automobiles by pulling back the small section of carpeting in the convenience tray, which exposes a screwed down metal tab. Remove the screw, and save for reinstallation.
Figure - 11
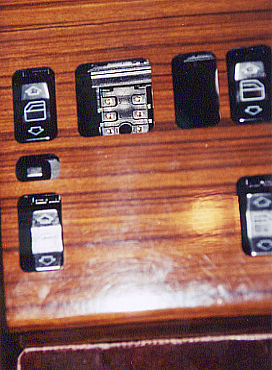
The wood part is held in place by the screw tab you just removed, by 2 hooks up front by the ashtray, and by the friction of two plug in switches which are snapped into the wood and plug into a console sub frame. (Switches shown removed).
Figure - 12
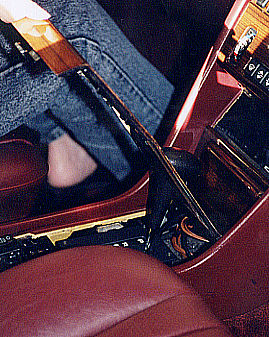
Removal is accomplished by tilting the wood by the screw tab up towards the dash as shown. There will be some resistance as the 2 switches (fader and power mirror switch) unplug from the console.
Figure - 13

Here the wood trim is shown vertical and almost touching the dash. The power mirror switch is shown in place to demonstrate the plug arrangement, while the fader switch has been removed to show the snaps on the back of the wood which secure these two switches in place. No other switches come off with the trim.
Figure - 14
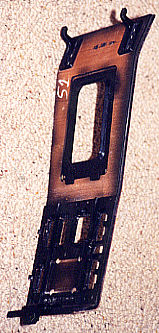
This is the removed wood trim, showing the screw tab at the bottom, the plastic switch frame at the lower center, the plastic and rubber shifter surround at the upper center, and the plastic hooks that secure the front near the ashtray.
Figure - 15
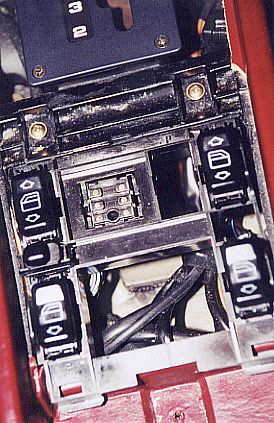
This is the exposed sub frame containing all the console switches. The fader switch and wiring snaps into place from the bottom of this frame. If the frame comes loose, it snaps easily back into place. I removed the fader control completely to allow creation of an auxiliary input for MP3 , tape, or minidisk player.
Figure - 16
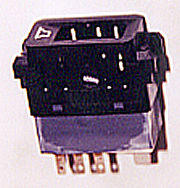
The unplugged fader switch is easily modified to make a custom frame for an auxiliary input. The switch disassembles by prying loose the two small rectangular tabs at the lower sides of the switch, and sliding out the rotary switch and frame. The switch will fall apart when removed from the frame, so keep a grip on it and tape it together after removal if you ever plan on using it again.
Figure - 17
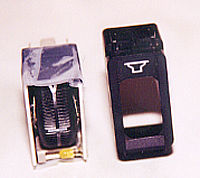
After the switch is removed, the black frame marked with a speaker symbol can easily be modified to hold an RCA or mini plug to run to the AUX input of your new head unit. The frame snaps back into the original location in the wood console trim, and looks stock.
Figure - 18

The next step in getting to the Becker head unit is removing the ashtray. Remove the chrome insert, exposing the spring at the bottom of the ashtray holder. This exposes 2 screws that must be removed to pull out the ashtray, which has 2 sets of wires leading off the back of the assembly.
Figure - 19
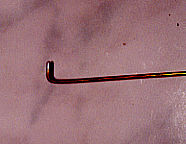
In order to remove the Becker, make a special tool, consisting of a section of coat hanger wire, with a right angle bend at one end.
Figure - 20
Insert the bent part of the coat hanger into the cassette door at the upper right corner, with the bent section aimed to the right, so that it does not interfere with the pushbuttons. Insert the wire just deep enough to go behind the faceplate.
Figure - 21
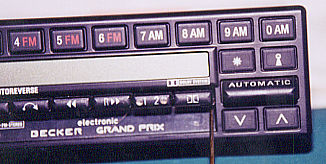
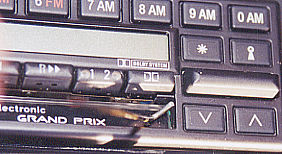
Pull gently on the coathanger wire. The faceplate is held on by the friction of a plug in electrical connector, and removes easily.
Figure - 22

The removed face plate exposes the buttons and chassis of the Becker Grand Prix. At the lower right and left of the chassis there are two rectangular holes, with black plastic tabs protruding through. To remove the radio, simultaneously depress both plastic tabs while pulling the chassis out of the dash.
Figure - 23
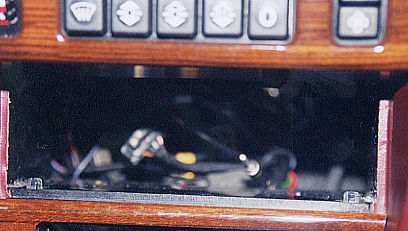
These are the black plastic tabs which lock the chassis in place, and remain behind after the radio is removed.
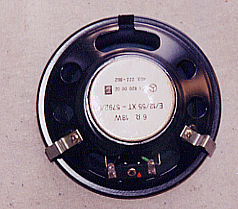
Figure - 24
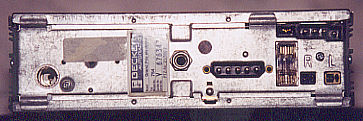
This is the back of the Grand Prix after all the wiring is unplugged, showing the 2 amplifier channels (R and L), a fuse, etc.
The old stereo is now removed, and ready for new speaker wire, RCA cables, speakers, amps, subs, etc. of your choice. There are many possible options for new installations, so the rest is up to you or your installer.
Enjoy!
- John Elliott 12/2000
CategoryDiy