Revision [409]
This is an old revision of W140BlowerMotor made by WebMaster on 2006-05-18 12:42:36.
Diagnosing the Blower Motor and Cabin Filter
on the 1998 S500 (W140)
by Greg Baxter
4/14/06
This is a how-to guide to fix the a/c blower motor on the Mercedes 140, AKA "S" Class 1993-1999. This article is of my own making, and from my own research. If you use any of the material within, then like me, you're on you're own. You can't hold me or anyone else responsible for whatever, so if you don't feel comfortable doing this sort of mechanical work, then take your car to an authorized mechanic.
Updates
Bill Wood, the owner of the most honorable website MercedesShop.com, was nice enough to review some of my content. Bill threw a few comments my way regarding the content. I thought enough of his feedback to re-write this DIY (Fan/Cabin Filters/Blower Regulator ).
Note that with just a small bit spliced wiring, you can make the 140 style blower regulator work on the old-style W210 (like a 98 E430) assembly. If you don't, you'll have to replace the entire unit to the "newer style" W210 unit. So if you're having trouble locating a blower regulator for the 210, try just cutting the plugs and soldering/heat shrinking those big 8 gauge wires. I would imagine replacing insulation is imperative. I haven't done this, so I'll stop here - again it was a recommendation. Do your own research here!
Now - this is important. This research (as noted below) was basically an accumulation of data from larger minds. It should at the least include a mention of M.B.Doc and Larry Bible, long-time contributors to Mercedesshop.com, who in retrospect have probably have contributed in some way to every DIY I have written.
Air conditioning and heating can be problematic in the S class of Mercedes production autos. Dozens of sensors, pressure, temp, evaporators that require the entire interior to be removed, condensors, pumps, compressors, driers, fans, valves, on and on. Even the fuel on a 140 is cooled through the a/c before it goes to the injectors.
Some of my earlier problems with a/c were electrical in nature. Like the fan motor. It's quite common for the motor to only put out say, 25% power at the highest control setting. On a hot day, this can be a major issue. So after doing my share of reading on the forum, I came up with some superior advice from the usual plethora of talent that hang thereabouts. The results of my reading are displayed herein, implemented by me.
25% power barely moves any air through the plenum. What was causing this, a short? A bad motor? Bad brushes? Was the controller itself sending bad "bias" voltage to the blower motor controller (a TTL transistor to amplify voltage). Should I just replace the entire fan unit, motor controllers and all? I came close.
The problem ended up being a bad TTL blower regulator, part number 140 821 83 51. You can find them from Phil (mercedesshop.com), or if you're lucky you may get one that works at a junkyard. But let's dig through the diagnostics I went through to isolate the problem - we'll take apart the firewall-forward air handlers to expose the motor and electronics. It's really not a big thing - especially to those that do them all the time. But for me it was fun, and even some redemption that I only spent $200 for the solution - when the shop had quoted $1,280.00 for labor and the entire assembly.
You'll need a voltmeter. And REMEMBER - there is power to the motor even when the switch is OFF. The blower motor on a 140 is controlled by the NEGATIVE pole. I understand that a lot of cars use this same technique. So the closer the negative on the motor is to a short circuit (0 volts), the faster the motor runs. Keep that in mind.
And finally, since the cabin/charcoal filter sits right on top of the blower assembly, I thought a simple relabel of the title would suffice. The other two filters are another story, one under the passenger side dash - easy to get to. The "pollen filter" is buried behind the evaporator, and is a significant job IMHO. We're going to do the big filter, the charcoal cabin filter.
Ok - here we go
First off - you're supposed to disconnect the battery, which I didn't do because I wanted to do my diags on the car (not on the bench). I do not recommend this. Remember - the positive to the motor is a hot wire even with the key off. If you ground the motor, it'll at best run at full capacity, and at worst arc, burn or melt your jumper. So that being said, if you don't feel comfortable working this way then DON'T. Take it to the dealer.
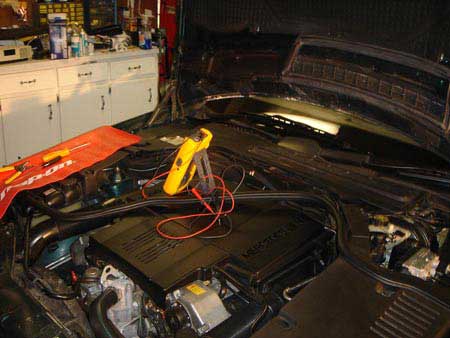
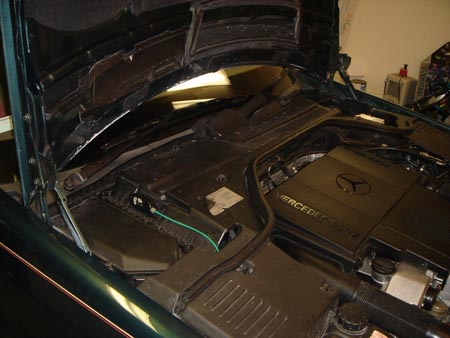
Here's the wiper cover manifold before it comes off.
This cover has to come off - bunch of screws. Those screws that go down the middle are fairly long, like 3" or so.
----> Note: if you're just replacing the filters, then if you're careful you don't really need to pull the plenum. Just be careful not to jerk out any connections like the vacuum hoses etc, and slide in your new filter, button it back up and you're done.

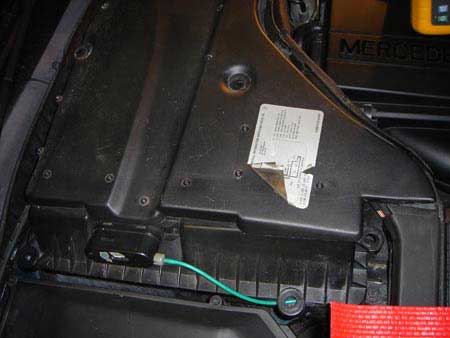
Notice that little plug? You DON'T have to undo the drain hoses for this piece to come off. Just give it a short CW twist and it pops right out of the manifold.
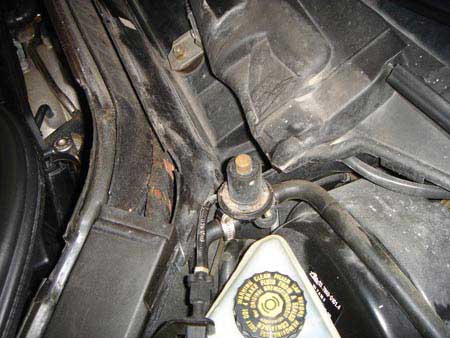
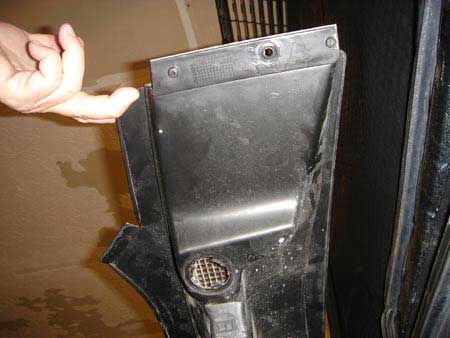
Here's the bottom, where the plug fits.
Just pop this little vacuum line off the manifold.
Unplug the "Smog" sensor and it's off - just set it aside for now
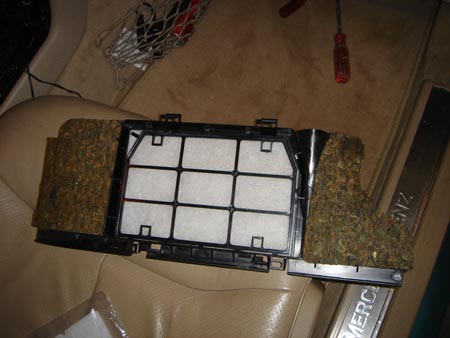
Notice my new shiny air filter, part# 140 835 01 47 pictured above. This is one of the charcoal filters, but NOT the real expensive one that sits in front of the evaporator - that one [not shown] is called the "pollen filter" and goes for around $380.00 cheapest I can find it. Part# for the Pollen Filter is 140 830 00 18. Note they are both active charcoal backed. I replace the main cabin charcoal filter often (140 830 00 18) - maybe once/twice a year - Phil has them for about the best price around. Like $100.00
I've replaced the pollen filter once, and don't plan on doing it again anytime soon. Not only is it a pain because the wiper assembly has to be removed to get to it, I simply don't use it that much. In order to use the pollen filter, you've got to press the little button on the console, and then it times out after 15 mins. I think the filter is rated for 24 hours continuous use, but will literally trap particles down to 1 micron (that's small).
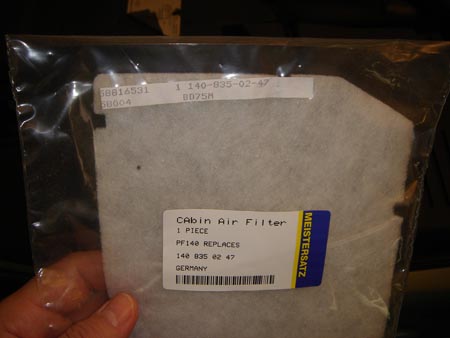
This is the "Recirculation Filter", part # 140 835 02 47.
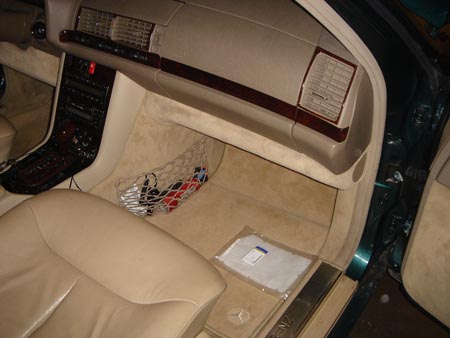
Little recirc filter sits above passenger foot well.
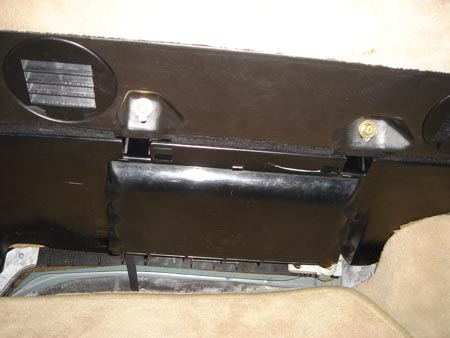
See those two 8mm nuts above? They do NOT have to be removed to get to the filter.
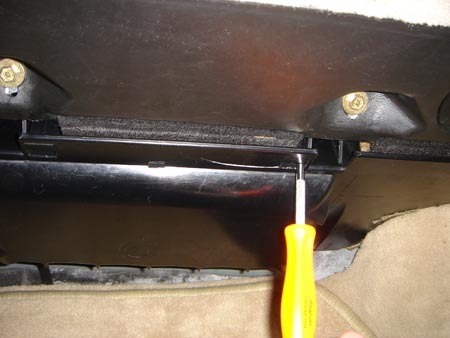
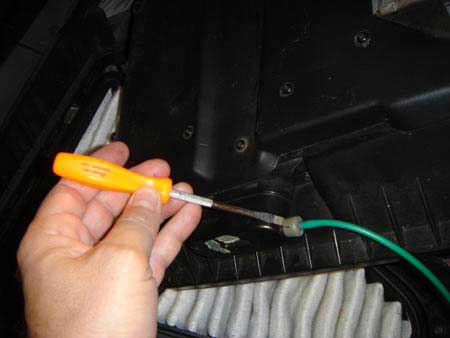
Just pop the release tabs with a straight slot and it pulls down like above.
The recirc filter just sits in its little tray, and is easy to replace.
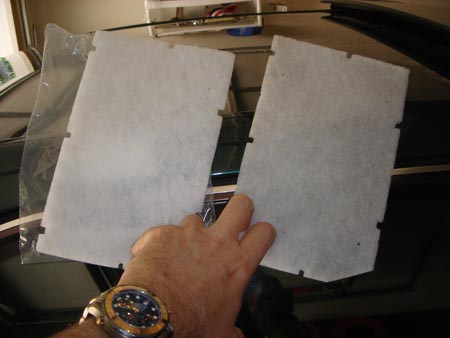
As a reference, I replaced this one 6 months ago - you can see it's just a bit dirty but not much. I don't use recirc all that much, even though the flaps keep it on 20% recirc all the time even when pulling "fresh air".
Bottom of the charcoal filter (140 835 01 47). Again this one is new. I can say firsthand that this filter works. I have yet to replace one that hasn't been absolutely filthy after just a few months. They will also clog if neglected. The symptoms are similar to low fan rpm, just restricted airflow.
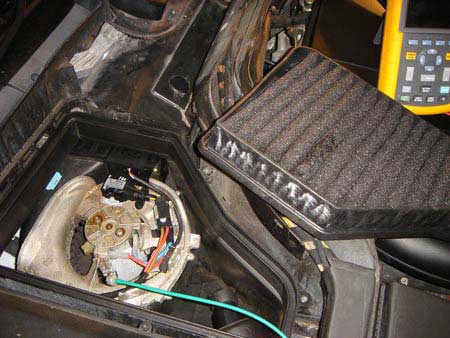
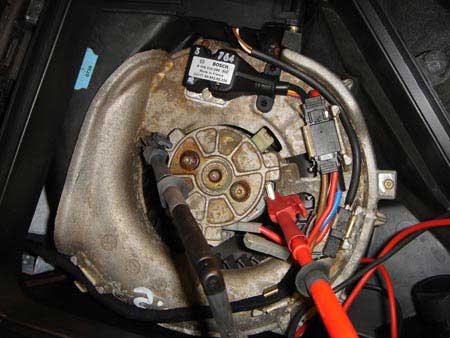
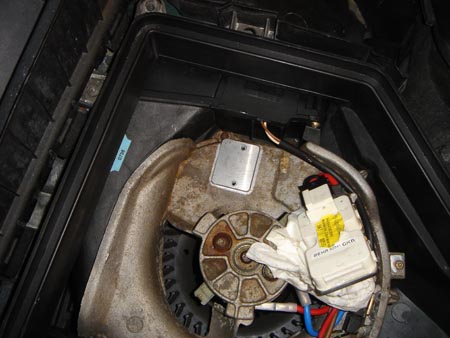
This fan is the original in my 98 S500. Notice the corrosion here and there - and I removed it to clean it up about a year ago. The motor bolts and the aluminum case itself seem to be subject to corrosion.
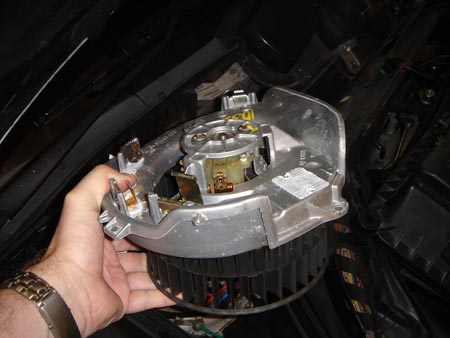
Here's the motor/fan removed, but again I didn't have to replace it. The motor will come out from this assembly, and can be replaced separately from the housing. Remember - you won't have to remove this assembly if you're just replacing the Blower Regulator.
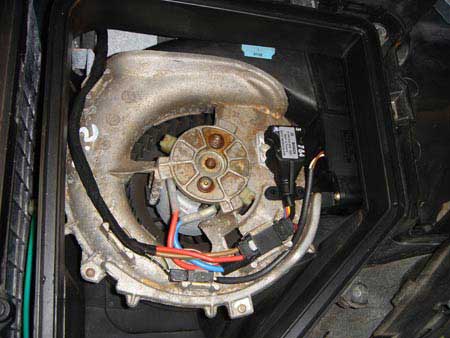
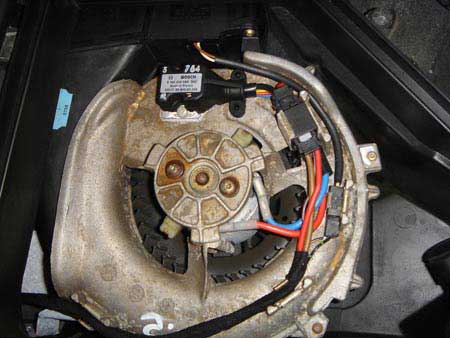
The Blower Regulator can be seen at 3 o'clock. Try doing the obvious diags first - like the little controller that sits on top of the fan. Look for loose wiring, corroded connections to the motor, anything like that. You can actually replace the brushes on these motors if you're up to it, but the comments I've heard are it's not worth it. A new motor is like $150, and of course it has new windings, new armature, new brushes, connectors, bearings etc. If you've got to pull the blower assembly, just pull the screws all the way around the fan case and it will lift out.
I took the broken one apart like a spoiled kid takes apart his trains on Christmas morning, but all I saw was a TTL transistor that was burned out. So that was that. I threw it in the trash.
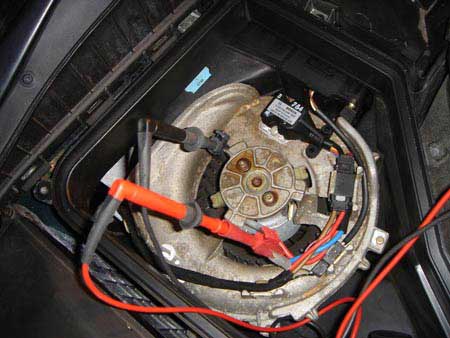
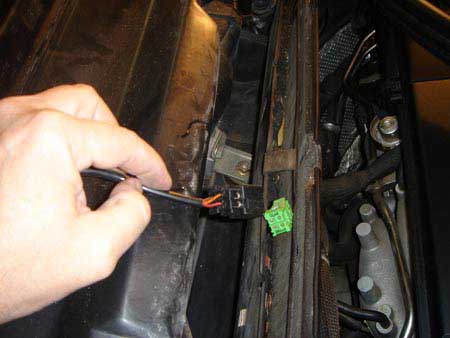
Here I'm testing the GROUND wire that connects to the motor (my red lead, the car's blue lead) against the frame ground (black). See results below. Remember - these motors are controlled by varying the ground potential voltage - NOT the positive voltage. The positive voltage to the motor is always a direct circuit to the battery (via a relay/fuse I believe). It's also hot all the time and never switched.
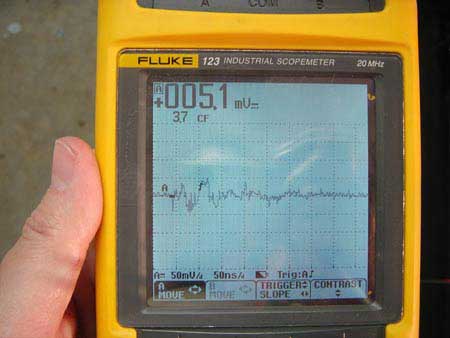
With my fan control inside the car set to "full", this is all the voltage I got to the motor on this car. So, 12V on the ground wire means the motor is shut off. 0V on the ground wire means it's running wide open. Actually, I think it's more like 1V. So with 6V control signal (bias) , I was supposed to be getting bias * 2, or 12V to the motor. This is why it was only turning about 1/3 speed. For the more technically minded: power-voltage = ( bias voltage ) * 2.
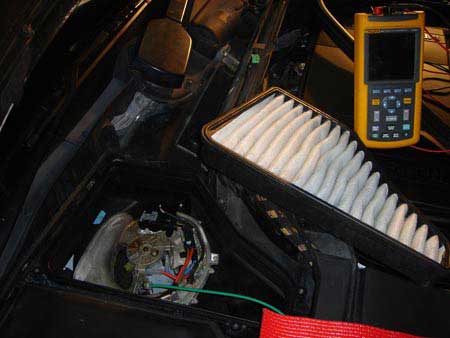
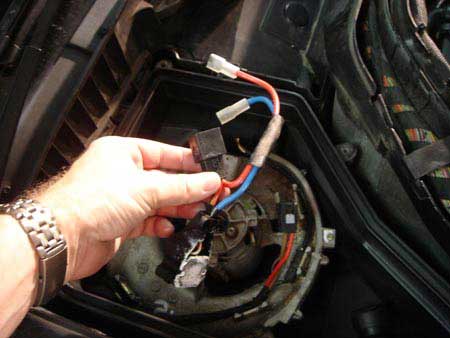
Another shot of how I attached the scope leads to test full potential between the two poles on the motor. It showed 12V, so I assumed at this point the motor was beginning to look good.

Through the motor. I'm not sure how a different value would be diagnosed, especially if there were diodes on the brushes. So maybe some of the experts reading this could comment.
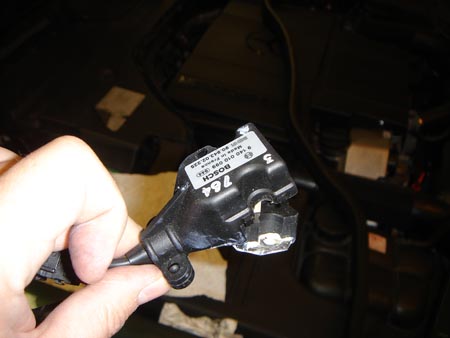
The culprit, the "Fan Resistor", aka Fan regulator, and officially known as the "Blower Regulator". Did I tell you this thing gets HOT? That motor pulls an awful lot of current.
Anyway - if you were here just to replace the filters then place your new one on top of the motor housing, charcoal down, and replace the cover in reverse order. Don't forget to do the wires and the drain plug, and the long screws.
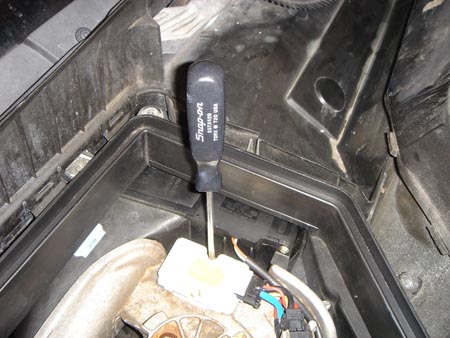
I think I took this pic to show the screw is a Torx T20, not an allen.
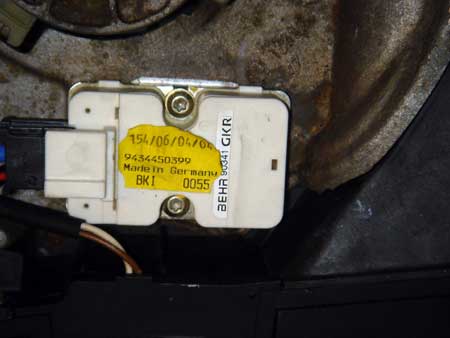
Here's one I replaced that (I think) came from a CL500 - but notice the specs were identical. It's been working fine ever since.

This was one of the changes made from the original text of this DIY: Bill suggested I clean the mess from the heat sinks with a coffee filter. What a great idea - coffee filters are made for no lint, and specifically made to leave no debris. And they're absorbent. So I cleaned both the bottom of the Fan Regulator, and the top of the fan housing where this little thing sits.
As clean as I could get it, then -
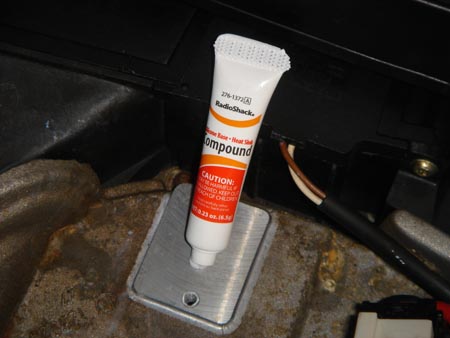
Just a SMALL amount of this heat dielectric grease. This is the same stuff used on computer CPU heat sinks. As you can tell it came from Radio Shack, like $1.98.
Note: Too much of this stuff will act as an insulator! Use just enough to get the job done. (thanks again, Bill).
All buttoned back up and ready to go...
Testing blower and pneumatic air valves
I first heard of this idea from Jim Forgione - pay his page a visit for a much better explanation and the key codes themselves. He even sells a CD chock full of diagnostic information like this, which I highly recommend. I believe his error code CD lists all codes for all CPUs and all regulators on all late model MBs back into the mid-80s.
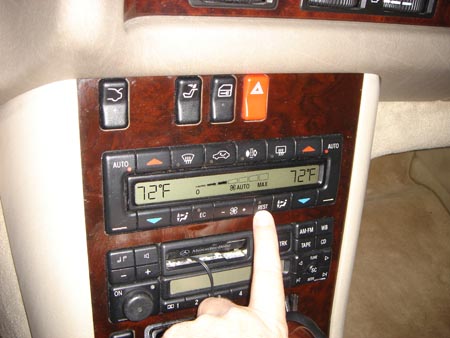
If you want to give your 140's air handling valves a workout, then press both the recirc and "rest" buttons at the same time for 6 seconds.
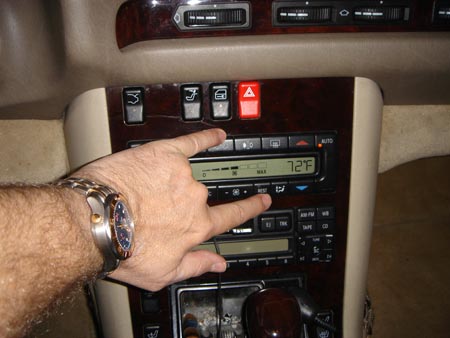
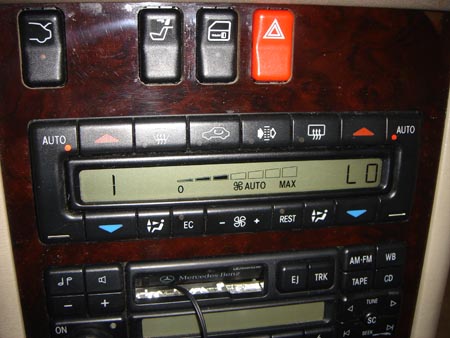
You'll then get a display that looks something like this. See the table for the map of all 14 valves. Press the left "Auto" button to cycle through each one, then press the right Auto button to change it from "Hi" to "Lo" (Open or Closed). Or you can put it on "15" and do all 14 valves at the same time. This is a great little procedure if you've got some doubt about how your vacuum, air valve controller or overall heat/cooling distribution is working.
To cancel the test, just push "Rest" again and that's that.
There's another test that I use almost weekly - even while driving down the road. By just pressing the Rest button by itself for 6 secs, it will show you most detailed information about the AC system at runtime. Like coolant temps, evap temps, system pressures, engine water temp, bias volts sent to fan regulator etc. Again to cancel just tap Rest.
This is the second one I've done. the first one I just purchased the entire assembly from Potomac Mercedes (junkyard). I got lucky and found one that came off a 99 S500 that had been totaled. He sold me the whole assembly for $240.00, so now I've got a spare motor and fan case. The second time I just purchased a new blower regulator (140 821 83 51) from Phil (MercedesShop). I hear this is a common part - perhaps I'll call Autozone one day for pricing, but I doubt I'd find it any cheaper.
Fan now runs 100% - what a difference! , and responds to inputs from the control panel in the car.
I wish you success!
-Greg Baxter
CategoryDiy