Revision [349]
This is an old revision of W210CabinFilter made by WebMaster on 2005-12-16 14:16:46.
Cabin Filter Replacement
on the 1998 E430 (W210)
12/16/05
This procedure applies to all W210 chassis vehicles.
1) There are 6 screws; two on the top of the glove box facing you, two on the bottom inside facing down (under the little rubber plugs) and two on top inside next the the light fixture. (you will have to look up with a flashlight to see them. Don't remove the ones holding the light.
2) Once the 6 screws are removed, you simply pull out on the glovebox door assembly to remove it. It will take a HARD JERK to remove it. There are slots on the top edge of the glovebox and tabs on the dash holding it all together. Some people have success prying gently around the tabs but you stand the chance of damaging the dash if you try to pry too hard.
3) When glovebox comes loose, you can then disconnect the wire from the glovebox light.
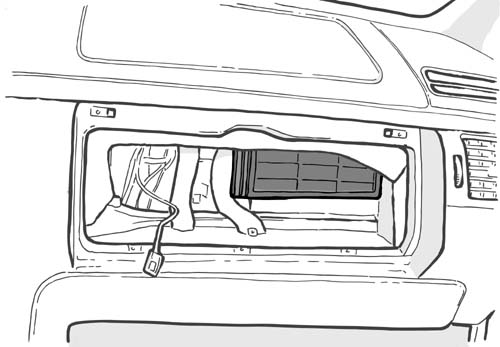
4) Look for a white clip holding the cover to the filter. It unlocks from the bottom. Once you get it off and remove the black plastic cover you will see the dirty filters.
5) Remove the two dust filters. First pull the left one out and then slide the right one to the left to get it out. Vacuum the space before installing the new filters.
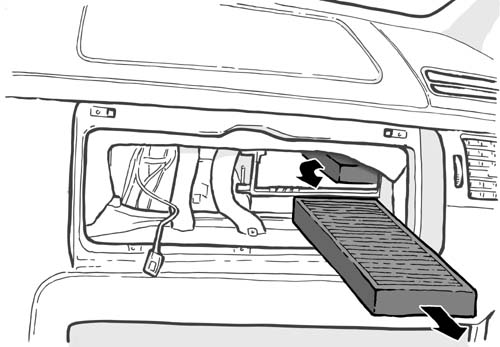
6) Reverse the process to install the new dust filters.
7) The charcoal filters are under the passenger side dash and can be reached by removing the underneath cover. Pull down to remove the 2 filters after the covers are removed.
8) Reverse the process to install the new charcoal filters.
CategoryDiy