I'm back with info. I'm happy to report that with my tool, I was able to press in Meyle subframe mounts fully without much fuss.
Here's a picture of the tool:
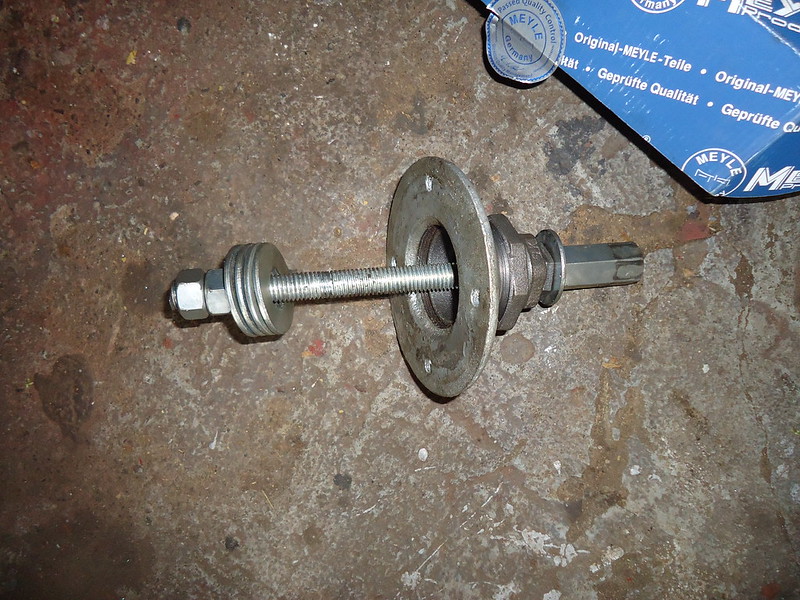
I used pipe fittings from Home Depot. The real key piece is the two inch floor flange, which sits PERFECTLY over the subframe mount, allowing you to press it into the subframe via the metal lip, as opposed to pressing on the center rubber portion of the subframe mount. Here's a list of the parts I used:
- 5/8" diameter threaded rod, 12" length (cut down to a total of ten inches)
- Two nuts to fit threaded rod
- 5 LARGE washers (the ones I used were almost too small - go big on these)
- one coupling nut to fit threaded rod
The following part numbers are plumbing fittings from Home Depot made by LDR:
- 311F-2 - 2 floor flange
- 310 B-2112 2 x 1 ½ black bushing
- 310 B-11234 1 ½ x ¾ black bushing
- 310 B-3412 3/4 x ½ black bushing
Arrange the parts on the threaded rod in the following order, according to the picture:
- coupling nut
- washer
- 310 B-3412 3/4 x ½ black bushing
- 310 B-11234 1 ½ x ¾ black bushing
- 310 B-2112 2 x 1 ½ black bushing
- 311F-2 - 2 floor flange
- four washers
- two nuts
The pipe fittings just screw together. I assembled them hand-tight only.
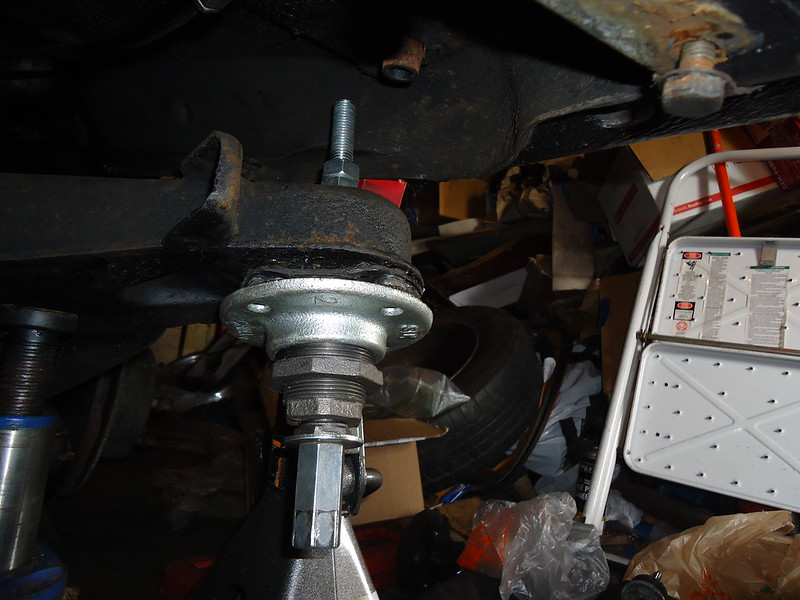
Here's s picture of the tool in place on the subframe:
And here's a picture of a Meyle mount fully pressed into place:
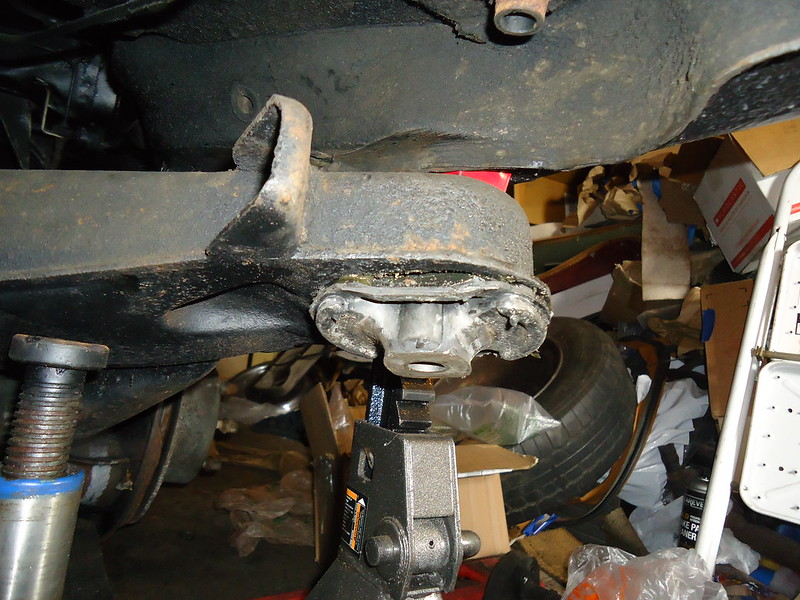
I was able to seat one of these by hand with a ratchet. The other one required the use of my electric impact wrench. Neither one took my more than ten minutes to change.
I can post a link to a video of this later.