I cleaned off the old foam and adhesive from the blend doors with paint stripper, being very careful to not get any on the plastic parts, because it will eat plastic. Remove the plastic pivots first and protect the plastic fin on the left door. After this, I cleaned them with brake cleaner (the doors, not the plastic parts). The right side door naturally has a couple holes in it from the tabs that stick up, so I covered them with aluminum HVAC tape. Then I covered each side with adhesive-backed 1/8" thick extra soft resilient high temperature silicone foam, again from McMaster-Carr.
You'll be shocked to know that I've spent well over $200 on a small amount of foam that's barely enough to do this project (one 12"X12" square of 1/8" thick extra soft resilient high temperature silicone foam at $26.81, three 12"X12" squares of adhesive-backed 1/8" thick extra soft resilient high temperature silicone foam at $38.05 each, and one 15' roll of 1" wide 1/4" thick soft high temperature silicone foam with adhesive back at $60.95). I didn't want some cheap foam that would only last a few years and couldn't find anything else much better than what the factory used.
It's easiest if you cut the inside holes for the fin and tabs first and then align it over, cutting the edges of the doors with a razor last after the foam is installed. I tried just doing one side and folding it over the other side like the factory did, but it does not work well with this type of foam.

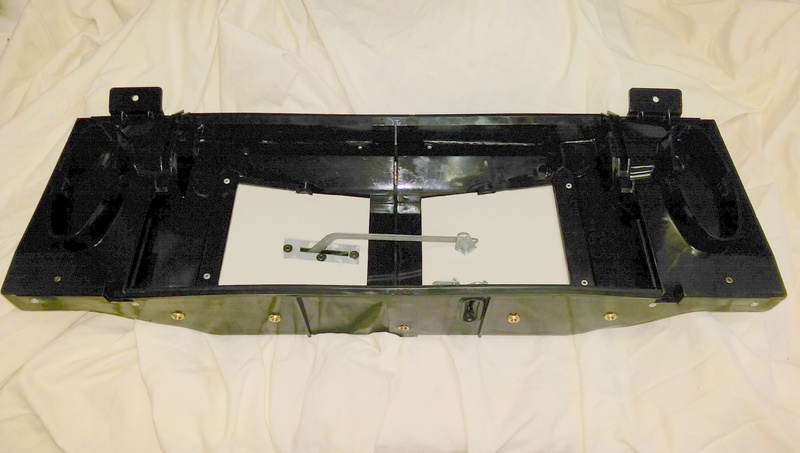
The blend doors in place. This foam is ideal for the job except for two drawbacks; the very high price and the fact that even the extra soft foam is rather hard to compress. This means that it doesn't pinch down well by the pivots, so it can impede the doors from fully shutting, leaving about a 1mm gap. I'm hoping that the foam will eventually collapse at the high-pressure points and allow for a better overall seal. At least I won't have foam blowing in my eyes while I'm driving and it will be a vast improvement over deteriorated foam.
The foam squares under the lower flap housing are still available from Mercedes, part number 107 831 01 42. They also fit the R/W107 chassis, so that explains it. I attached them with contact cement.

The 1/8" adhesive-backed 1/8" thick extra soft resilient high temperature silicone foam that I used around the heater core was too thick for the lower flap housing to fit on the case, so I had to scrape it off of the lower sides.

This was my first attempt at sealing up the lower flap housing using Mercedes non-hardening sealing compound, part number 001 987 56 46. It is similar to Silly Putty.

__________________
Stop paying for animal enslavement, cruelty, and slaughter. Save your health and the planet. Go vegan! I did 18 years ago. https://challenge22.com/
DON'T MESS WITH MY MERCEDES!

1967 W110 Universal Wagon, Euro, Turbo Diesel, Tail Fins, 4 Speed Manual Column Shift, A/C
1980 W116 300SD Turbo Diesel, DB479 Walnut Brown, Sunroof, Highly Optioned, 350,000+ Miles