

|
|
|
|
|
|
#1
 05-17-2013, 11:06 PM
|
||||
|
||||
|
W123 240D Emergency left rear floor repair
This is not pretty, but solid and effective.
This picture is roughly 1/3 of the corrosion during the floor repair. 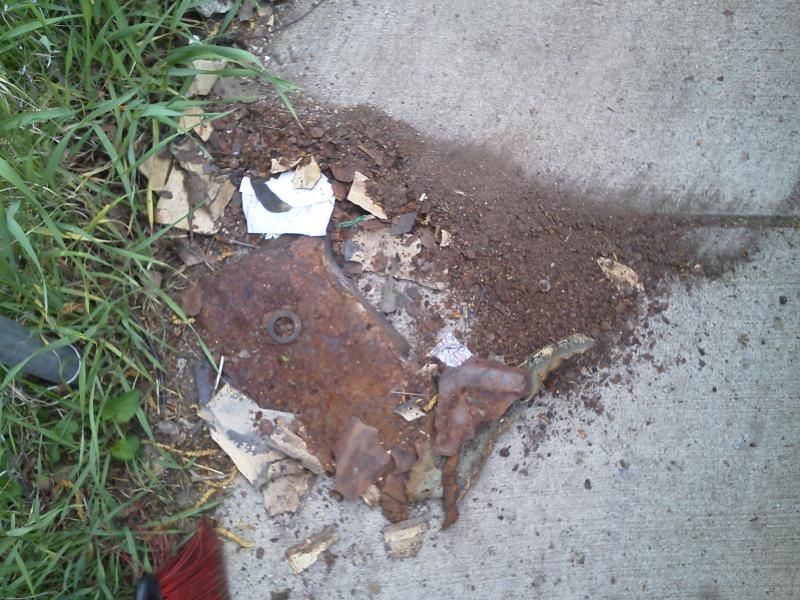 The red line defines most of the metal that fell off while fitting the patch floor pan. . 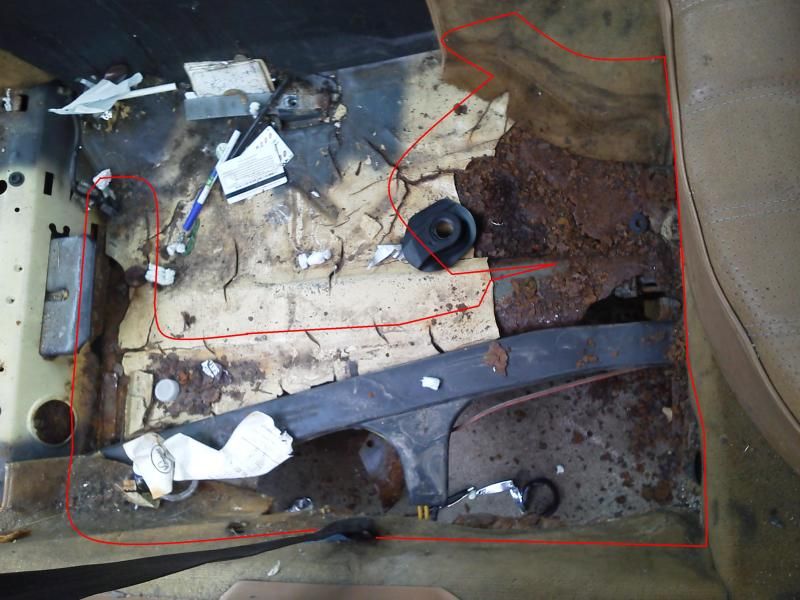 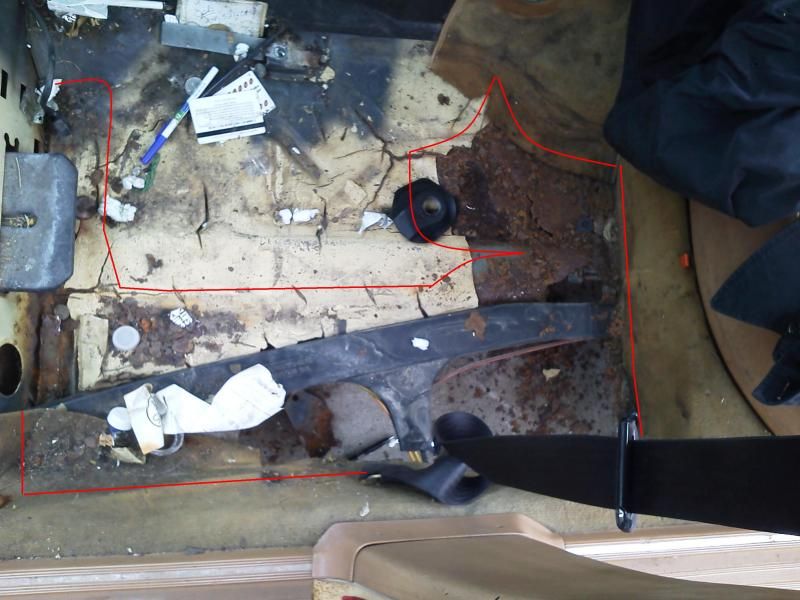 I started out with a 40 inch by 24 inch sheet of steel, roughly 1 MM thick. Here is the first rough layout for bends and cuts. The blue box indicates more cutting for the wire/vacuum harness access.  Here is a drawing that shows the additional cuts needed after the panel was installed and beaten to match existing floor contours. 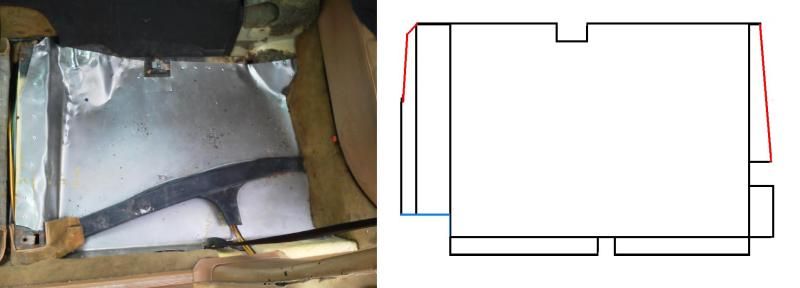 Here is what it looked like after five broken drill bits and many rivets. Note: Unsupported panels are difficult to drill, the shifting - flexing metal layers can/will trap and break drill bits. 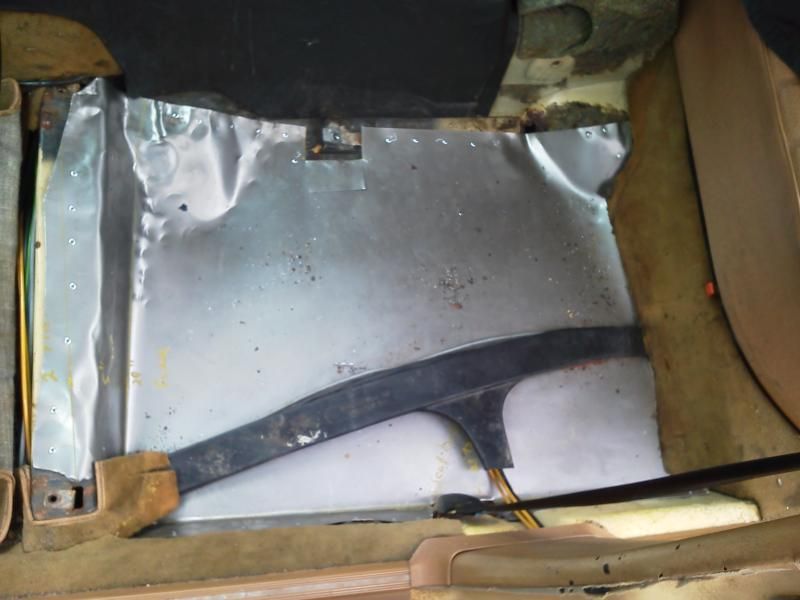 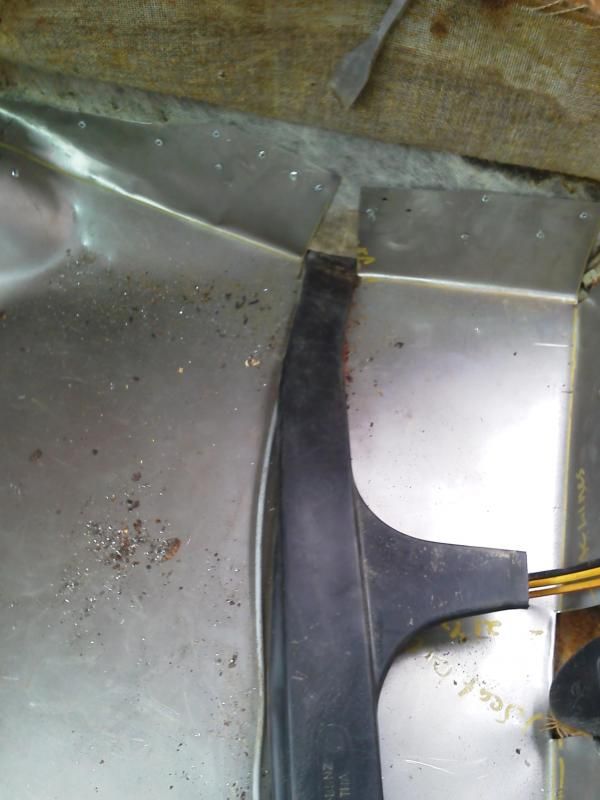 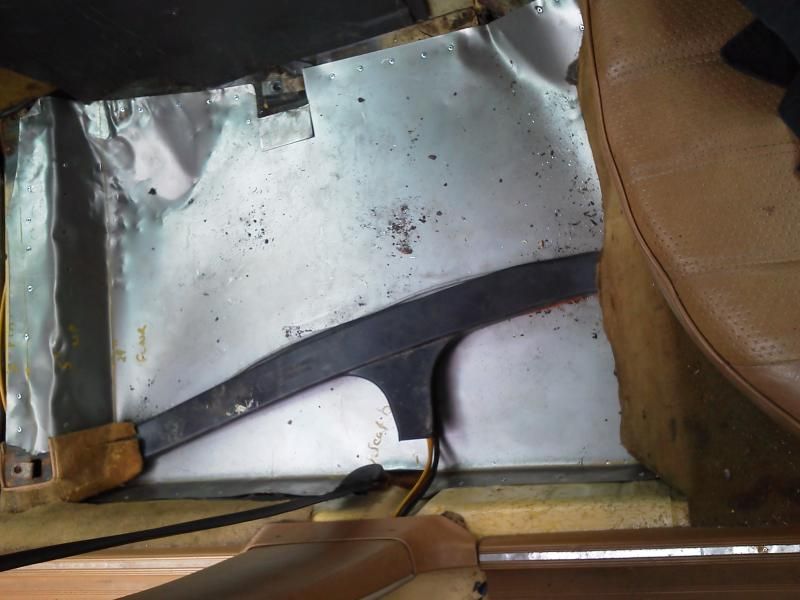 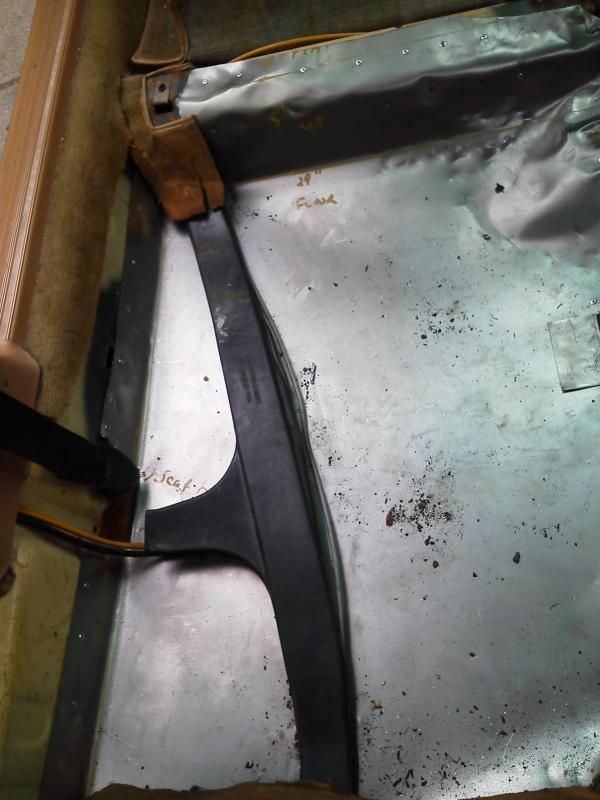 4.5 hours later the job was done, including related seat and track issues. Supplies: Sheet metal Rivets Spray foam ********** TOTAL $50.00 .
__________________
ASE Master Mechanic asemastermechanic@juno.com Prototype R&D/testing: Thermal & Aerodynamic System Engineering (TASE) Senior vehicle instrumentation technician. Noise Vibration and Harshness (NVH). Dynamometer. Heat exchanger durability. HV-A/C Climate Control. Vehicle build. Fleet Durability Technical Quality Auditor. Automotive Technical Writer 1985 300SD 1983 300D 1984 190D 2003 Volvo V70 2002 Honda Civic https://www.boldegoist.com/ 
|
|
#2
05-17-2013, 11:09 PM
|
||||
|
||||
|
Looks 10000x better than other quick repairs I have come across.
|
|
#3
11-23-2013, 09:00 AM
|
|||
|
|||
|
Nice, but the safety of this car is still compromised. How did you reinforce the lower seatbelt mount? How did you remount the outer rear seat mount?
With the rocker and floor eaten away right in that area, the structure of the car designed to hold the seatbelt secure is actually gone, and retained with no more than a bolt through some 20 gauge flat steel than can be bent by hand. By riveting over the entire hole, the inherent structural integrity of the floor design is still gone, making the seat more likely to pitch forward out of the floor, and the seatbelt to pull up and out of the unsupported inner rocker wall. How were the other issues resolved? I have seen some very nicely installed pop rivet repairs like this, and in one instance pushed the seat up out of the floor by hand through the riveted material.
__________________
This post brought to you by Carl's Jr. Last edited by JB3; 11-23-2013 at 12:29 PM.
|
|
#4
11-23-2013, 02:28 PM
|
||||
|
||||
|
Answer
Quote:
The driver seat was on the ground when I started, when done it was solid. Essentially it was a short term emergency repair due to Michigan RUST. FYI: The car was broken up for parts, four months after this repair. .
__________________
ASE Master Mechanic asemastermechanic@juno.com Prototype R&D/testing: Thermal & Aerodynamic System Engineering (TASE) Senior vehicle instrumentation technician. Noise Vibration and Harshness (NVH). Dynamometer. Heat exchanger durability. HV-A/C Climate Control. Vehicle build. Fleet Durability Technical Quality Auditor. Automotive Technical Writer 1985 300SD 1983 300D 1984 190D 2003 Volvo V70 2002 Honda Civic https://www.boldegoist.com/
|
 |
| Bookmarks |
|
|


 Linear Mode


