

|
|
|
|
|
|
#1
 10-04-2012, 12:50 AM
|
||||
|
||||
|
Installed an auto-dimming mirror for W123
Purchased from Rik Johnson (2phast).
Some notes first: The new mirror is definitely heftier, due to the added parts. The thickness of the mirror body is significant compared to the thin, older mirror. The older mirror is very light compared to the new one, but certainly feels just as durable. The ball mount on the new mirror is not as difficult to move as the older mirror, which still retains a very good grip despite the years. The older mirror is slightly wider by an inch (half an inch on both sides), but height is the same. Older mirror has a wider range of adjustment through the ball joint, and slightly less with the anti-glare tab flipped. The anti-glare tab moves the ball mount within the mirror body, so this somewhat lessens the range a little. New mirror has less range, but the range is well within the usable aspect. Older mirror simply was over-engineered to accommodate a wider range. The older mirror provides a field of view wider than the new mirror, but this wider field of view includes portions of the W123 that are not needed (base of C-pillar is what's covered). In the new mirror, the field of view is still similar. Those of you who have a newer car with autodimming function will appreciate the new mirror. Those of you who don't have it will take a while to get accustomed to it. Before we had the Subaru Forester (2011), I was so used to the stock W123 mirror with wide-angle Broadway clip-on mirror for better field of view. But I realize now that this is not necessary. Notes before installation: If you have a W123 with loose mirror mount (stalk to vehicle link), then chances are one or more of the 3 screws holding the base is loose. There is a way to reinstall the mirror pretty easily, and removing it is as simple as yanking it sideways. If the mount is loose, it will give you difficulty in removing, because the base is yielding to your pull, preventing the stalk to separate from the base. Couple of notes from the installation: The installation went smoothly. Instead of removing the A pillar, I just slipped the extension wires through the sun visor mount holes. 1. Download the auto dimming installation guide from Rik Johnson's site, to get an idea on how to proceed. 2. Remove the mirror by yanking it sideways. GRAB THE STALK, not the mirror. 3. Remove the dome light and electric connections. 4. Remove the sun visor and clip on side you want to run the wires through. 5. Pull out the weatherstrip material that surrounds the door opening. This material is the type that starts from the top of the B pillar, forward to the A pillar, and down to the front portion of the door sill. No need to remove it completely, just out of the way where the dashboard, A pillar and weather strip material meet. 6. Slip a 20 or 22 gauge wire into the sun visor mount opening (not the clip opening) until you reach it from the dome light opening. 7. Slip the other end of the wire into the sun visor mount opening, until you can pull down on the header material and slip the wire out. Run the wire on the rear edge of the A pillar trim, and using a flat blade screwdriver, CAREFULLY push the wires into the space between the A pillar frame and A pillar cover. 8. Slip the end of the wire into the dashboard. This is to be accessed via the glove box opening. 9. Tap any SWITCHED 12V source you wish. In my case I used the glove box door, but note that if you use the glove box power leads, make sure you access the leads closer to the insulation material. This will assure that you will tap the ground wire that is NOT deactivated by the glove box door. Otherwise, the mirror will run only when the glove box is open (and vehicle is running). 10. Mount the mirror and test. If it tests good, then you can reinstall everything back. If not, determine source of problem and troubleshoot. Photos: Original and modified 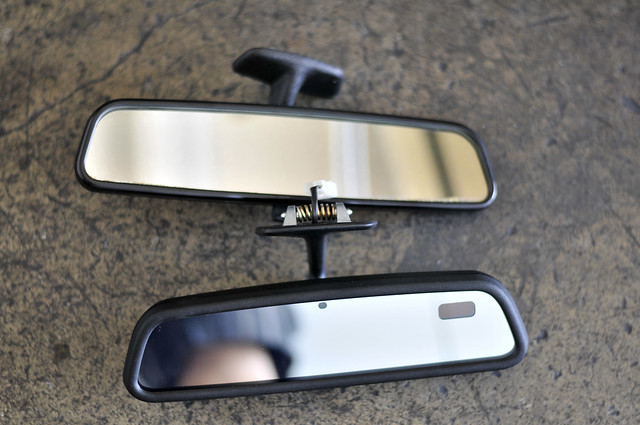 In detail 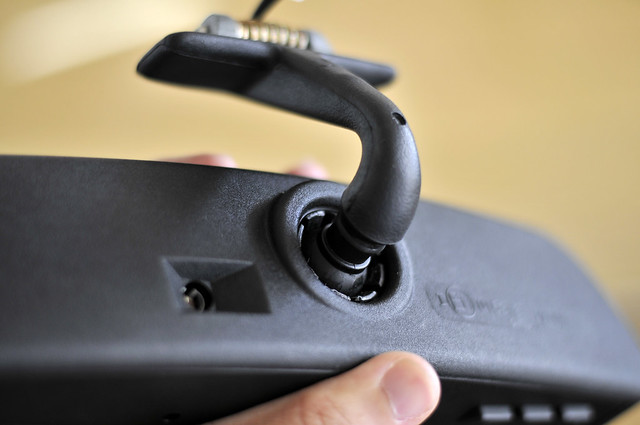 As seen from within the car 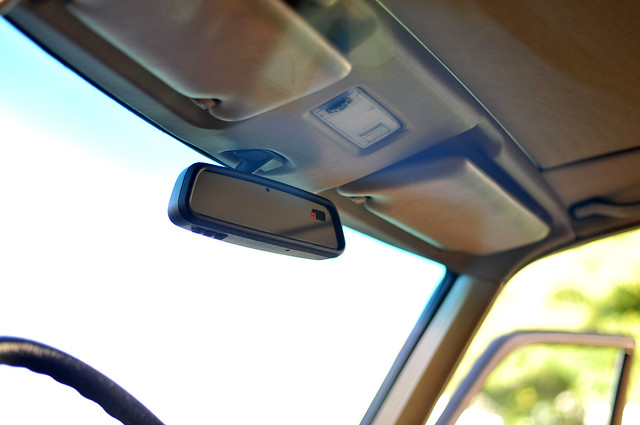 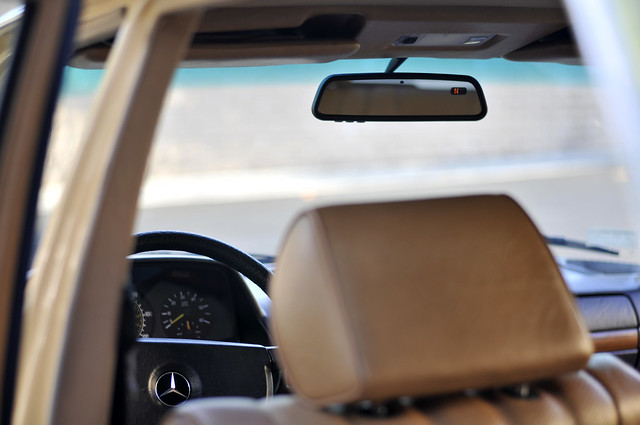 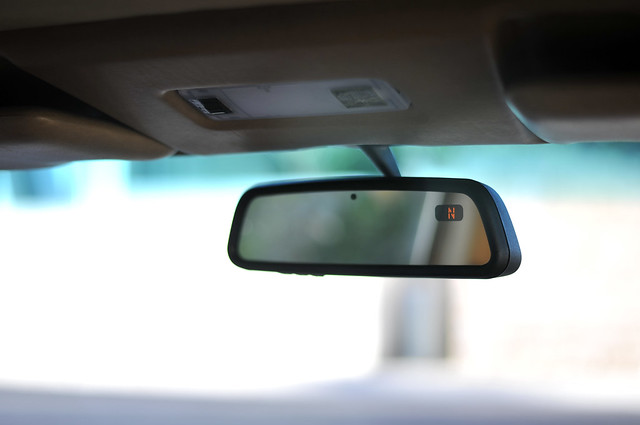 It blends in fairly well 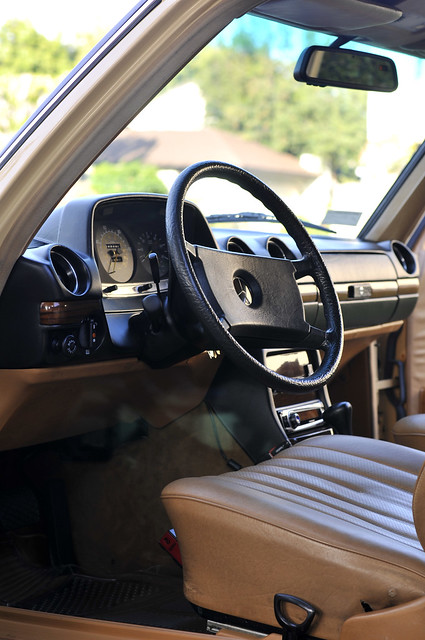 As seen from the front 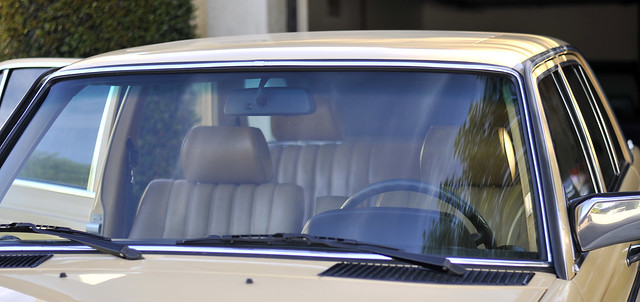

|
|
#2
10-06-2012, 11:40 AM
|
|||
|
|||
|
That looks reallllly clean! Good job. I might have to splurge a bit.

__________________
http://i193.photobucket.com/albums/z...-RESIZED-1.jpg 1991 300E - 212K and rising fast...
|
|
#3
10-06-2012, 02:18 PM
|
||||
|
||||
|
Thanks John!
For those wondering, the front dome light is not standard on a W123. The W123 standard light (from 83 to 85) is a single light unit with no map light. This was a replacement from a W126. When I got the car in 2004, it already had this dome light. This is only for '83 to '85 because the cutoff is large enough to accommodate the W126 unit. The '82 and older W123's have a cutoff that is too small.
|
|
#4
11-07-2012, 12:37 AM
|
||||
|
||||
|
Now that daylight savings is no longer in place around here, I've been driving my 300D more at night. I noticed that the amber colored compass indicator does not get in the way of the rear view. Since the compass indicator dims when the mirror dims, it does not stand out and I can look at the mirror while driving, and not get distracted by the compass. The photo sensor pointing towards the back is also unobtrusive. I don't notice it until I really look for it.
If you're looking into this modification, I say go for it. I purchased my mirror from Rik Johnson: Mercedes Auto dimming mirrors with Homelink & Compass but surely you can definitely make your own. My mechanic did the same with his 300TE, except he made it himself. It's not factory-looking like what Rik did, but it does the job nicely.
|
|
#5
11-07-2012, 02:50 AM
|
||||
|
||||
|
I was thinking "what the frig is homelink"...
...it is a garage door opener. It is a shame there isn't a solution to the power supply for people without the electric sunroof. Patrick - you say you used the glove compartment light? It probably wouldn't take too much to rig up but it would certainly make the job more involved - can you show what you did?
__________________
1992 W201 190E 1.8 171,000 km - Daily driver 1981 W123 300D ~ 100,000 miles / 160,000 km - project car stripped to the bone 1965 Land Rover Series 2a Station Wagon CIS recovery therapy! 1961 Volvo PV544 Bare metal rat rod-ish thing I'm here to chat about cars and to help others - I'm not here "to always be right" like an internet warrior  Don't leave that there - I'll take it to bits!
|
|
#6
11-11-2012, 01:21 PM
|
||||
|
||||
|
Quote:
Sorry, I should have been more clear on Homelink - yes it's the garage door opener. If you do not have this type, you can still use Homelink for other functions - like turning on the lights when you arrive, etc. When the wire is routed to the right side of the dashboard, it's easy to tap into the glove box wires. This part can be confusing because the glove box wires can come from the harness and from the switch. Make sure you tap the wire coming from the harness, and not the wires coming from the switch. This way, the mirror will operate with the glove box on or off (switch does not deactivate the mirror compass and auto dim function when the glovebox is closed). Sorry I didn't have pics of the installation process, but it should be straightforward to tap into these two wires. I wanted a clean install - out of sight and does not look aftermarket. All the wires on the sun visor panel and dome light are not switched 12v. They are ALL active. You can leave the key out and turn on the dome light, as well as the illuminated sun visor lighting. So I had to use switched 12v, which can only be accessed at the dashboard level.
|
 |
| Bookmarks |
|
|


 Linear Mode


