

|
|
|
|
|
|
#1
 03-10-2014, 09:01 PM
|
||||
|
||||
|
Moman indiglo gauges
With spring on its way soon, I cant wait to get my 560sel out and about and enjoy the new year. But there's a few upgrades I wanted to do to the car to bring it tastefully into the 21st century. Driving my 420, makes me appreciate how much I like the backlit gauges on my other rides. front lighting doesn't cut it for me; squinting at the gauge at night is a real pain even with the brightness cranked to max and no burnt bulbs, and the yellowish glow just feels a bit out dated
 Putting new white leds just doesn't really go with the car too much. Putting new white leds just doesn't really go with the car too much.When hunting for options to spruce up the fine 560, I came across these Moman EL backlit gauges that a few of the 124 guys seemd to like. After finding them on eBay, and drooling over the installed pics. The order was placed, and the box arrived on Friday  . .The gauge backs are made in Poland, and they are a custom build to order setup. They have a lot of ricer blingy stuff on their site for the "hip" cars, but they did have some more formal styles for the older MB's, with the option to customize as crazy as you want. They had a original looking insert with backlit letters, and they had a 2nd more modern look with a sharper front and a few artistic color inlays. That's the one I really like for the "concept" I envisioned for my car once I was done. They also have a choice of 4 backlit colors, I choose white/skyblue. They look more green/blue in my pics then in real life. The pics make the dash look very "Tron" like, its not that extreme in real life, cameras pick up UV light differently then human eye does. I found a thread showcasing the whole install, and for myself, it was pretty straight forward. I pulled the cluster out of the car, and carefully removed the rear connectors. Brought it inside and began working away. I didn't take a whole bunch of pics because I was tickin away pretty quick, but it was as simple as, remove gauges carefully. Pull off needles, carefully attach overlay, and reinstall. While I was in there, I did a few upgrades as well. New capacitors on the speedo, tach and clock. And I painted the needles with a house of color neon orange. I was very picky when ordering the paints. I wanted something that actually was UV reactive, bright, and had a flat finish when dried. The HOC neon orange was all of that. Picked it up for 7$ on ebay  I ordered some 5050 T10 UV leds to put in the front lighting light pipes, but they don't work too well because the acrylic pipes are UV reactive, and don't carry any light. So I had to order a roll of 5050 UV led strips that I can fit under the lighting ridge to light the dials. it should be much brighter this way also. I wired the inverter to the same circuit that drives the front lighting, and it should be dimmable. A set of chrome rings to finish it off. Im very happy with it The colored trim Is grey, not blueish as in the pics. 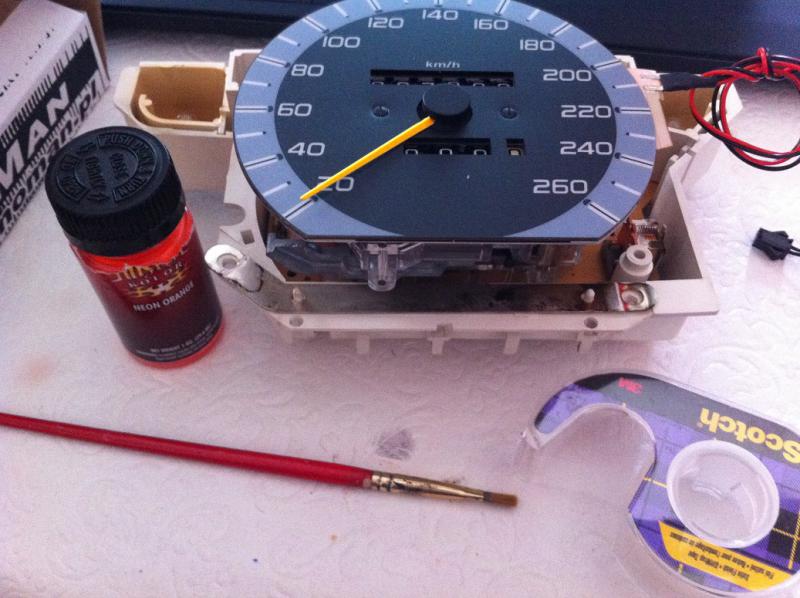    
__________________
Just my MB's: 1990 420sel - Winter DD - 410,000km 1990 560sel - absolutely showroom mint - 360,000km! 

|
|
#2
03-11-2014, 04:07 AM
|
||||
|
||||
|
Gucci
__________________
1992 W201 190E 1.8 171,000 km - Daily driver 1981 W123 300D ~ 100,000 miles / 160,000 km - project car stripped to the bone 1965 Land Rover Series 2a Station Wagon CIS recovery therapy! 1961 Volvo PV544 Bare metal rat rod-ish thing I'm here to chat about cars and to help others - I'm not here "to always be right" like an internet warrior  Don't leave that there - I'll take it to bits!
|
 |
| Bookmarks |
|
|


 Linear Mode


