

|
|
|
|
|
|
#1
 05-20-2009, 11:39 PM
|
||||
|
||||
|
87 300D rear power window regulator replacement
The good news is the B-pillar wiring in my 87 300D is good. The bad news is the left rear power window doesn't work. The motor is good, the transmission is good and the cable is good. What I figure is the bushing at the far end of the motor shaft is binding. There were nylon shavings all over the transmission so retired I the original regulator and got a replacement.
I don't remember what car the replacement came out of but I was told it's a replacement, as in it's not the original regulator from the donor. The biggest difference is the orientation of the motor. The original has a black plastic transmission case, the replacement has an aluminum transmission case. Also, the original regulator has pins that slip into the common MB connector, the replacement has lugs that go into a bus strip - 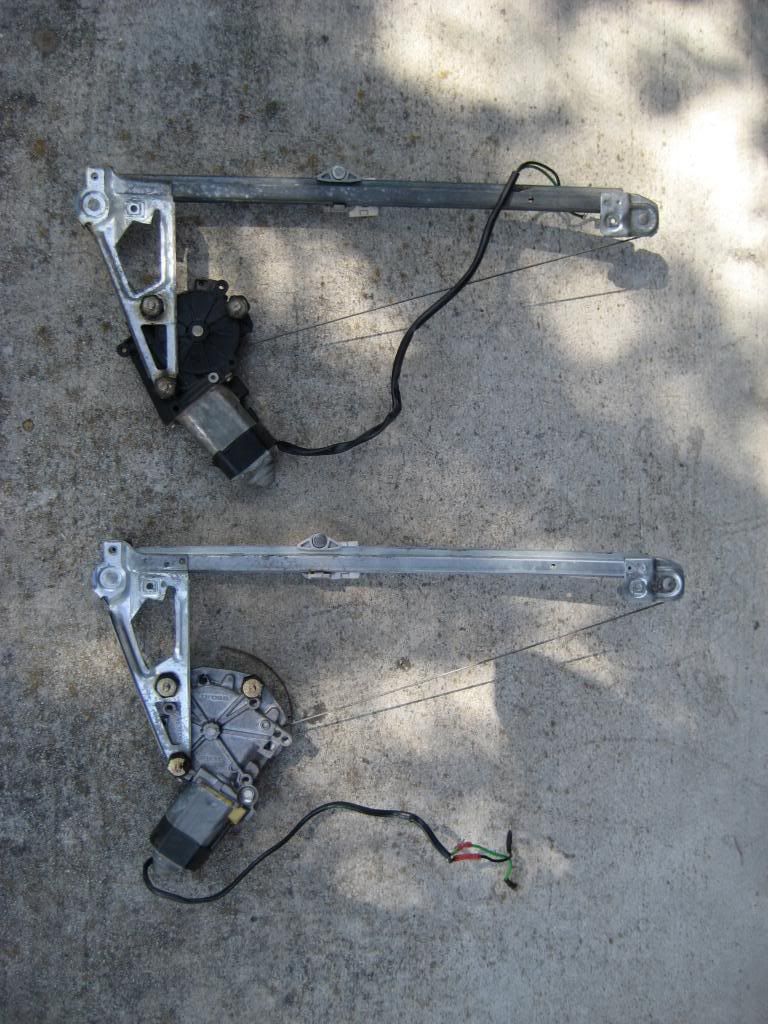 Turns out none of that is a problem so let's fix that window! Note that this car is over 20 years old. Who knows who's been inside the door. Certain steps might not apply to all 124s Removing the door liner is unconventional but generally easier than with other cars. Some pieces have to come off, namely the striker escutcheon, release handle escutcheon, puddle lamp and golf tee door lock pins. My car has Euro door lock pins which can stay in place. The striker escutcheon is held by a screw and a tab. Remove the screw and slide the escutcheon downward to release the tab - 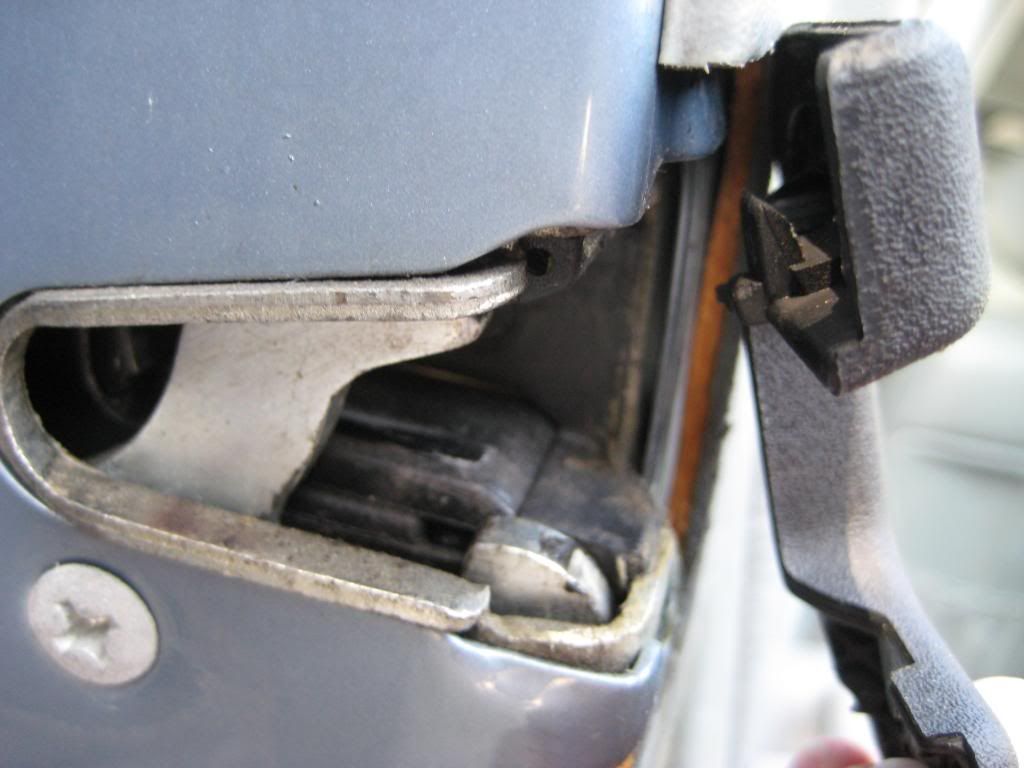 The release handle escutcheon is clipped to the door liner. Grip and pull or pry and pull. Try gripping first to minimize collateral damage - 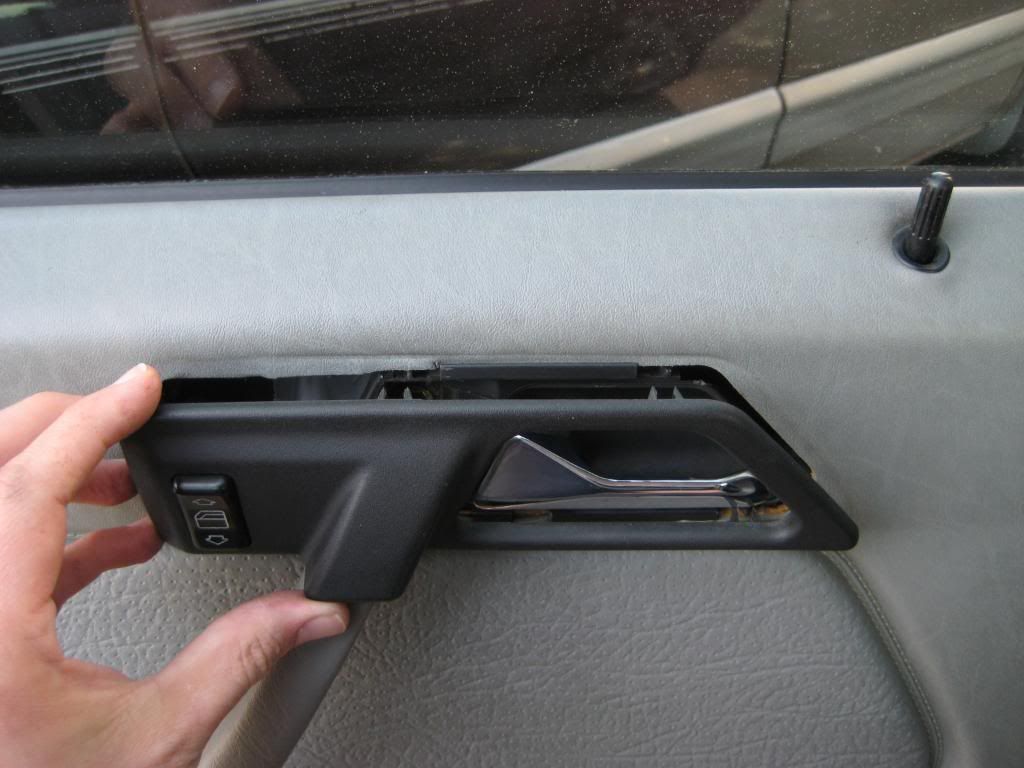 Pull or pry the connector from the window switch to release the release handle escutcheon - 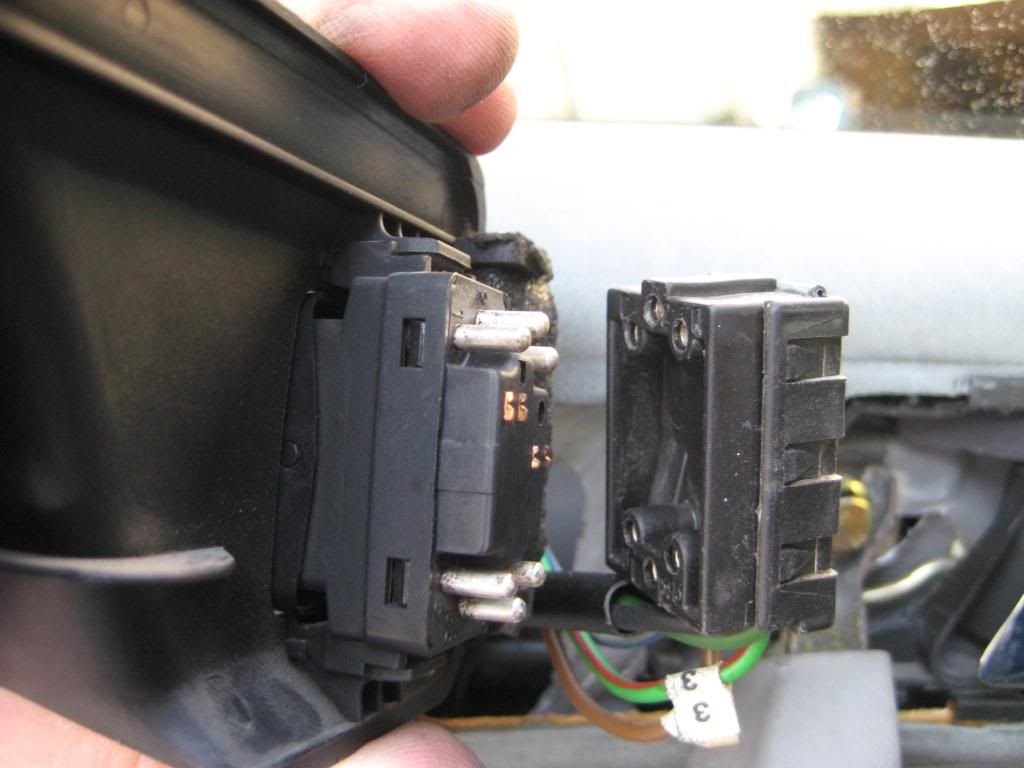 Pry downward on either the forward or trailing edge of the puddle lamp - 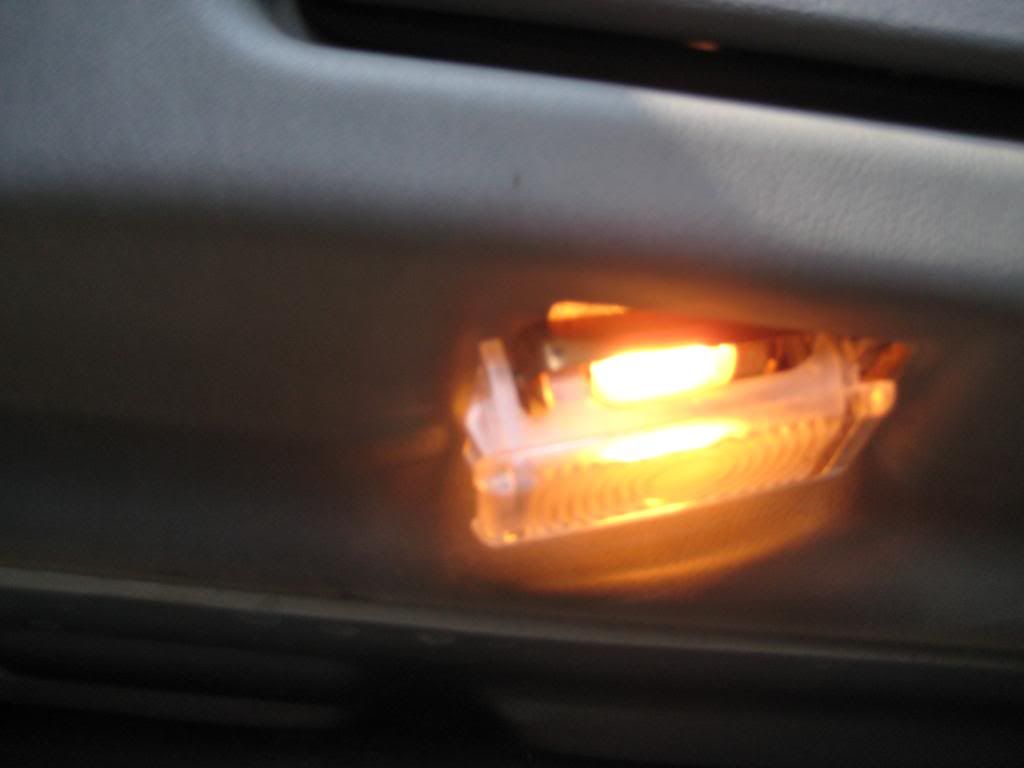 Pull the puddle lamp free of the door liner - 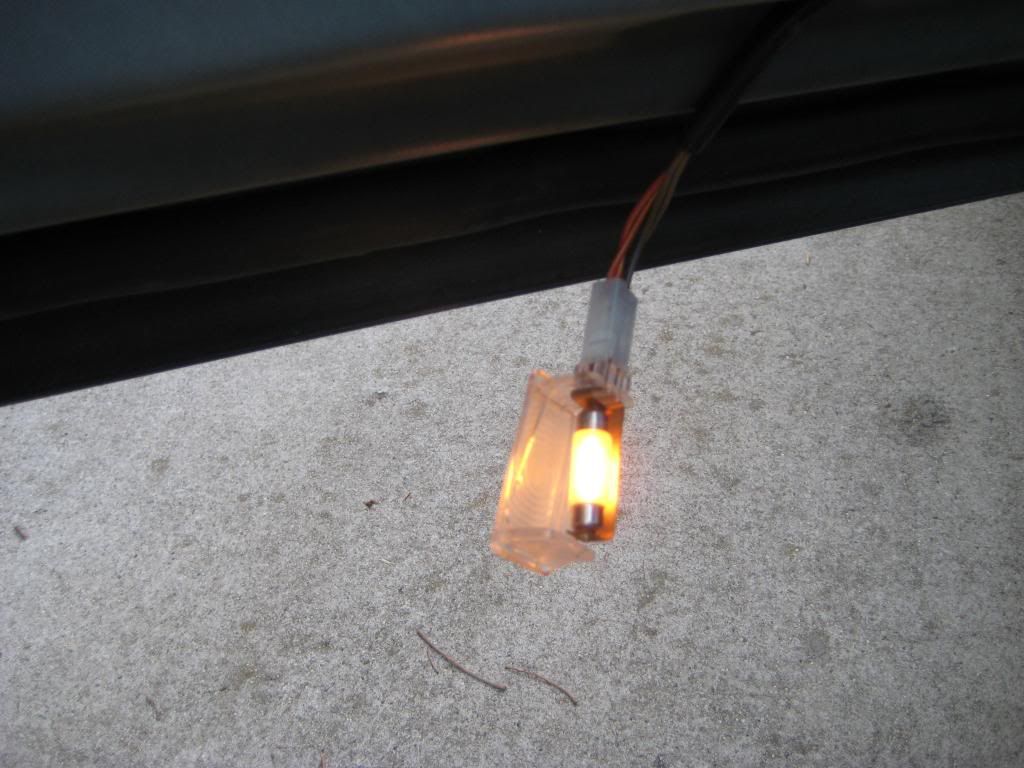 Disconnect the puddle lamp - 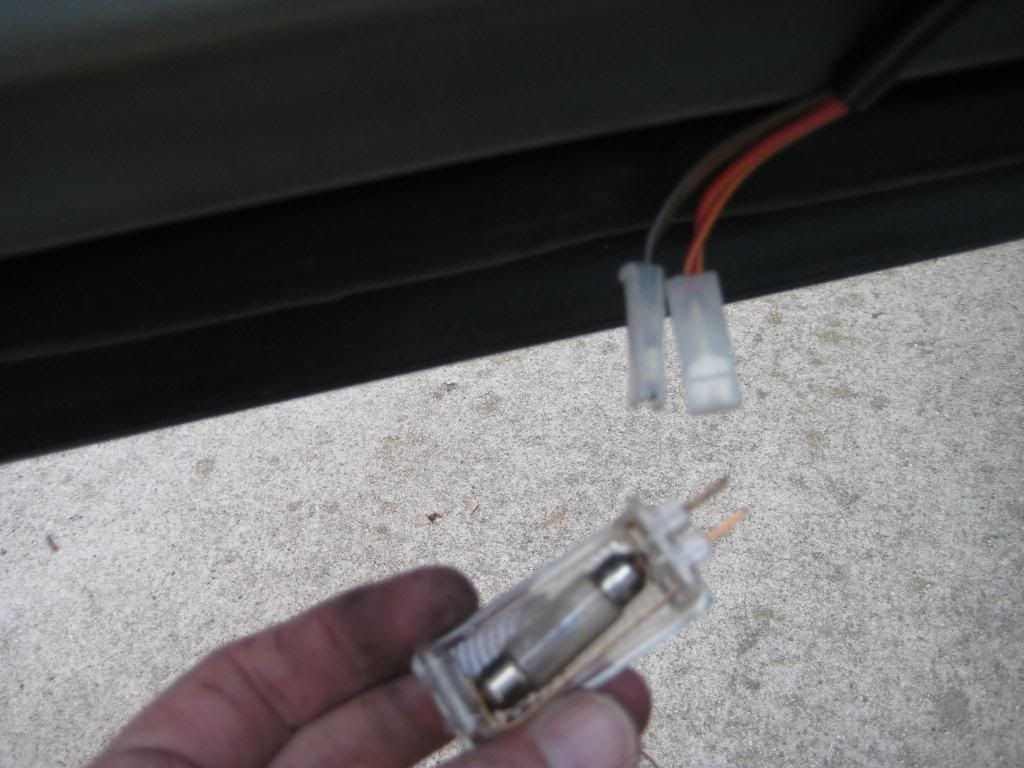 Remove the bolt that takes a 10mm socket that holds the grab handle to the door. Sorry, no picture of this step. Pry the release rod from the hidden end of the release handle - 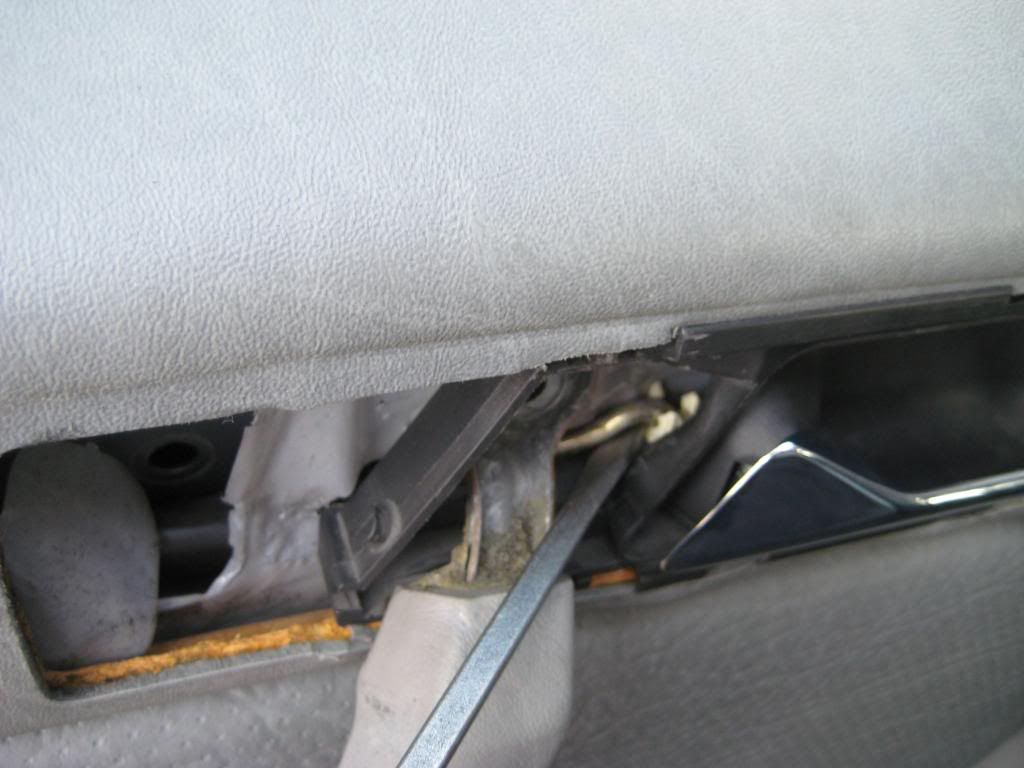 Slide the release handle housing forward about 3mm. It'll stop against the forward edge of the door liner opening - 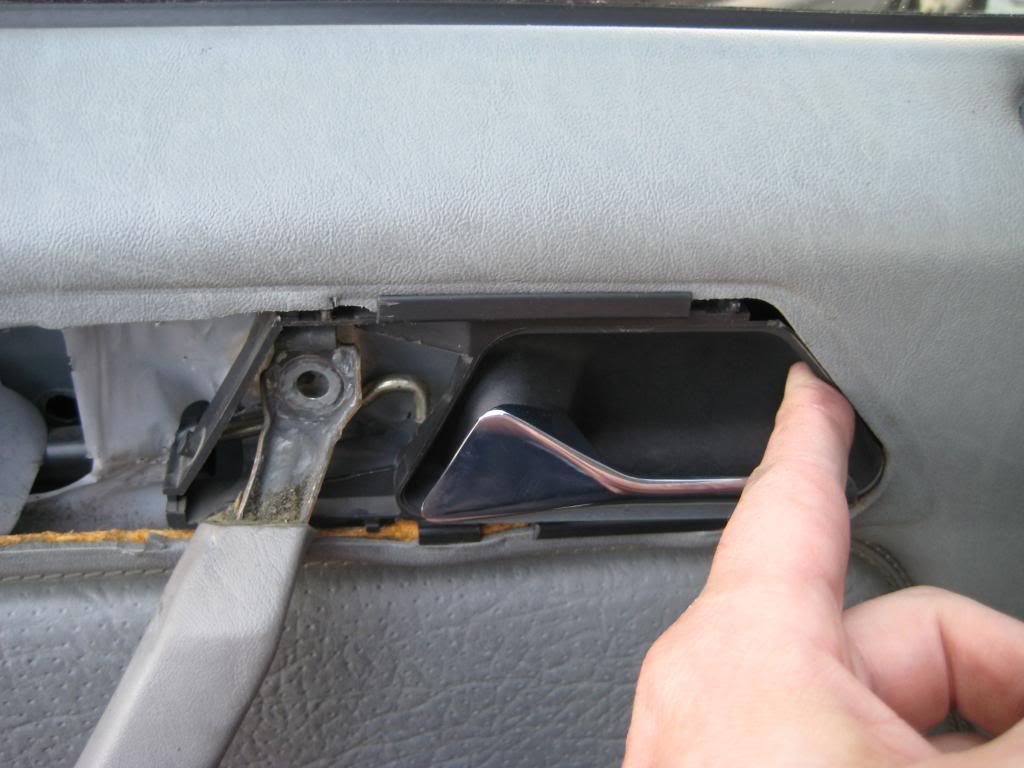 Wiggle the release lever off the door liner - 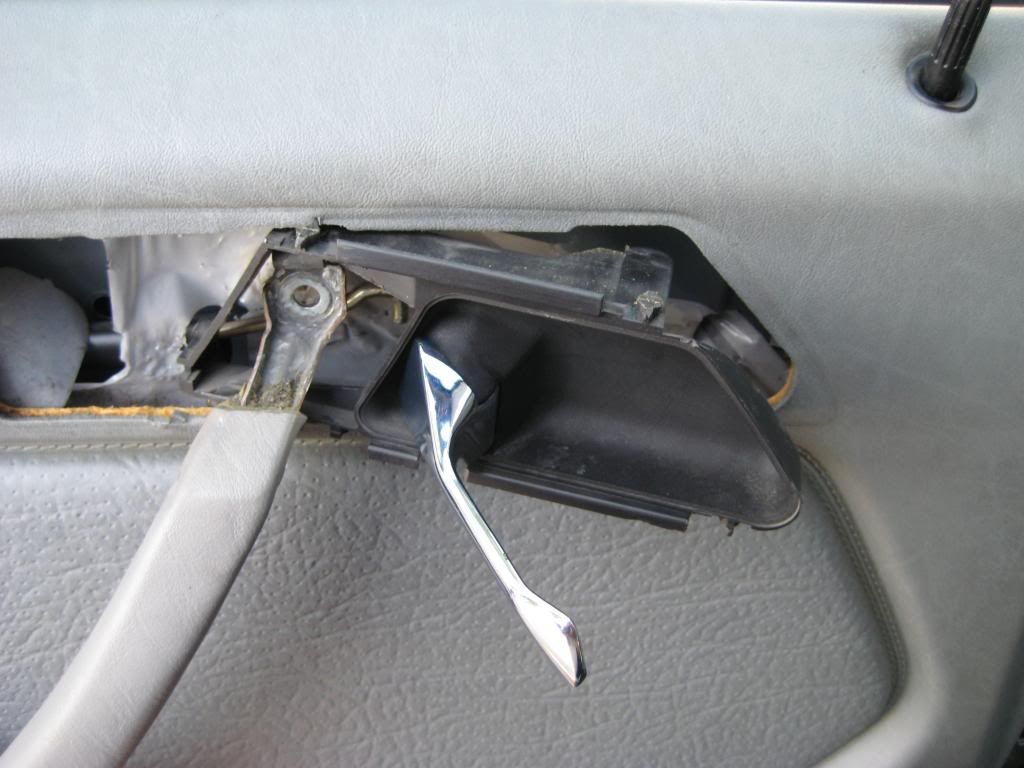 Working around the bottom and side edges of the door liner and the grab handle, lift the door liner about an inch so tabs on the hidden side of the door liner release from slots in the door frame. Pull the door liner off the door and set in a safe location - 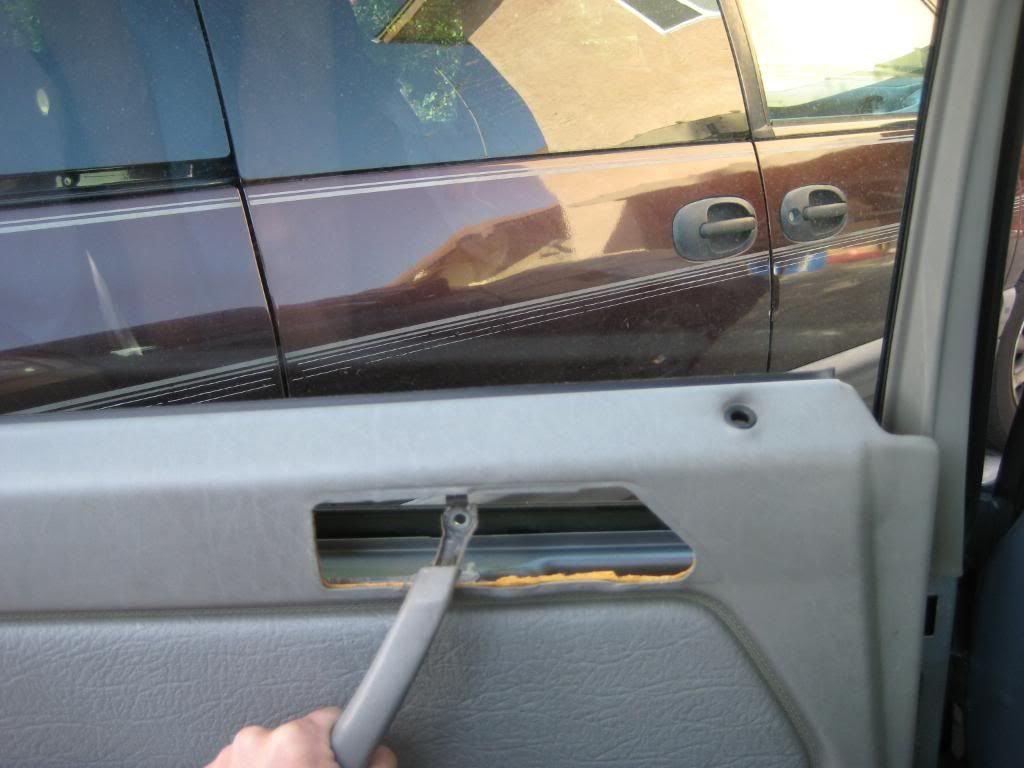 There will likely be plastic sheeting glued to the door frame. Gently detatch the plastic sheeting starting at the forward lower corner. I peeled all the way up the forward edge and halfway up the trailing edge noting where the puddle lamp wiring came through the sheeting. In my car, the window motor wires run directly between the switch and motor. I pried the edges of the switch connector cover on both sides to release the tabs - 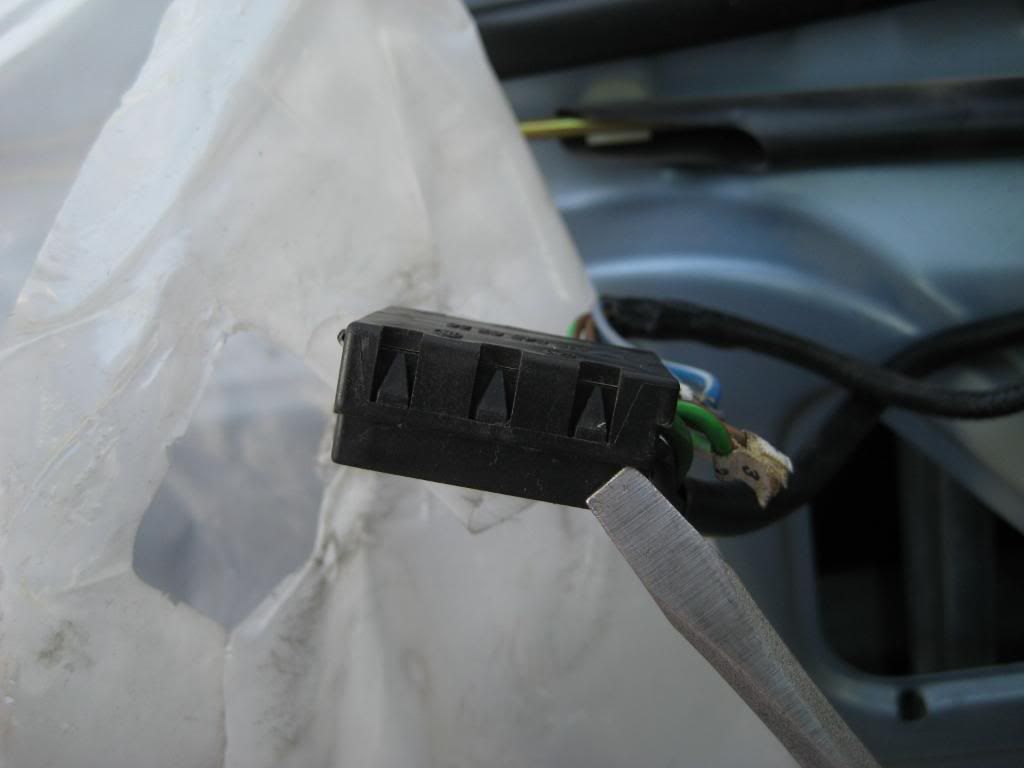 I was pleasantly surprised to find a color coded connector diagram inside the cover. The heavy green and black wires go to the motor. Remove those wires from the connector then close the connector so none of the other wires come off or worse, touch. A smart person would have disconnected the battery  - -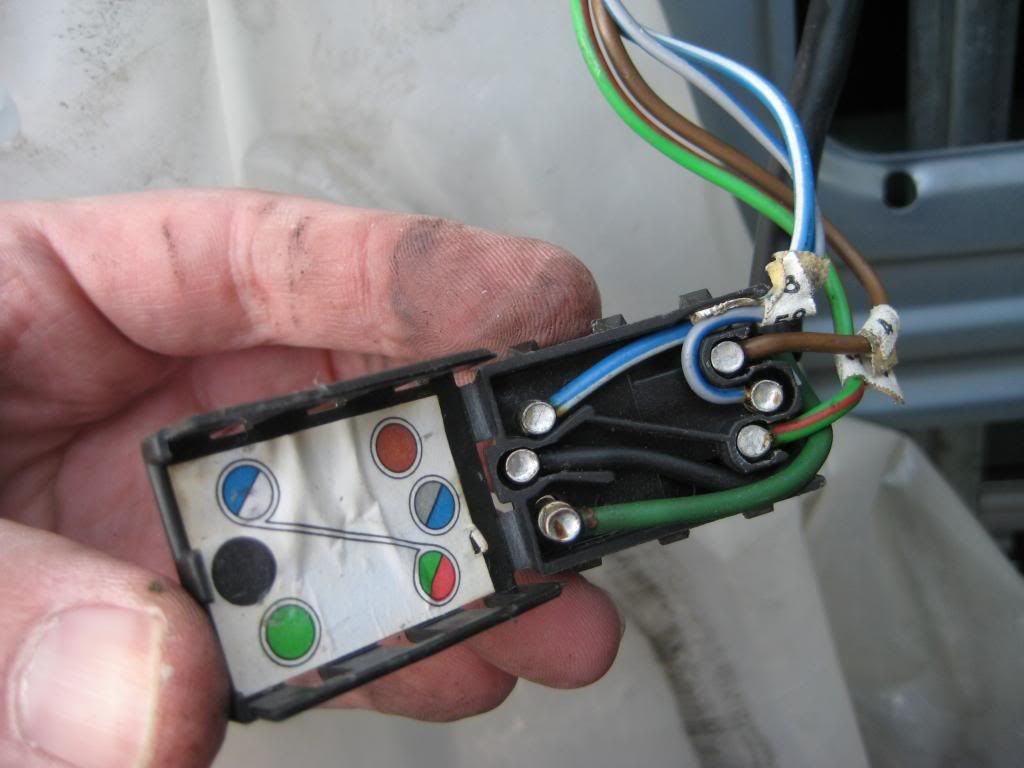 Snake the wire pair back through the retaining clips on the door frame - 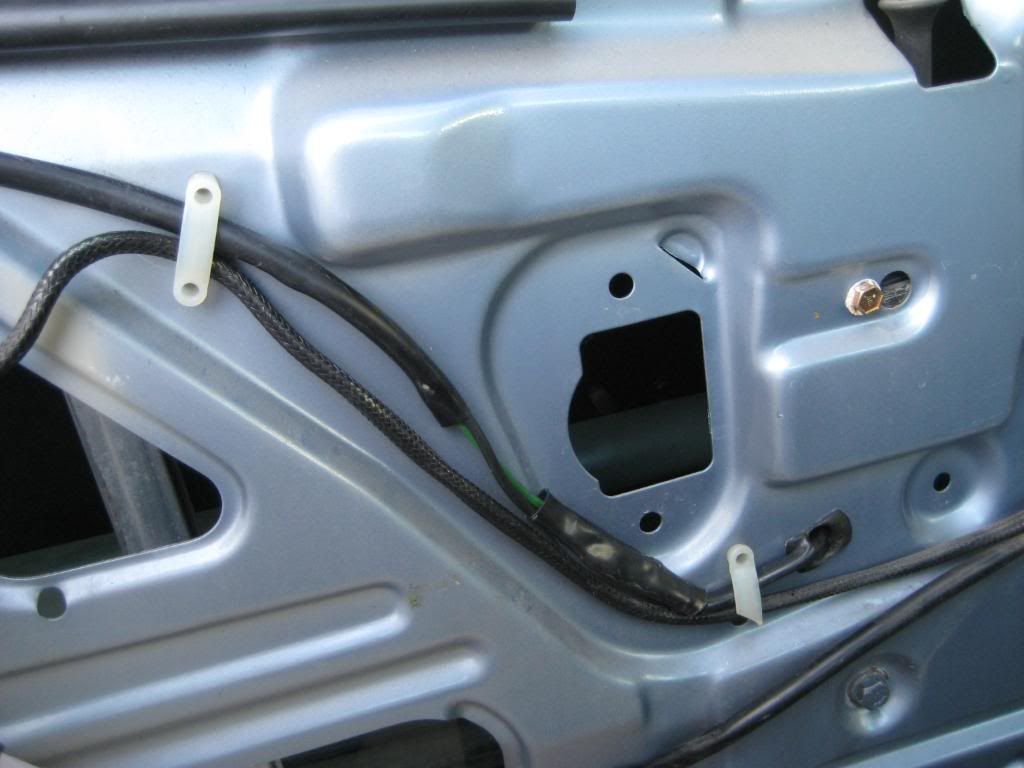 Pull or push the wire pair through the grommet in the door frame - 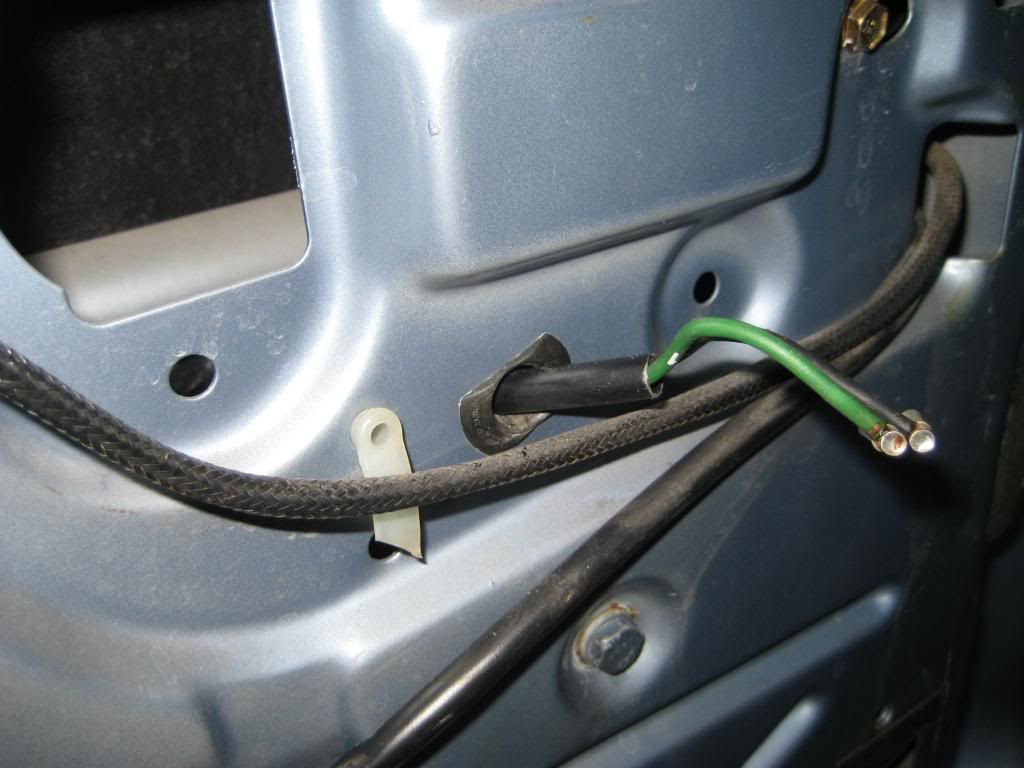 My window was stuck in the raised position but for clarity the next pictures will show the window about two-thirds the way down. Remove the black retainer that holds the sliding jaw in place at the bottom of the glass. You have to do this by feel with the window raised. I don't know how you do this with the window completely lowered. Pry down one end then the other - 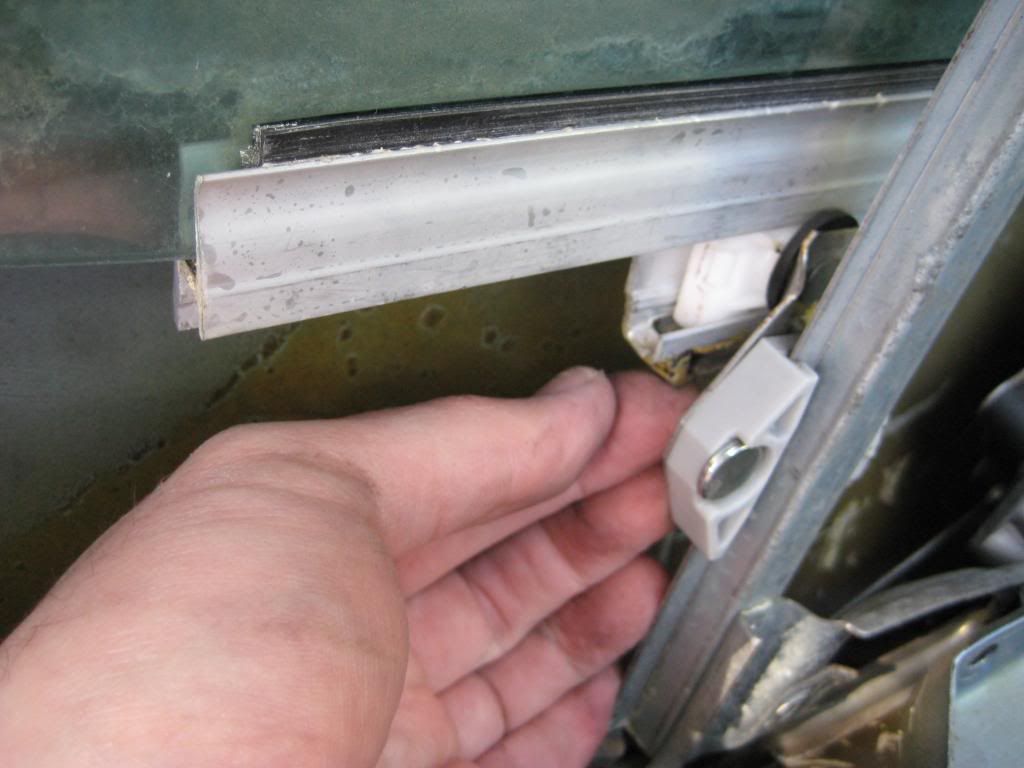 Remove the two bolts and three nuts holding the regulator to the door frame. All take a 10mm socket. One bolt is up top behind the door release rod (bolt not in place) - 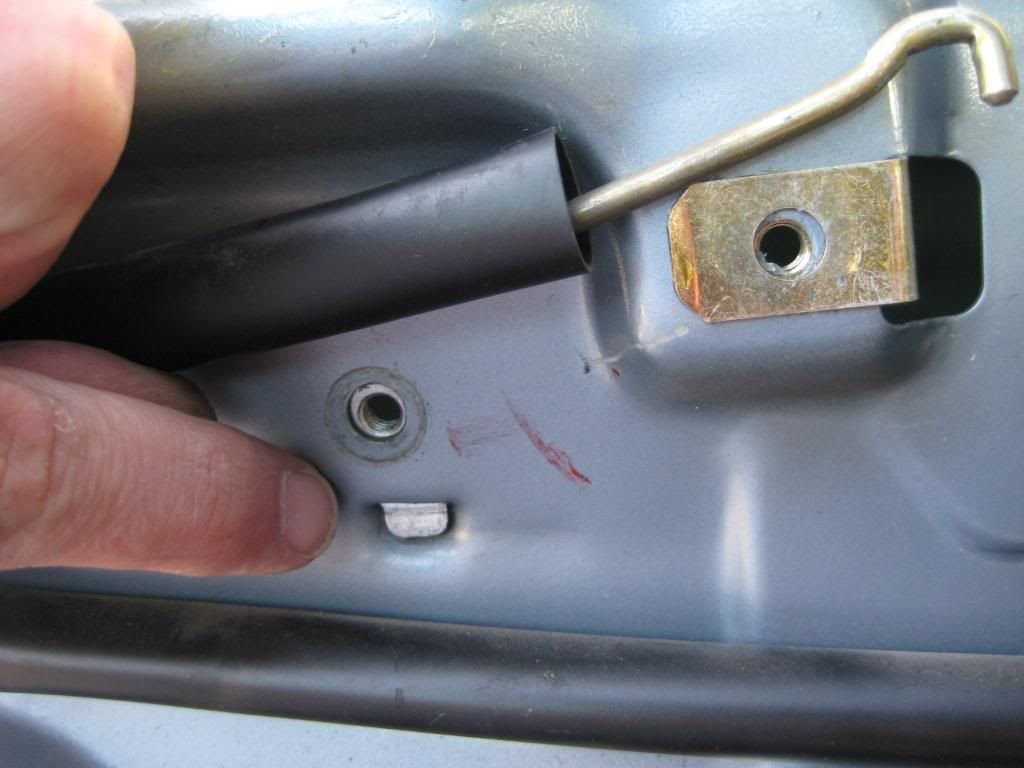 The other is at the bottom end of the regulator track (bolt not in place) - 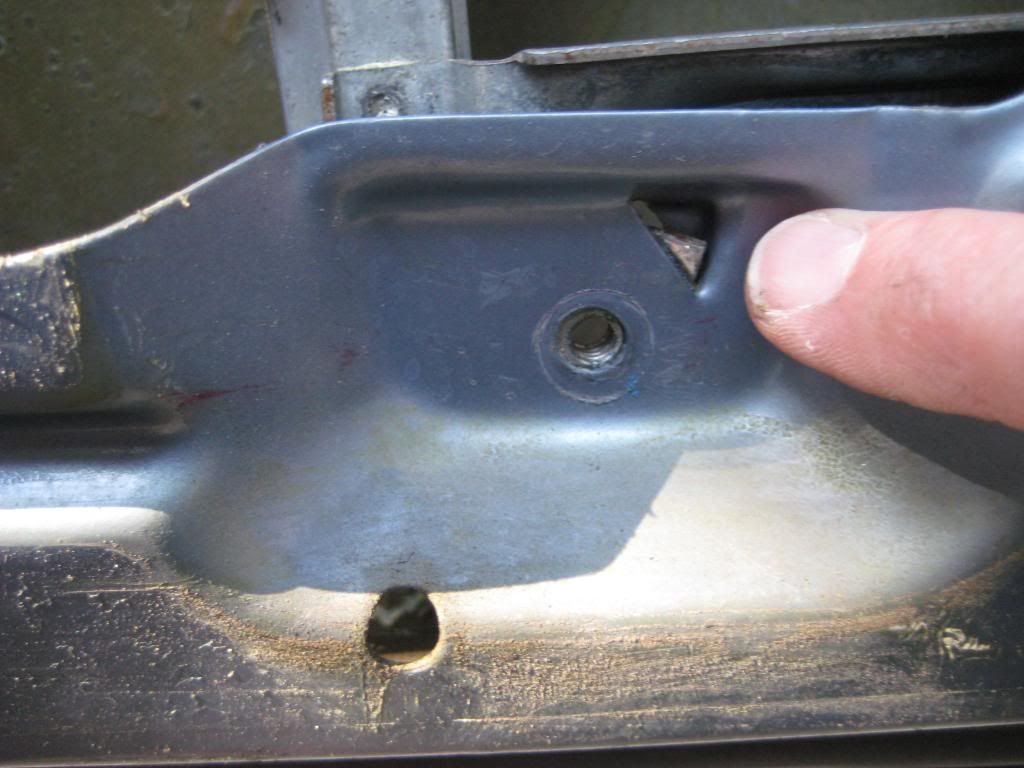 The three nuts are clustered ahead of the lower forward edge of the big rectangular opening in the door frame (nuts not in place) -  Push the regulator away from the door frame so the three studs are free of the door frame. Swing the bottom end of the regulator to release the tab north east of the lower bolt hole (what my finger is pointing to a couple of pictures up). Lift the regulator to release the tab south of the upper bolt hole (what my finger is pointing to a picture above the previous one). Slide the regulator aft to release the sliding jaw from the track at the bottom of the glass - 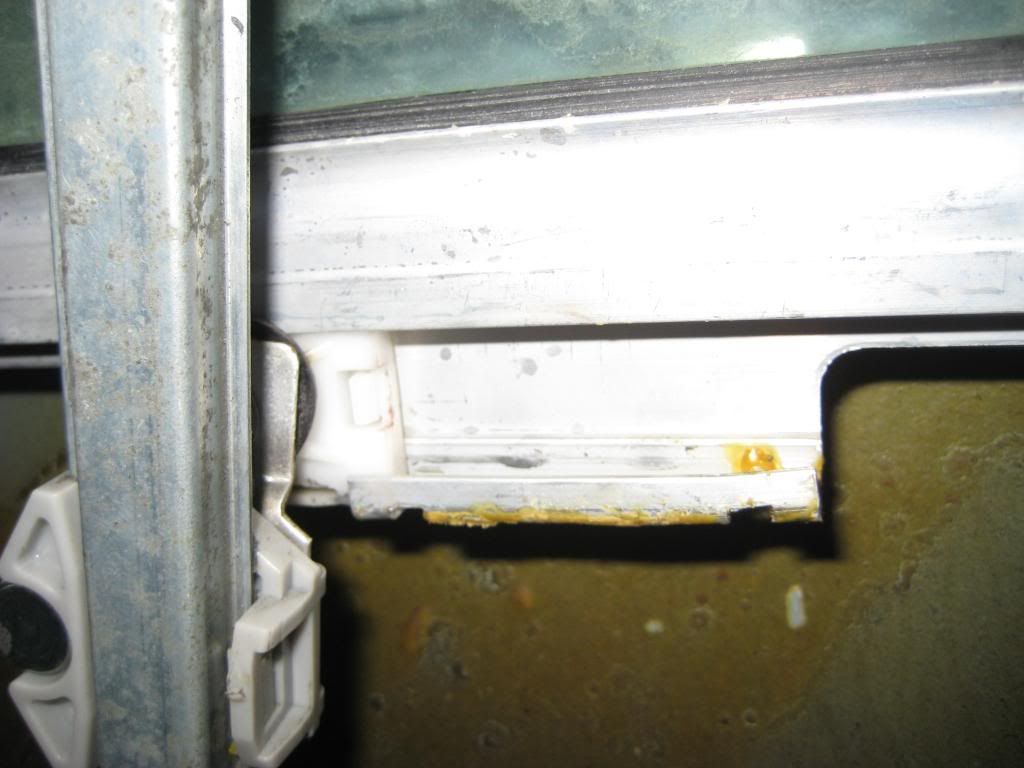 Support the glass when it's free of the regulator. My glass sticks in the raised position but to be safe I propped the bottom of the glass against the intrusion tube running along the door with a 10 1/4" length of pipe (yellow) - 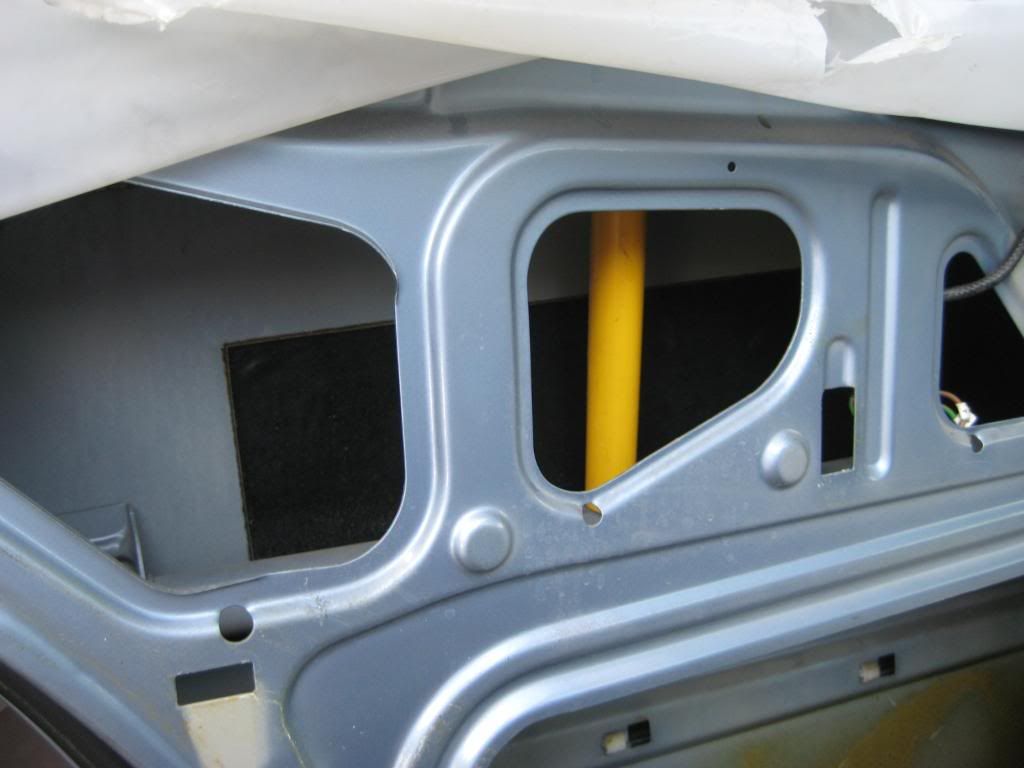 I set the regulator in the door such that the top end was towards the hinges and the motor was by the big rectangular opening. It didn't take much wiggling to get the regulator free of the door. I had to splice the original connectors in place of the lugs in the replacement regulator. I won't get into that. Apply power to the wires of the replacement regulator so the sliding jaw is about a third of the way from the motor end. Reverse polarity to send the sliding jaw in the other direction. At this point you might open another browser window and scroll back through the pictures as I recount putting things back together. Send the upper end of the regulator through the big rectangular opening then get the motor end in. Swing the regulator into its installed orientation. Lower the glass so the track at the bottom is about halfway down the big rectangular opening. My window stayed in place. If yours doesn't, try a loop of tape over the window frame to keep the glass in place. Set the sliding jaw just aft of the track at the bottom of the glass. Slide the jaw to the middle of the track. Fit the black clip under the track so the tabs extend upwards through the slots in the track to limit movement of the sliding jaw. Lift the regulator, now with glass attached, and set the tab south of the regulator's upper bolt hole into the slot south of the door frame's upper bolt hole. Swing the lower end of the regulator into place such that the tab north east of the regulator's lower bolt hole goes through the slot north east of the door frame's lower bolt hole. Wiggle the three studs through the corresponding holes in the door frame. Attach the two bolts and three nuts. I don't know the torque spec. Now's a good time to test the motor! Send the motor wire pair through the grommet in the door frame and thread through the retaining clips in the door frame. Set the plastic sheeting back in place. Double sided cellophane tape or rubber cement should hold the loose ends on the door frame. Don't forget the puddle lamp wires! Open the window switch and replace the motor wire pair. Set the door liner about an inch above its installed position and slide downward while applying pressure throughout the surface of the door. Yes, easier said than done. Make sure all edges of the door liner are snug against the door frame and that there are no bulges indicating a door liner tab isn't engaged in the door frame. Mind the door lock rod and don't forget to send the puddle lamp wires through the opening along the bottom of the door liner! Attach the door release rod to the door release lever. Set the door release lever in place in the door liner opening as far forward as it will go. Slide the door release lever aft about 3mm to lock it in place. Attach the bolt holding the grab handle to the door frame. Attach the connector to the window switch. Press the door release handle escutcheon in place. You can see where the escutcheon tabs slot into the door liner. Slide the tab in the striker escutcheon into the slot in the door frame and attach the screw. Attach the puddle lamp connectors to the puddle lamp. Set one edge of the puddle lamp into place in the door liner then press the other edge into place. Test the replacement regulator! Sixto 87 300D Last edited by sixto; 05-21-2009 at 02:00 AM. 
|
|
#2
05-21-2009, 12:52 AM
|
||||
|
||||
|
Nicely done as usual.
__________________
 "Buster" in the '95 Our all-Diesel family 1996 E300D (W210) . .338,000 miles Wife's car 2005 E320 CDI . . 113,000 miles My car Santa Rosa population 176,762 (2022) Total. . . . . . . . . . . . 627,762 "Oh lord won't you buy me a Mercedes Benz." -- Janis Joplin, October 1, 1970
|
 |
| Bookmarks |
|
|


 Linear Mode


