Parts Catalog Accessories Catalog How To Articles Tech Forums
Call Pelican Parts at 888-280-7799
Shopping Cart Cart | Project List | Order Status | Help


Go Back   PeachParts Mercedes-Benz Forum > Mercedes-Benz Tech Information and Support > Diesel Discussion

Reply
 
LinkBack Thread Tools Display Modes
  #16  
Old 12-06-2009, 07:28 PM
Registered User
 
Join Date: Aug 2008
Posts: 97
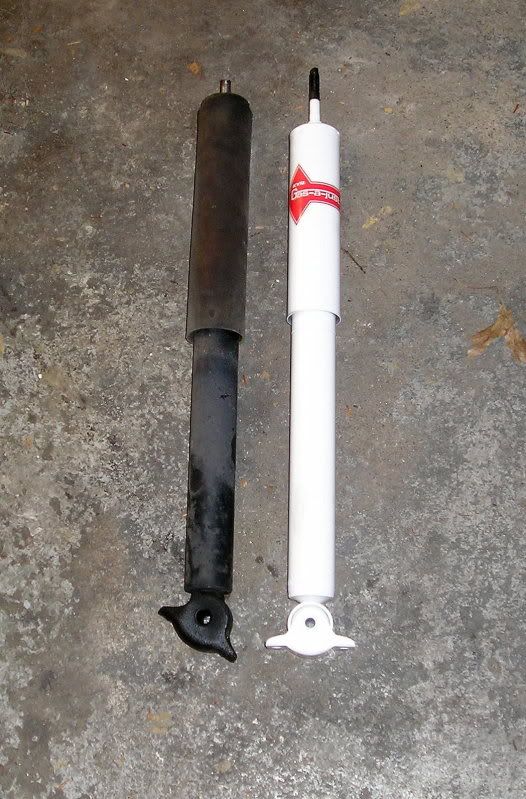
Here is what the 12 pointers I bought looked like. I have several ratchet sets, but I've never had a need for these before.


__________________

84 300D, 303K
71 MGBGT, ?K
96 GMC C1500, 115K
Reply With Quote
  #17  
Old 12-06-2009, 10:03 PM
t walgamuth's Avatar
dieselarchitect
 
Join Date: Apr 2005
Location: Lafayette Indiana
Posts: 38,626
The 123 and 126 are essentially the same. If you tilt the shock there is plenty of room to get on it with a 1/2" drive 10mm with an extension.

Really.

Done with those tools that way it is easy peasy.
__________________
[SIGPIC] Diesel loving autocrossing grandpa Architect. 08 Dodge 3/4 ton with Cummins & six speed; I have had about 35 benzes. I have a 39 Studebaker Coupe Express pickup in which I have had installed a 617 turbo and a five speed manual.[SIGPIC]

..I also have a 427 Cobra replica with an aluminum chassis.
Reply With Quote
  #18  
Old 12-06-2009, 10:42 PM
Banned
 
Join Date: May 2002
Location: Blue Point, NY
Posts: 25,396
Quote:
Originally Posted by t walgamuth View Post
If you tilt the shock there is plenty of room to get on it with a 1/2" drive 10mm with an extension.

Really.

Done with those tools that way it is easy peasy.
I can positively assure you that it is impossible to get a 1/2" socket on those screws on a W-126. The body of the shock would prevent the use of anything that large. The 3/8" barely makes it and I wouldn't want to do it again.

This further confirms my suspicion that a W-126 is slightly different than a W-123.
Reply With Quote
  #19  
Old 12-06-2009, 10:51 PM
t walgamuth's Avatar
dieselarchitect
 
Join Date: Apr 2005
Location: Lafayette Indiana
Posts: 38,626
Quote:
Originally Posted by Brian Carlton View Post
I can positively assure you that it is impossible to get a 1/2" socket on those screws on a W-126. The body of the shock would prevent the use of anything that large. The 3/8" barely makes it and I wouldn't want to do it again.

This further confirms my suspicion that a W-126 is slightly different than a W-123.
Did you unhook the top of the shock and swing it to the side?

I just looked at page 107 of the FSM for model 126 volumn 1. It looks to me as if the shock is being tilted back to give clearance to get a socket on there. I don't think I have ever tried it with a 3/8" socket. Perhaps the 1/2" 10 mm actually is slimmer where it matters. I don't think I could get one of those stout bolts out without breaking a 1/4" drive and a u joint same size.

I've had three 126's and probably 20 123s, and have changed shocks on most of them with this method.

I just found a drawing in the haynes manual for the front shock bottom mount. It looks the same only reversed in the picture.

I am going to look at the parts for the suspension in fastlane and see if they are different. I am under the impression that most of the suspension parts are interchangible.
__________________
[SIGPIC] Diesel loving autocrossing grandpa Architect. 08 Dodge 3/4 ton with Cummins & six speed; I have had about 35 benzes. I have a 39 Studebaker Coupe Express pickup in which I have had installed a 617 turbo and a five speed manual.[SIGPIC]

..I also have a 427 Cobra replica with an aluminum chassis.

Last edited by t walgamuth; 12-06-2009 at 11:04 PM.
Reply With Quote
  #20  
Old 12-06-2009, 10:59 PM
Banned
 
Join Date: May 2002
Location: Blue Point, NY
Posts: 25,396
Quote:
Originally Posted by t walgamuth View Post
Did you unhook the top of the shock and swing it to the side?
Absolutely.

Swinging it doesn't give you much benefit right down near the screw..........the pivot point is just above the screw and the body of the shock around the pivot is the limiting factor.

You cannot use a 1/2" socket............guaranteed............it hits the shock.
Reply With Quote
  #21  
Old 12-06-2009, 11:04 PM
teezer's Avatar
ex minutiae manager
 
Join Date: Sep 2007
Location: ohio
Posts: 159
Quote:
Originally Posted by mattmacklind View Post
I I thought maybe a bushing went underneath the mount and then one more on top, but realized today that it makes no sense as the shock has a raised area that actually slots into the underside of the hole in the top mount (does that make any sense?) so I double bushed the top so I wouldn't run out of thread. I placed a metal cap between the two bushings. Couldn't figure out any other way to solve that particular issue.

Anyway, I tightened everything up today and its pretty nice. Something else is loose down there (control arm bushings possibly) so my work continues, but I'm done until new years anyway. Good luck to everyone else.

if you put the bushings on this way, take the shocks off and do it right ~~~ shock top gets a steel cap then bushing ~~~ stick it up through the hole on the body and put a bushing, steel cap and then tighten the nut
__________________
1989 300ce smoke silver / brazil, in a constant state of flux ~~~
Reply With Quote
  #22  
Old 12-06-2009, 11:22 PM
t walgamuth's Avatar
dieselarchitect
 
Join Date: Apr 2005
Location: Lafayette Indiana
Posts: 38,626
Quote:
Originally Posted by Brian Carlton View Post
Absolutely.

Swinging it doesn't give you much benefit right down near the screw..........the pivot point is just above the screw and the body of the shock around the pivot is the limiting factor.

You cannot use a 1/2" socket............guaranteed............it hits the shock.
Well, the lower control arms carry different part numbers but I printed out the pictures and the relationship of the holes where the shocks bolt on look pretty much the same as near as I can tell....

You actually tried using a half inch drive 10mm on them, right?

I suppose it is possible that I have not actually changed the front shocks on a 126, but I doubt it.

I am certain I have never used any different wrench on them. I seem to remember thinking this method would not work and my dad showing me how to do it.
__________________
[SIGPIC] Diesel loving autocrossing grandpa Architect. 08 Dodge 3/4 ton with Cummins & six speed; I have had about 35 benzes. I have a 39 Studebaker Coupe Express pickup in which I have had installed a 617 turbo and a five speed manual.[SIGPIC]

..I also have a 427 Cobra replica with an aluminum chassis.
Reply With Quote
  #23  
Old 12-06-2009, 11:36 PM
Banned
 
Join Date: May 2002
Location: Blue Point, NY
Posts: 25,396
Quote:
Originally Posted by t walgamuth View Post
You actually tried using a half inch drive 10mm on them, right?

I suppose it is possible that I have not actually changed the front shocks on a 126, but I doubt it.

I am certain I have never used any different wrench on them. I seem to remember thinking this method would not work and my dad showing me how to do it.
I actually tried using the 3/8" socket, which was entirely too large and pressed against the shock preventing me from getting a straight shot at the cap screw. The 3/8" did work, but I'll never do it again. A 1/2" cannot work.

BTW, where are you finding a 10mm socket with 1/2" drive? Doesn't make any sense.............??
Reply With Quote
  #24  
Old 12-06-2009, 11:44 PM
Registered User
 
Join Date: Sep 2004
Posts: 8,971
Quote:
Originally Posted by Brian Carlton View Post

BTW, where are you finding a 10mm socket with 1/2" drive?
10mm is a very common "starting" size in 1/2" drive socket sets.
Reply With Quote
  #25  
Old 12-07-2009, 05:58 AM
t walgamuth's Avatar
dieselarchitect
 
Join Date: Apr 2005
Location: Lafayette Indiana
Posts: 38,626
Quote:
Originally Posted by Brian Carlton View Post
I actually tried using the 3/8" socket, which was entirely too large and pressed against the shock preventing me from getting a straight shot at the cap screw. The 3/8" did work, but I'll never do it again. A 1/2" cannot work.

BTW, where are you finding a 10mm socket with 1/2" drive? Doesn't make any sense.............??
I have at least two of them....craftsman.
__________________
[SIGPIC] Diesel loving autocrossing grandpa Architect. 08 Dodge 3/4 ton with Cummins & six speed; I have had about 35 benzes. I have a 39 Studebaker Coupe Express pickup in which I have had installed a 617 turbo and a five speed manual.[SIGPIC]

..I also have a 427 Cobra replica with an aluminum chassis.
Reply With Quote
  #26  
Old 12-07-2009, 08:14 AM
Registered User
 
Join Date: Jan 2001
Location: Alexandria, Virginia
Posts: 5,480
Quote:
Originally Posted by mattmacklind View Post
I'll post again on this thread instead of thew one I started two days ago. I thought the 300D sedan was self leveling as well, but that shows what I know. I look forward to replacing the rear shocks now!

Here is a pic of my old shock and the new KYB. You can see how much longer the threaded top screw is. I thought maybe a bushing went underneath the mount and then one more on top, but realized today that it makes no sense as the shock has a raised area that actually slots into the underside of the hole in the top mount (does that make any sense?) so I double bushed the top so I wouldn't run out of thread. I placed a metal cap between the two bushings. Couldn't figure out any other way to solve that particular issue.

Anyway, I tightened everything up today and its pretty nice. Something else is loose down there (control arm bushings possibly) so my work continues, but I'm done until new years anyway. Good luck to everyone else.

I believe the reason your KYBs appear to have 'longer' studs than your old Bilsteins is that one of each Bilstein's mounting bushings are concealed under the removeable plastic boot. Pull the boots and rubber bushings off your old Bilsteins and the studs should be about the same length as the KYBs.
The non-removeable steel boots on the KYBs are welded to the shafts so both rubber bushings go above the boots on those.
One bushing goes under and the other goes over the upper body-mount. So if you put both KYB bushings above the body-mount, it's time to pull the shocks and redo them. First, the KYB takes a cup-washer. Then a rubber bushing. Then insert the KYB stud in the body-mount. Finish up with the other bushing, cup-washer & nut on top.

Happy Motoring, Mark
__________________
DrDKW

Last edited by Mark DiSilvestro; 12-07-2009 at 08:27 AM.
Reply With Quote
  #27  
Old 12-07-2009, 09:45 AM
Registered User
 
Join Date: Aug 2008
Posts: 97
Quote:
Originally Posted by Mark DiSilvestro View Post
I believe the reason your KYBs appear to have 'longer' studs than your old Bilsteins is that one of each Bilstein's mounting bushings are concealed under the removeable plastic boot. Pull the boots and rubber bushings off your old Bilsteins and the studs should be about the same length as the KYBs.
The non-removeable steel boots on the KYBs are welded to the shafts so both rubber bushings go above the boots on those.
One bushing goes under and the other goes over the upper body-mount. So if you put both KYB bushings above the body-mount, it's time to pull the shocks and redo them. First, the KYB takes a cup-washer. Then a rubber bushing. Then insert the KYB stud in the body-mount. Finish up with the other bushing, cup-washer & nut on top.

Happy Motoring, Mark
I tried it that way, too, but the top of the KYB would not "meet" the top of the body-mount on the passenger side, even with jacking up the control arm assembly and then using the weight of the car itself, so I assumed it was incorrect. The bushing on top would just continue to compress without pulling the shock upwards. I will do it again. I don't need to jack up the car or remove the wheel to do this so its easy. Ill just remove the bushes, compress the shock, assemble below, then above and tighten again.

Sure does ride nice, even if its bushed incorrectly.

Oh yeah, and you can use a 1/2" drive and ratchet. Its the extension that allows for it, but you can use a 3/8", too.
__________________

84 300D, 303K
71 MGBGT, ?K
96 GMC C1500, 115K
Reply With Quote
  #28  
Old 12-07-2009, 10:07 AM
Registered User
 
Join Date: Sep 2004
Posts: 8,971
Quote:
Originally Posted by mattmacklind View Post
I tried it that way, too, but the top of the KYB would not "meet" the top of the body-mount on the passenger side, even with jacking up the control arm assembly and then using the weight of the car itself, so I assumed it was incorrect.
Something is not right with that analysis. If the shock is too short with one bushing on the bottom side of the mount, removing the bushing would make it even shorter, effectively.
Reply With Quote
  #29  
Old 12-07-2009, 12:14 PM
Registered User
 
Join Date: Aug 2008
Posts: 97
Quote:
Originally Posted by tangofox007 View Post
Something is not right with that analysis. If the shock is too short with one bushing on the bottom side of the mount, removing the bushing would make it even shorter, effectively.
One would think so and I see what you mean, but it wasn't the case. I thought the lower bushing and cap was preventing the shock from seating properly, though. I could see there was room between the top of the shock and the body-mount. It just wasn't moving, even though I couldn't hear any rubbing or feel that there was a meeting between the the bushing and the body-mount. When I removed the bushing, the shock extended fully into the cavity very naturally, leaving me to believe this was how God an MB intended it to be, and the little raised circle on top of the shock went perfectly into the recess on top of the body-mount. the bushes have this raised circle as well, though.

Like I said, I'll go back and swap the bushes back to beneath the body-mount. I'll post if I have problems.
__________________

84 300D, 303K
71 MGBGT, ?K
96 GMC C1500, 115K
Reply With Quote
  #30  
Old 12-07-2009, 12:56 PM
t walgamuth's Avatar
dieselarchitect
 
Join Date: Apr 2005
Location: Lafayette Indiana
Posts: 38,626
Yeah, you don't want to run it that way. It is designed to have the rubber bushing and without it there are some bad things that could happen:
1. you will not have the proper amount of drop in the suspension
2. the metal to metal contact could wear a hole in the car or the shock.

I bet the shock was just hanging up on something.

__________________
[SIGPIC] Diesel loving autocrossing grandpa Architect. 08 Dodge 3/4 ton with Cummins & six speed; I have had about 35 benzes. I have a 39 Studebaker Coupe Express pickup in which I have had installed a 617 turbo and a five speed manual.[SIGPIC]

..I also have a 427 Cobra replica with an aluminum chassis.
Reply With Quote
Reply

Bookmarks

Thread Tools
Display Modes

Posting Rules
You may not post new threads
You may not post replies
You may not post attachments
You may not edit your posts

BB code is On
Smilies are On
[IMG] code is On
HTML code is On
Trackbacks are On
Pingbacks are On
Refbacks are On


All times are GMT -4. The time now is 04:45 PM.


Powered by vBulletin® Version 3.8.7
Copyright ©2000 - 2024, vBulletin Solutions, Inc.
Search Engine Optimization by vBSEO 3.6.0
Copyright 2024 Pelican Parts, LLC - Posts may be archived for display on the Peach Parts or Pelican Parts Website -    DMCA Registered Agent Contact Page