

|
|
|
|
|
|
#1
 07-02-2010, 10:41 PM
|
||||
|
||||
|
I'm Lost - Bought euro headlights, need to know which globes
Finally took the plunge and bought some "aftermarket" euro headlight assemblies. Opened the box, of course no globes and I am clueless. I just want good light without smoking the reflectors, and hopefully an amber foglamp. I need bulb #'s (H4, 60/55 I think is what I want for headlamps) city lamps? I think I can use the same type of foglamp, just get the amber anodized....right? Any help appreciated.
__________________
327K on 1986 W201, 602.911, 722.414 2.5 190D ("The Red Baron") 139K on 1993 W124, 104.942, 722.433 2.8 300E ("Queen") http://farm5.static.flickr.com/4081/...0bb92d3c_m.jpg http://i370.photobucket.com/albums/o...g?t=1325284354 Do not worry about your difficulties in Mathematics. I can assure you mine are still greater. - Albert Einstein take a walk down memory lane... 
|
|
#2
07-02-2010, 10:59 PM
|
||||
|
||||
|
The regular lights should be H4 as you figured, and fog bulbs should transfer directly from your US lights.
No amber necessary, unless you like the look (I don't, but then I'm not French).
__________________
 Gone to the dark side - Jeff
|
|
#3
07-03-2010, 07:54 AM
|
||||
|
||||
|
I used PIAA H3 for the fogs, and Hella H4 55/60 for the mains.
__________________
79 MB 280 SEL Euro 133k 77 MB 450SL 154k 05 Mustang GT Vert (3) 104k 12 TSX Wagon Tech (66k) (192k) 06 Subaru Outback base (135k) 164k 16 Acura MDX (109k) 111k 18 Silverado 2500 LTZ Midnight (212) 56k 97 Ford Ranger 163k 11 RAV4 154k 01 Escape 173k 04 Honda Pilot 292k 1967 Mustang (Resto Project) 1968 Mustang (Parts Bin) 00 Ford Ranger 124k
|
|
#4
07-03-2010, 11:56 AM
|
|||
|
|||
|
__________________
92 300D 2.5L OM602 OBK #59
|
|
#5
07-04-2010, 12:36 AM
|
|||
|
|||
|
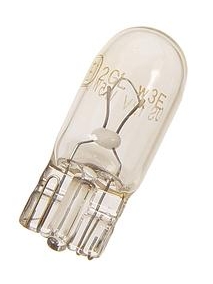
For city lights it's "typically" a 9w bulb but you'll have to figure out what type it is, bayonet or threaded etc.
If you like the yellow French theme you can purchase headlights with the yellow glass balloon installed or a kit that contains just the glass balloon itself, and install it on your H4 bulbs. Also, 9003 is another number for H4 also IIRC. Steve A
__________________
Steve A 92 W140 OM603 97 VW Jetta TDI 90 Passat variant TDI 6 speed MT 94 Chevy K1500 6.5TD 05 E320 CDI + others
|
|
#6
07-04-2010, 01:29 AM
|
||||
|
||||
|
Quote:
 City lights for Bosch and Hella use these:  Regular H4 bulbs work fine, and H3 for the fogs. Use www.danielsternlighting.com to align the beam properly.
__________________
http://farm8.staticflickr.com/7271/7...144c3fc1dc.jpg
|
|
#7
07-04-2010, 11:13 AM
|
||||
|
||||
|
Thanks everyone - you were all immensely helpful. Got some el-cheapo Wagners (H4=9003) made in Hungary for $22 a pair at NAPA, and used the same old H3's that were in there already (just replaced about 5K miles ago). The little glass halogens are "194." I will post before/after pics when the project is finished.
__________________
327K on 1986 W201, 602.911, 722.414 2.5 190D ("The Red Baron") 139K on 1993 W124, 104.942, 722.433 2.8 300E ("Queen") http://farm5.static.flickr.com/4081/...0bb92d3c_m.jpg http://i370.photobucket.com/albums/o...g?t=1325284354 Do not worry about your difficulties in Mathematics. I can assure you mine are still greater. - Albert Einstein take a walk down memory lane...
|
|
#8
07-04-2010, 06:17 PM
|
||||
|
||||
|
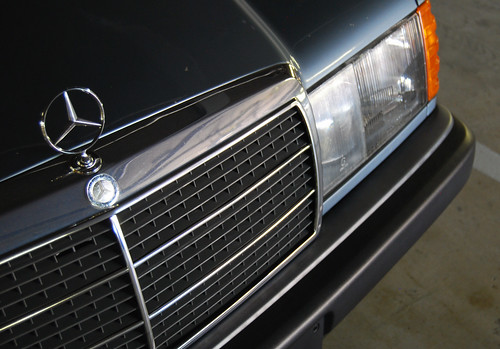
Here's the before and after. I think that installing the Depos is pretty popular these days, so I took enough pics to work up a little pictorial which I will append to this thread later. Gotta go out and set off some incendiary devices right now...
 Happy fourth everyone!
__________________
327K on 1986 W201, 602.911, 722.414 2.5 190D ("The Red Baron") 139K on 1993 W124, 104.942, 722.433 2.8 300E ("Queen") http://farm5.static.flickr.com/4081/...0bb92d3c_m.jpg http://i370.photobucket.com/albums/o...g?t=1325284354 Do not worry about your difficulties in Mathematics. I can assure you mine are still greater. - Albert Einstein take a walk down memory lane...
|
|
#9
07-05-2010, 01:17 AM
|
||||
|
||||
|
Looks great, I went for Hella (with MB star/logo) on my 190E.
__________________
http://farm8.staticflickr.com/7271/7...144c3fc1dc.jpg
|
|
#10
07-05-2010, 02:07 AM
|
||||
|
||||
|
Here's a little pictoral how-to for '86+ 190's and 300's that I figured those who are "upgrading" their lighting solution to Depo euro's could make
use of, since I had a hard time locating anything that spelled out the steps in a detailed fashion. Depo units are decent quality, DOT and SAE approved, and my budget could not afford the Bosch or Hella. The euro look is IMHO much better than the CAN/AM "door" system, which looks plasticky. I got my set at a rather well-known auction site for less than $200. They come complete with the option of installing "city lights" which run off of the hot lead to the corner amber indicator lamps. The first step obviously is to remove the old units. Thanks to Don Labar for this quick and dirty method: 1) Unplug the 4 pin electrical connector from the headlight assembly. 2) Undo the round plastic nut that holds the side marker to the headlight assembly; remove the bulb holder from the side marker wiring connector and remove the side marker assembly. 3) Below the headlight, remove the body colored filler piece held in with a single 8mm bolt. 4) Carefully remove the L-shaped rubber gasket skirt. If still useable, clean it up and set aside to dry, otherwise you may have to buy another one. 5) With the rubber skirt removed you will have access to the 8mm bolt located under the middle of the headlight but set far back on the unit. Use a socket extension to loosen and back almost all the way out - leave the bolt hanging. 6) Remove the two 8mm bolts at the top of the headlight unit and the whole assembly will pull free of the chassis - with a little coaxing of the bottom center retaining clip (loosening the bolt collapses the prongs inward and enables it to come out of its square hole). Once removed you should see something like this. The four-pin socket connectors circled will be the focus of the mod since euro assemblies require six-pin connectors on the headlight units. Also, I took this opportunity to vacuum out years worth of road grime from the area.  I went ahead and got a couple of six-pin socket connectors at the same well known auction site. The pin order is different on the euro assemblies, so I had to re-arrange according to this order: Put pin 2 (brown wire) into socket 2 Put pin 1 (green wire) into socket 6 Put pin 3 (yellow wire) into socket 5 Put pin 4 (white wire) into socket 4  The fifth pin will be the city light connection on socket 3. I had an old socket end leftover from a cruise control actuator 8-pin socket connector that I pulled from the junk yard, but it is possible to use the female end of a bullet connector from the parts store soldered and modified to fit into the German 6-pin unit.  The City Light jumper is connected via the snap type wire splice by opening the side marker wire connector and locating the wire that powers the running light. The wire, of the 3 present, is the one that is not paired and has an empty connector socket on the same side. Mine was black with a gray stripe. Carefully make an incision into the plastic insulation jacket that holds the 3 wires, find the proper wire and make the splice.  And the spice is complete:  Next, prepare the headlight assembly for installation. After all the freaking out about bulb selection oddly enough I found the bulb types clearly marked on the Depo assembly itself. H4 (9003) for the mains, H3 for the fogs, and 194 for the city light. The city light socket receives the 194 bulb and neatly inserts into a grommet (circled) that leads into the main reflector area. Pretty good quality for an aftermarket item. You will have to pull the top screwclips from the old units and relocate to the corresponding areas (arrows) on the euros.  Finishing up is the reverse of the beginning, taking care to make sure that the corner indicator housing tabs insert neatly into their corresponding slots on the headlight unit housing, and taking care to make sure the bottom bolt receiver is pushed all the way into its square hole before torquing down the bolt. It is a good idea to check the mains, fogs, turns and indicators ("park lights") before tightening the bolts. Before:  After: 
__________________
327K on 1986 W201, 602.911, 722.414 2.5 190D ("The Red Baron") 139K on 1993 W124, 104.942, 722.433 2.8 300E ("Queen") http://farm5.static.flickr.com/4081/...0bb92d3c_m.jpg http://i370.photobucket.com/albums/o...g?t=1325284354 Do not worry about your difficulties in Mathematics. I can assure you mine are still greater. - Albert Einstein take a walk down memory lane... Last edited by sasquatchgeoff; 07-05-2010 at 12:09 PM.
|
|
#11
07-05-2010, 02:20 AM
|
||||
|
||||
|
Quote:
__________________
327K on 1986 W201, 602.911, 722.414 2.5 190D ("The Red Baron") 139K on 1993 W124, 104.942, 722.433 2.8 300E ("Queen") http://farm5.static.flickr.com/4081/...0bb92d3c_m.jpg http://i370.photobucket.com/albums/o...g?t=1325284354 Do not worry about your difficulties in Mathematics. I can assure you mine are still greater. - Albert Einstein take a walk down memory lane...
|
|
#12
07-05-2010, 02:32 AM
|
|||
|
|||
|
wow, Geoff!
its amazing how that transforms the car. Thank you for the wonderful write-up. I vote for DIY Wiki. You need to update your sig now, though..... mbeige takes some pretty nice photos, doesn't he? ps... what is that hideous grey thing in your driveway?... blahhh
|
|
#13
07-05-2010, 02:36 AM
|
||||
|
||||
|
Nice write up!
However, on the base of the headlights the mounting clips can EASILY be broken. I think this needs to be mentioned as I broke both of mine so the lights were left "hanging" from the two 8mm top screws. One would be better off buying the new clips at the dealer (cheap enough, I bought more than I needed) - same deal with the top plastic mounting screws. They work like drywall screws - when you put them on, the two "prongs" are close to each other. When you screw the 8mm screw into them, the "prongs" separate and lock the headlamp assemblies to the mounting bracket. I would do this only after I have fastened the two top mounting screws (loosely). Then when it's all snug, realign the new light assemblies into position in relation to the body components (hood, fender, bumper and grille). Then tighten, and align the beams. Just wanted to add that bit, since I have also recently done mine and this is a good write up.  Quote:
__________________
http://farm8.staticflickr.com/7271/7...144c3fc1dc.jpg
|
|
#14
07-05-2010, 03:28 AM
|
||||
|
||||
|
Thanks MBeige,
Agreed, I broke one of mine a while ago and bought two new ones. The reason I said leave the screws hanging was because when re-installing, it makes it a heck of a lot easier to not bother with trying to start the screw. Also, it is important to note that the bolt receiver is designed to slide into a special slot on the back of the assembly housing. I at first made the mistake of not doing that and it left the unit cocked up at a weird angle. When removing, you can reach down under the assembly housing with the thumb and index finger and squeeze the "prongs" together, releasing them from the square hole.
__________________
327K on 1986 W201, 602.911, 722.414 2.5 190D ("The Red Baron") 139K on 1993 W124, 104.942, 722.433 2.8 300E ("Queen") http://farm5.static.flickr.com/4081/...0bb92d3c_m.jpg http://i370.photobucket.com/albums/o...g?t=1325284354 Do not worry about your difficulties in Mathematics. I can assure you mine are still greater. - Albert Einstein take a walk down memory lane... Last edited by sasquatchgeoff; 07-05-2010 at 05:35 AM.
|
|
#15
07-05-2010, 05:23 AM
|
||||
|
||||
|
Quote:
__________________
327K on 1986 W201, 602.911, 722.414 2.5 190D ("The Red Baron") 139K on 1993 W124, 104.942, 722.433 2.8 300E ("Queen") http://farm5.static.flickr.com/4081/...0bb92d3c_m.jpg http://i370.photobucket.com/albums/o...g?t=1325284354 Do not worry about your difficulties in Mathematics. I can assure you mine are still greater. - Albert Einstein take a walk down memory lane...
|
 |
| Bookmarks |
|
|


 Linear Mode


