

|
|
|
|
|
|
#1
 02-27-2011, 09:34 PM
|
|||
|
|||
|
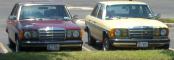
W123 coupe window lube
I'm prepping my car to be sold in a month or so, so I'm trying to fix the coupe specific problems that the cognoscenti may ask about. On to the DIY:
Keywords: w123 coupe, 300CD, 280CE, coupe window, rear window, halfway, coupe window regulator, 1983, C123 Summary: cleaning and lubing the tracks for rear (quarter) power windows in the W123 coupe. Car in pics is a 1983 300CD I recommend using the Factory Service Manual for this repair since there are several overlapping areas. You will: Remove the rear seat (FSM 91-170) Possibly remove the rear hat shelf/parcel shelf (68-458) Possibly disconnect the front seat belt(s) (91-500) Remove the upper rear quarter trim panel (68-449) Remove the rear quarter trim panel (68-456 caution: not correct and may damage parts) Remove the inner window wiper (68-456 see above) Remove the window rail (67-400) Remove the rear window (67-400) Possibly remove the regulator (67-415 caution: outdated info) Adjust the rear window (67-400) And then put it all back together. A helper, or a third arm if youre an alien or mutant would be useful. Before you start, keep in mind that the coupe is different. The vacuum controlled seats have a relay behind the glovebox that is energized to the battery and turned ON when the doors are open. If you leave a door open for a long time during this repair, that relay gets very hot. If you dont open the doors, you get very hot. I recommend you lower the windows and get a fan and keep the doors closed. You need the battery and switches in place to move the windows. This repair is also MUCH easier if you can get your windows all the way down to start. A little lateral and downward pressure can help the motor overcome the friction in the rail. Removing the seats and the hat shelf are self-explanatory. Why the hat shelf? Because the corner of the upper and lower side trim panels tuck under that raised corner of the shelf. And when you finessing the pieces back in youll wonder Why didnt I take out those two screws and get this thing out of my way? Why the front seat belt? Look at the pics. The plastic outside piece, the chrome strip and the vinyl interior are really one big piece. Sure you can pop them apart and hope youll get them to stick back together. On one side of my car they were already popped loose, so I didnt need to pull the seatbelt out. But theres no way I can get them to stick back together. 
|
|
#2
02-27-2011, 09:40 PM
|
|||
|
|||
|
Sorry about some of the photos. I was having auto-focus issues. Unfortunately it means I refer a lot to the FSM pics.
1) Remove the seat, hat shelf and disconnect the front seat belt. 2) Remove the upper trim panel using the steps in FSM 68-449. Look at the attached pic for tips to not break off the 25+ year old plastic clips. 3) Lower the rear window all the way. Use gentle pressure if needed. 4) Removing the lower trim panel causes some problems. FSM 68-456 step 7 says to pry it with a wedge. On my car there is a small hidden screw in the wiper. You have to move the rubber out of the way to see the head. I used a #1 Phillips to unscrew. It is semi-buried in the wiper rubber. 5) Unplug the window switch from the bottom and replace with a spare switch. Dont have a spare? If not, push the switch ONLY out from the trim panel. Leave the plastic surround in place, then put the switch back in the wiring. 6) Remove the metal cover per 67-400 steps 1 thru 3. If you cant get your window down youll have trouble with the outside bolt near step 3. The three interior bolts may be hidden by sound-deadening padding. A ratcheting 10 mm box end wrench with a hinge is the tool to have here. In total there are four 10 mm bolts without washers.
|
|
#3
02-27-2011, 09:44 PM
|
|||
|
|||
|
7) Raise the window all the way
8) There are THREE slotted holes that are used to adjust the path of the window. The rail slots are left-right on the body of the car and the parallel-to the-door window slot is up/down on the window slider. A long scribe/awl is necessary to reach the upper rail screw. BEFORE DOING ANYTHING ELSE LOCATE THESE SCREWS AND SCRIBE THEIR POSITIONS. FSM 67-400 shows the rail bolts in the pic near step 7. The upper one is recessed, the lower is near the seatbelt. The other bolts are shown in the pic near 67-400 step 6. The front screw has a slot, the rear one does not. Scribe the position of the front screw onto the guide plate AND the position of the guide plate onto the window mounting bracket. If you dont, youll have more trouble getting the windows right. 9) Remove the lock clip per 67-400 step 4. This is a PITA to loosen and free up. I used a small set of vise grips to compress the regulator arm onto the guide plate, then a 90 degree awl to pull the clip off. I used a similar technique to reinstall. NOTE: There is a washer behind the regulator arm. Odds are it will fall off and into the window well. A telescoping magnet is also a good tool to have. The washers on the left and right side appeared to be dished to different levels, probably from torque. It looked like the wide part of the cone went against the regulator and the skinny part against the guide plate. If someone else does this repair and sees different, post the correction in the thread as an update to Step 9. 10) The window is now held up by friction. You can slide it to where you can access bolts. I loosened all four (2 x slider bolts and 2 x guide plate bolts) before removing them. These are 10 mm bolts with a washer. Do not confuse them with the other four 10 mm bolts without washers. 11) If you have large hands you may need to undo the three nuts that hold the regulator in place in order to grasp the slide rail. I did it both ways, once disconnecting the regulator, the second time without. Fish around in there, find the rail and pull down with one hand while holding onto the window with the other hand. Itll slide away from the guide jaw and cause the loose-friction fit rectangular plastic cap to pop off. Remember to fish around inside and find that cap before reassembling.
|
|
#4
02-27-2011, 09:47 PM
|
|||
|
|||
|
12) Getting the glass out was a bit fidgety. Lower the glass to get it off the rear seal, then pull it outwards and upwards and forward. I was unable to simply Lift quarter window glass forward out of the shell as described in step 8 without getting it clear of the rubber at the top.
13) With the window and slider out you can see the complexity of the motion. The window moves in a straight-ish line for a few inches, then rotates fore-aft slightly to change direction and slide rearwards while also being torqued slightly inboard. 14) I cleaned the rail and the jaw and relubed with a ceramic based grease. 15) The jaw has a spring and a hollowed area that I treated like a bearing and cleaned out the old dirty grease and re-packed using a putty knife to force the lube into it. It sort of squeezes out, but I presume some of the problem is due to no-longer lubricating lube in this jaw. Last edited by Yak; 02-27-2011 at 09:57 PM.
|
|
#5
02-27-2011, 09:49 PM
|
|||
|
|||
|
16) I cleaned the dirty gray grease off the slider and coated that as well. Then I slid the jaw through the slider repeatedly until the friction/contact area was coated with fresh grease.
17) You may be tempted to remove the straight rod with the guide plate and lube that as well. Id advise caution and evaluate the condition of the lube that is currently on it. I removed one side since the washer popped off and slid behind it. There is also an inboard/outboard adjusting slot on this bolt. If you remove it, youll have to readjust it. The grease on the straight rod was still slick and clean, so I left it intact and simply reinstalled the straight rod. While I was in there, I looked around. No rust, nice and solid on the rockers.
|
|
#6
02-27-2011, 09:52 PM
|
|||
|
|||
|
18) A helper would be really handy upon reassembly. Someone needs to slide the window back in rear first, angling in and down, then over the guide jaw, then down while outside the rubber seal and finally back up to fit inside the rubber. Then, while its holding itself up, finagle the newly greased slider into the sidewall and up onto the guide jaw in the correct orientation. Then, while those parts hold themselves together, line up the upper hole and insert a 10 mm bolt with washer into the hole. Then, while gravity is still suspended and the parts stay in place by themselves, slide the guide plate onto the window glass and insert a bolt. After this point friction and geometry should take over and keep the glass in place. The open side of the slide is on the outboard side. Its a hassle to have to pull it out mid-insertion with the glass in place and rotate it around. A magnetic tipped 10 mm nut driver is very useful here.
19) My guide plates were in fine shape and are not the reinforced style. I was a bit surprised to see that the pins are dry, so I added some grease upon reassembly. I used the vise grip technique to compress the regulator onto the washer+guideplate pin, then put the clip back on. 20) Adjustment goes a LOT easier if you scribed the location of the plate and bolts. Its covered in the FSM 67-400, but the basics are this: raise the window all the way up. Push the window all the way rearwards, then tighten the slider bolts. Raise/lower a few times, then loosen the bolts on the guide plate and adjust so the chrome strip +rubber is parallel to the door glass. This is a bit tricky since the bolt position AND the window position moves. That hinged, ratcheting 10 mm wrench is good to have since you can get access with it, as is a deep 10 mm socket since you need to torque it down pretty good at the end. 21) Be careful moving the window without the exterior wiper in place while adjusting. The window may shift outboard and try to jump out of the rubber and bind up. This has the potential to crack the glass if not watched. 22) I did not uninstall the regulator + motor. I was able to get enough slack from the electrical cable to lift it up and inspect it. The motor and gears looked fine, and I did not see a simple way to disconnect the electrical, so I left them alone. 23) Assembly, as they say, is done in reverse order. 24) Trust me, youll be glad you removed the hat shelf.
|
|
#7
02-27-2011, 11:02 PM
|
||||
|
||||
|
Great stuff!
__________________
Current Diesels: 1981 240D (73K) 1982 300CD (169k) 1985 190D (169k) 1991 350SD (113k) 1991 350SD (206k) 1991 300D (228k) 1993 300SD (291k) 1993 300D 2.5T (338k) 1996 Dodge Ram CTD (442k) 1996 Dodge Ram CTD (265k) Past Diesels: 1983 300D (228K) 1985 300D (233K)
|
|
#8
03-07-2011, 12:04 AM
|
||||
|
||||
|
...Maybe I should simply leave the damned windows closed........
__________________
-Nate 1982 240D 408,XXX miles Ignorance is the mother of suspicion and fear is the father I did then what I knew how to do ~ now that I know better I do better
|
|
#9
03-08-2011, 08:14 PM
|
||||
|
||||
|
__________________
John HAUL AWAY, OR CRUSHED CARS!!! HELP ME keep the cars out of the crusher! A/C Thread "as I ride with my a/c on... I have fond memories of sweaty oily saturdays and spewing R12 into the air. THANKS for all you do! My drivers: 1987 190D 2.5Turbo 1987 190D 2.5Turbo 1987 190D 2.5-5SPEED!!!  1987 300TD 1987 300TD 1994GMC 2500 6.5Turbo truck... I had to put the ladder somewhere!
|
|
#10
05-10-2011, 10:54 PM
|
||||
|
||||
|
Following up on this... how long did the job take per side?
__________________
Current Diesels: 1981 240D (73K) 1982 300CD (169k) 1985 190D (169k) 1991 350SD (113k) 1991 350SD (206k) 1991 300D (228k) 1993 300SD (291k) 1993 300D 2.5T (338k) 1996 Dodge Ram CTD (442k) 1996 Dodge Ram CTD (265k) Past Diesels: 1983 300D (228K) 1985 300D (233K)
|
|
#11
05-11-2011, 08:54 AM
|
||||
|
||||
|
Man when that car goes on the market, I am gonna be drooling!
Are you getting out of the 123 game or do you have a replacement lined up?
__________________
 Current Mercedes 1979 maple yellow 240D 4-speed Gone and fondly remembered: 1980 orient red 240D 4-speed Gone and NOT fondly remembered: 1982 Chna Blue 300TD Other car in the stable: 2013 VW Jetta Sportwagen TDI / 6-speed MT
|
|
#12
05-11-2011, 01:40 PM
|
|||
|
|||
|
Bookmarked--
it would have been advantagous for the rest of us-but not you , if you had have broke off the front clips on the rear sail panel like most everyone does and had to do a fix -so the rest of us could have seen how you would deal with it. About the only stuff I know might work is cutting a new piece out of spare mb interior parts and the try to glue it in with the special Flexable Parts Repair kit sold at parts stores for fixing urathane bumper covers. most other gues -like two part jb weld stuff probably wont work---But there are other epoxies that would--that sticks like crazy to any plastic.
|
|
#13
05-11-2011, 07:28 PM
|
|||
|
|||
|
I did both sides in a weekend, off and on. Probably more off than on, so figure maybe 4 hours per side. The problem is that you've got to go through so much to get the part out to lube it.
Car has been sold, maybe a month ago. Currently out of the 123 market. Saw a white sedan that got t-boned near Bandera and 410 today. Sort of Jekyll/Hyde: right side looks good, left side is toast - doors, windows gone. For busted clips maybe a whole new fiberglass mini-repair, sort of like welding? Gluing never seems to work on old plastic. A final tip: if the window sticks on the way down, just get off the switch and let it settle. With the clean lube it clears the back/down/out sticking point by itself under gravity.
|
|
#14
07-31-2011, 09:33 PM
|
||||
|
||||
|
Quote:
Ill do my best to observe the direction of the washer when I mess with the other side. I dont know that I agree with scribing the rear window positions. Going through it right now (Im only halfway done with one side because Im doing a bunch of other things on the doors now too), it seems to me that the best thing after 30 years is to correctly adjust the alignment of the front door window and then adjust the alignment of the rear to be properly parallelized and aligned so that we have the most chance for success. The FSM procedure isnt particularly tough it seems to do the adjustment...
__________________
Current Diesels: 1981 240D (73K) 1982 300CD (169k) 1985 190D (169k) 1991 350SD (113k) 1991 350SD (206k) 1991 300D (228k) 1993 300SD (291k) 1993 300D 2.5T (338k) 1996 Dodge Ram CTD (442k) 1996 Dodge Ram CTD (265k) Past Diesels: 1983 300D (228K) 1985 300D (233K)
|
|
#15
04-01-2012, 12:50 PM
|
||||
|
||||
|
Yak,
Thanks for the DIY. You referenced FSM in your write up. If you are out of the W123 hobby, do you have FSMs to sell?
__________________
83 300TD (need rear wiper assembly dead or alive) 84 300SD Daily driver 85 300TD almost 400k miles and driven daily. 98 E300D *sold 86 300SDL *sold and made flawless 10 hour journey to new home. 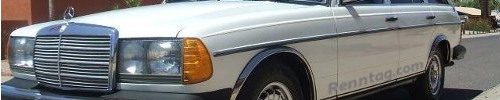
|
 |
| Bookmarks |
|
|


 Linear Mode


