

|
|
|
|
|
|
#1
 01-28-2012, 07:07 AM
|
|||
|
|||
|
W115/OM616 Injection Pump Installation and Timing How To.
After having a new timing chain rolled into my '74 240D, the fuel injectors rebuilt, and the IP timing adjusted by an Indy Mercedes mechanic, I was still having problems with smoking. During my car's extended stay at the shop, the mechanic noted that there was a vaccum leak at the pneumatic governor of the injection pump and, although it wasn't critical now, the IP would need to be bench tested and repaired at some point. The car then spent two months in a body shop and came out just in time for an Xmas road trip.
 It was during the trip to visit family that I noticed a constant 100 yardish long plume of the white stuff coming out the back. And, even though it 'twas the season, it wasn't snow. So much for waiting... Since it's winter and the car is parked for the season, I figured now would be the time to get it done. But that indy shop is half a state away and I've been throwing money by the bucket fulls at this car, so it fell to me to make it happen. Not picking on any group or poster, but it seems like the W115 doesn't get a lot of love and what info there is seems spread across a thousand different places. Given that our cars are pushing forty years and beyond, most of the survivors out there will need IP work at some point if not already. Never doing this before, I read about every thread on the subject (here and elsewhere) and poured over the FSM. So, I'm posting this to help keep everything in one place. One thing I'd like to note is that I have a freshly rolled in timing chain so it was almost an ideal installation. Be mindful that if you have timing chain stretch, you may not have such an easy time. Read more by copying and pasting this in Google: site:peachparts.com w115 timing chain stretch Removal is pretty straight forward: set the crank to 45 BTDC on the compression stroke, disconnect everything from the IP, set aside any nuts or bolts, and then slide the IP out. Although you can remove the IP with the crank in any position, rotating it to 45BTC sets you up for the reinstallation later. Once the IP came back from the shop, here's how I tackled the reinstallation: 1. Ensure that the crank is set to 45 BTDC on the compression stroke. Rotate the crank in the clockwise direction only! To verify that you're on the compression stroke, remove the oil fill cap and check to see if both cam lobes for the front piston (#1) are roughly pointed up (about 9 and 3 or 10 and 2 o'clock positions). If not, rotate it through again. 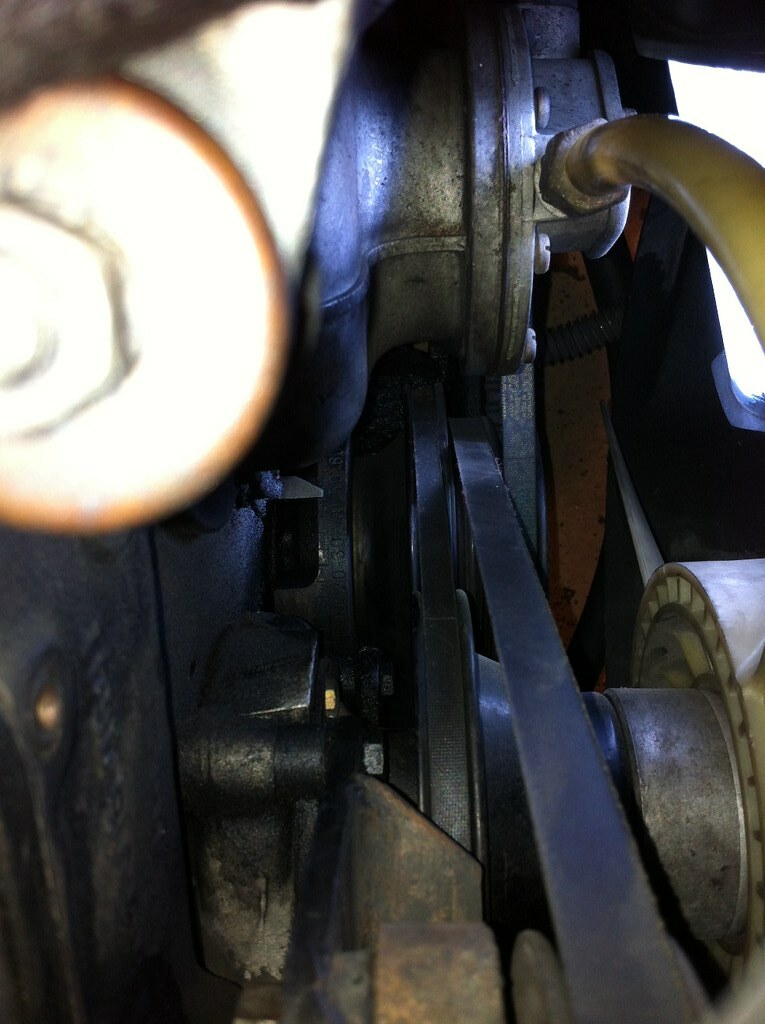 2. Set the IP cam two teeth before start of delivery as per FSM. 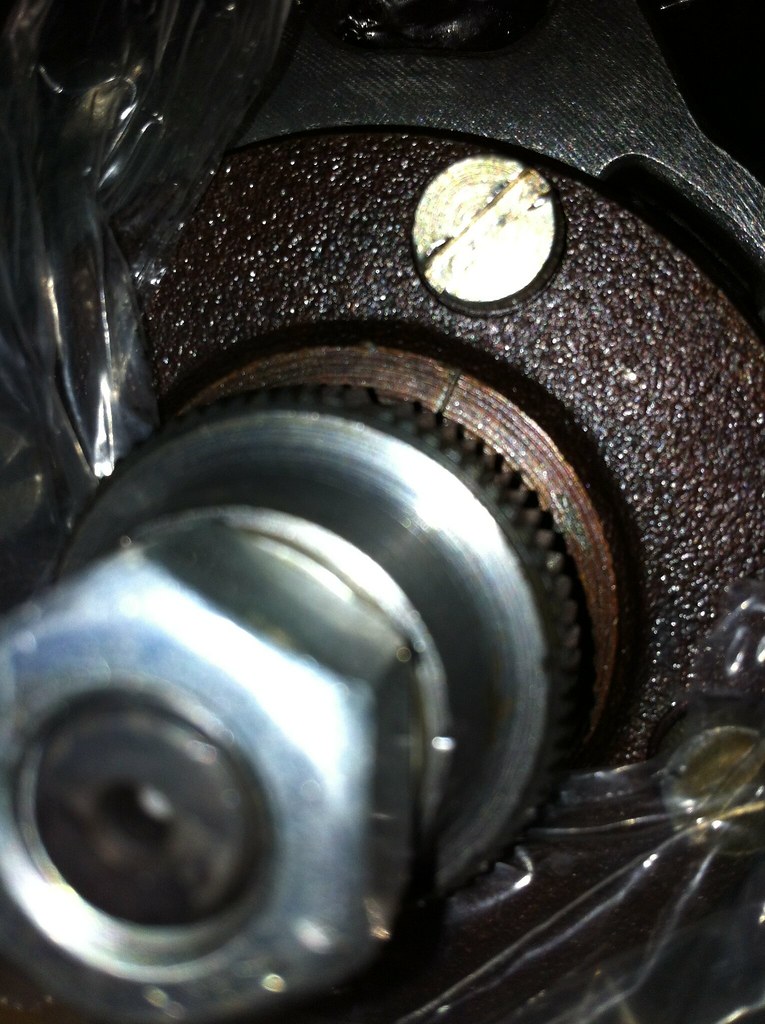 3. Open oil drain plug on the left side of the IP. Add about 8 ounces of motor oil or until it begins to flow from the plug, then tighten the drain. I figure it's easier to do this now rather than once it's back in the engine.  4. Install coupling on the IP. There was no key on my OM616 so it didn't really matter how it slid on. Your model may vary, however. 5. Install the mounting gasket and carefully slide the IP into position on it's 3 mounting studs. Try to center the IP on the bolts to ensure the most accurate spline to spline alignment with the engine. 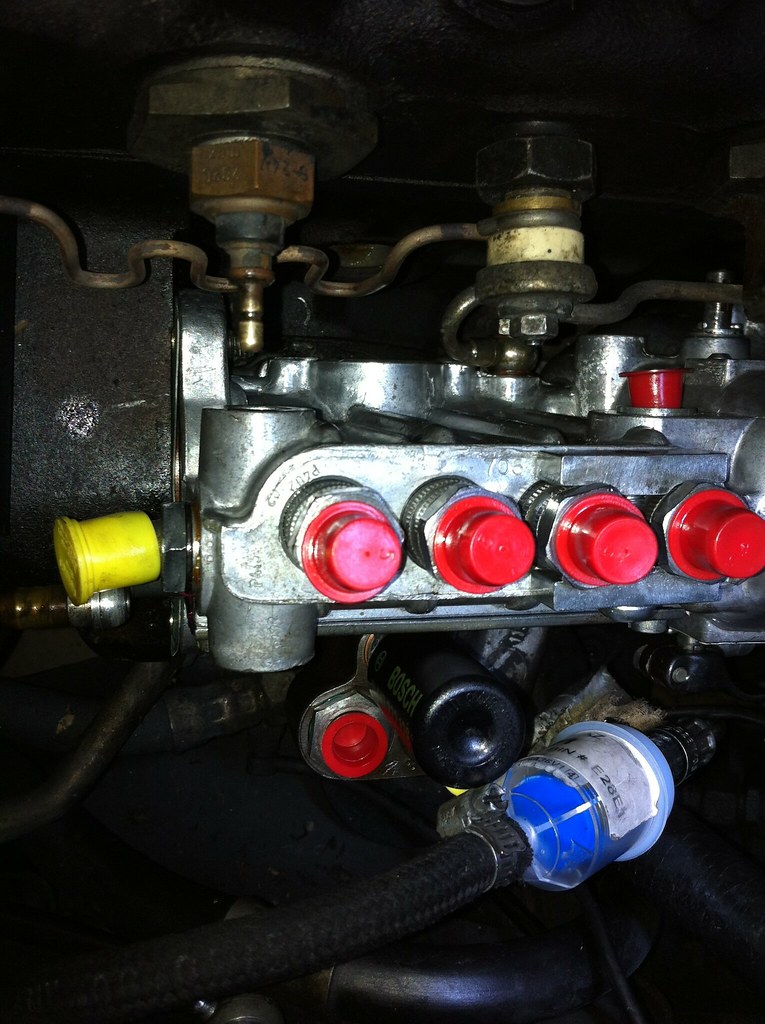 6. Hand tighten the 3 mounting nuts and reattach the rear bracket to the engine block. This asssumes that you undid the entire bracket when you removed the IP as opposed to simply removing the rear mounting nut at the governor. Regardless, you might want to loosen this rear mounting nut while it's still on your workbench as it's easier to get to. The front two nuts are obvious. The bottom one...not such much. The rear one can be found by feel later or by looking from underneath. All are 13mm. 7. Reattach all 4 fuel clear fuel lines. You will probably have to remove the heater hose coming from the cylinder head. Of course, if you removed the IP yourself you probably already found things a bit easier if it were out of the way. 8. The procedure also calls for the run/stop lever to be in the "run" position, or about 4:00. You do not necessarily have to reattach the gorilla knob at this point as this lever is spring loaded by default to maintain the run position. 9. Reattach tickler arm. If you didn't play around with it while it was off, you shouldn't have anything to worry about. If you did shorten or lengthen it, well...there's an entire section of the FSM devoted to getting it back to the proper length. Good luck. 10. Open the throttle and keep it secured in the full open position. I used a zip tie to hold the linkage in place. 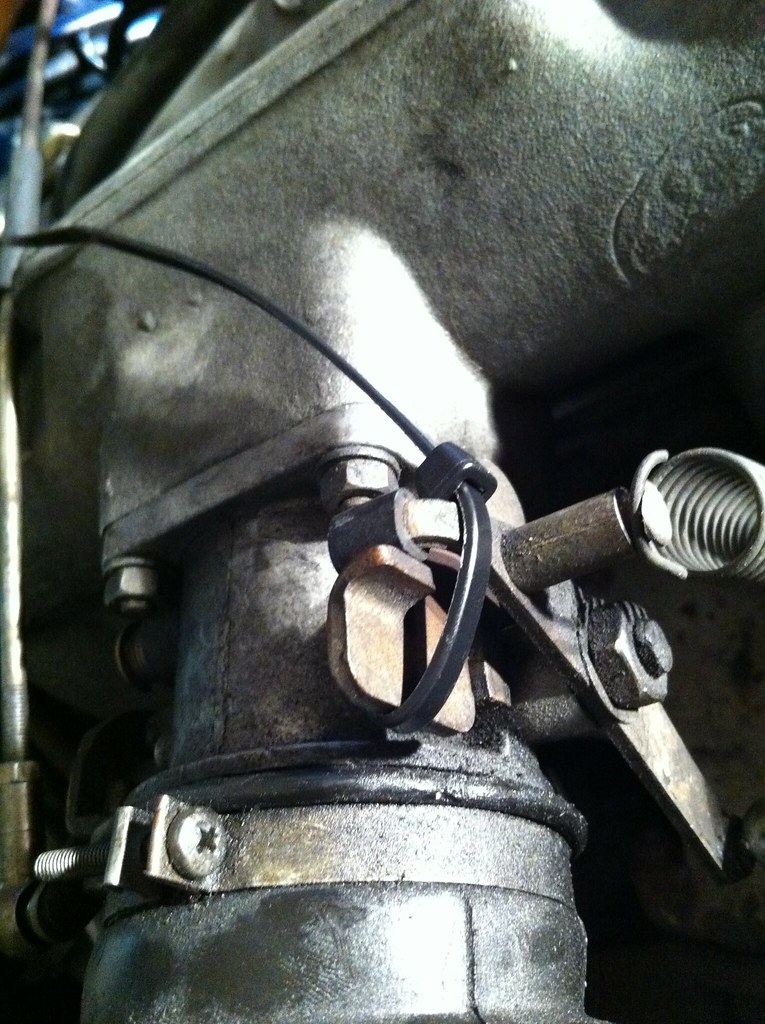 11. Do not reattach the plastic vacuum line to the the pneumatic governor yet. It needs to be left off for the drip timing procedure. 12. Rotate the crank to the 24 BTC position...21 degrees from where you are now. The FSM says that 23-27 degree range is ok. Again, rotate the crank in the *clockwise* direction to get there! 13. Remove #1 delivery element. Carefully remove the spring and then the valve inside. Again, this might be easier to do while on the bench. Maintain cleanliness!! Here's mine in a zip lock bag. 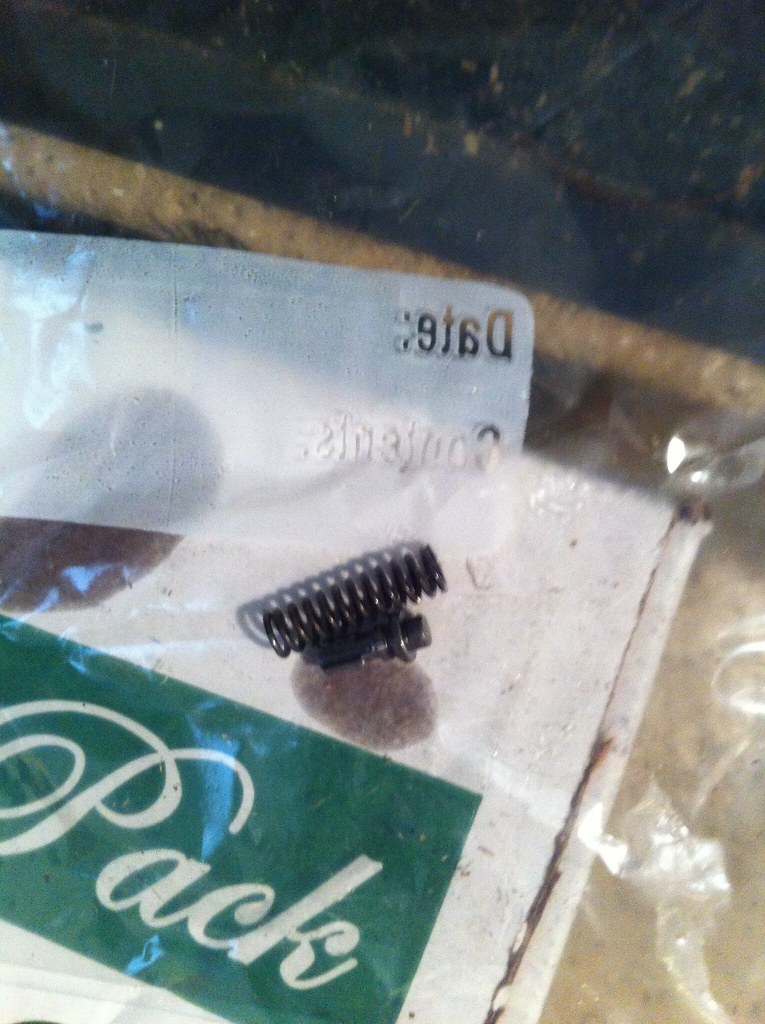 14. Tighten the delivery valve carrier to 35 NM and attach the drip tube.  15. Begin working the hand pump with regular and steady pressure. Since the fuel lines are empty, it might take a few (dozen) strokes to fill up. If no fuel comes from the drip tube, don't panic! You should be incredibly close to, if not right at, the beginning of delivery. Shift the IP in either direction until you do have fuel. 16. Keep pumping the hand pump while pivoting the IP towards or away from the block until one drop per second is achieved. I like to retard (away from the block) and then gradually advance (towards). This is begin of delivery and marks the spot where your timing should be exact. Youtube video. http://www.youtube.com/watch?v=neukRJ4olz0 17. Once found, mark the IP housing and the engine block so that you know where it is should it become misaligned later. 18. Start tightening up the 3 front mounting nuts. The one on the very bottom is difficult to get to. Some people will recommend using a 90 degree wrench, others will get to it from the wheel well. I use a combination of a long 1/4" extension, socket, and swivel in conjuction with an inspection mirror and come from the firewall. Once it's mated with the nut, attach rachet and tighten. Don't forget the rear nut at the bracket. You might have to get to it from underneath, but it's possible to reach it from the firewall side as well.  You can find additional pictures from the timing how to in the Peach Parts Wiki: http://www.peachparts.com/Wikka/OM615OM616InjPumpTiming Note that you may or may not have the same style of injection pump, but it should give you an idea of where the studs/nuts/bolts are. Here's a swivel stuffed with papertowel. The idea is use a small amount of tape to prevent the swivel from bending easily when it bumps into anything (and it will!). The towel is to wedge the nut in place and prevent you from dropping it a few dozen times (assuming that it falls through to the ground to begin with). 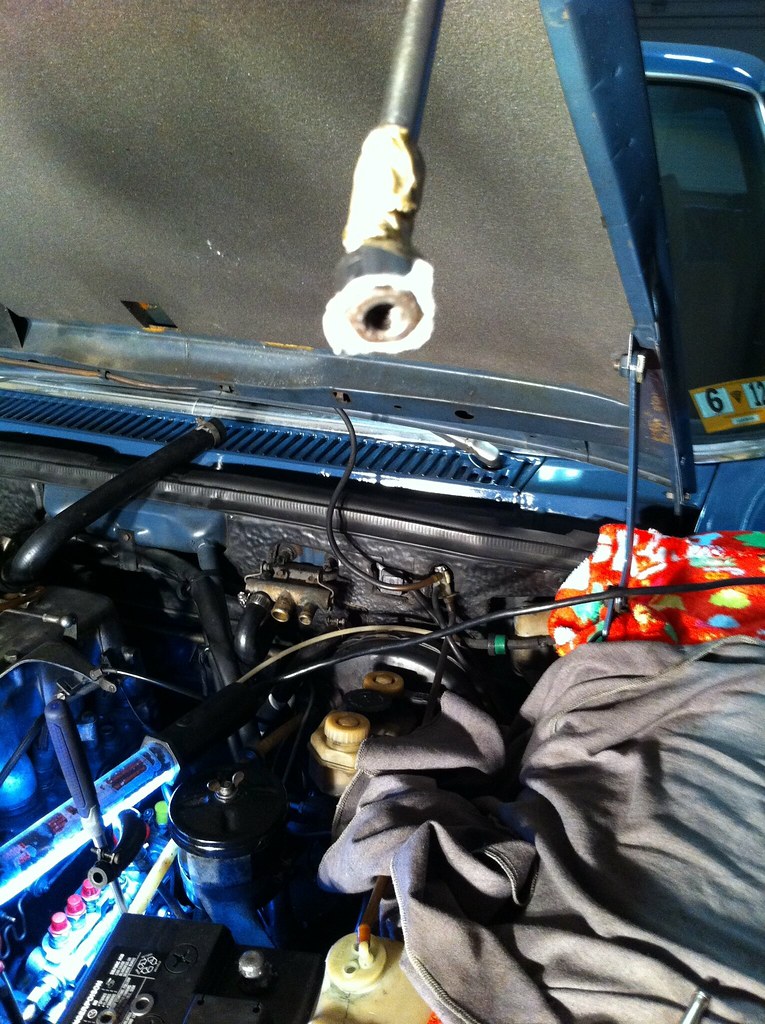 19. Double check that you still have one drip per second. I found that tightening might cause it to shift slightly into the delivery stage. After 2-3 rounds, of going back and forth between tigthening and double checking/readjusting, I gave up... 20. Reattach any hoses or glow plug bars that you may have removed to gain better access. 21. Remove the drip tube and reinstall the delivery valve, spring, and element. You might also want to include a new washer. Tighten in sequence to 30 nm - 30 nm- then to 35 nm. 22. Install fuel injector hard lines. Note that you may have to bend the lines to get them into their new positions. 23. Install vacuum line at the pneumatic governor. 24. Remove the zip tie from the throttle linkage. 25. Reattach gorilla knob to the run/stop lever. Ensure that you have full motion, especially in the stop direction should you have to kill the engine. 26. Bleed the fuel lines and ensure that you have no leaks. 27. Have someone standing by the emergency shut off or ready to disconnect the fuel lines. I understand that bad things can happen during an IP rebuild or when installing an unknown used one. 28. Glow and start. 29. Bleed air from the fuel system as needed. 30. Enjoy? Feel free to add your feeback and any specs that pertain to your chasis/engine.
__________________
1974 240D "Boldie" 170K.- New timing chain/freshly rebuilt IP/replaced valve seals/injectors/upgraded stereo/new Bilsteins with Yokohamas/fresh paint and rocker panels plus lots of welds. Last edited by bipolardave; 01-28-2012 at 07:23 AM. 
|
|
#2
01-28-2012, 08:44 AM
|
|||
|
|||
|
Good write-up.
re: 10 There is no need to keep the throttle open, it is not used for timing. It is necessary for a compression reading. re: 18 Removal of the front wheel can help to get to the lower bolt. Re: 21 The copper washer needs to be new and cannot be reused. It is a special thin washer, don't use a generic one, but the one from a diesel service station or the MB dealer. You also might need a rubber O ring. The delivery valve locking device needs to be put back too. Re: 22 Bend only with your hands, not with a tool, it can lead to a break in the line. Re: 28 & 29 Better to bleed first and then try to start.
|
|
#4
01-28-2012, 01:00 PM
|
|||
|
|||
|
Quote:
__________________
1974 240D "Boldie" 170K.- New timing chain/freshly rebuilt IP/replaced valve seals/injectors/upgraded stereo/new Bilsteins with Yokohamas/fresh paint and rocker panels plus lots of welds.
|
 |
| Bookmarks |
|
|


 Linear Mode


