

|
|
|
|
|
|
#1
 07-12-2014, 02:53 AM
|
||||
|
||||
|
w123 Outside Air Cabin Filter addition
I've meaning to do this project ever since I pulled my HVAC box, took it apart and found 30 years of nasty.
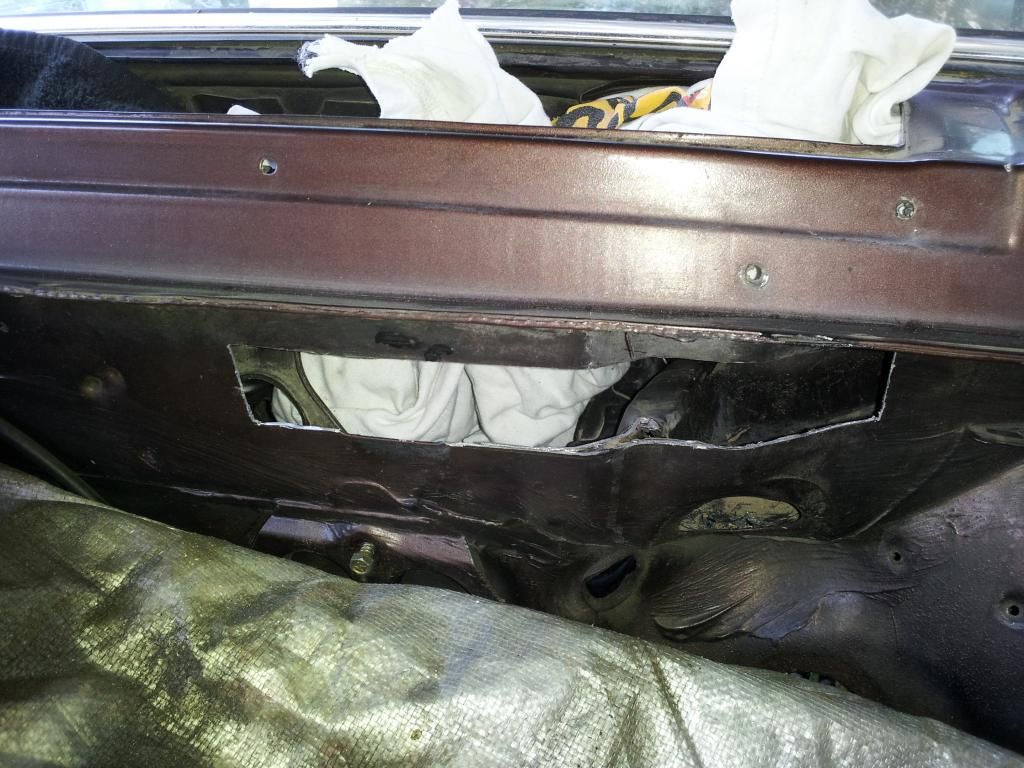
Just astounded we were possibly breathing this crap! Evaporator  HVAC box Outside Air Inlet  HVAC box Outside Air Duct  Heater Core  To prevent this from happening again, is to add in cabin filters to the system. I will eventually get around to having both inside air and outside air cabin filters. But for this thread, the focus is on the outside fresh air side. I had several thoughts on how to go about doing this including this.. Everyone rebuilding their A/C system should clean out their HVAC assembly box! Cutting a slot into the firewall for easy access to the cabin filter was another idea. I agonized over this thought because I really didn't want to cut any holes, but in the end, it was the best choice. My choice of filter is the readily available 2004-2014 Ford Mustang cabin filter. It's measurements are 7 inches x 8 inches. I thought it will fit fine with the narrow, mostly 7 inch depth cowling. 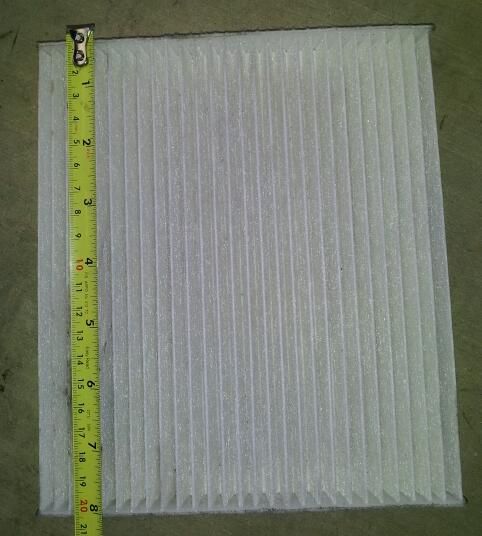 Here is the area I will be working on. Eight inches across for the filter is what is needed. 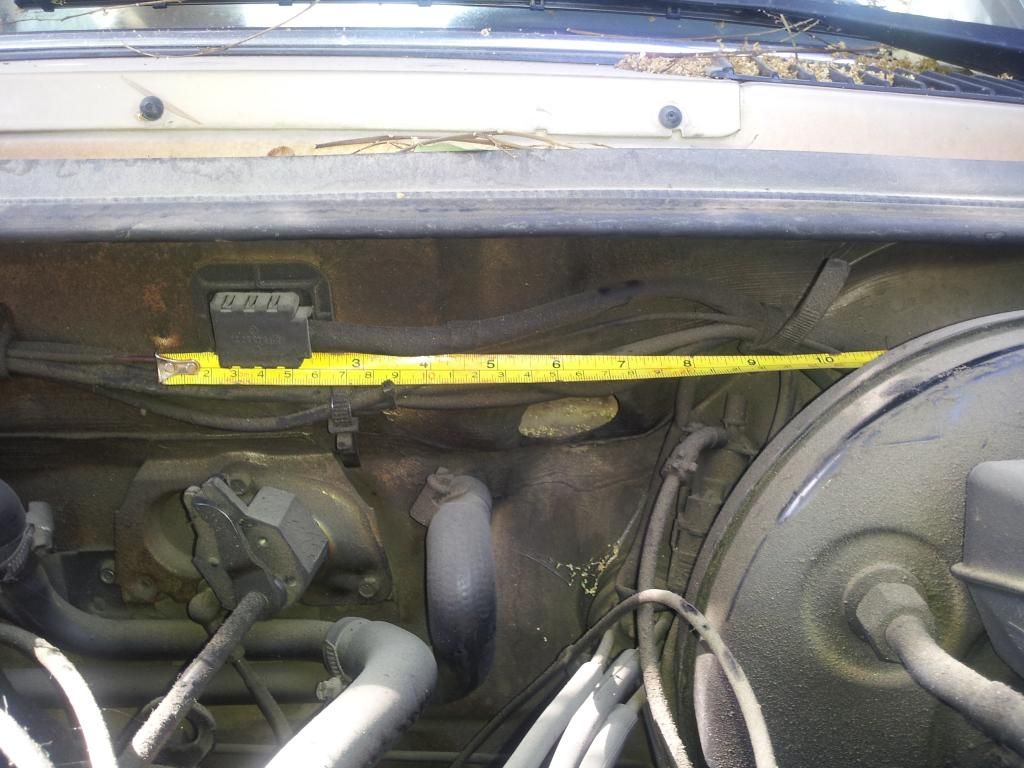 Inside the narrow cowling with the center outer cover, windshield wiper motor and arms removed.   Taped an outline for the new slot. 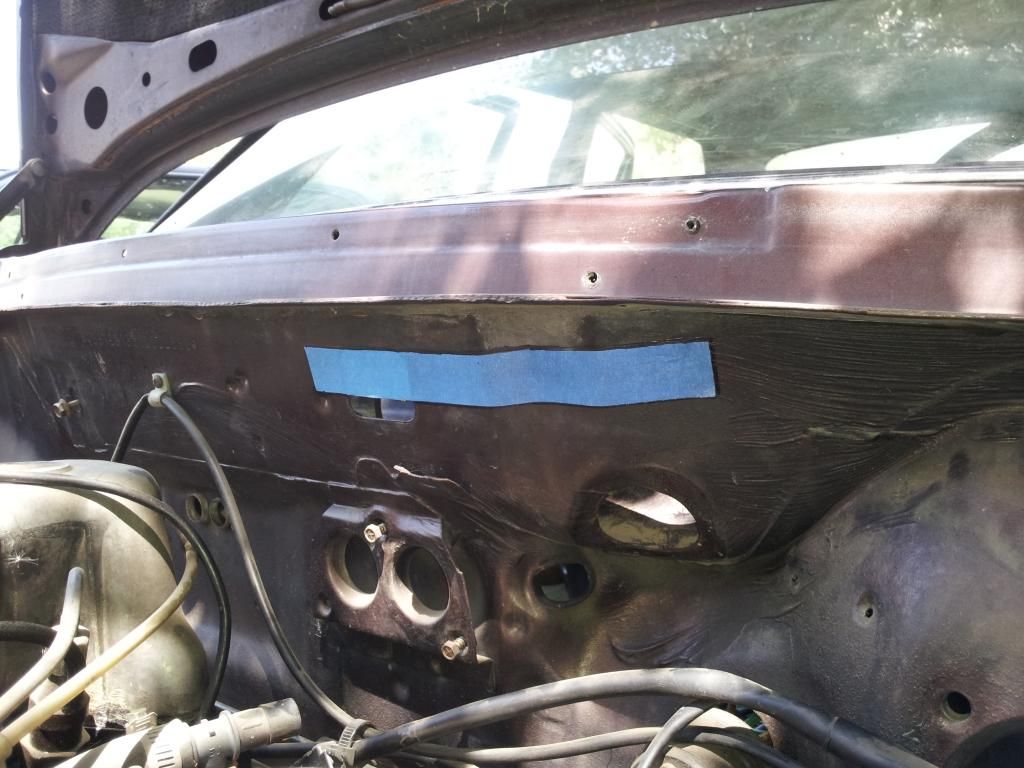 Oh my! What have I done! The cutting has begun, no turning back now!?!! 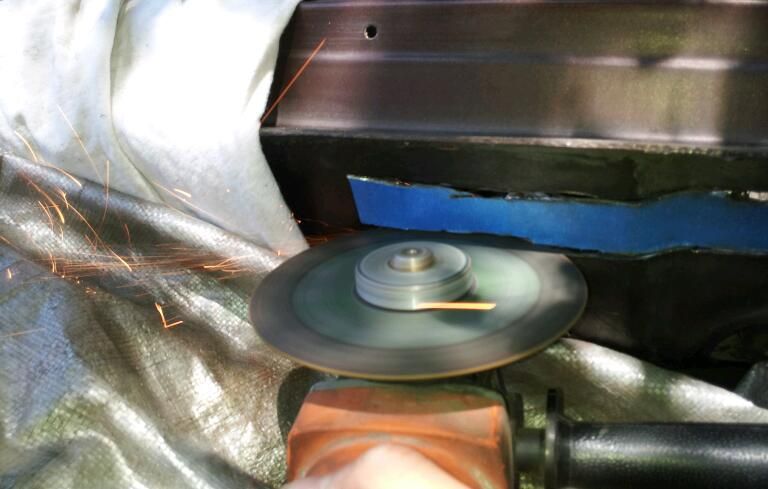  .
__________________
1983 123.133 California - GreaseCar Veg System 

|
|
#2
07-12-2014, 02:54 AM
|
||||
|
||||
|
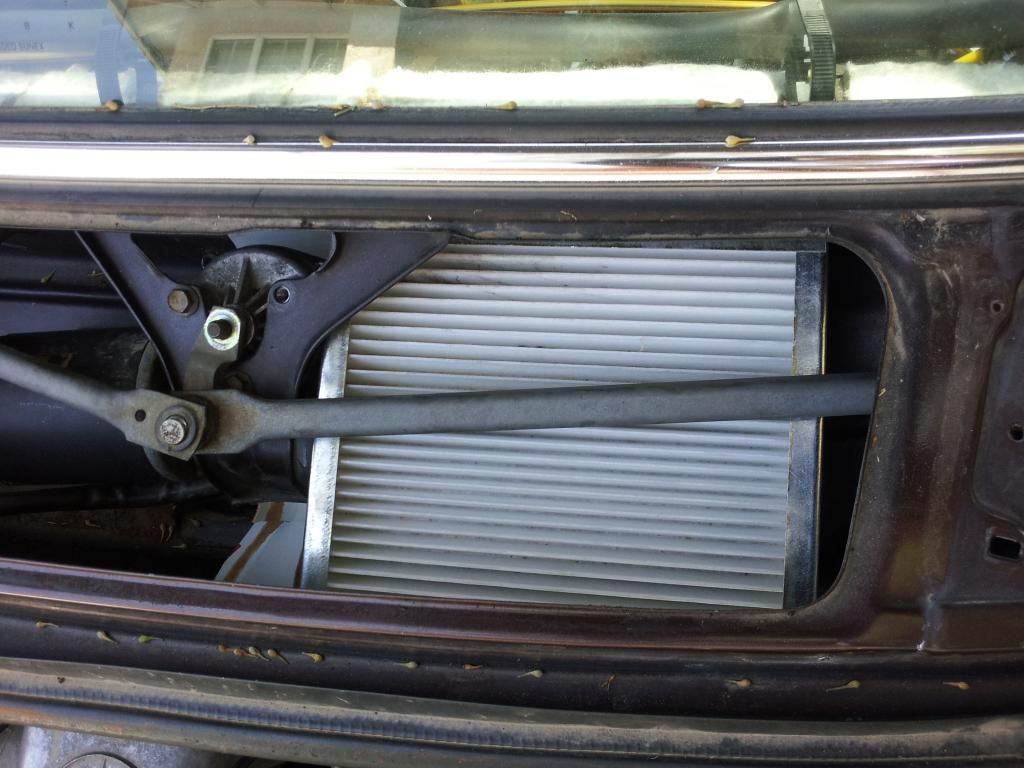
Rough opening.
 Cabin Filter test fitted through the new slot. The left corner of the cabin filter hangs out of the firewall. A new molded door will cover the filter on the finished product. 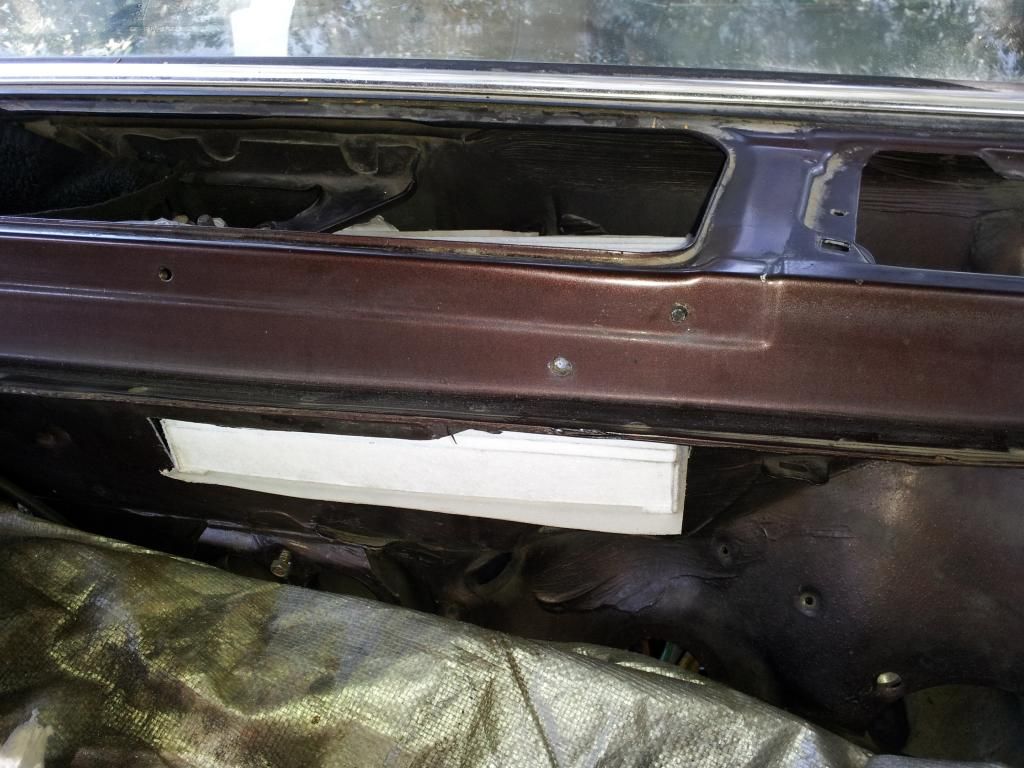 Shot of the cabin filter through the cowling vents. 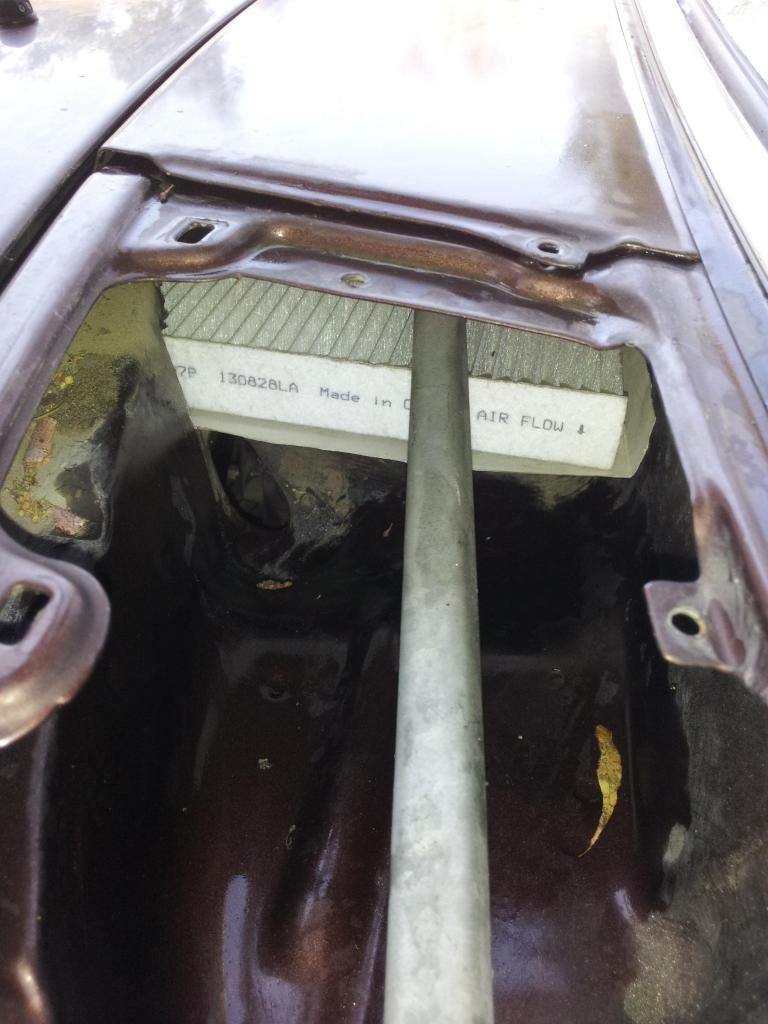 Shot of the cabin filter into the cowling. Looks pretty good to me so far. 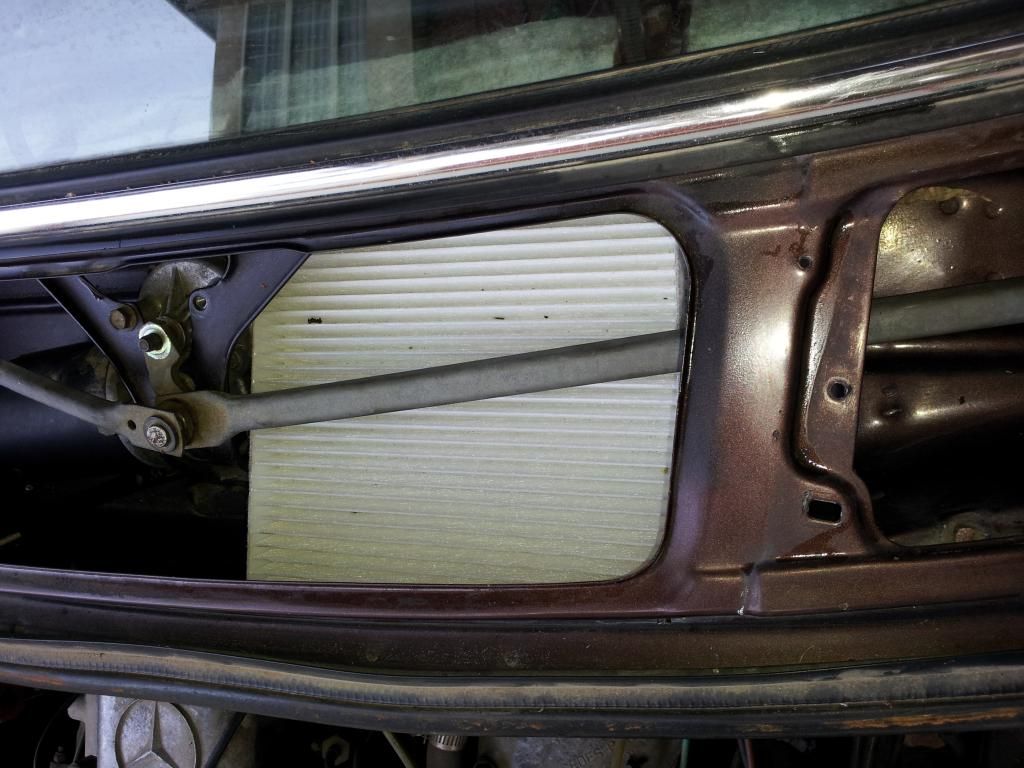 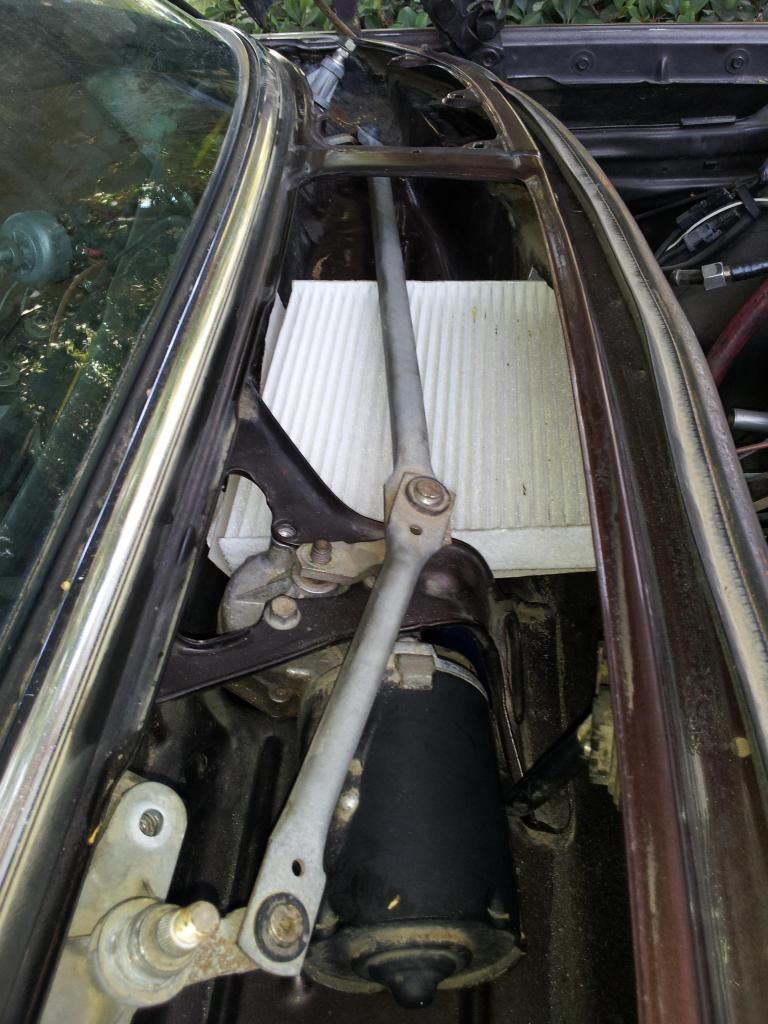 The next step is to fabricate the filter base, filter duct and a firewall cover. Not sure which material I will be using for the base and duct. It might be fiberglass or sheet metal. Overall I think I am satisfied with the fit and will continue on this path. I will make updates to the thread when I make progress.
__________________
1983 123.133 California - GreaseCar Veg System
|
|
#5
07-13-2014, 12:07 PM
|
||||
|
||||
|
Quote:
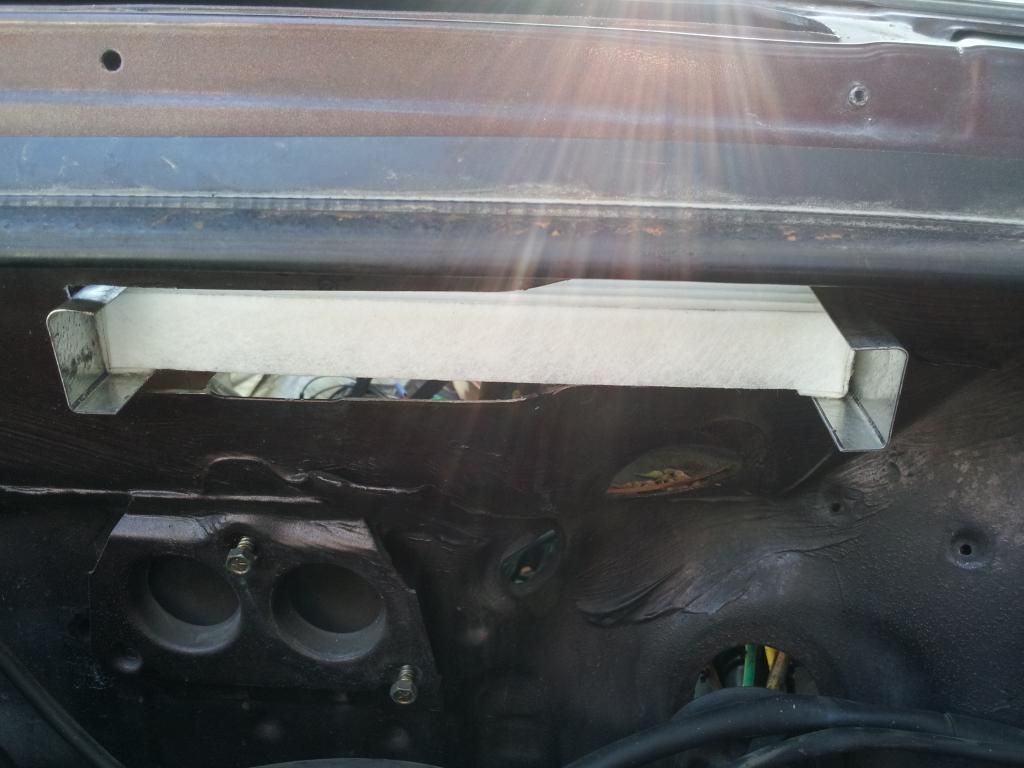
The issue with the w123 is the windshield wiper motor is in the way of the inlet to the HVAC box. The windshield wiper motor hovers over about 25% of the inlet hole, so placement of the filter directly above the inlet is impossible if you are keeping the original wiper motor. The final filter position is placed offset, and leads to a flow issue. With the new duct narrowing on the right side of the inlet under the wiper motor, it will loose air volume. So to gain volume back, the left side has to be free flowing. To do this, I have to remove the left cowling water dam. The new duct will be the new water dam, but the dam will be moved over a few inches because the filter is wider. Here are pics with more gut wrenching surgery... Drilled out the spot welds and wrangled the water dam out of the cowling. 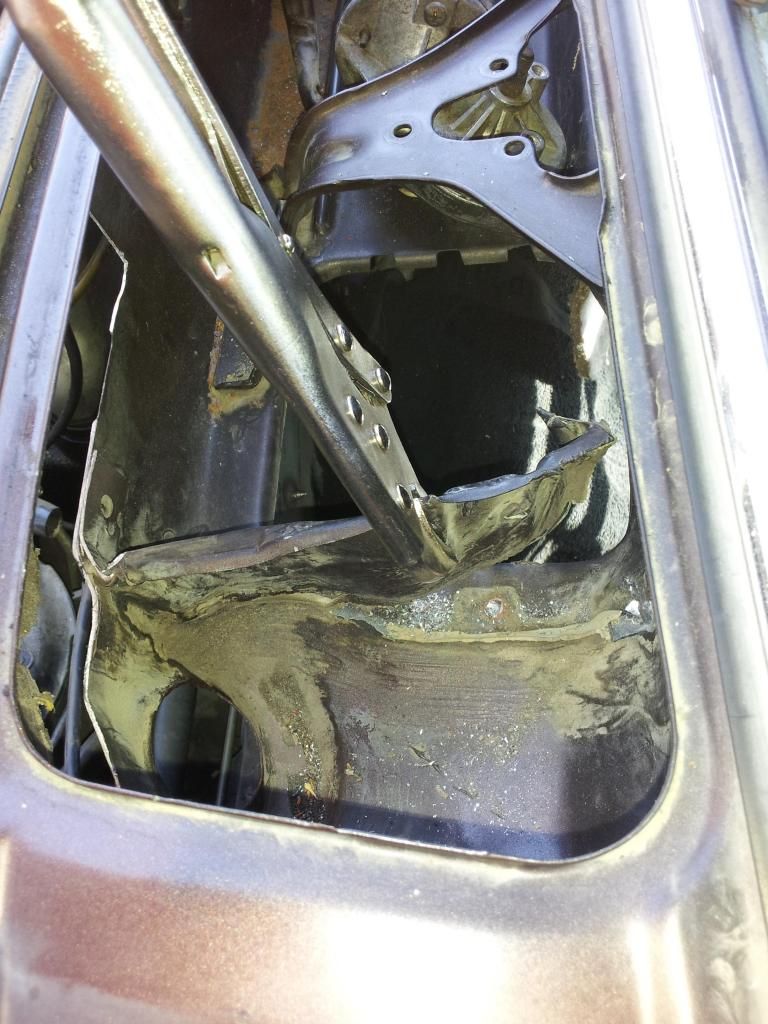 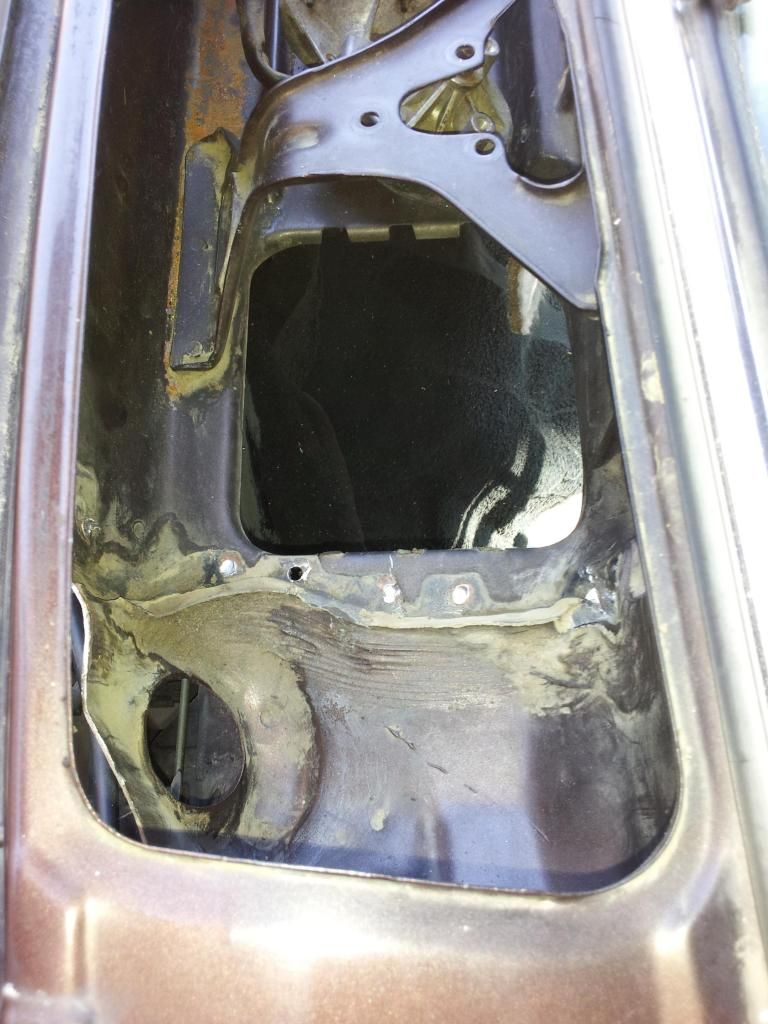 A bit more breathing room under the filter now. 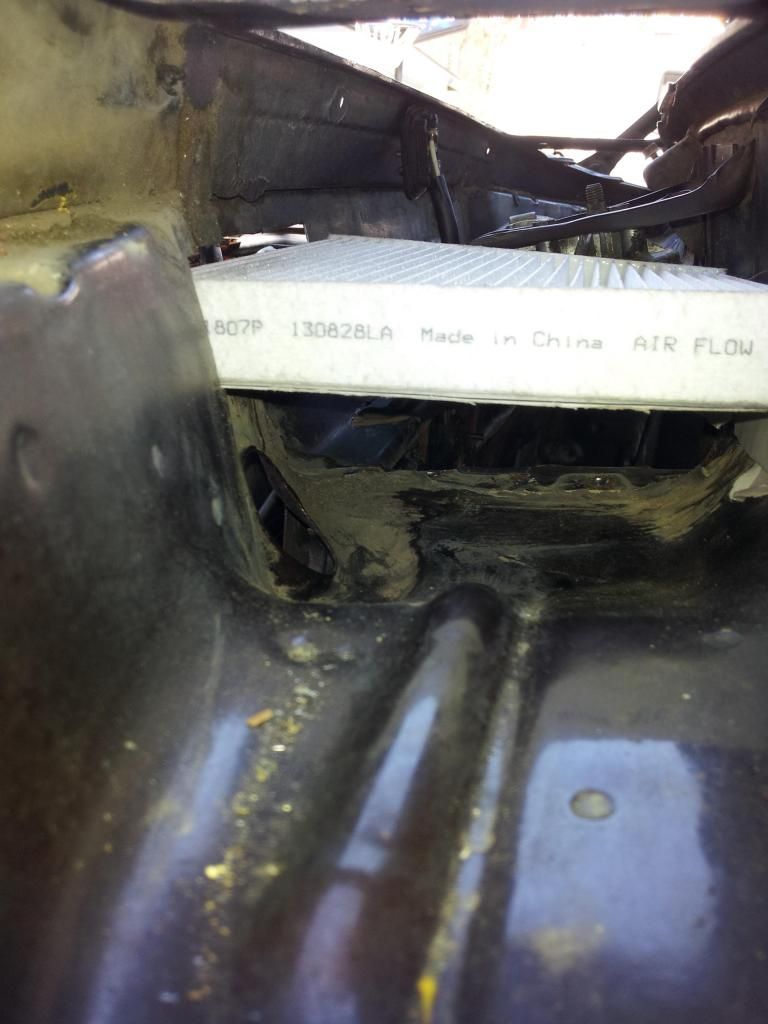
__________________
1983 123.133 California - GreaseCar Veg System
|
|
#6
07-13-2014, 12:09 PM
|
||||
|
||||
|
Quote:
.
__________________
1983 123.133 California - GreaseCar Veg System
|
|
#7
07-13-2014, 05:22 PM
|
||||
|
||||
|
I am following this as well. You might think about making patterns for all the metal pieces you will make, and offer them for a small fee so others don't have to "reinvent the wheel" as it were......Rich
__________________
 All Diesel Fleet 1985 R107 300SLD TURBODIESEL 2005 E320 CDI (daily) LOTS of parts for sale! EGR block kit http://www.peachparts.com/shopforum/diesel-discussion/355250-sale-egr-delete-block-off-plate-kit.html 1985 CA emissions 617 owners- You Need This! Sanden style A/C Compressor Mounting Kit for your 616/ 617 For Sale + Install Inst. Sanden Instalation Guide (post 11): http://www.peachparts.com/shopforum/diesel-discussion/367883-sanden-retrofit-installation-guide.html
|
|
#9
07-15-2014, 03:38 PM
|
||||
|
||||
|
Quote:
Quote:
__________________
1983 123.133 California - GreaseCar Veg System
|
|
#10
07-23-2014, 04:01 PM
|
||||
|
||||
|
I decided I will be using sheet metal to fabricate the filter frame, duct and firewall cover.
I am using 22 gauge sheet metal. I think it will be sturdy enough to prevent any resonance and thin enough to easily manipulate. 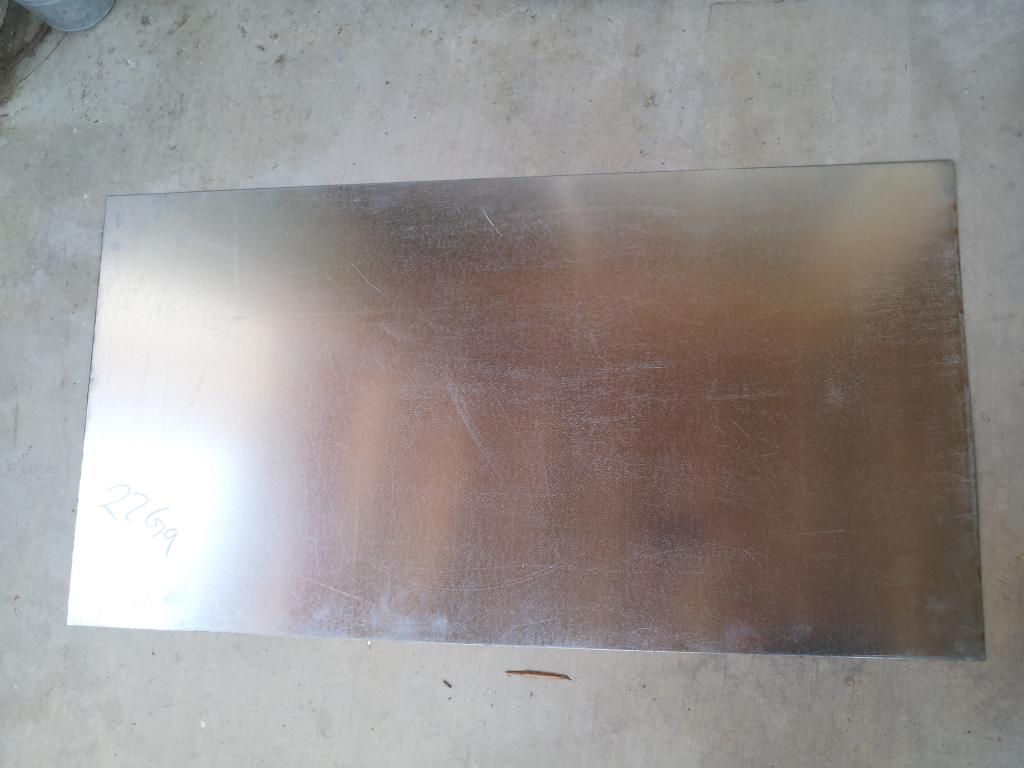 For this round, I focused on the filter frame. Fabricated a channel piece and then made a basic frame. 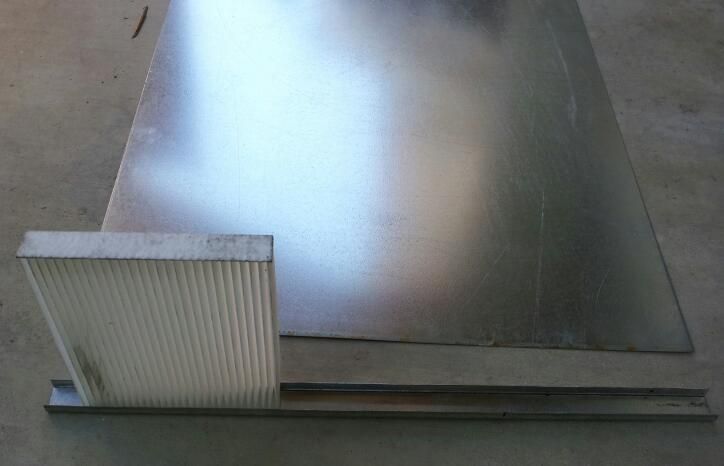  .
__________________
1983 123.133 California - GreaseCar Veg System
|
|
#11
07-23-2014, 04:01 PM
|
||||
|
||||
|
Test fitted into the cowling.
   Next I'll have to figure out how to deal with the firewall slot surround because of the unevenness and fabricate the ducting. .
__________________
1983 123.133 California - GreaseCar Veg System
|
|
#12
07-23-2014, 04:23 PM
|
||||
|
||||
|
Nice work! A lot of work also! As an alternative, is it possible to use RTV and glue a foam filter sheet (cut to size) that you can get from HVAC or vacuum cleaner filters to this opening?
Or build a frame that you glue into the opening and insert a foam filter?
__________________
85 300D turbo pristine w 157k when purchased 161K now 83 300 D turbo 297K runs great. SOLD! 83 240D 4 spd manual- parted out then junked
|
|
#13
07-23-2014, 04:57 PM
|
||||
|
||||
|
Quote:
But I wanted the ease of future filter replacements. Which means.. 1st open the cover 2nd pull the old filter and insert the new filter 3rd close the cover The issue with this idea is that you will have to go through the hoops of removing the cowling cover for access to install a new filter. This mean you have to.. 1st remove the windshield wipers, 2nd remove the wiper linkage brittle plastic covers, 3rd remove cowling vents without cracking them and their lock push pins, 4th remove the cowling cover the lock push pins without destroying them, 5th remove the passenger side wiper linkage lock nut, 6th remove the cowling 7th replace filter 8th reverse installation plus reseal the cowling if the seal has not been torn up. I hope this explains the work I am putting into this.  .
__________________
1983 123.133 California - GreaseCar Veg System
|
|
#14
07-24-2014, 08:43 PM
|
||||
|
||||
|
As I stated earlier in the thread, one of the problems is dealing with the unevenness or the waviness of the firewall at the filter slot. A new surround will fix that issue. Once I start attaching every piece, I will use urethane adhesive or some type of autobody glue to fill in the unseen gaps.
Cardboard template 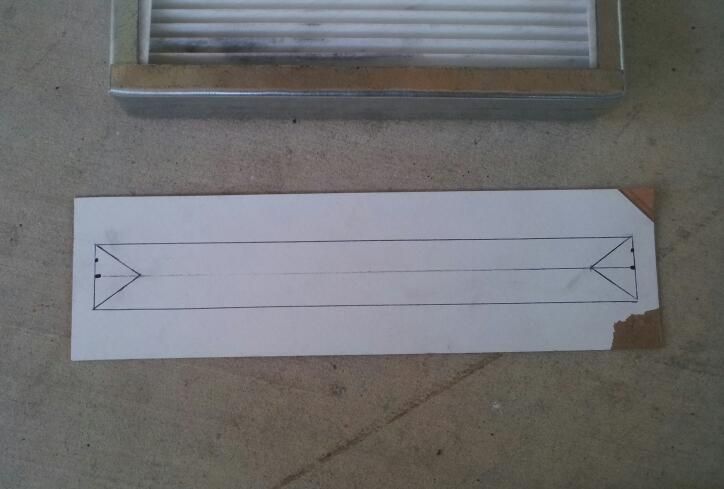 Transferred the pattern on the sheet metal and made first cuts. 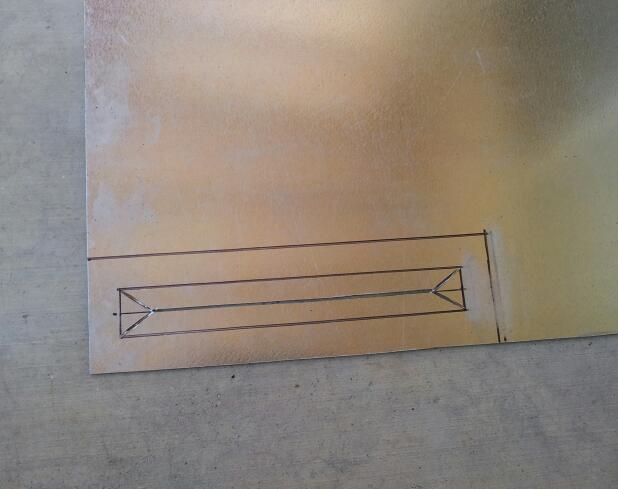 After some bending and forming, the new firewall slot surround. 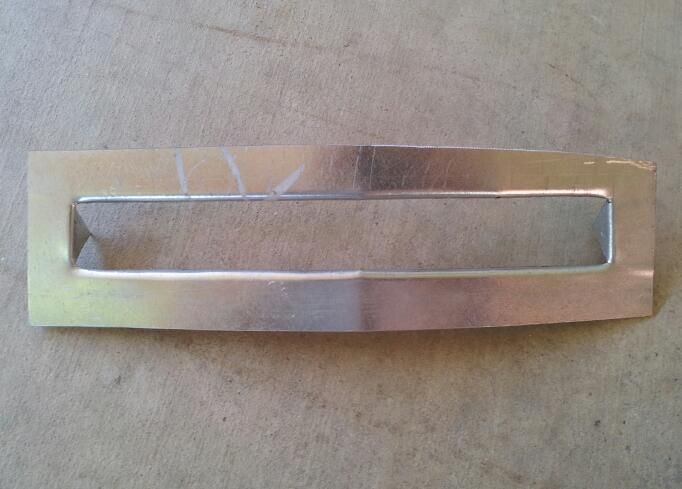  .
__________________
1983 123.133 California - GreaseCar Veg System
|
|
#15
07-24-2014, 08:44 PM
|
||||
|
||||
|
Surround attached to the filter frame.
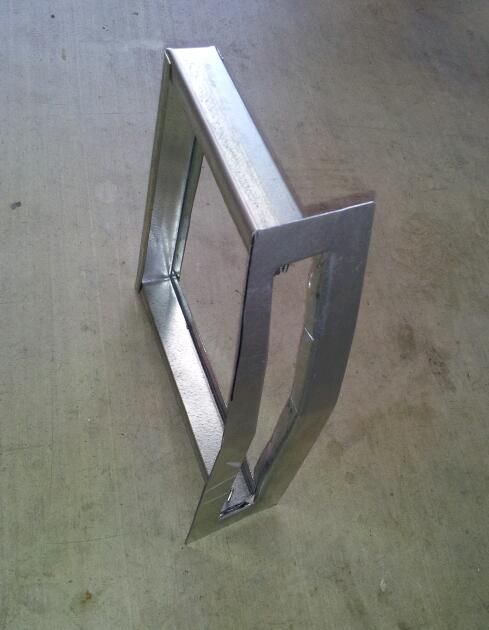 This pic shows the simple bend that will cover the unevenness of the firewall.  Which will make fabricating a simple door easier.  Next is to fabricate the ducting and fabricate the filter slot door.
__________________
1983 123.133 California - GreaseCar Veg System
|
 |
| Bookmarks |
|
|


 Linear Mode


