

|
|
|
|
|
|
#46
 04-10-2015, 04:07 AM
|
||||
|
||||
|
FYI
Quote:
This needs to be done every 15000 miles or twelve months. Excessive delay between adjustment = carbon build up on the valve face and seat = may requires several adjustments within a day or two, with higher than average RPM running between to break up the face/seat carbon, repeated until the adjustment becomes stable. Once you have been through this = catching up maintenance = you will not allow it to happen again.  Here is all the data you should need. Valve adjustment OM615, 616, 617 FYI. Roy .
__________________
ASE Master Mechanic asemastermechanic@juno.com Prototype R&D/testing: Thermal & Aerodynamic System Engineering (TASE) Senior vehicle instrumentation technician. Noise Vibration and Harshness (NVH). Dynamometer. Heat exchanger durability. HV-A/C Climate Control. Vehicle build. Fleet Durability Technical Quality Auditor. Automotive Technical Writer 1985 300SD 1983 300D 1984 190D 2003 Volvo V70 2002 Honda Civic https://www.boldegoist.com/ 
|
|
#47
04-10-2015, 03:54 PM
|
||||
|
||||
|
Quote:
Especially on the homemade tools link!
__________________
1991 300E 124.030 103.983KE 722358 03 412178 207K 1979 240D 123.123 250K (Project car) 2000 Ford Ranger, 187K 2015 Dodge Ram 1500 EcoDiesel 37K
|
|
#48
04-10-2015, 04:04 PM
|
|||
|
|||
|
Quote:

__________________
|
|
#49
04-10-2015, 07:51 PM
|
||||
|
||||
|
Thanks, cooljjay, for the pix.
It was connected, so I disconnected the line, and tried to start again - no luck. Pushed the primer pump again, this time about 100 times, and finally heard the "squish, squish" noise. Tried to start again - same, no luck. The (brand new) battery is getting lower with all these starts, now reading 12.25 volts approx. For the fun of it, I tested the fuse strip on the firewall - nothing registered for volts. Tested the wires that connected to glow plug relay (in other words, took the relay out, and put the positive in each hole, neg to body of car) - nothing registered on the ohm meter. Tested each glow plug (neg to battery neg and pos to each gp screw) and got about 10V each. Switched to a spare glow plug relay, and tried to start again, but no luck. ------------------------------------------------------------------------ EDIT: was not all in vain - found a package of new ceramic fuses I needed for the 300E.
__________________
1991 300E 124.030 103.983KE 722358 03 412178 207K 1979 240D 123.123 250K (Project car) 2000 Ford Ranger, 187K 2015 Dodge Ram 1500 EcoDiesel 37K Last edited by mbzr4ever; 04-10-2015 at 08:19 PM.
|
|
#50
04-10-2015, 11:08 PM
|
|||
|
|||
|
I would move onto the valve adjustment and have the battery tested/charged.
You do know that your starter is designed to be cracked up to 60 secs I believe with out damage? You must let it cool between those long cranks. I say this as my 78 sometimes pops right off and other times I have to hold the key a bit and then give throttle after it catches.
__________________
|
|
#51
04-11-2015, 02:32 AM
|
||||
|
||||
|
Yeah, I was wary of stressing the starter too much - didn't go even close to 60 seconds.
It will take a week or so to get the parts/tools before I can attempt to adjust the valves. EDIT: Has anyone successfully used crowfoot wrenches (instead of buying the 14 mm offset wrenches)?
__________________
1991 300E 124.030 103.983KE 722358 03 412178 207K 1979 240D 123.123 250K (Project car) 2000 Ford Ranger, 187K 2015 Dodge Ram 1500 EcoDiesel 37K Last edited by mbzr4ever; 04-12-2015 at 05:00 PM.
|
|
#52
04-12-2015, 12:35 AM
|
|||
|
|||
|
Don't worry about stressing the starter. If it is going to fail it will no matter how hard you use it.
My 78 wouldn't start when I first go it put back together. I was cranking that thing for every out of frustration. It wouldn't start until I adjusted the valves after that I cranked that sucker till I heard it catch, I floored it and continued cranking until she was running on her own. The starter didn't need replacing until maybe 2 years ago. It was replaced because it was an original low power starter with age it just wouldn't turn the engine over fast enough in the cold thus killing the battery. I think to actually kill the starter you would need to hook the battery up wrong. It doesn't weigh like 50lbs for no reason!
__________________
|
|
#53
04-25-2015, 03:55 AM
|
||||
|
||||
|
Changed the primary fuel filter.
Had the battery charged again, and double checked each glow plug with a "light pen". Wanted to use the instructions here, but the negative on the ohm meter will not reach the battery negative terminal, if I am to test the glow plug relay harness under the steering wheel. Don't know what to do there.... Tried to start again, with the hose disconnected, as cooljjay's picture indicates. Found this wire to be suspect - but what does it do? I had it connected with a bullet (?) type connection, but is there something better I can replace it with? Also there is another similar connection next to it, black plastic, more towards the center. Purpose? EDIT: Discovered O'Reilley's has the compression testing equipment to loan out for free - after I already bought one online. They also have a fuel pressure testing kit which I may check out next, as well as an O2 sensor changing tools I could use for the 300E.
__________________
1991 300E 124.030 103.983KE 722358 03 412178 207K 1979 240D 123.123 250K (Project car) 2000 Ford Ranger, 187K 2015 Dodge Ram 1500 EcoDiesel 37K Last edited by mbzr4ever; 04-25-2015 at 04:19 AM.
|
|
#55
04-25-2015, 05:04 AM
|
||||
|
||||
|
Answer
Quote:
.
__________________
ASE Master Mechanic asemastermechanic@juno.com Prototype R&D/testing: Thermal & Aerodynamic System Engineering (TASE) Senior vehicle instrumentation technician. Noise Vibration and Harshness (NVH). Dynamometer. Heat exchanger durability. HV-A/C Climate Control. Vehicle build. Fleet Durability Technical Quality Auditor. Automotive Technical Writer 1985 300SD 1983 300D 1984 190D 2003 Volvo V70 2002 Honda Civic https://www.boldegoist.com/
|
|
#56
04-25-2015, 12:54 PM
|
||||
|
||||
|
Quote:
Quote:
Still have to think of a better way to connect securely.... EDIT: Couldn't find the exact connector, so I bought a 61 cent bullet piece to replace on the inside of the old connector. Will try later today to see if it works.
__________________
1991 300E 124.030 103.983KE 722358 03 412178 207K 1979 240D 123.123 250K (Project car) 2000 Ford Ranger, 187K 2015 Dodge Ram 1500 EcoDiesel 37K Last edited by mbzr4ever; 04-26-2015 at 06:38 PM.
|
|
#57
04-25-2015, 01:38 PM
|
|||
|
|||
|
Quote:
__________________
|
|
#58
04-26-2015, 06:39 PM
|
||||
|
||||
|
Quote:
Or is there a link to the parts catalog so I can see what it is supposed to look like? EDIT: Found some clues: 85 300D... what is this electrical connection?
__________________
1991 300E 124.030 103.983KE 722358 03 412178 207K 1979 240D 123.123 250K (Project car) 2000 Ford Ranger, 187K 2015 Dodge Ram 1500 EcoDiesel 37K Last edited by mbzr4ever; 04-26-2015 at 07:10 PM.
|
|
#60
04-26-2015, 08:11 PM
|
||||
|
||||
|
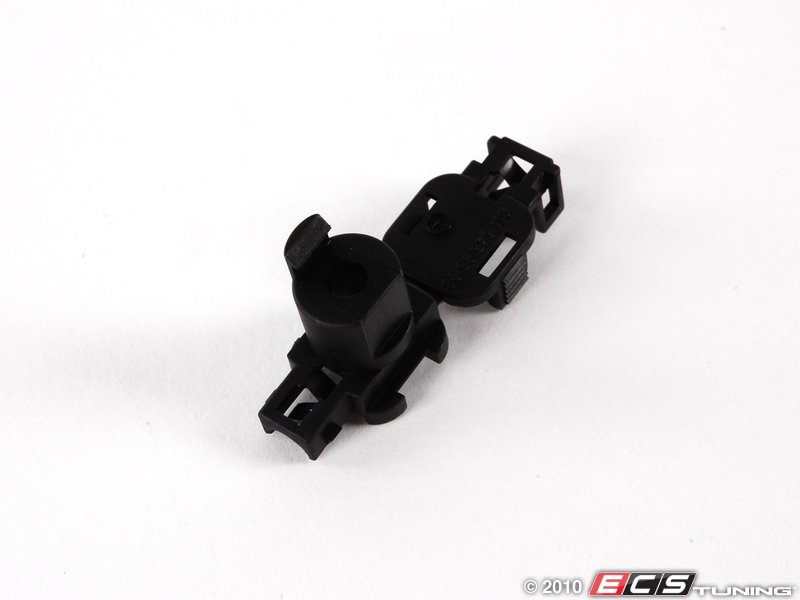
Thanks, coolljay, I believe 0015453726 is the metal part I need.
What is that black part underneath - a cover?
__________________
1991 300E 124.030 103.983KE 722358 03 412178 207K 1979 240D 123.123 250K (Project car) 2000 Ford Ranger, 187K 2015 Dodge Ram 1500 EcoDiesel 37K
|
 |
| Bookmarks |
|
|


 Linear Mode


