

|
|
|
|
|
|
#76
 08-26-2016, 08:37 PM
|
||||
|
||||
|
Quote:
Hopefully tomorrow once the heat shield is removed it will provide a better base to push against, if not I may need to get some sort of backing plate made up similar to above video on Vito. By combining both methods of bolt pushing plus hydraulic press it may shift it, unbelievable really when you think the shaft is only a couple of inchs long.
__________________
David 1996 Mercedes S124 E300TD - 129k - rolling restoration project - 1998 Mercedes W210 300TD - 118k (assimilated into above vehicle) 
|
|
#77
08-26-2016, 09:58 PM
|
|||
|
|||
|
The way you're going about it, you will end up with no hub, no upright, and no press. All you're doing is crushing those studs. The bearing won't budge until you remove the clip, and you can't do that while the hub is in place. Looking at this, I'd say it's a waste of a fine press. And now the question is whether any of the parts are salvageable. At this point, your backing plate is total toast, let's hope the upright and hub aren't bent.
Watch how they remove the hub in this video, starting at 4:12... https://www.youtube.com/watch?v=wKYL9_4mXRI Yes, it's a BMW, but the architecture is identical. Your hub will come out exactly the same way. It may be possible to do this on the press, but let's not get crazy. The hub isn't going to come out cleanly...it will take the inner bearing race with it. The only way I've ever found to separate the inner race from the hub is to carefully cut it away with a die grinder. Once the hub is out, you can release the snap ring and drive out the remainder of the bearing with your press. (Don't attempt to pull the bearing the way they do in the BMW video, it's too big and you have some rust making things interesting.)
|
|
#78
08-27-2016, 01:06 AM
|
||||
|
||||
|
Quote:
I don't think the heat shield is causing any trouble. So long as you are pushing against the part you show and have a good strong reaction block on the underside of the wheel carrier this should make a nasty cracking sound and come out. I guess the problem must be that your press is bending and then the "reaction bolts" are bending so that the hub touches those parts and that is enough to stop it from coming out. It is a shame you don't live closer - you could send it to me (!)
__________________
1992 W201 190E 1.8 171,000 km - Daily driver 1981 W123 300D ~ 100,000 miles / 160,000 km - project car stripped to the bone 1965 Land Rover Series 2a Station Wagon CIS recovery therapy! 1961 Volvo PV544 Bare metal rat rod-ish thing I'm here to chat about cars and to help others - I'm not here "to always be right" like an internet warrior  Don't leave that there - I'll take it to bits!
|
|
#79
08-27-2016, 07:46 AM
|
||||
|
||||
|
Cheers guys, here's a bit more detail on what I guessed might be happening.
With the heat shield off it becomes easier to find square locations for the five long bolts. Photo 1 shows the lip which runs most of the way around except for maybe 2/3 places. If you add in the thickness of the shield it pushes the bolt 'out' even more. 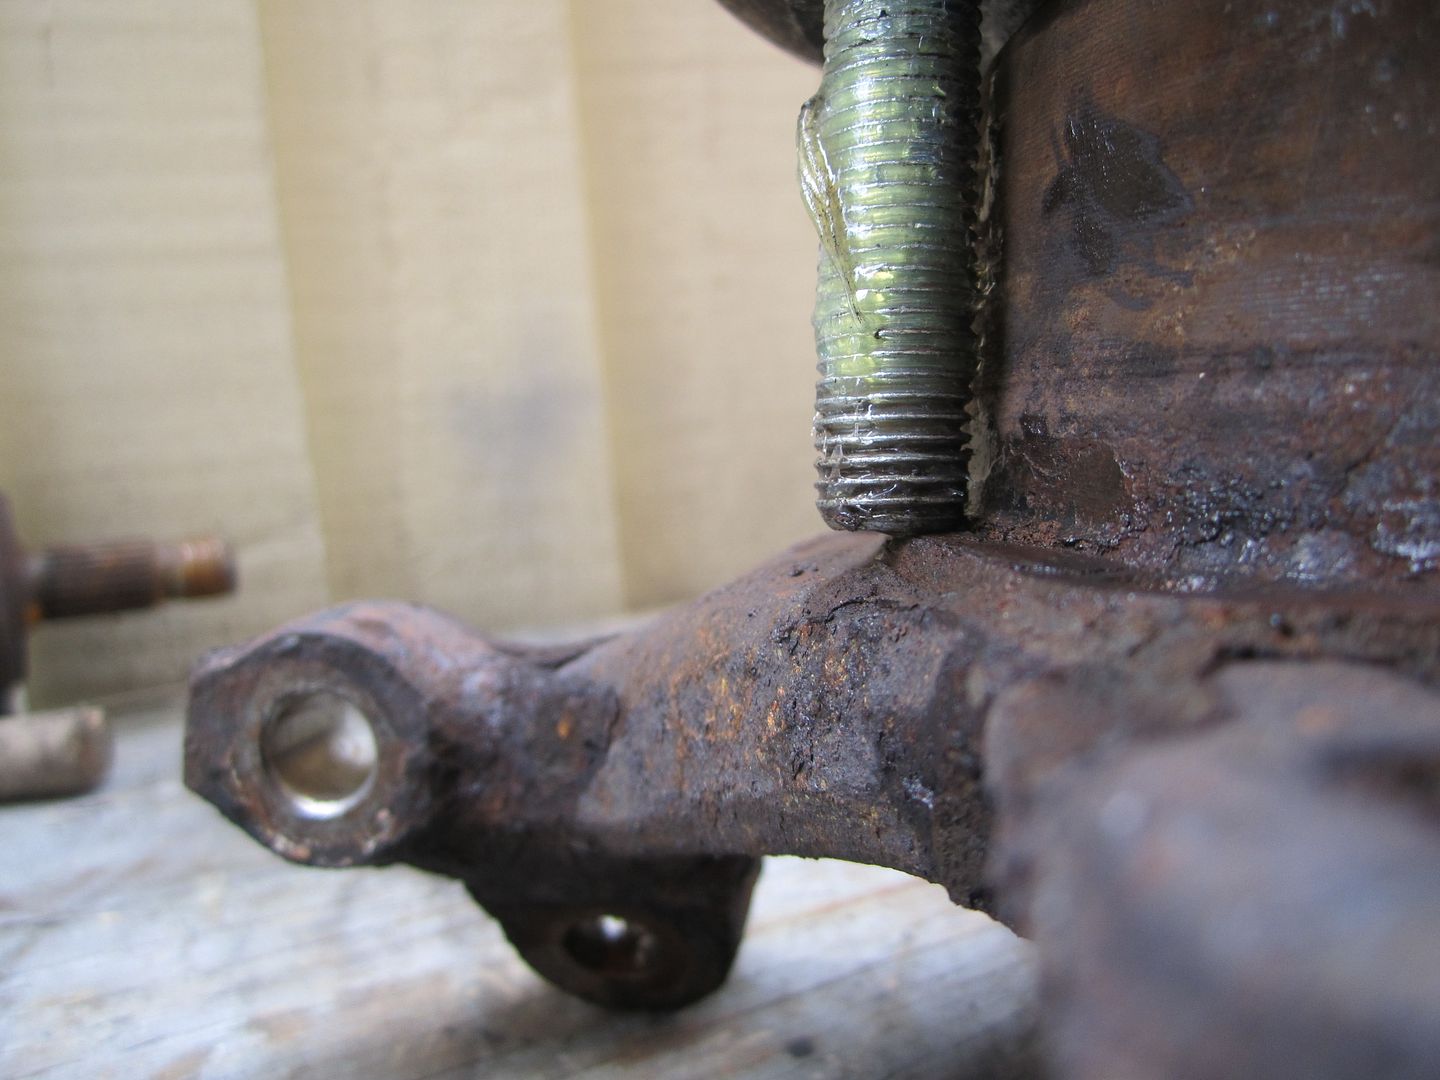 It really needs a backing plate which leads me (again) to address Frank's question. If you have been following the thread Frank you will know I purchased the largest bearing separator available here in the UK, at a reasonable price sub $100. As you can see from the next two photos it will not fit over the hub even at the narrowest point. 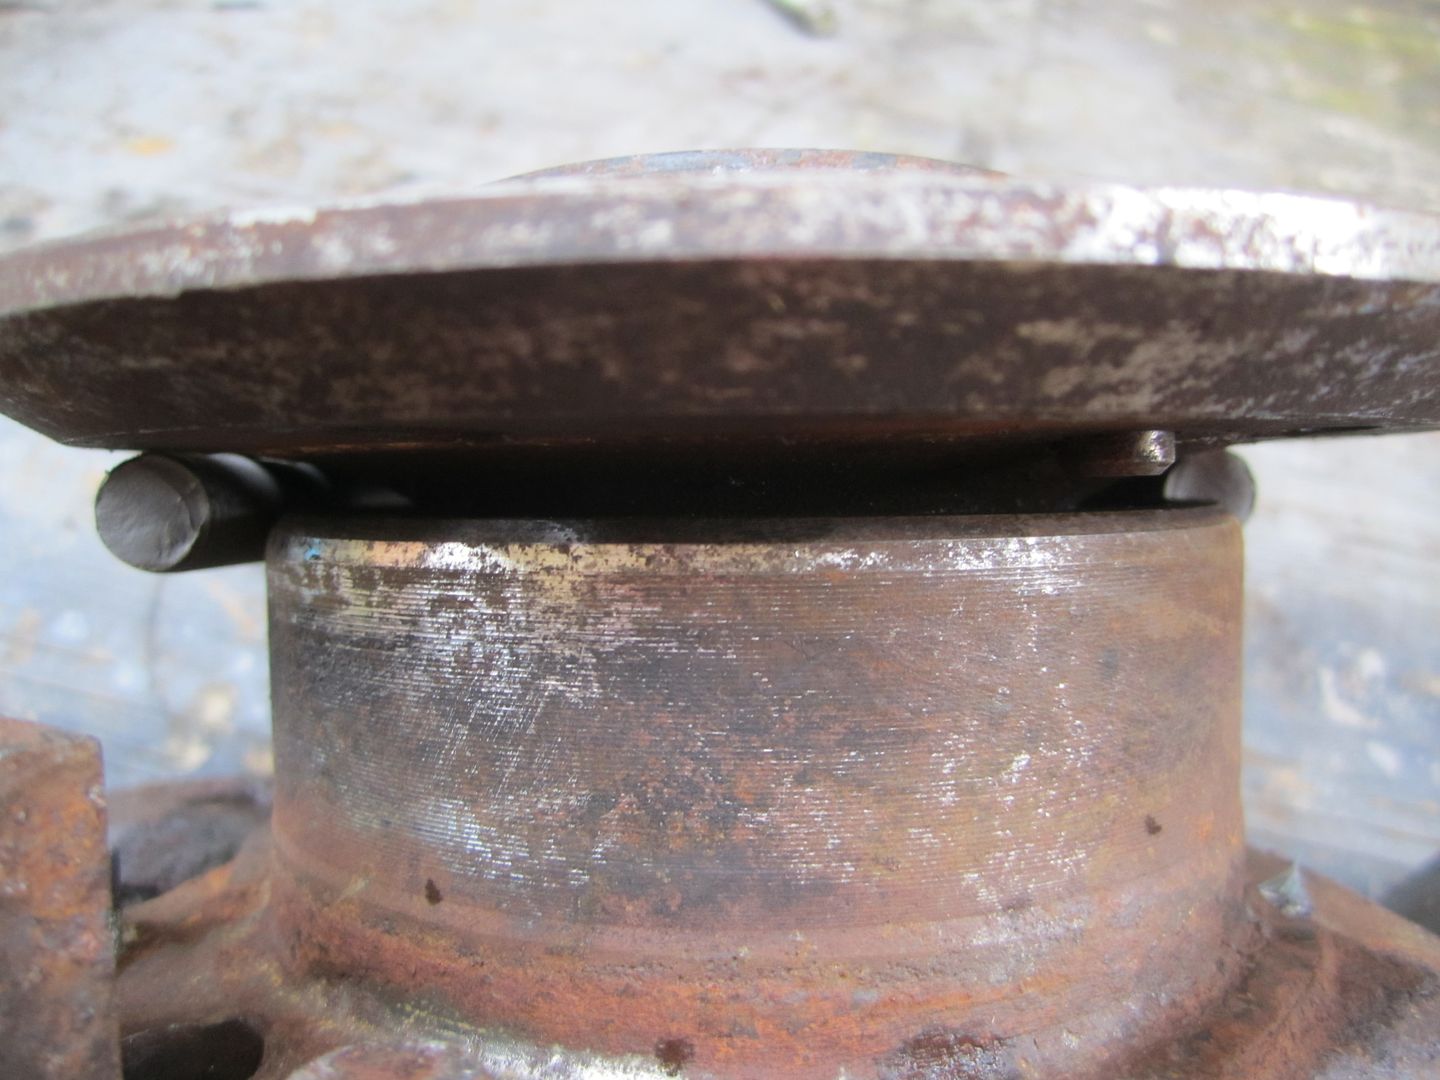 If I bend (something I have become quite good at) the bolts out the cap will not fit other end. 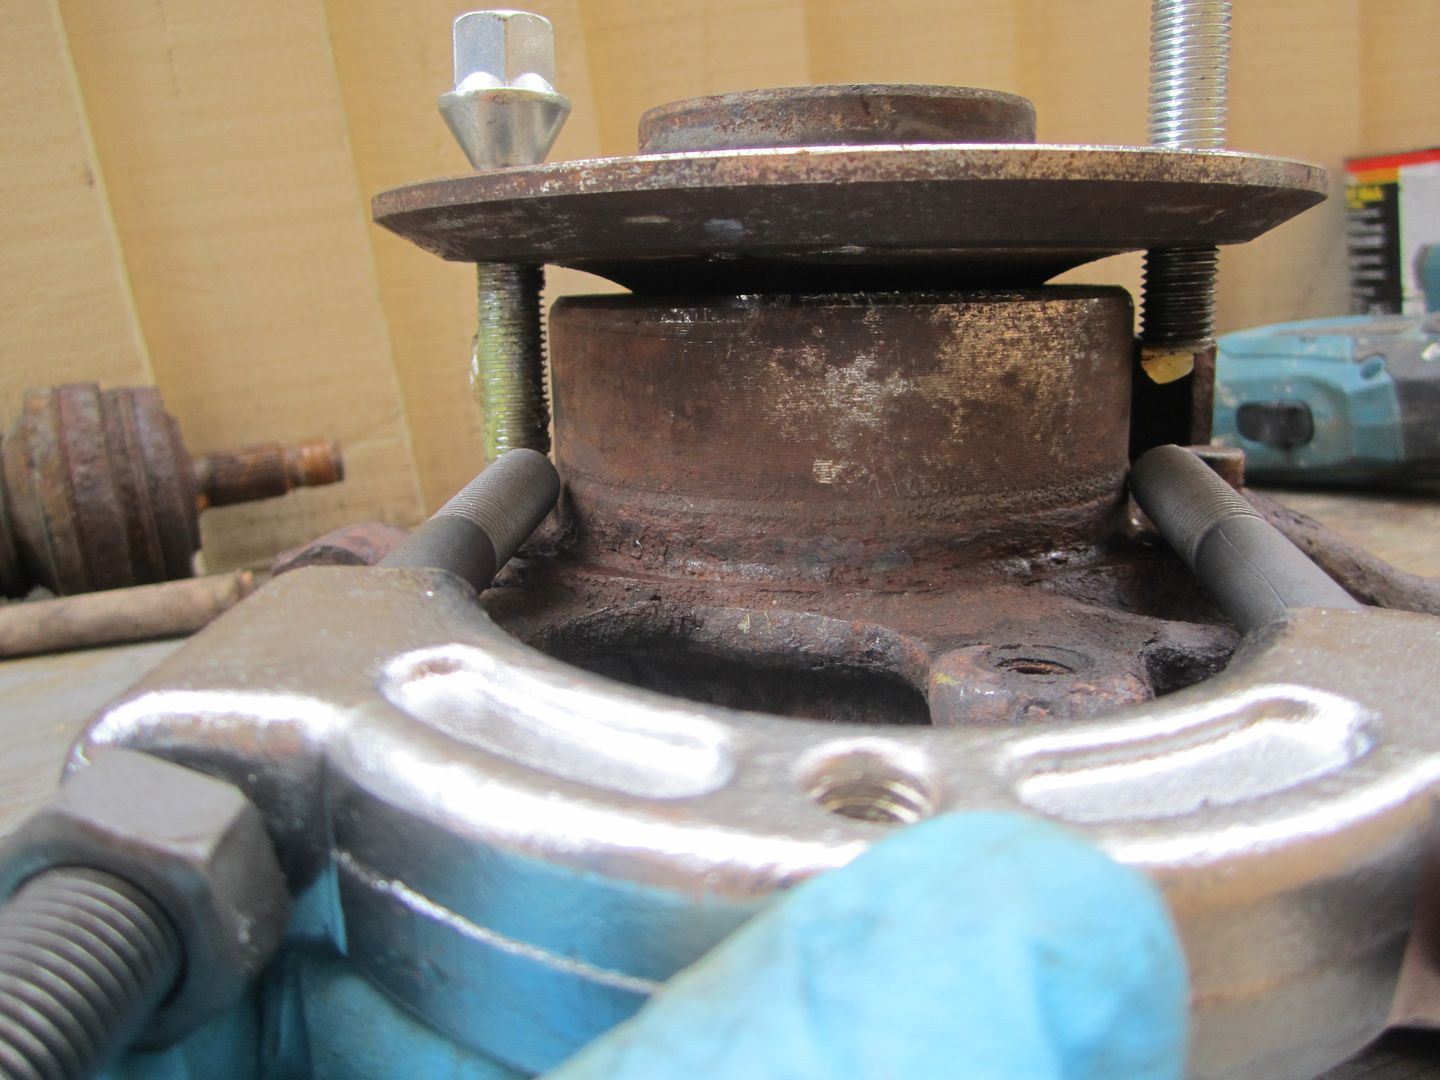 What I hope to do is file notches out of the high tensile studding to sit over the lip providing better support.
__________________
David 1996 Mercedes S124 E300TD - 129k - rolling restoration project - 1998 Mercedes W210 300TD - 118k (assimilated into above vehicle)
|
|
#80
08-27-2016, 11:55 PM
|
||||
|
||||
|
Don't knacker the puller.
Worse case scenario put the bolts onto something solid and hammer the hub out of the wheel carrier. The hydraulic press should ideally be used for this (but I'd be pretty wary about yours as it bends - are you going to send it back?)
__________________
1992 W201 190E 1.8 171,000 km - Daily driver 1981 W123 300D ~ 100,000 miles / 160,000 km - project car stripped to the bone 1965 Land Rover Series 2a Station Wagon CIS recovery therapy! 1961 Volvo PV544 Bare metal rat rod-ish thing I'm here to chat about cars and to help others - I'm not here "to always be right" like an internet warrior Don't leave that there - I'll take it to bits!
|
|
#81
08-27-2016, 11:56 PM
|
||||
|
||||
|
It could also just be time to buy a second hand hub and wheel carrier...
...have you got to do the other side of the car too?
__________________
1992 W201 190E 1.8 171,000 km - Daily driver 1981 W123 300D ~ 100,000 miles / 160,000 km - project car stripped to the bone 1965 Land Rover Series 2a Station Wagon CIS recovery therapy! 1961 Volvo PV544 Bare metal rat rod-ish thing I'm here to chat about cars and to help others - I'm not here "to always be right" like an internet warrior Don't leave that there - I'll take it to bits!
|
|
#82
08-28-2016, 01:51 AM
|
||||
|
||||
|
Morning Stretch, just saw your reply.
I had to laugh as while looking for something else up popped another Peach Parts tutorial but this time with a difference. It appears they also tried the sliding hammer approach but ended up bending the foot, not sure why this didn’t make it through to the W124 tutorial as it may have helped in my assessment of easy/difficult/forget it, you’re crazy to even think about tackling it! Mercedes-Benz SLK 230 Rear Wheel Hub Removal | 1998-2004 | Pelican Parts DIY Maintenance Article Thanks for the offer of sending this across but you may end up in the same predicament as myself (possibly not though). Basically there isn’t anything to get a firm purchase on for the bolts – I tried most of yesterday with different configurations but never got to the stage of feeling comfortable to go ahead and use the press, it needs a firm back plate. There’s only two UK suppliers of the larger style bearing separator’s that I can see, already dropped them a mail regarding sizes. On the workshop press front, it’s basically the two issues I spotted when putting it together, namely the jack is not bolted to anything so moves around when applying handle pressure, and secondly the gap on jack travel guide. Both gaps are large but one end must be 12mm or so, adding these both together will result in off centre pressing at point of contact. Several videos showing assembly of very similar models, you can see the jack being screwed to the plate together with almost no gap on the jack guide – I’ll have a chat with them Tuesday to see if they can swap the guide rail, I can tap a hole in the plate to secure it which is probably easier than sending it back See 8.46 in https://www.youtube.com/watch?v=4eEIyOIh9PE P.S, why are we up so early looking at a car forum
__________________
David 1996 Mercedes S124 E300TD - 129k - rolling restoration project - 1998 Mercedes W210 300TD - 118k (assimilated into above vehicle) Last edited by spock505; 08-28-2016 at 01:13 PM.
|
|
#83
08-29-2016, 01:09 PM
|
||||
|
||||
|
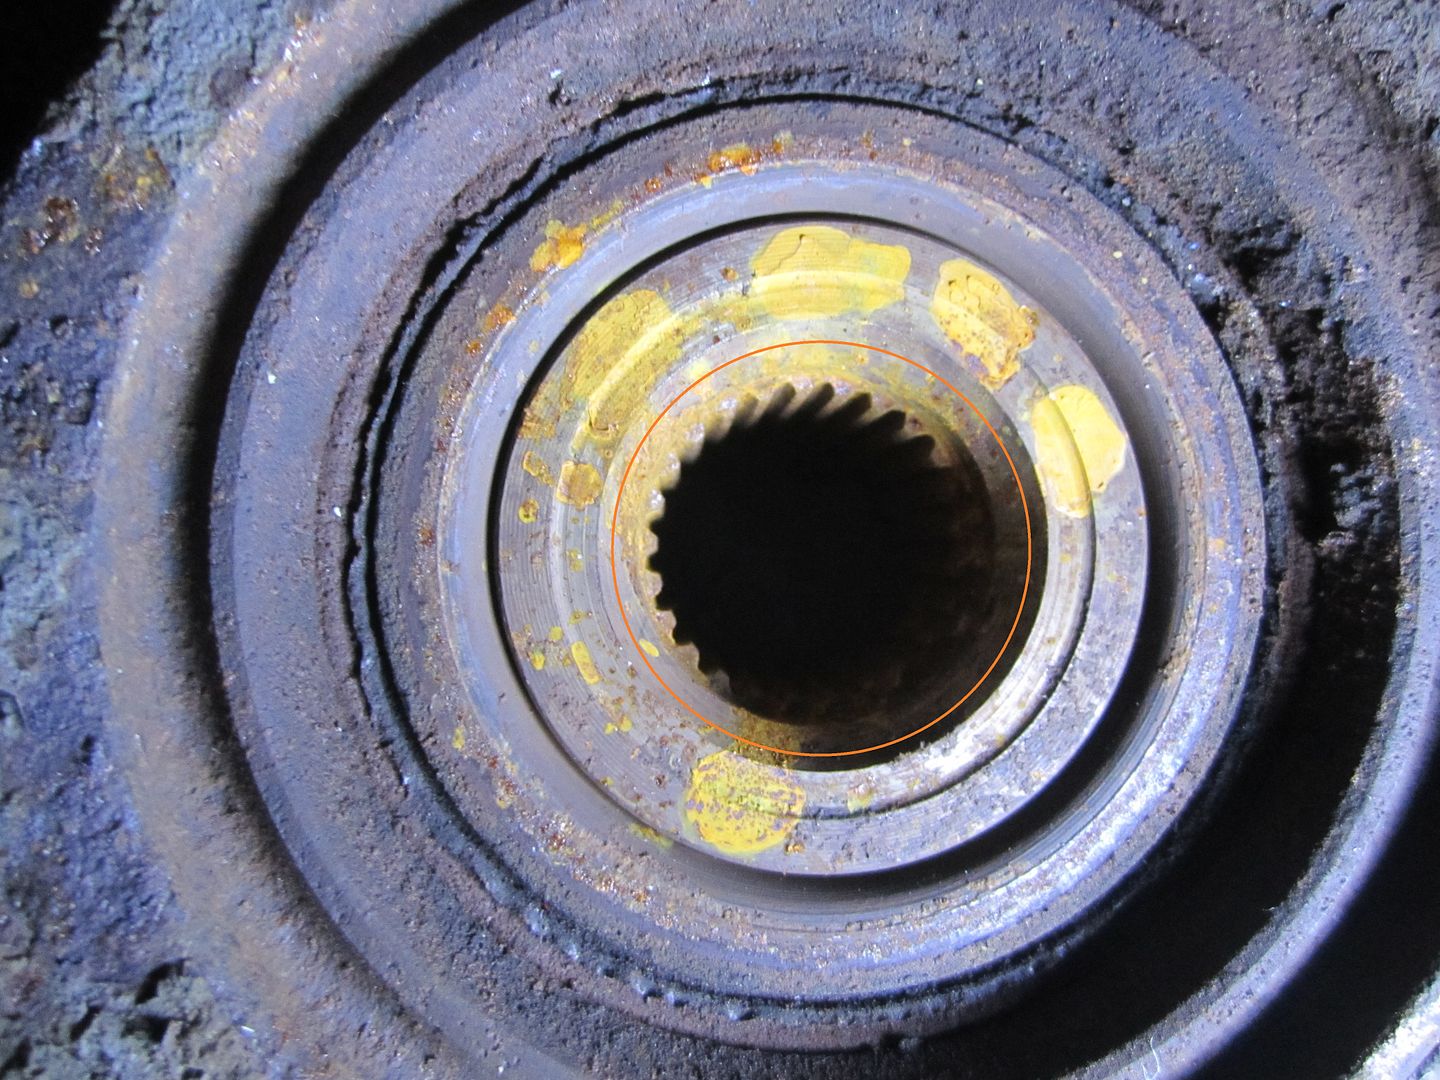
Okay, went ahead and ordered bearing separator after reviewing sizes, also had another read of John's (vstech) thread experience which tbh, is almost identical to mine -
John mentions 6" spacing for the hub to pass through which takes you into 150mm sized separators. There are two options sizes here, 100 - 150mm or 150 - 200mm Whilst the 100 - 150mm will accommodate the hub itself it may not provide enough support outside of this for press mounting (i.e not enough of the separator tool available for blocks) Given the pressures involved so far I opted for the larger size, this should provide a comfortable margin of safety during pressing. I couldn't understand when first reading John's thread why he just didn't follow the PP procedure, after all these cars are 20 + years old, surely must have this down by now? No doubt folks are reading this saga thinking the same thing - but I did - and it don't work! It can be tempting just to think 'heck this guys hasn't a clue' but unless you have tried first hand the pressures required will not be evident, it would be helpful if WIS detailed this similar to torque settings. It's going to be a week or so before the tool arrives which gives me time to prep and paint, order new bushes ect.. also sort of the press.
__________________
David 1996 Mercedes S124 E300TD - 129k - rolling restoration project - 1998 Mercedes W210 300TD - 118k (assimilated into above vehicle) Last edited by spock505; 08-29-2016 at 02:24 PM. Reason: added content
|
|
#84
08-29-2016, 02:08 PM
|
||||
|
||||
|
Quote:
Once we had the right press and bearing separator it came apart easily and went back together smoothly. You're also dealing with rust making things stick together, we did not have that issue on my vehicle.
__________________
The OM 642/722.9 powered family Still going strong 2014 ML350 Bluetec (wife's DD) 2013 E350 Bluetec (my DD) both my kids cars went to junkyard in 2023 2008 ML320 CDI (Older sons DD) fatal transmission failure, water soaked/fried rear SAM, numerous other issues, just too far gone to save (165k miles) 2008 E320 Bluetec (Younger son's DD) injector failed open and diluted oil with diesel, spun main bearings (240k miles) 1998 E300DT sold to TimFreeh 1987 300TD sold to vstech
|
|
#85
08-29-2016, 02:23 PM
|
||||
|
||||
|
Quote:
What press weight, bearing separator size did you end up using? edit: This was my final 'Heath Robinson' attempt before finally giving up, notice bolts starting to splay outwards. 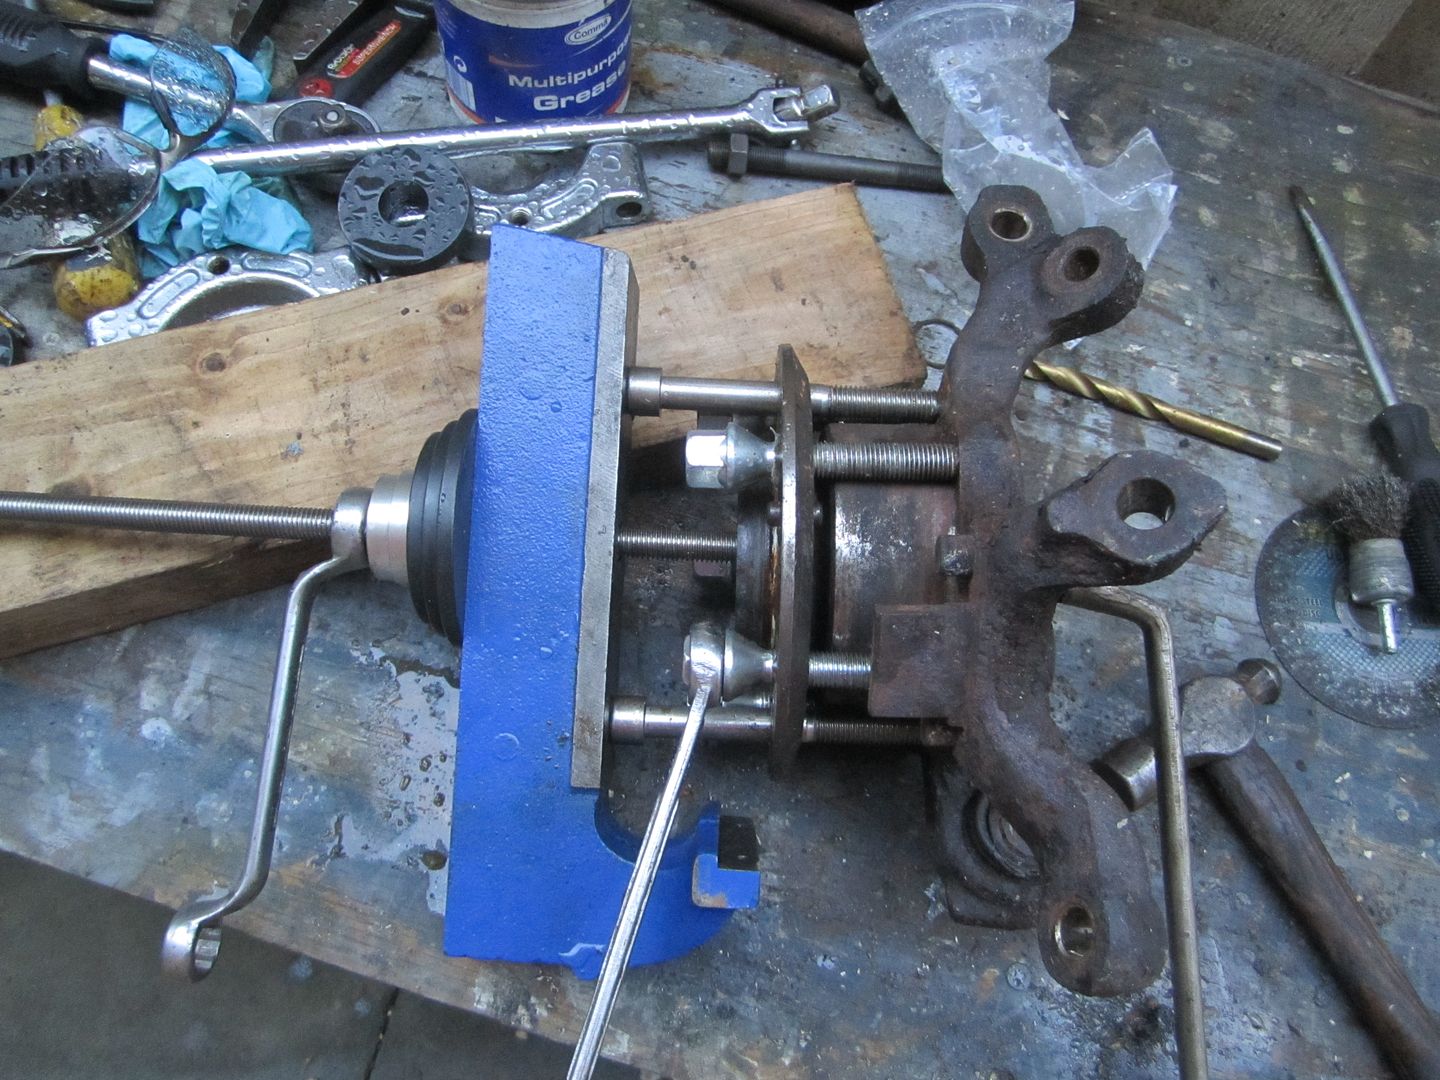 ..ta
__________________
David 1996 Mercedes S124 E300TD - 129k - rolling restoration project - 1998 Mercedes W210 300TD - 118k (assimilated into above vehicle) Last edited by spock505; 08-29-2016 at 02:34 PM. Reason: added photo
|
|
#86
08-29-2016, 07:16 PM
|
||||
|
||||
|
John knows for sure but I believe he had a 6 inch separator and a 20 ton press.
He states it in his thread. Once you can get the forces applied to the right things it came apart readily. On our first attempt the smaller cheap bearing separator failed. Cultural reference side note: Harbor Freight Tools is a US importer of really cheap Chinese tools. The American satire magazine Mad named them Hazard Frought Tools in a parody and it fits perfectly. Actual website: Harbor Freight Tools Parody ad: http://www.meyette.us/hf_tool_sale.pdf Ok back on topic I'm concerned you may have damaged your hub with all the force. When the bearing separator gave out for us, the brake caliper mounting ears got bent. No matter how much we tried, we could not get the two mounting points back in line to accurately locate the caliper on the rotor. Of course we did not figure this out until we had everything back together, because the last step before putting the tire back on is to install the caliper. So a perfectly good set of bearings and dozens of hours of work went into the scrap heap along with the damaged hub.
__________________
The OM 642/722.9 powered family Still going strong 2014 ML350 Bluetec (wife's DD) 2013 E350 Bluetec (my DD) both my kids cars went to junkyard in 2023 2008 ML320 CDI (Older sons DD) fatal transmission failure, water soaked/fried rear SAM, numerous other issues, just too far gone to save (165k miles) 2008 E320 Bluetec (Younger son's DD) injector failed open and diluted oil with diesel, spun main bearings (240k miles) 1998 E300DT sold to TimFreeh 1987 300TD sold to vstech
|
|
#87
08-30-2016, 05:18 PM
|
||||
|
||||
|
Cool, tool wise sounds like I am heading in the right direction.
The hub carrier looks okay, although it was only the last real attempt using wood that may have caused distortion, the rest were bolts well away from anchor points. 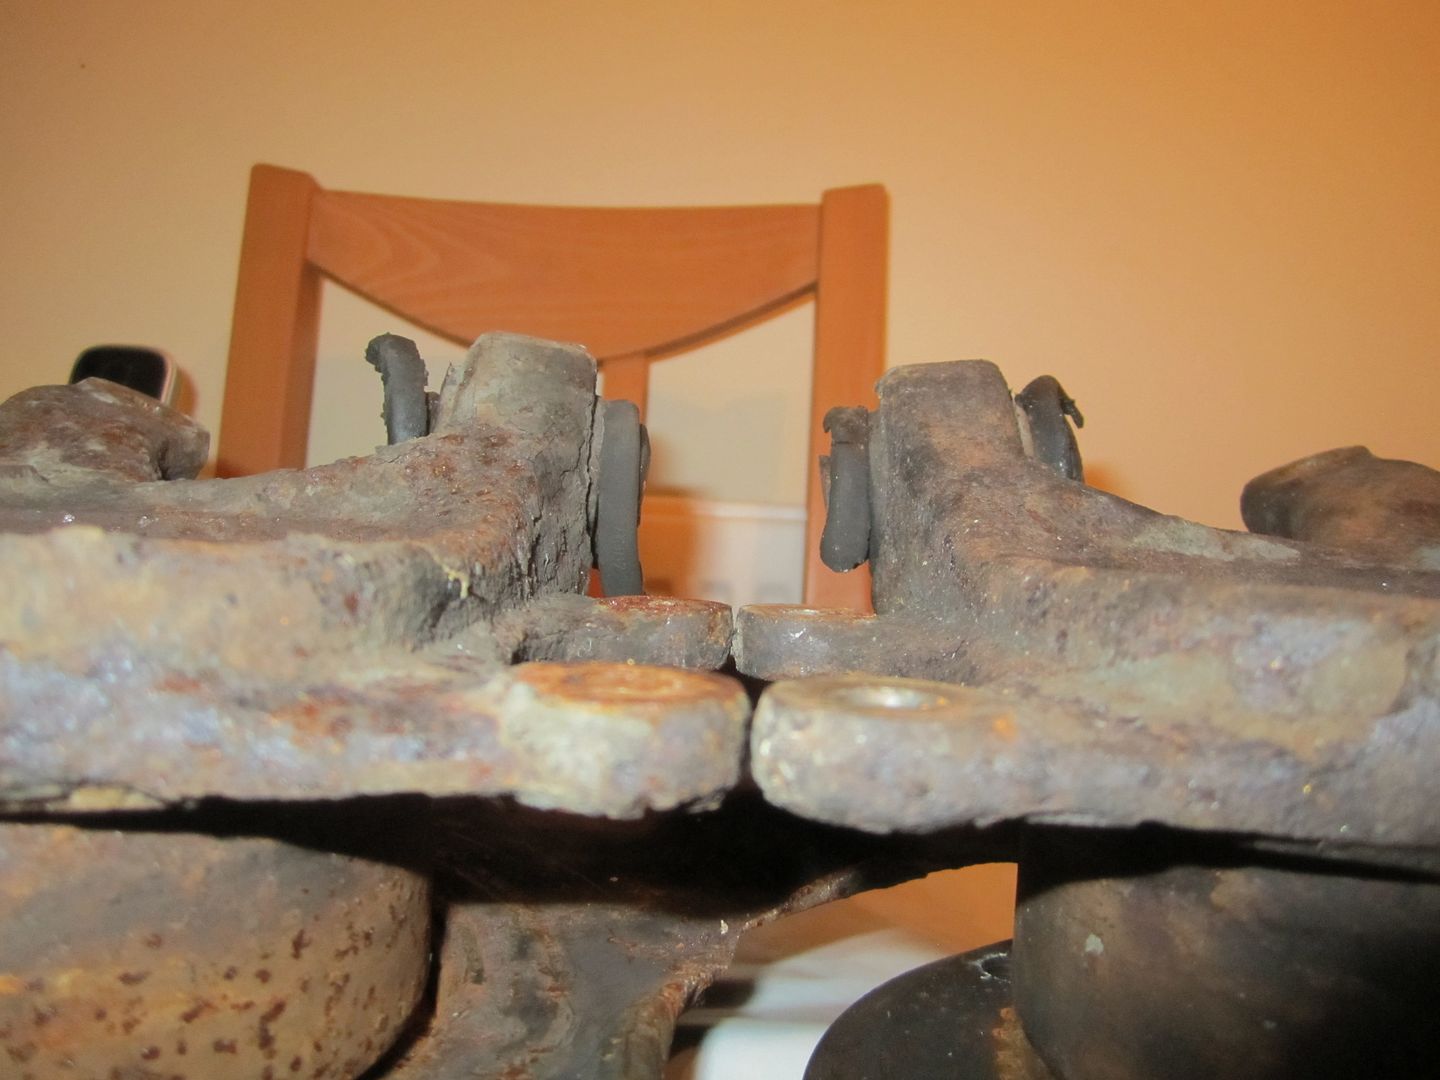 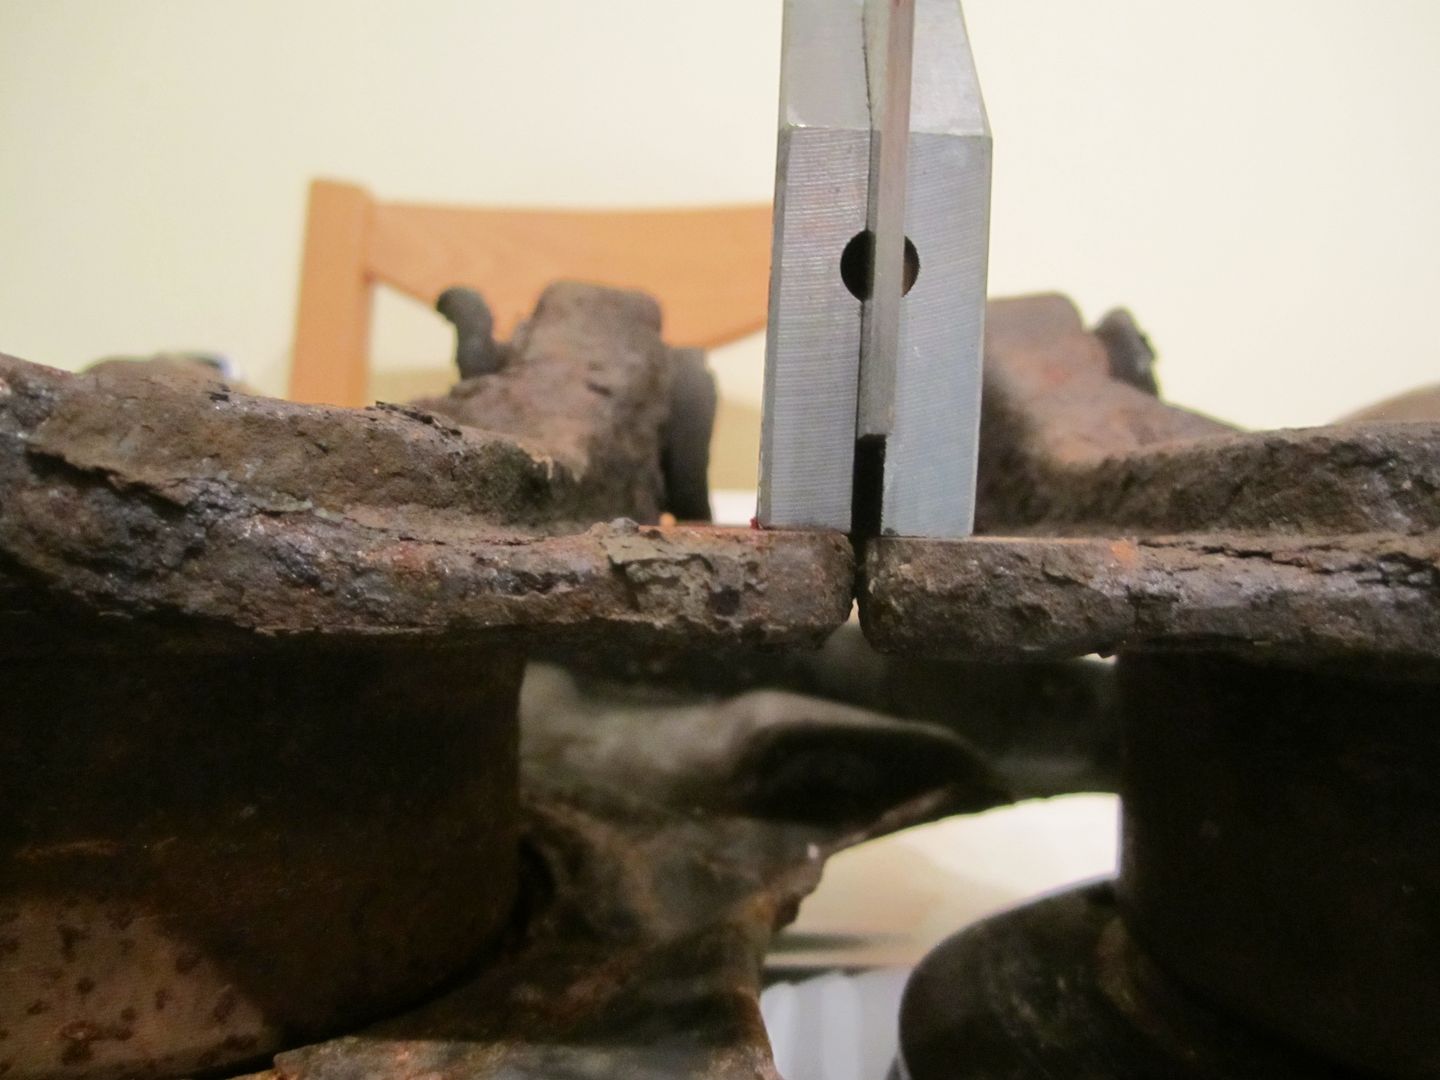 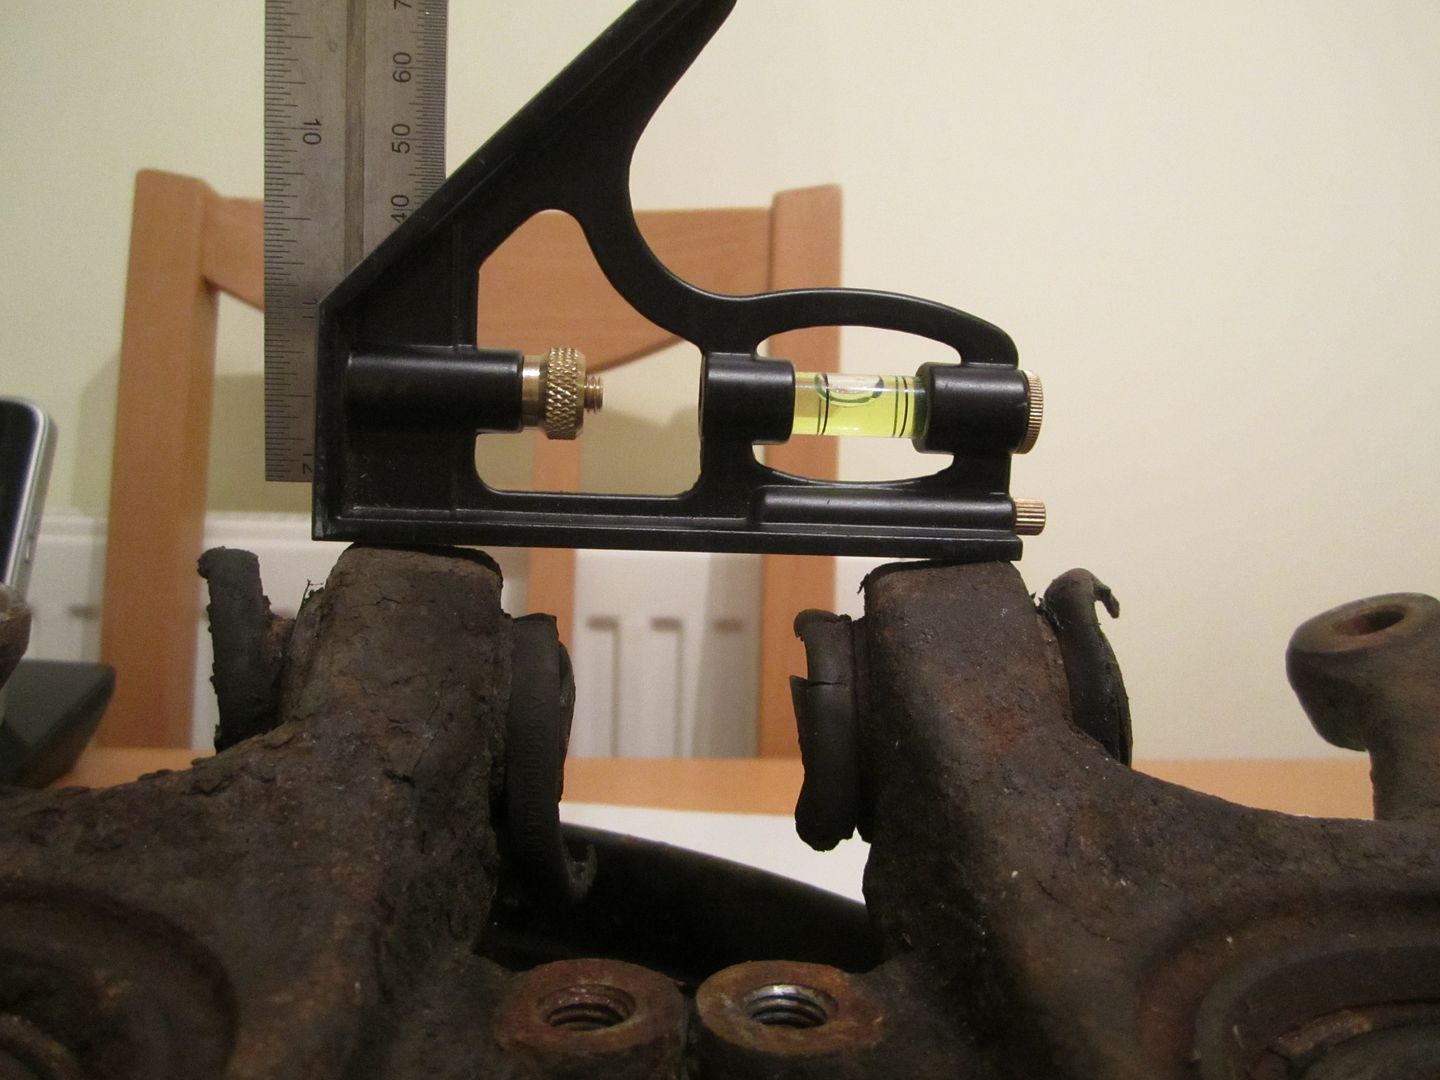 Kitchen table so not 100% level.. Sorry to hear about your situation, that's really bad luck but appreciate the heads up, easily done and not noticed. ..mate, looks like we share more more than just rear axle woes, that Harbor Freight link made me laff..out very loud..  General update Bearing separator being dispatched from Germany on Friday, so maybe Monday/Tues before delivery here. Press being swapped out this week. Meyle lower bushings ordered. Heat shield - looking at after market as MB daft..
__________________
David 1996 Mercedes S124 E300TD - 129k - rolling restoration project - 1998 Mercedes W210 300TD - 118k (assimilated into above vehicle)
|
|
#88
08-31-2016, 12:39 AM
|
||||
|
||||
|
Be wary of Meyle parts - usually a bit of a lucky dip just like Febi
__________________
1992 W201 190E 1.8 171,000 km - Daily driver 1981 W123 300D ~ 100,000 miles / 160,000 km - project car stripped to the bone 1965 Land Rover Series 2a Station Wagon CIS recovery therapy! 1961 Volvo PV544 Bare metal rat rod-ish thing I'm here to chat about cars and to help others - I'm not here "to always be right" like an internet warrior Don't leave that there - I'll take it to bits!
|
|
#89
08-31-2016, 03:25 AM
|
||||
|
||||
|
Has anyone experience with klokkerholm who manufacture aftermarket items, many pressed parts such as wings (fenders), brake shields.
No problems with Meyle so far, are they not OEM suppliers? Quality seems on par.
__________________
David 1996 Mercedes S124 E300TD - 129k - rolling restoration project - 1998 Mercedes W210 300TD - 118k (assimilated into above vehicle)
|
|
#90
08-31-2016, 04:11 AM
|
||||
|
||||
|
Quote:
...they are now just box shifters. They employ others to make their stuff and put their own packaging on it just like Febi. The quality of "their" parts is quite often variable. Getting others to make your stuff for you is not an uncommon thing to happen these days - they are all at it - but some manufacturers are more discerning than others. I have even bought spares at the dealership that have made me think "well my 90 year neighbour could have done a better job than that". ######## Klokkerholm: Body panels not great, they are quite lazily made - very little attention to detail in my opinion - lots of ripples and wrinkles - don't fit at all like old stock original panels. I'd expect their heat shields to be functional and probably perfectly fit for purpose however - but I've never seen one before so can't tell you for sure. I mean if they can't make decent heat shields then they really ought to be driven into the sea with fire and pitch forks...
__________________
1992 W201 190E 1.8 171,000 km - Daily driver 1981 W123 300D ~ 100,000 miles / 160,000 km - project car stripped to the bone 1965 Land Rover Series 2a Station Wagon CIS recovery therapy! 1961 Volvo PV544 Bare metal rat rod-ish thing I'm here to chat about cars and to help others - I'm not here "to always be right" like an internet warrior Don't leave that there - I'll take it to bits!
|
 |
| Bookmarks |
|
|


 Linear Mode


