

|
|
|
|
|
|
#1
 02-08-2009, 10:08 PM
|
||||
|
||||
|
87 300D dash replacement
Jeremy found for me a dash with no cracks to replace my Texas dash. I have the dash off at this point. I owe Jeremy a huge debt for walking me through the dash replacement process while we had the dash in front of us. I hope he doesn't mind my sharing his knowledge via my experience putting his words into practice. Here's my recollection of the steps to get the dash off:
1) Pry forward then upwards the trailing edge of the trim strip along the inboard edge of the speaker grill. As you lift the trim strip, slowly and gently send a rod forward between the dash and the trim strip to release the rest of the trim strip clips. 2) With the trim strip off, remove the 2 Philips head screws holding the grill to the dash. 3) Lift the inboard edge of the grill and rotate upwards towards the A-pillar. This should release the grill. 4) Remove the screw that takes a 8mm wrench. 5) Peel off the fabric lined trim along the door jamb. It was easiest for me to release it near the upper door hinge then pull it off all the way to where it goes horizontal with the roof. 6) Grip the trailing edge of the A-pillar trim and rotate it inwards towards the windshield. As you feel clips release, pull the A-pillar trim back to release it from tangs along the forward edge. Tug on the headliner piece that contains the visors. Note that the A-pillar trim has a tab that slots into the headliner. Pull downwards and slightly bend the A-pillar trim to release it from the headliner. Lift the A-pillar trim from the dash. 7) Repeat on the other side. My car had a clip that came loose on the passenger side with no counterpart on the driver side. I'm looking into this. 8) Release the 4 clips in the right dash vent. Easier said than done. The first picture shows the vent and you can just make out a slot near each corner. The second picture shows my fingers pressing down the inboard clips. This is what you have to do with a prying tool. Unless you can do 4 at a time, do one edge, pull the vent as much as it will go and wedge in that way, do the other edge, then seesaw the vent off the dash. 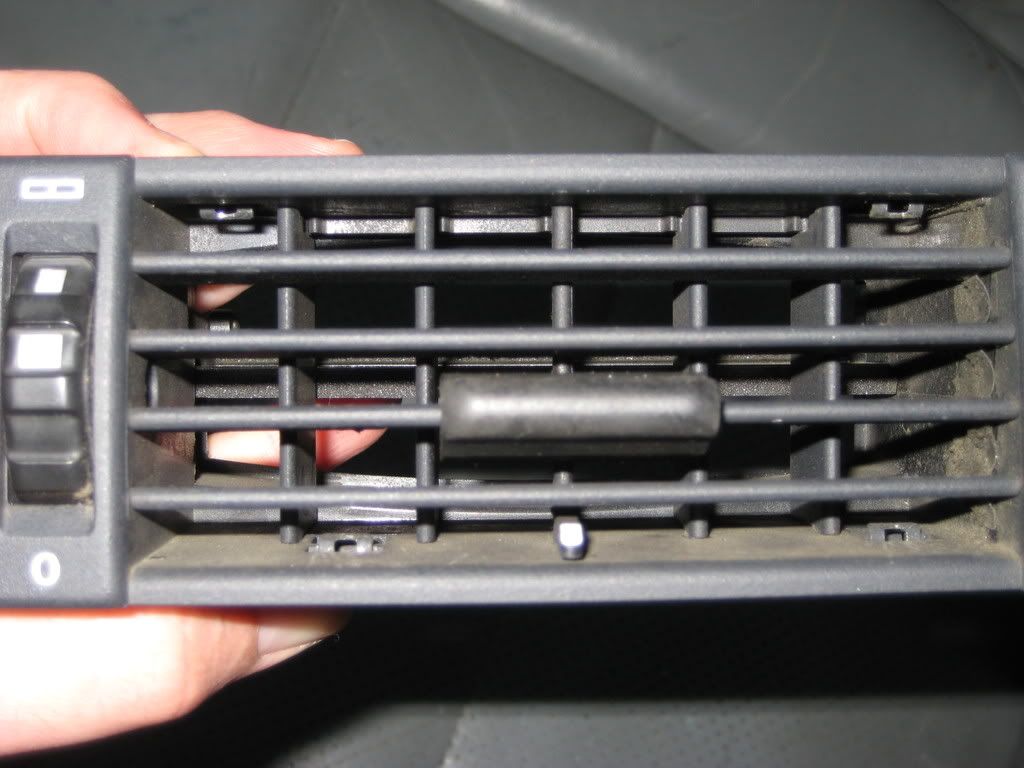 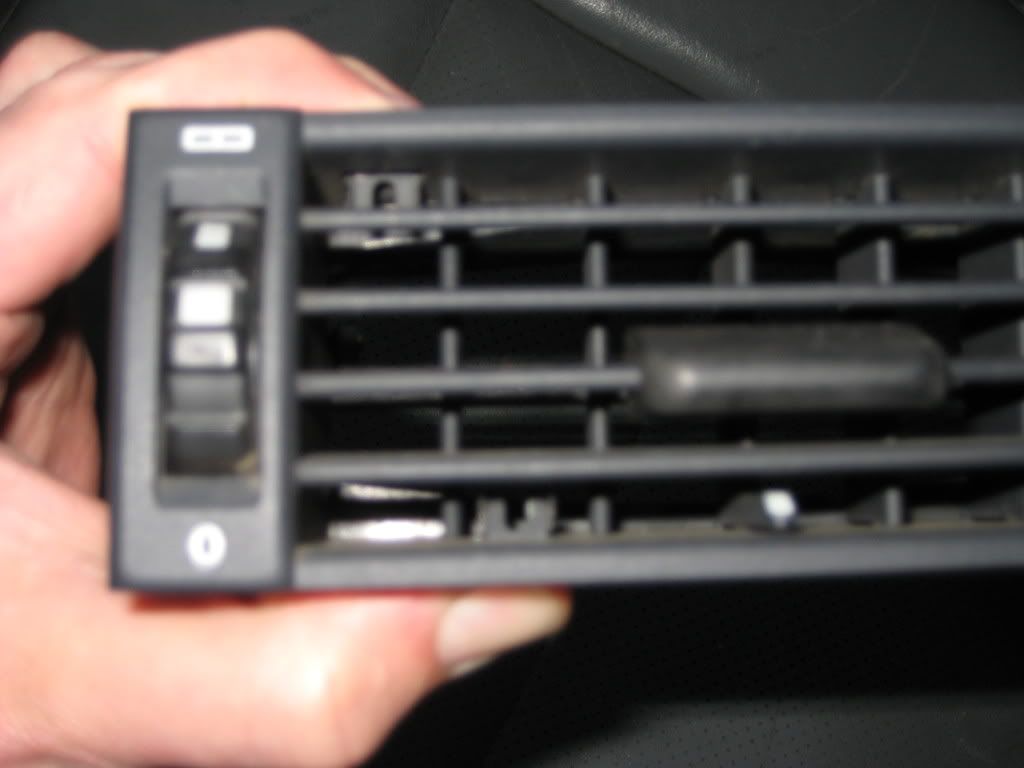 You hold a camera stedy while pressing down on those clips  9) As the vent comes away from the dash, release the bulb holder. 10) Remove the 2 Philips head screws that go downwards below the the now open vent cavity. A screw that takes an 8mm wrench is shown in the inboard screw position in this picture. 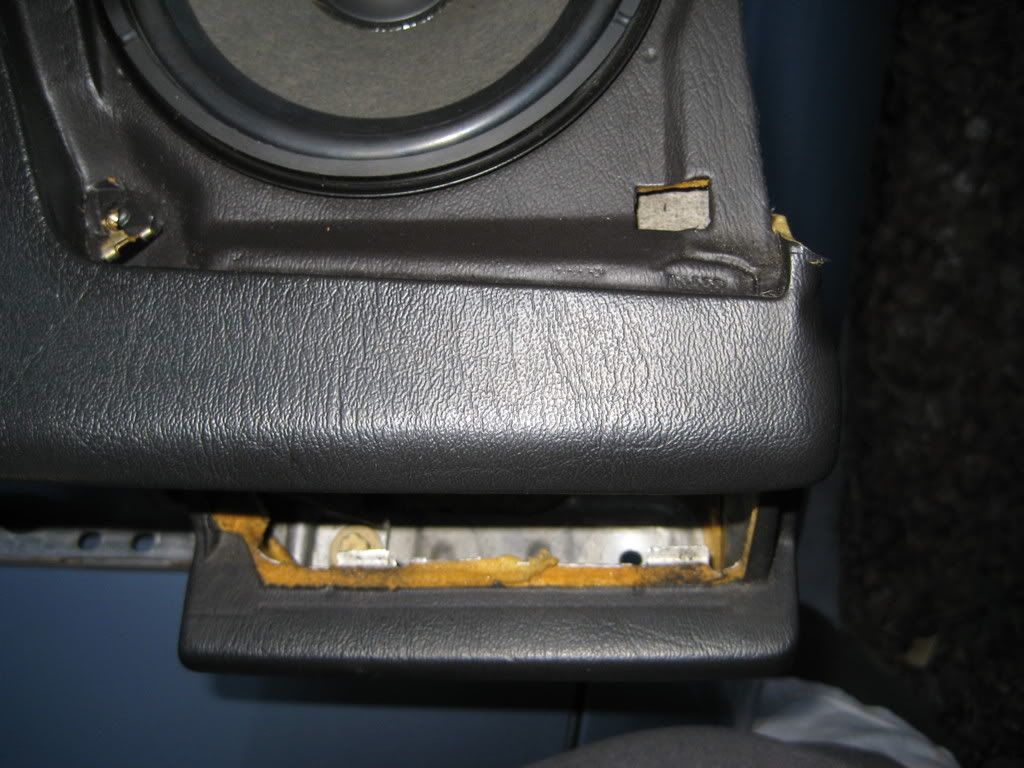 11) Remove the 2 screws that take an 8mm wrech along the forward edge of the lower dash liner under the glove box. 12) Remove the glove box liner. If I have to explain this, you have no business pulling the dash 13) Release the rubber grommets holding the glove box arms to the dash. They peel right off. It might take some wiggling to get the arm hooks out of the dash even with the grommets loose. 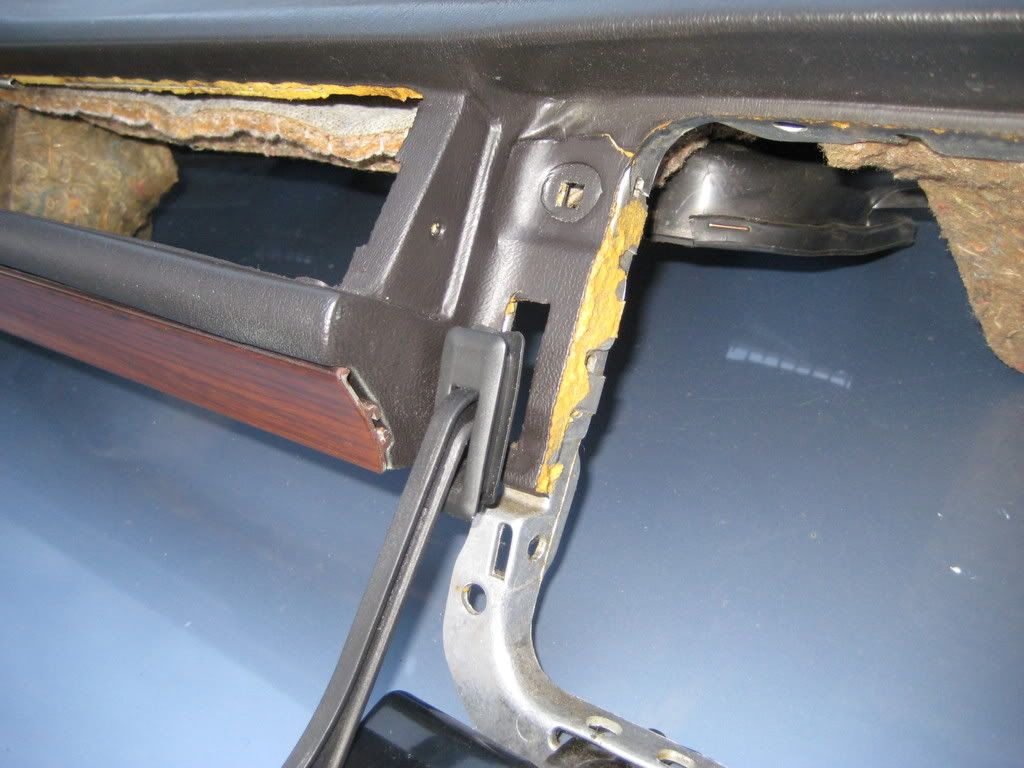 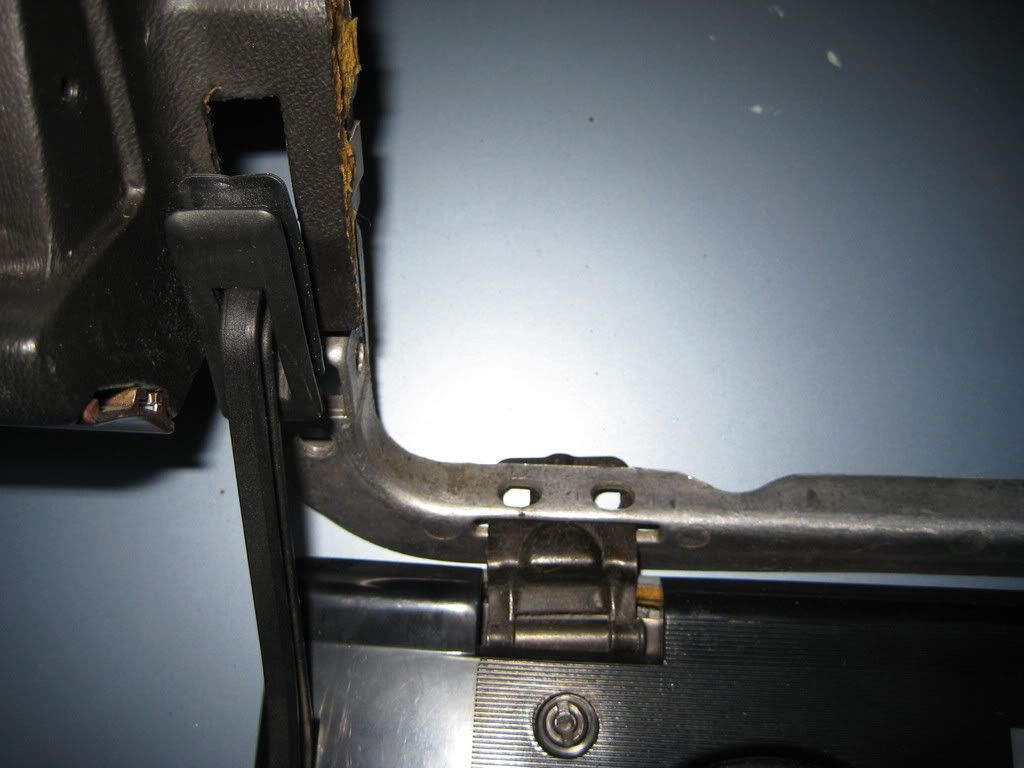 14) Remove the 4 Philips head screws holding the glove box door to the dash. Remove the glove box door. 15) Remove the gauge cluster. Again, if I have to explain this, stop reading! 16) The next couple of steps might not be representative because my car has loose headlight switch and key switch trim strips. I don't know how these pieces pry off if all the tabs are intact. Pull off the headlgiht switch. Remove the nut that takes a 24mm socket holding the trip strip the head headlight switch. Lift the outboard edge of the trim strip to clear the headlight switch then pull the trim strip towards the left to free it. 17) Pry the inboard end of the key switch trim strip. Lift the inboard edge of the trim strip until the rubber filler clears the key switch then pull the trim strip towards the right to free it. 18) Remove 3 screws that take an 8mm wrench exposed when you removed the headlight switch trim strip, and 2 more screws exposed when you removed the key switch trim strip. Push down the lower dash liner. 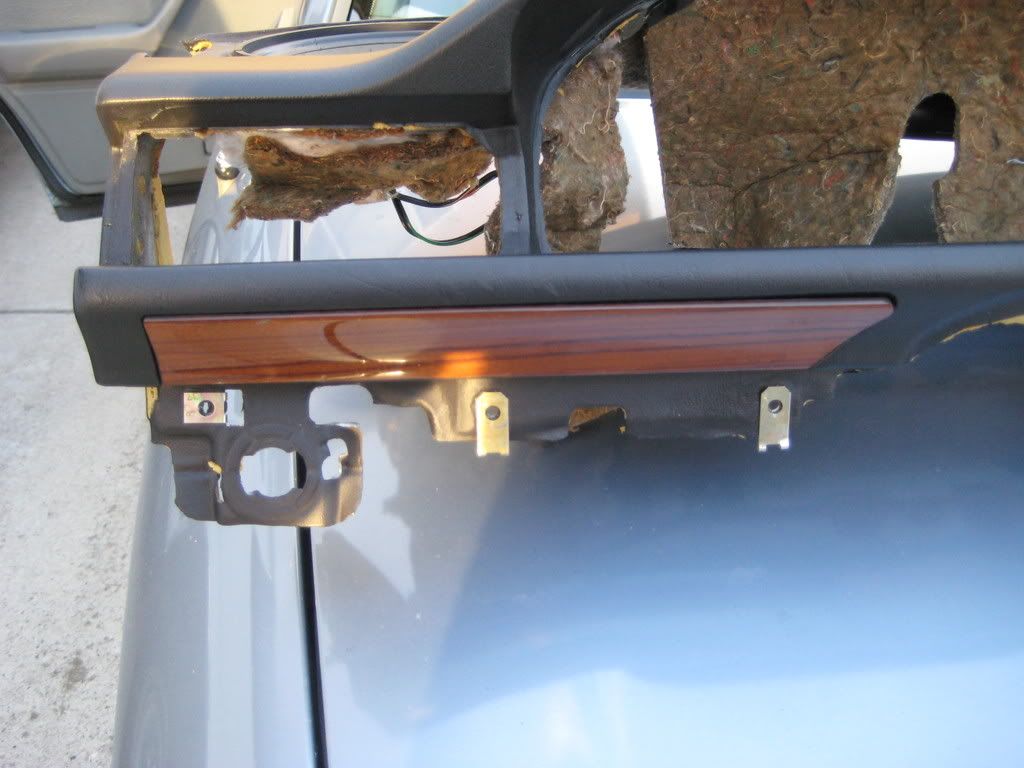 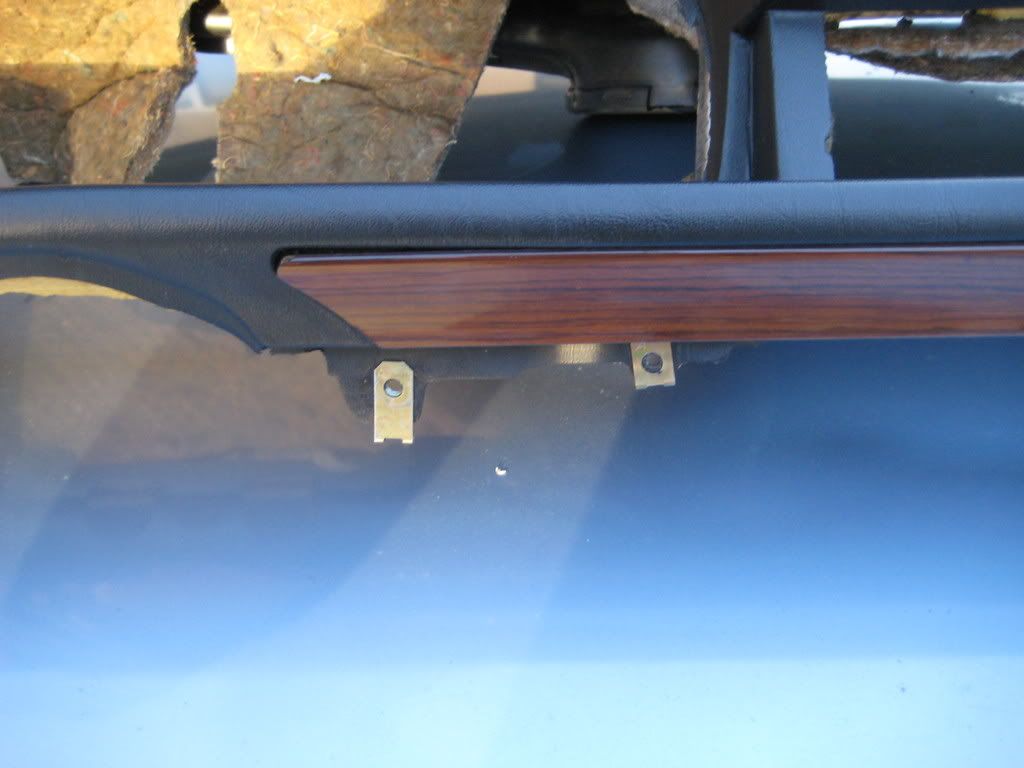 19) Remove the Philips head screw pointing inward from the driver door opening. The nut strip on the other end of the screw might fall off as you lift the dash so listen for the telltale 'clink.' 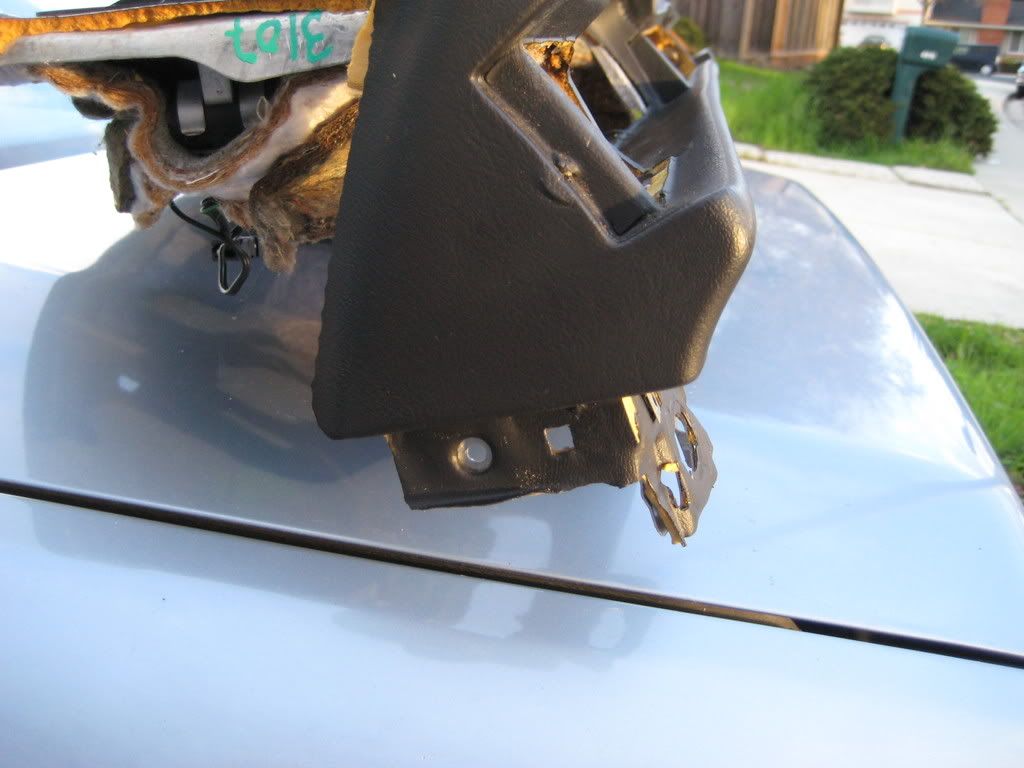 20) Remove the Philips head screw from the glove box end of the center vents. 21) Set the center vent switch to full closed. Use a long 4mm hex key to unscrew the... uhh... screw visible between the top blind and the one just below it just to the right of the open-close thumbwheel. The screw is captive and doesn't feel loose when it is so give it a couple dozen full turns to be sure it's free. I owe a picture of this. 22) Release the two tabs along the left edge of the center vent. These are the same tabs you came to hate in the right vent. Pull the center vent assembly off the dash. Push out the left edge from the forward most point of the vent assembly. If you put pressure on the faceplate, the vent assembly will come apart. Ask me how I know. 23) The center vent will be dangling by some wires. Pry open a 12cm by 12cm panel below the open-close thumbwheel. Use pointy pliers to extract the bulb socket. Release the wires from the clips to free the center vent. You know you're going to forget to put this bulb back during reassembly, right? 24) Remove two Philips head screws pointing upwards into the ACC control panel wood trim above the radio. 25) Pull the bottom edge of the ACC control panel wood trim away from the dash and pivot it upwards until it comes off the dash. 26) Remove 6 Philips head screws holding the ACC PBU to the dash. Pull out the PBU. You can leave it dangling by the wires. 27) This next step was very difficult for me. The console has plastic tabs that extend inward into the slots in the switch panel. I had to muscle the right tab to the right while bending the switch panel forward to release the tab. Then it slipped off the left tab. I was told it comes off easily if you remove the outboard switches but I couldn't figure it out at the time. 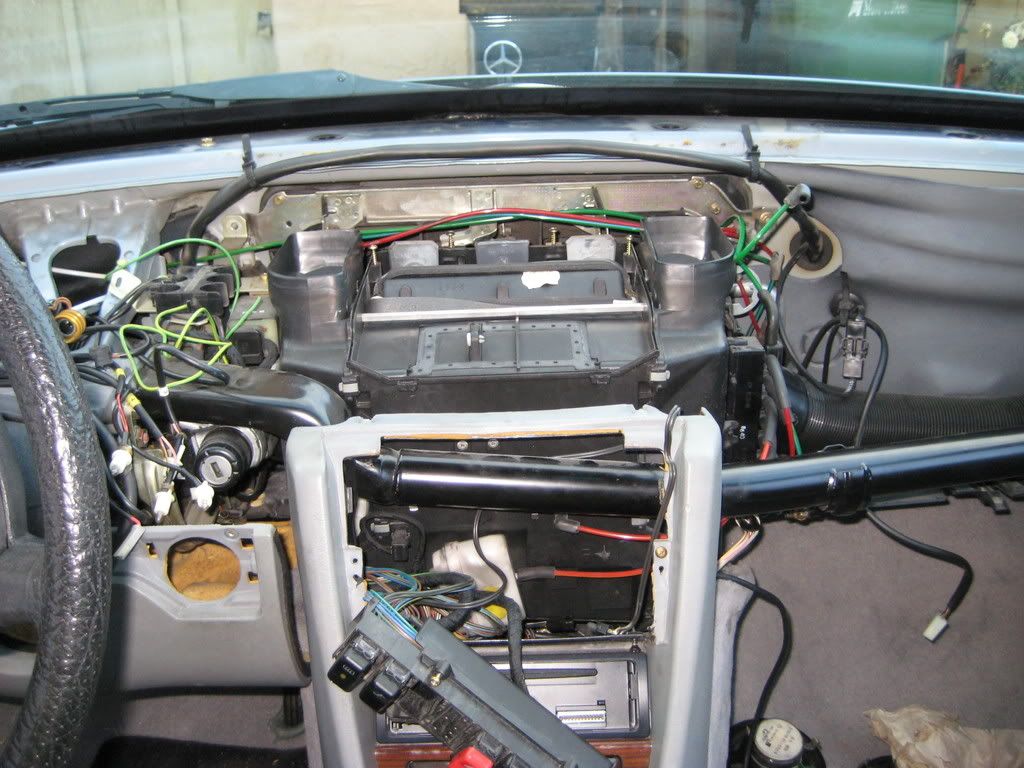 28) Look/feel for two bolts sticking down from the dash into slots at the top of the console. You can just see the notches at the top of the console in the picture in step 26. Each bolt is held by a nut that takes a 10mm wrench. I was able to get a socket on the right nut but the dash crossmember runs too close to the left bolt to use anything but an open wrench. Maybe you have a skinny ratcheting box wrench. Jeremy suggests removing the carriage bolts at this point so you don't mar the console. Looking down into the center vent cavity, you'll see spring clips holding the carriage bolts. The spring clips have a tang on the aft end. Lift the tang off the blot and pull the spring forward then lift the bolt out of the dash. 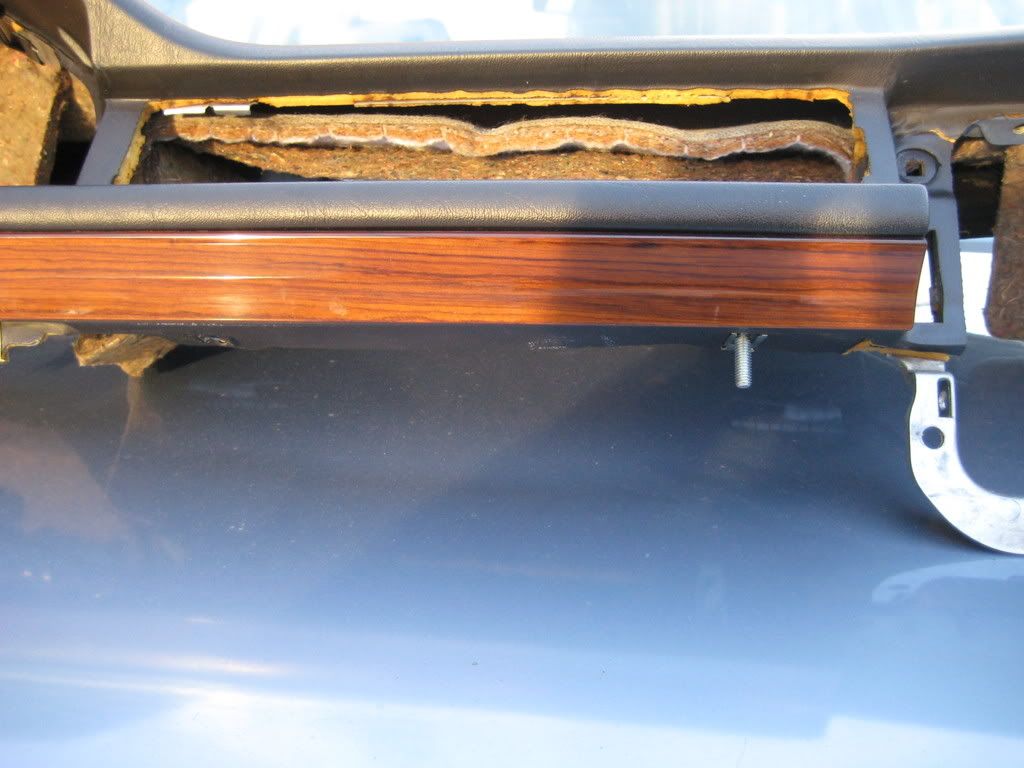 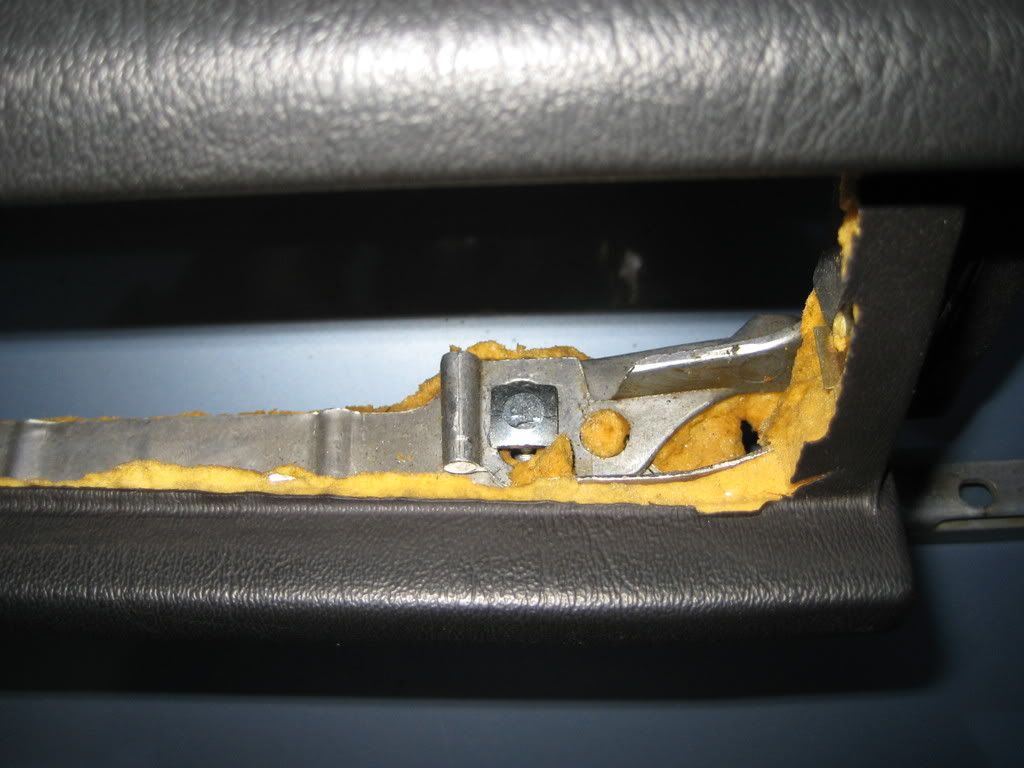 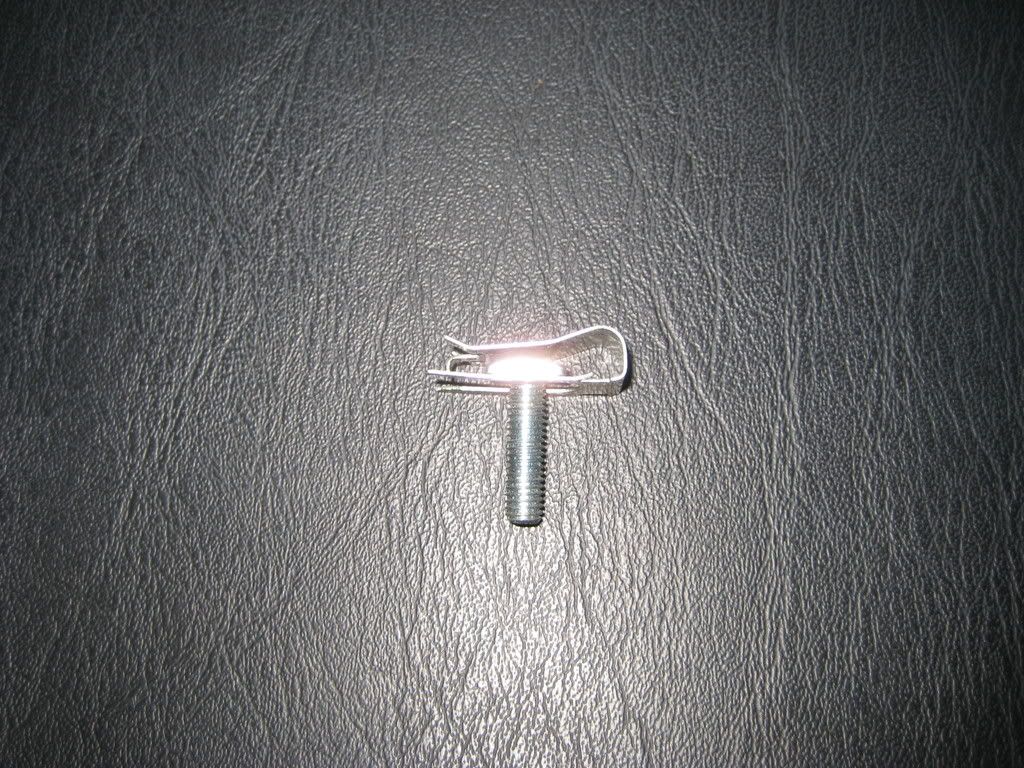 29) Reach through available openings to disconnect the speaker wires. 30) I removed the left dash vent but realized I didn't have to. If you leave it in place, don't forget to remove the bulb holder. 31) The headlight switch is a bayonet mount into the dash. IIRC you twist the switch clockwise as you view it from the driver seat then push the upper left tab towards the front of the car to free the switch from the dash. 32) I'm sure I'm forgetting something but this is all I remember. I'll take more notes as the dash goes back in place. Oh, the steering wheel didn't bother me more than during the gauge cluster removal so I didn't remove it. Anyway, lift the dash off the... uhh... dash? The British have a term for the section of the car the dash attaches to but it's in my Lotus Elite book which I'm lazy to check. I'll provide an update later. Lift the dash until you feel the defroster registers release from the airbox. Like you know how that feels. It'll be difficult to lift one moment then easier the next. With the dash free of connections, it'll hang on the A-pillars. I moved the wires running up the right A-pillar ahead of the dash then forced, bent and crumpled the front right corner of the dash past the right A-pillar structure. Jeremy suggested it might be possible to cut off that corner of the dash since the speaker grill covers it. Hmm... Well, that's where I am. I have some ACC vacuum pods to sort out then it goes back together. Sixto 87 300D 
|
|
#2
02-08-2009, 10:09 PM
|
||||
|
||||
|
Random views of a dashless 87 300D
What follows was part of my dash removal writeup but I hit the 10,000 character limit.
I haven't identified the white line just below the windwhield. It splits from the ACC vacuum supply line. I think it goes down the left side of the car to the rear headrest release mechanism. 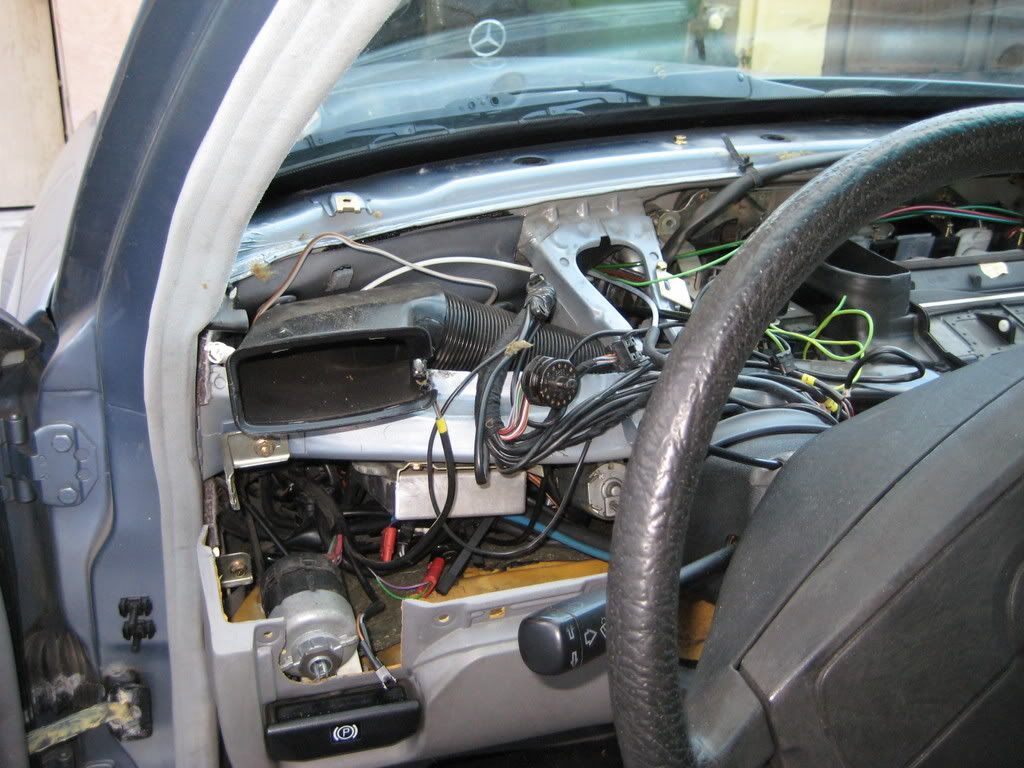 The loose green wire is my prewiring for an afterglow indicator. The loose rubber hose is for my economy/boost gauge mod. 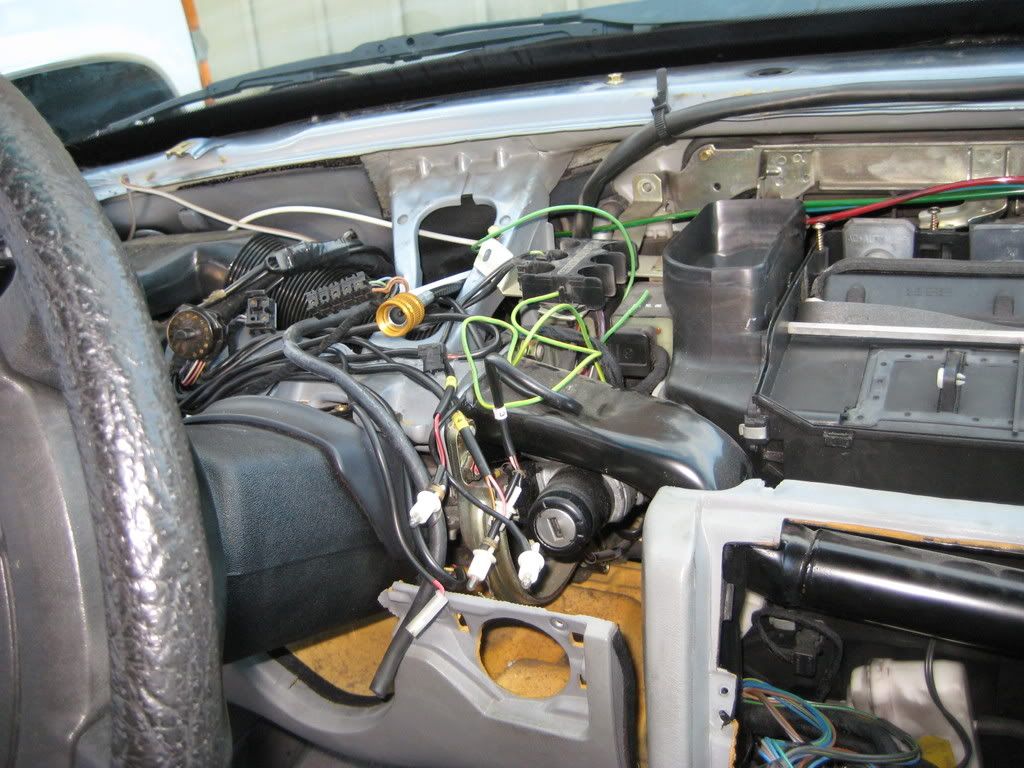 The recirculation, defroster and diverter vacuum pods are off the car. In fact the top of the ACC airbox is off the car as well. That's the aspirator motor dangling below the right dash vent duct. 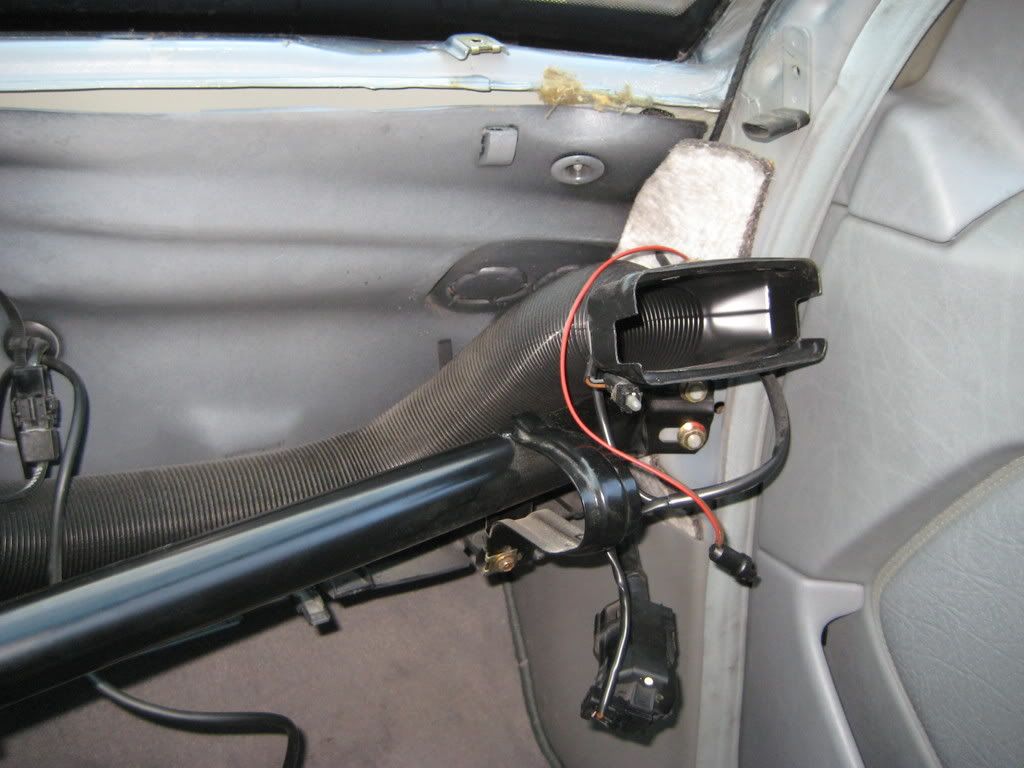 ACC PBU cavity. The white canister is the footwell vacuum pod. The red line above connects to the center vent vacuum pod inside the airbox. 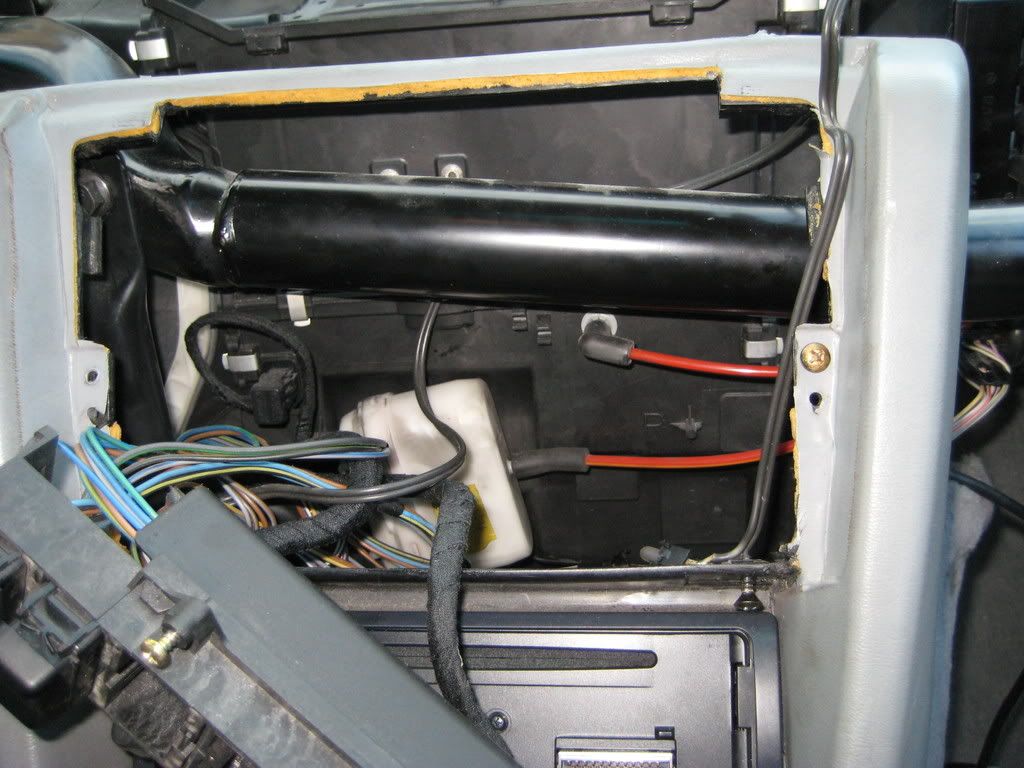 Under the steering column viewed from the driver door. The aluminum box is the cruise amp. The red connector below it is for the driver airbag. Disconnect this before removing the steering wheel. 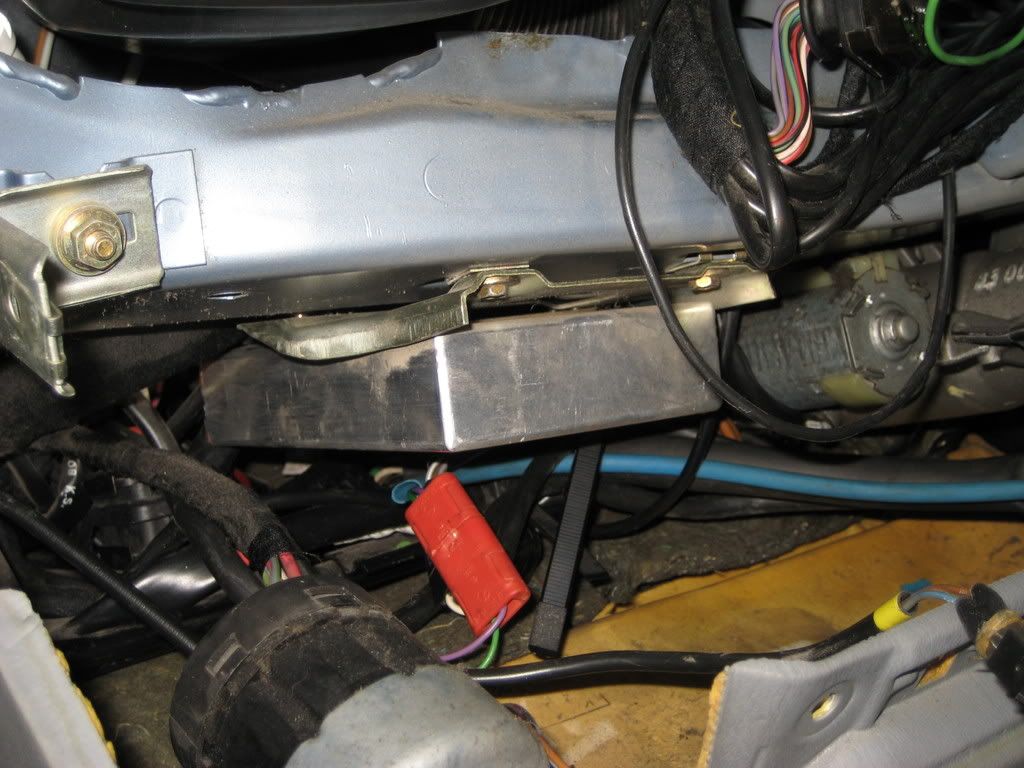 Looking into the airbox to see the center vent vacuum pod. If I had to, I'll bet I could replace it without pulling the airbox. 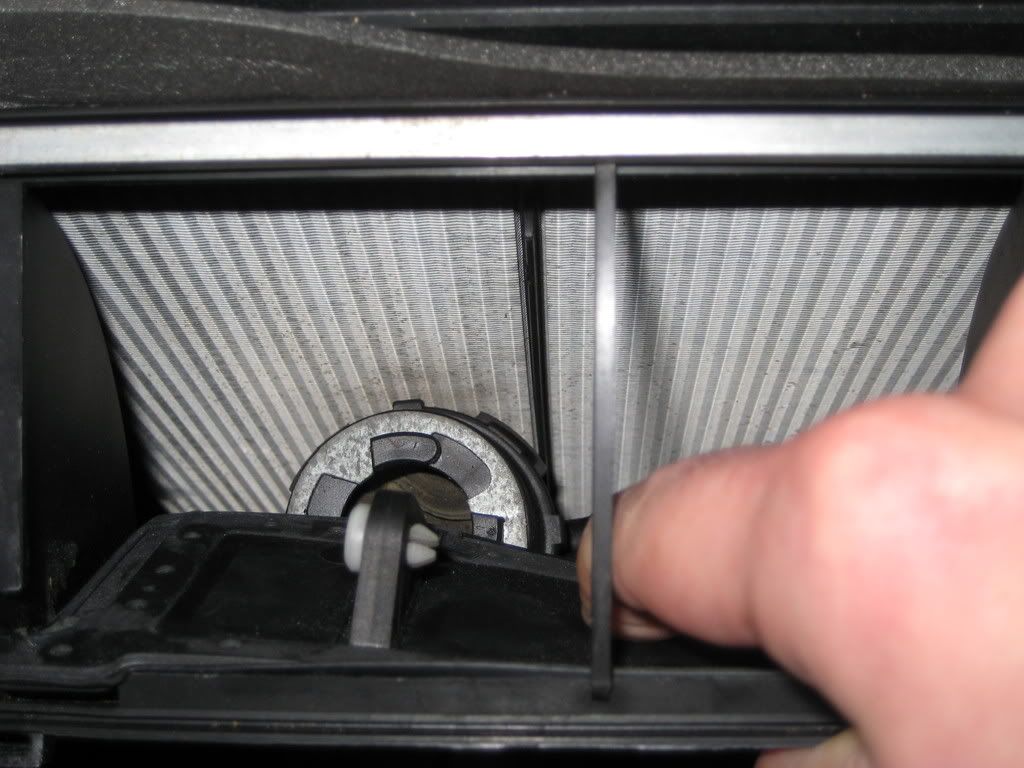 Airbox with no top and no recirculation vacuum pods. The point is to show the 4 Philips head screws and 2 clips (straddling the center vent flap hinges). 2 of the screws and the 2 clips are easy to see but the 2 middle screws are difficult enough to find let alone set a screwdriver on. 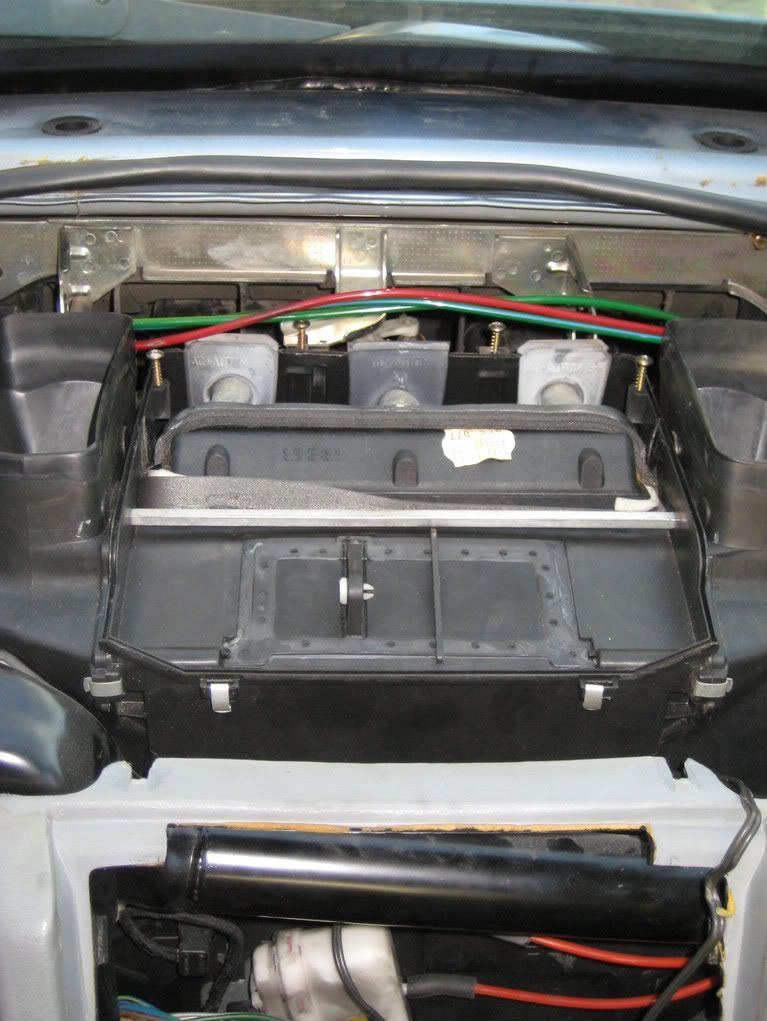 Sixto 87 300D Last edited by sixto; 02-08-2009 at 10:15 PM.
|
|
#3
02-08-2009, 10:48 PM
|
||||
|
||||
|
Nicely done. I copied all of the pictures in both posts, will be nice to review before I do my own dash replacement.
__________________
 "Buster" in the '95 Our all-Diesel family 1996 E300D (W210) . .338,000 miles Wife's car 2005 E320 CDI . . 113,000 miles My car Santa Rosa population 176,762 (2022) Total. . . . . . . . . . . . 627,762 "Oh lord won't you buy me a Mercedes Benz." -- Janis Joplin, October 1, 1970
|
|
#4
02-08-2009, 11:09 PM
|
|||
|
|||
|
nice work
i have done quite a few of those and each time i do it im constantly finding short cuts
__________________
1986 300SDL, 211K,Dealership serviced its whole life 1991 190E 2.6(120k) 1983 300D(300k) 1977 300D(211k)
|
|
#5
02-08-2009, 11:17 PM
|
||||
|
||||
|
Well done, sir
This should go in the Wiki...?
__________________
1987 300D (230,000 mi on a #14 head-watching the temp gauge and keeping the ghost in the machine) Raleigh NC - Home of deep fried sushi!
|
|
#6
02-09-2009, 12:20 AM
|
|||
|
|||
|
Nice write up! You are going to replace all the vacuum pods, right? You don't want to do that again for a few more years. No sense taking a chance with a new dash.
__________________
1987 300TD 309, xxx 2.8.2014 10,000 mile OCI Be careful of the toes you step on today, as they may be connected to the ass you have to kiss tomorrow. anonymous Be who you are and say what you feel, because those who mind dont matter, and those who matter wont mind. Dr. Seuss
|
|
#8
04-15-2009, 02:18 PM
|
||||
|
||||
|
__________________
Bill Wood - Retired Webmaster My Personal Website 1998 Mercedes E430 2010 Toyota Sequoia My Photo Albums
|
|
#9
01-31-2017, 03:08 PM
|
|||
|
|||
|
Thanks it was very helpful, to me the headest part was taking the center vacuum pod in the airbox, there is a robber door on the driver side but you need small hands
I also fund on the floor little rubber squares where these come from? Questions: my car is a 92 300D, and on the passenger side under the vent there is a motor connected to a house, what is that for? Also in the driver side near the vacuum pod there is a Black vacuum line not connected to anything is that normal ? to bad I can't upload any pictures I guess you need a spacial account ?
|
|
#10
01-31-2017, 04:51 PM
|
||||
|
||||
|
Rubber squares = possibly the shims between the gauge cluster and dash cavity. They should be glued to a couple of indents atop the cluster. Maybe a couple go below as well.
Motor = there's an aspirator motor below the passenger side vent that draws air across the cabin temp sensor by the dome light then exhausts to the blower casing. Black vacuum line = there's a black vacuum line hanging open in the driver footwell. It's the collective vent for vacuum devices under the hood. One way to share pictures is to upload them to a site like Photobucket then paste the image link within [img] [/img] tags in a post. Sixto 83 300SD 98 E320 wagon
|
|
#11
01-31-2017, 09:46 PM
|
|||
|
|||
|
Using a hosting site will work to upload images, but the downside is that in the future the links can go dead when the images are no longer hosted.
When you are in the "Quick Reply" pane, if you click on the yellow "Go Advanced" button the "Quick Reply" pane changes to a "Reply to Thread" pane and an "Additional Options" pane opens (also it opens when you click on the "Post New Topic" button) In the "Additional Options" pane , click on the "Manage Attachments" button to open the "Manage Attachments" pane, and you can add up to 5 thumbnail attachments (per post) from your own computer. Valid file extensions: bmp doc gif jpe jpeg jpg pdf png psd txt wav wmv zip
__________________
78 W116 300SD 'Desert Rose' new as of 01/26/2014 79 W116 300SD 'Stormcloud' RIP 04/11/2022
|
 |
| Bookmarks |
|
|


 Linear Mode


