

|
|
|
|
|
|
|||||||
 |
|
|
LinkBack | Thread Tools | Display Modes |
|
#1
 11-21-2011, 11:50 AM
|
|||
|
|||
|
This is the second "how to" I've put together, and I hope it will assist others who are trying to breathe new life into their older Benz.
QUICK BACKGROUND: I recently acquired "Eve", my first Mercedes (and first diesel), and have been working to bring her back to life. The car had been severely neglected, but I believed it had potential. The car has approximately 275K Miles, and while it runs OK, it has been suffering from lack of power, black smoke upon even mild acceleration, rough idle and harder than normal starting. I had completed a diesel purge, run several tanks of fuel with biocides & system cleaners, changed the fuel filters, checked all my vacuum lines, bypassed the EGR, and adjusted the wastegate. Each of these things has helped immensely, but it was time to get serious. There are no service records with the car so I have no idea if/when the injectors had been serviced before, but it seems my remaining symptoms suggest new injector nozzles would not hurt. TECHNICAL INFO: The injectors on this car are mechanical, not electronic as newer models. Basically, fuel is pumped into the top of the injector at very high pressure. There is a plunger in the injector which closes the hole on the bottom of the injector by way of a spring. When the pressure exceeds the pressure of the spring in the injector, the plunger retracts spraying atomized fuel into the combustion chamber. As injectors wear, several things can happen to degrade their performance. They can become plugged with deposits, the springs can weaken causing the plungers to retract too early, and the nozzle orifice can wear causing the spray pattern to be off (improperly atomizing fuel for maximum burn efficiency). Symptoms of worn injectors include hard starting, excessive exhaust smoke, decreased fuel economy, and lack of power. In general, the nozzle is the only part of the injector that receives enough wear to need replacement. Replacing the nozzle is much cheaper than replacing the entire injector, and as you will see it can easily be accomplished by a novice such as myself. Ideally the injectors should also be balanced when you replace the nozzles. This basically means you want to get proper tension on the injector springs so that they open at the correct pressures. To balance the injectors, you either need to take them to a service center or make your own "pop" tester. While it is feasible to make your own tester, it is more economical to bring them to a service center and let them do it. I had all 6 of mine balanced for about $80. Building your own tester and getting a shim kit would likely cost you $150 - 250 at minimum. If you intend to do this more than once, it may be worthwhile to build your own; however, I do not cover this. I will presume you will be taking the nozzles to a service tech. (The topic of balancing injectors has been covered in detail already in the forums if you are interested). QUALIFICATIONS: In my case it is basically none. I have never worked on the fuel injection system of any vehicle, so I was a little anxious about tackling this job, but it was very easy. Trust me, if I can do it so can you. Being a novice, it took me about 4 hours for the whole process. With this tutorial I believe you should able to do it in under 3 hours (including clean-up). I suggest you read this entire post before beginning the project, it will save you time. PARTS: There are basically 3 choices in nozzles that I have found. Bosio, Bosch, and Monark. After much reading, I opted for using Monark replacement nozzles. Not only were they the cheapest, but they come highly recommended by most that have used them, and appear to be the only ones still manufactured in Germany. They also are a more advanced design then the Bosch nozzles and are supposed to handle WVO and Bio-Fuels more efficiently. You will also need new heat shields (1 for each nozzle). These are cheap and should be replaced every time you remove the injector - as such it would be wise to order extras in the event you need to pull & fix a leaky injector after the new nozzles go in. If you are going to balance the injectors yourself, you should also get a shim kit (adding thicker shims inside the injector places more compression on the spring so you can bring the release pressure back within spec range). TOOLS NEEDED: 1. Deep 27mm socket and at least 4" extension (NOTE: I found that an impact socket will not work because the socket wall is too thick to get around the injector while in the head). 2. 14mm Open Wrench (to remove the metal fuel lines from the injectors) 3. 6mm Allen Wrench (to remove the intake crossover for access to front injectors) 4. Brass or Nylon (NOT STEEL!!!) bottle brush (to clean injector bodies & parts) 5. 2000 grit sandpaper (to lap mating surfaces of injectors) 6. Glass plate or VERY FLAT machined surface (for lapping - it is important that this is something very smooth. A workbench top generally will not do). 7. Small dish of solvent for soaking injector parts (I used carb cleaner) 8. Dental-style pick (for removing and seating heat shields) 9. Torque wrench that will fit your 27mm socket (capable of 52-59 ft/lb) 10. Bench Vice (to hold the injector for dis-assembly & reassembly) 11. Small amount of motor oil - any grade (to lubricate injector parts upon assembly) 12. Air Compressor (to blow off & clean injector parts before reassembly) 13. OPTIONAL: Blue Thread-locker (to use sparingly in joining the injector halves) 14. OPTIONAL: A few of your favorite beers (to lubricate yourself) LET THE FUN BEGIN: Before beginning, you will want to check to see that you have all the parts for the job (6 Nozzles and 6+ new heat shields). The kit I ordered had everything nicely packaged and even included basic (but very helpful) instructions: 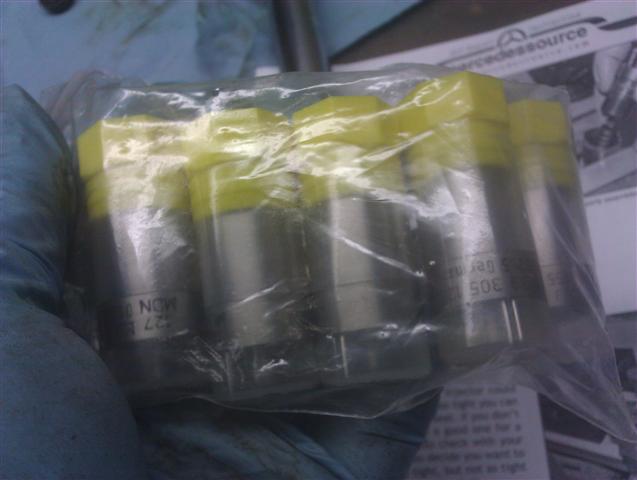 Then check to be sure you have all your tools, this is important because upon inspection I found I needed to replace one of my tools: 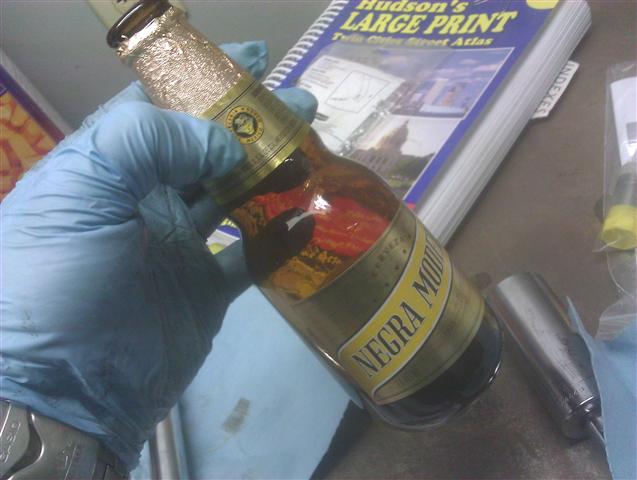 Fortunately I get these things by the case so I didn't need to delay the project. I would suggest only removing and rebuilding 1 injector at a time. The injectors should have been balanced previously, so you don't want to mix & match any of the parts with the other injectors. It will help ensure pressures are as close as possible, and will minimize the possibility of leaks. I decided to start with the injector closest to the front of the car. I first pulled the braided fuel lines from the top of the injector. (There are 2 nipples on each injector, and these braided lines are just pushed onto them). Just grab the lines firmly and wiggle back and forth while pulling. It may feel like nothing is happening, but the will just pull off. Once they are removed, use your 14mm wrench to loosen and remove the metal fuel line from the top of the injector. I was able to just push the metal line to the side enough to get my socket over the top of the injector. Be careful not to break this fuel line - they are expensive (about $70 each at the dealer) and not always readily available - even in the junk yards. Now use your 27mm socket & wrench to remove the injector itself. DO NOT USE YOUR TORQUE WRENCH FOR THIS OR YOU COULD RUIN IT!! Torque wrenches are designed to tighten only. My first injector loosened without too much force, and in less than a minute it was out & in my hand. Woo-hoo! Here is how it looked with the first injector out: 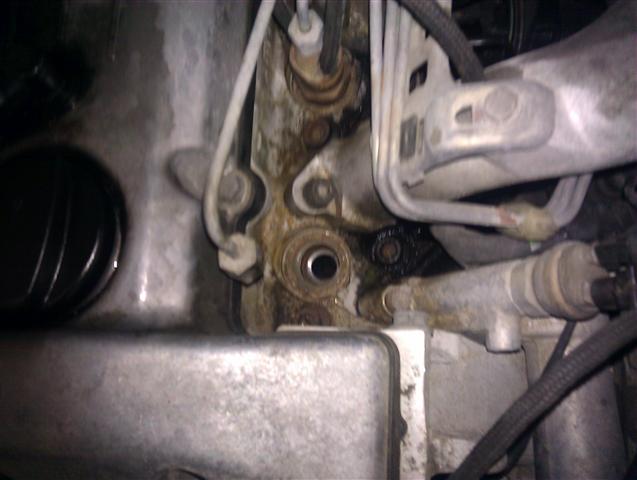 Here is the freshly removed injector on my work bench: 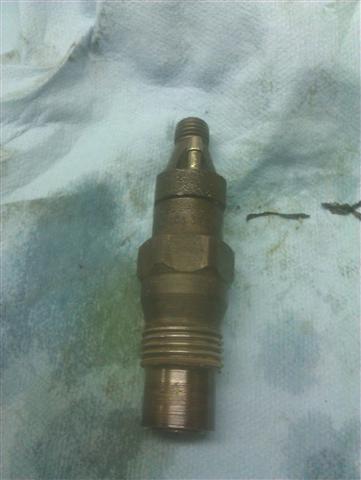 Looking at the "business end" of the injector, you can see it has been around for a while: 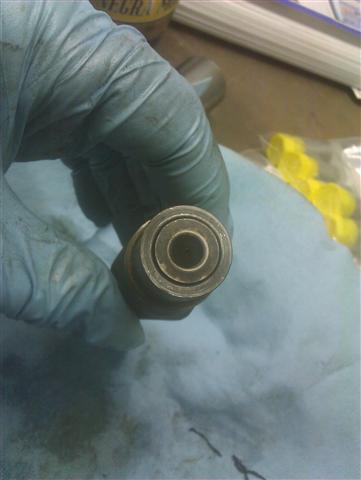 Now it is time to open up the injector. The easiest way is to place it in a bench vice with the nozzle pointing up. You will find that the upper half (end pointing down) has 2 flat sides that make it perfect to rest in the jaws of the vice. You should probably have some type of guards in the vice so you don't chew up the injector - though you will see in the photo I didn't do that.  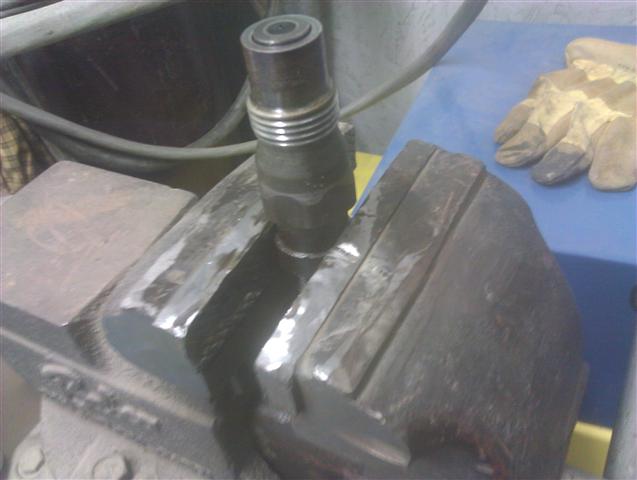 Once secured, use your 27mm socket to loosen the injector halves from each other. It will take a little bit of force, but not too bad. REMEMBER: DO NOT USE YOUR TORQUE WRENCH FOR THIS!! Use your standard ratchet wrench. Once the halves are part, carefully remove the innards. Pay particular attention to how everything comes out as it will help you to put it all back together. Once dis-assembled, here is what you will have: 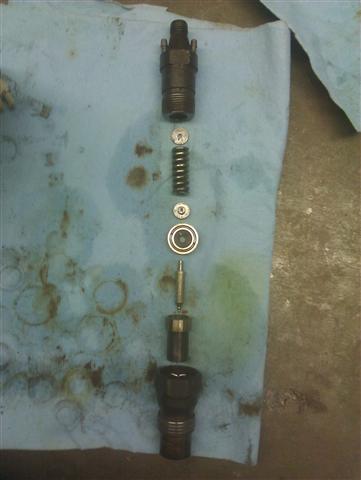 Place everything except the old nozzle in your container of solvent & let them soak for a few minutes. This is a good time to enjoy a sip or four of your favorite beer.  At this point, I used the bottle brush to do an initial scrub of the injector halves, then placed them back into the solvent for further cleansing. While the rest of the parts are soaking, it is a good time to lap the upper injector body & spacer. Fish out the spacer from the solvent dish and inspect it. You will likely see scoring in the shape of a ring like this: 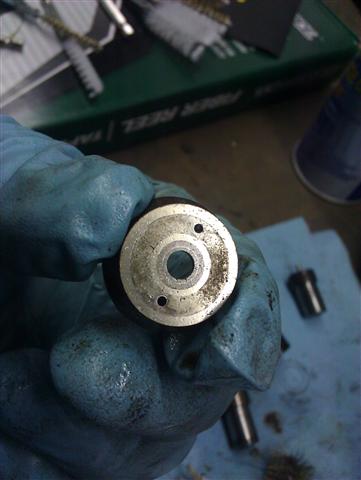 That ring is caused by the mating with the upper injector body. Because there is no gaskets to keep the injectors from leaking, this surface needs to be UBER-FLAT (very, very, VERY flat). We need to remove this scoring and pitting, so we will lap the parts that will be mated once the injector is back together. Place your 2000 grit sandpaper on the lapping surface (glass plate, machined surface, etc). I used the machined surface of my drill press. Drip a little diesel fuel or solvent on the sandpaper to get it wet and lay the spacer on the surface of the paper, rubbing it in small circles. KEEP IT FLAT AT ALL TIMES! 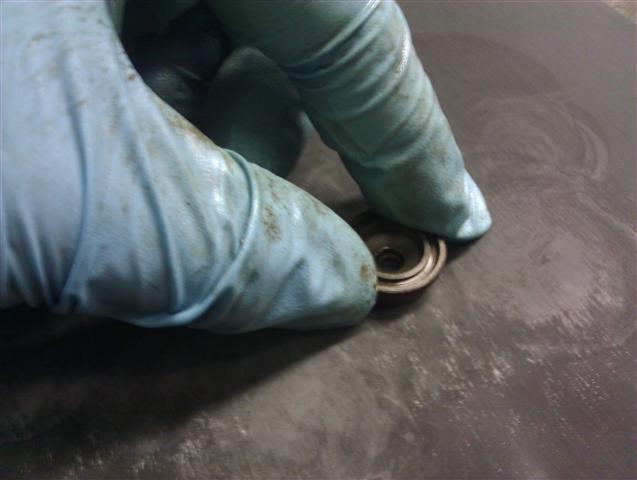 Do this to both sides of the spacer until you can no longer see the scoring marks. When you are done, it should look like this:  Next, fish the upper-half of the injector out of the solvent and inspect it. You will probably find scoring there too, like this:  Lap that surface on the sandpaper too, keeping it flat at all times. When done it should look like this:  Now it is time to put it all together with the new nozzle. (OK, you can take a sip of beer first). Remove all the parts from the solvent, brush them well and use your air compressor to blow off all the crud. HOLD ONTO THE PARTS TIGHT. You don't want to blow these parts across the room and lose them or damage them, but it is very important you get them clean. Any little particle inside the injector can cause big problems down the road. Once clean, lay the parts out and make sure you know how they will go back together. Here is a photo with each of the parts labeled and in the proper order:  OK, I know that the part between the spring & spacer isn't really called a widget, but get over it. ") The easiest way to reassemble the injector is to go back to the bench vice. Place the lower half of the injector in the vice. Now lightly coat all the internal parts of the injector with a film of motor oil - this will keep them lubricated until the diesel fuel fills the injector to do the job. Once oiled, drop in the nozzle and needle into the bottom half as 1 piece. Next, place the spacer in (with the flat side down and the cupped side up). Make sure it seats with the top of the needle sticking thru the hole in the middle of the spacer. Next part in is the widget. It will sit with the recess down (again, the top of the needle will rest in this opening), and the protruding part of the widget will stick up. Set the spring down on top of that, and you will find that the protrusion on the widget fits into the center hole of the spring. The only parts left should be the shim and the top half of the injector. Drop the shim into the upper half of the injector. The light coating of oil on the shim will keep it in place as you place this over your parts in the vice. Place a very small amount of blue thread locker on the threads of the top half, then carefully begin threading the two halves together. Once hand tight, remove the injector assembly from the vice and flip it over (so the nozzle end is pointing up again). NOW YOU CAN USE YOUR TORQUE WRENCH. Carefully place the 27mm socket over the injector - paying particular attention so you don't bump the needle tip with the socket. It wouldn't take much to deform that little tip, ruining your new nozzle. Also, make sure your socket is deep enough so that when you lower the socket onto the injector you are not bottoming-put (and mashing the needle tip on the roof of the socket). The socket halves should be torqued to 52-59 ft/lbs. Once done, it will look like this: 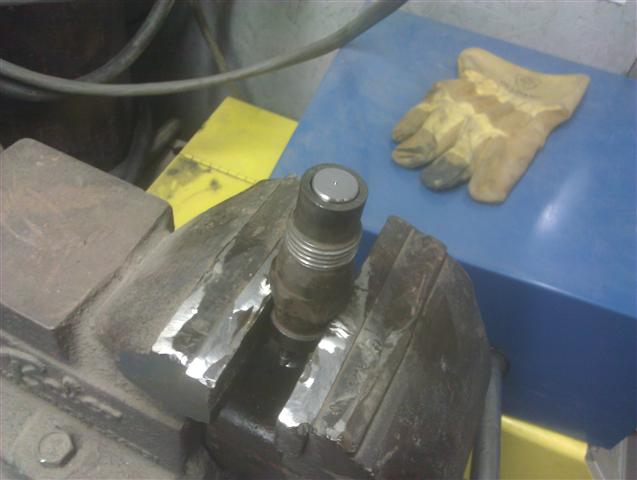 CONGRATS! You are done with your first injector for now. Have another sip of beer and go look at your engine. More to follow...
__________________
Current Ride: 2012 GL350 Past Rides: 2004 E320, 1987 300SDL 
|
|
#2
11-21-2011, 11:52 AM
|
|||
|
|||
|
Now that you have 1 injector done, lets plan the attack on the remaining 5 injectors.
You will notice the intake crossover pipe is in the way for the next 2 injectors. Not to worry, it is easy to get this out of the way. There are 3 allen head bolts you need to remove (I am pretty sure they were 6MM). Here is the location of the bolts: 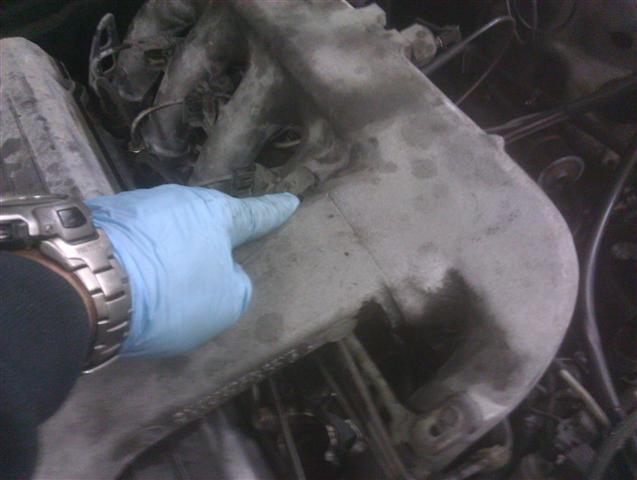 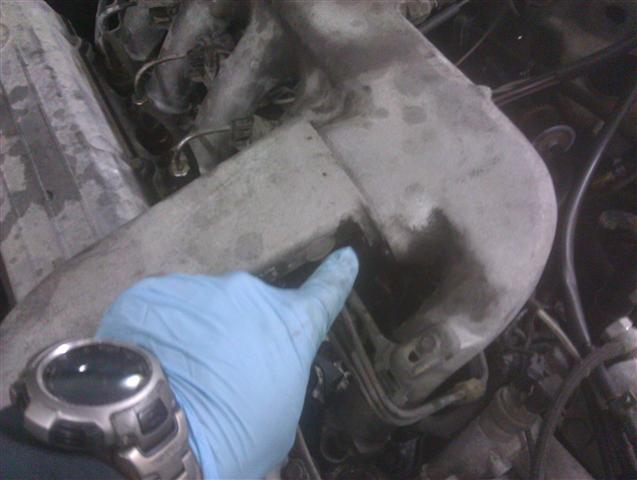 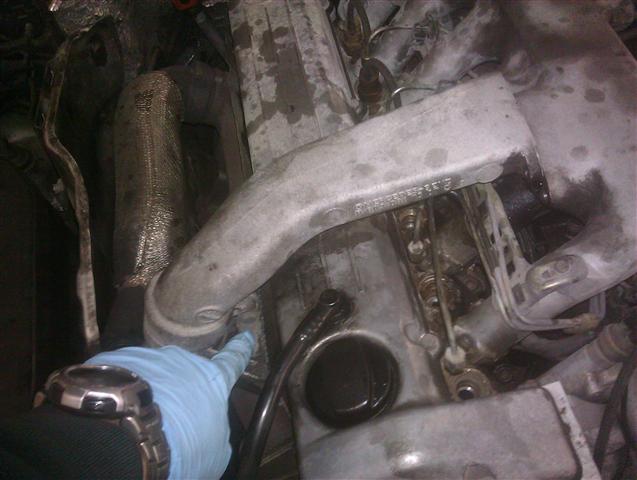 Once these are removes, you can just twist the crossover out of the way like this: 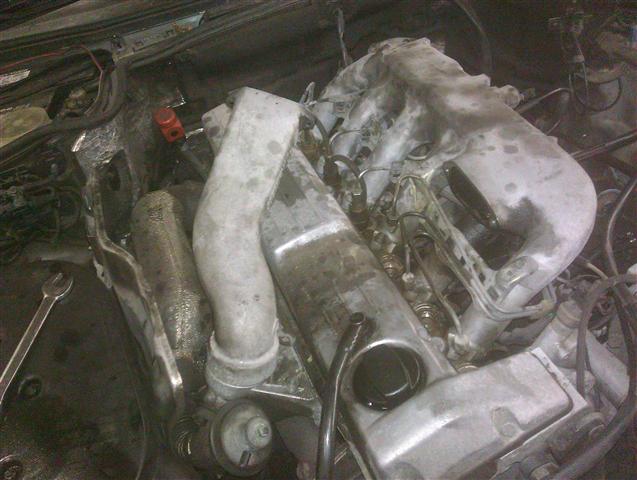 At this point, you will have easy access to the remaining 5 injectors. Just repeat the previous steps for each of the remaining injectors. After getting that first one under your belt, the others will go very quickly. After you have completed the above steps for all 6 injectors, you have a decision to make: 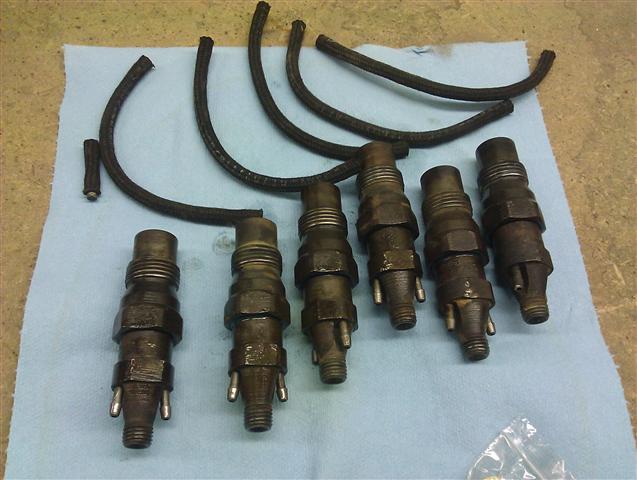 Are you going to have them balanced, or risk that they are good enough to just place back into the car? You really should get them balanced, but if you can't the car should still run better with unbalanced new injectors vs. old worn injectors. My 2 cents is that unless it is a total hardship, get them balanced. Even with new nozzles, unbalanced injectors can cause problems, and they will only get worse as the new nozzles begin to wear. I have 2 service centers in my area that can perform the services for me. Both indicated I would need to leave the injectors overnight. I dropped them off and picked them up the next day, all ready to be installed. When installing them, you will need to use the dental-type pick to remove the old heat shields from the block. They just sit in the bottom of the hole that the injectors thread into. They should just lift out. Be careful when removing them not to let junk drop into the holes (and thus into the combustion chamber). If you are curious as to if you really need to replace them, look at this other member's post. It will show you why they should be replaced: Do I NEED new injector heat shields? As you can see, mine had heavy deposits on them (as compared to the new ones).  Carefully place new heat shields in each of the injector holes on the engine. Make sure they are in properly as well. The tapered side should be facing down. If in doubt, look at the old ones. The sooty/dirty side is the side that was facing down. With the heat shields in place, carefully thread the injectors into the engine and use your 27mm socket & torque wrench to tighten them down (52-59 ft/lbs). DO NOT OVER-TIGHTEN!!! You will warp the heat shield and possibly the injector itself, causing leaks. After the injectors are all properly torqued down, re-attach the metal fuel lines and the braided lines (use new braided fuel lines if you have them. If you reuse the old lines, watch closely for leaks. These are notorious for leaking after being removed because they get brittle). Don't forget to replace the intake cross-over pipe and tighten the 3 bolts holding it in place. Now for the moment of truth..... Remember, the engine will need to be primed. On the OM603, it is self priming. Not sure how well this guide will apply to the other engines, but if you are following this and have a hand-primer use it now. If all went well, it should fire up after a few seconds of cranking. Don't worry if it runs rough at first (remember, there is probably still air in the lines). Mine ran rough for about a minute, then began to purr. Before running off to give it a test drive, check for leaks. Areas to check are the fuel lines and the joint between the injector halves. If the fuel lines are leaking, tighten or replace the offending line and see if that helps. If your injector is leaking from the middle joint, you will likely need to remove it and re-lap the mating surfaces. I was fortunate and didn't have any leaks. DON'T GET COCKY THOUGH! Most leaks don't show up for a few miles. No leaks now is good, but you need to check again after running her a bit. Now, assuming you haven't had too many beers, take her for a test run. I immediately noticed big improvements. A bit more power, almost NO smoke (even at full throttle), and it just "felt" better. Seemed much smoother. All in all I am a happy camper. I hope this helps someone else out there, and for those with more experience than me, if I have made any error or if you have any suggestions to improve this guide, please let me know. I will update as needed. I am off to have another beer and celebrate another victory. 
__________________
Current Ride: 2012 GL350 Past Rides: 2004 E320, 1987 300SDL Last edited by ccrobin; 11-21-2011 at 01:29 PM.
|
|
#3
11-21-2011, 12:24 PM
|
|||
|
|||
|
Nice job.
A couple of issues: "Lapping" by definition, is not done with a piece of sandpaper. I'm curious as to whether you strictly utilized 2000 grit paper. I'm not familiar with anything finer than 600 paper, and I cannot imagine that 600 paper would have a prayer of removing the lightly scored surfaces that you show in the photos. If you found and only used 2000 paper, how long did it take to achieve that finish on one injector half?
|
|
#5
11-21-2011, 01:23 PM
|
|||
|
|||
|
Quote:
Yes, 2000 grit is all I used. You won't likely find it at Home Depot, but any decent automotive store will carry it (usually used for body/paint work). It only took about 20 seconds for each surface cleaned. You want to be careful not to take more off than needed, as thinning the metal will lower the tension on the spring and could actually lower the pop pressure of the injector if you get too aggressive. Using 600 grit only will actually leave the surfaces too rough, and will likely leak.
__________________
Current Ride: 2012 GL350 Past Rides: 2004 E320, 1987 300SDL
|
|
#6
11-21-2011, 09:39 PM
|
|||
|
|||
|
Quote:
Clearly, it was quite successful for you.
|
|
#7
11-21-2011, 10:04 PM
|
||||
|
||||
|
Quote:
__________________
85 300D turbo pristine w 157k when purchased 161K now 83 300 D turbo 297K runs great. SOLD! 83 240D 4 spd manual- parted out then junked
|
|
#8
11-21-2011, 10:08 PM
|
||||
|
||||
|
A question for you. You bought new nozzles? Why did you take the needle out of new nozzles? A rule of thumb: never take the needle out. And why are you wearing that watch when you work?

__________________
85 300D turbo pristine w 157k when purchased 161K now 83 300 D turbo 297K runs great. SOLD! 83 240D 4 spd manual- parted out then junked
|
|
#9
11-21-2011, 11:55 PM
|
||||
|
||||
|
Quote:
I have also seen new Injector Nozzles that had bits of metal from the machining inside of them that needed to be blow out. It used to be a common problem with Bosch Nozzles back in the late 1970s You can pull the Pintle/Needle out to do the cleaning as long as you keep the Nozzle and the Pintle together and when you assemble them dip them in Diesel Fuel; never install them dry.
__________________
84 300D, 82 Volvo 244Gl Diesel
|
|
#10
11-25-2011, 08:25 PM
|
|||
|
|||
|
Quote:
The watch? I wear it to tell the time. Trust me, its been thru much more abuse than working on a car could ever give. Its not the one I wear for dress.
__________________
Current Ride: 2012 GL350 Past Rides: 2004 E320, 1987 300SDL
|
|
#11
09-03-2020, 12:08 PM
|
|||
|
|||
|
Hello! I have new Injectors on the way and have never done this.
My sense is that a regular long socket that would otherwise work to remove the injector will not fit over the nipples for the return lines. So you need a special socket with slots down the side? Is that true and if so what size should that be?
|
|
#12
09-04-2020, 10:58 AM
|
|||
|
|||
|
Been long time, but my original post indicated I used a deep 27mm socket and 4" extension. Cant be an impact socket though as the wall of the socket is too thick on an impact. I did not need/use a split socket.
|
|
| Bookmarks |
|
|


 Linear Mode


