

|
|
|
|
|
|
#1
 06-11-2010, 01:07 PM
|
||||
|
||||
|
I use heavy plastic/rubber, and other materials between my work bench and these parts, to protect from impact damage of precision machined surfaces..
Everything must be kept clean, and the pump gears/sump thoroughly lubricated (drowned in ATF) before re-assembly. You should plan to use up several quarts of ATF, cleaning, lubricating, and random minor spills. #1. Remove the torque converter. #2. Remove the 13 MM pump face bolts. #3. There are two threaded blind holes in the face plate, screw two of the 13 MM pump face bolts in the holes and use them as handles to pull the pump assembly out. . 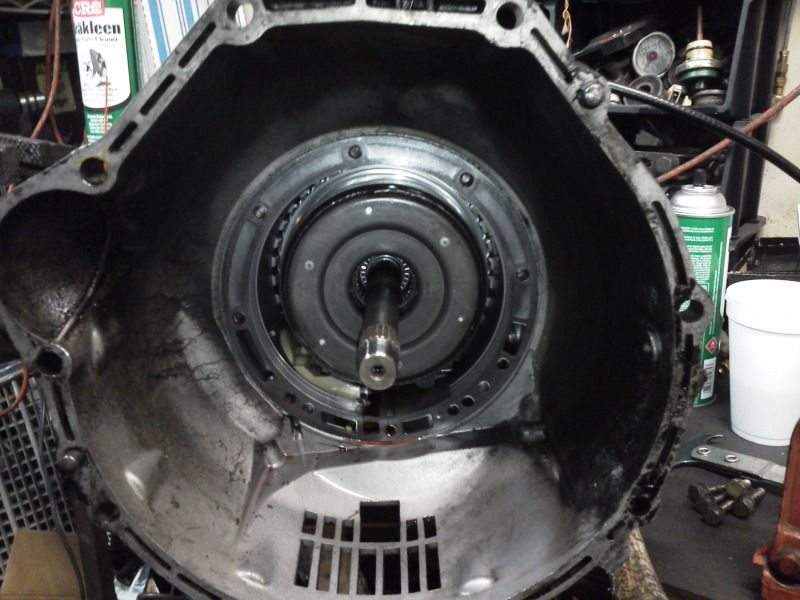 #4. Remove the Teflon rings from the shaft to prevent damage. #5. This may require a helper to push down on the spring plate, exposing the snap ring you must remove. . 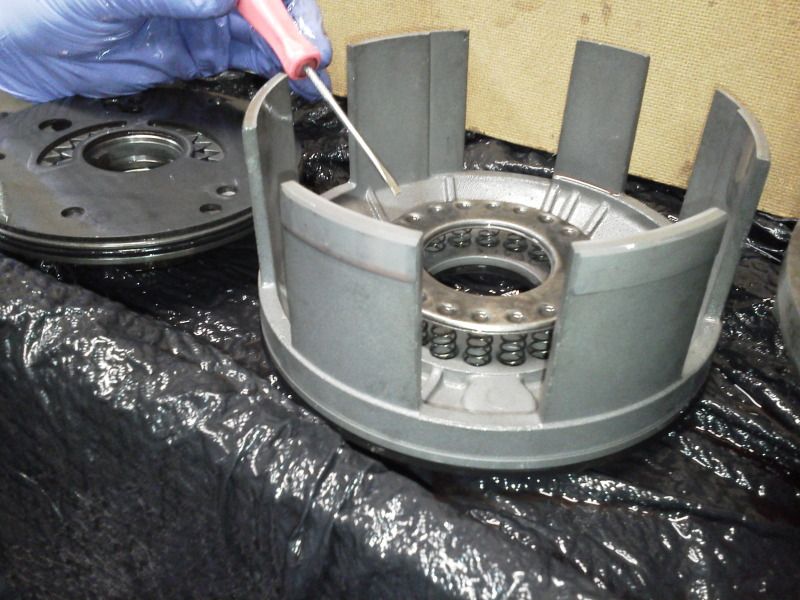 #6. This is the snap ring you must remove. . 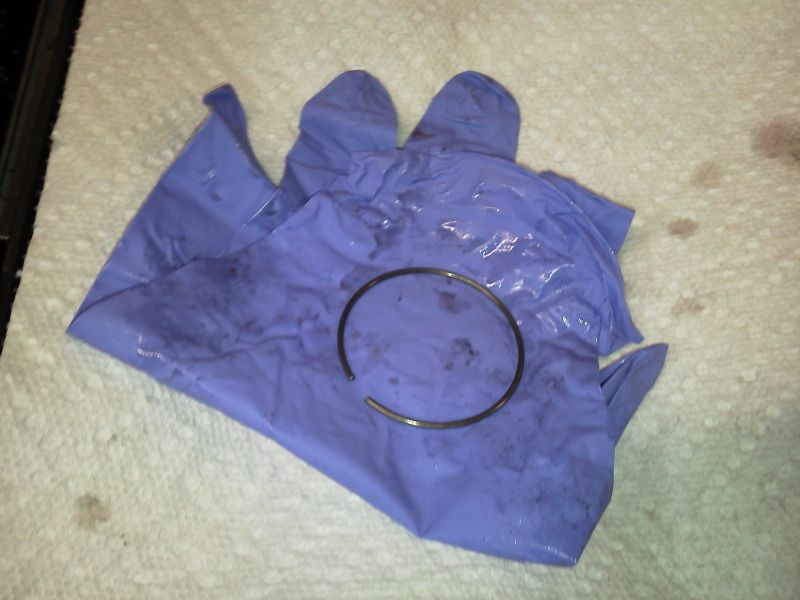 #7. These two pictures show the snap ring seating groove. . 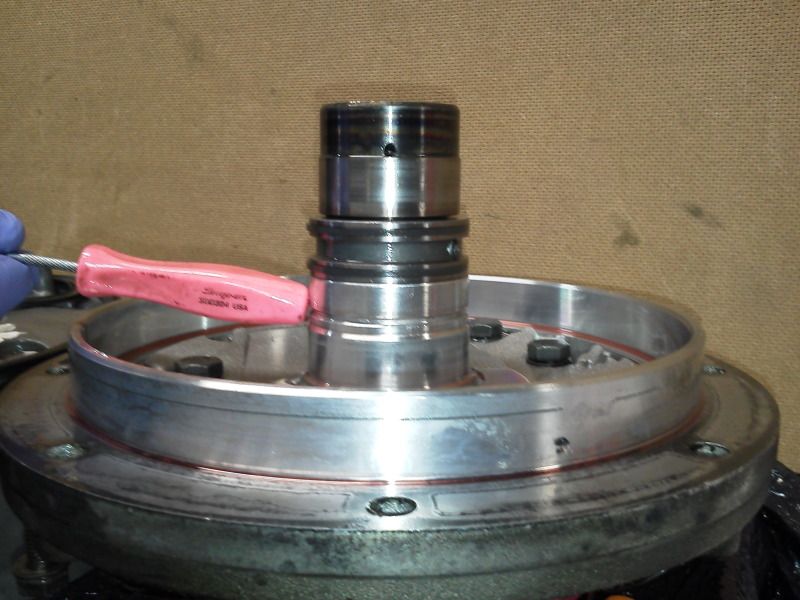 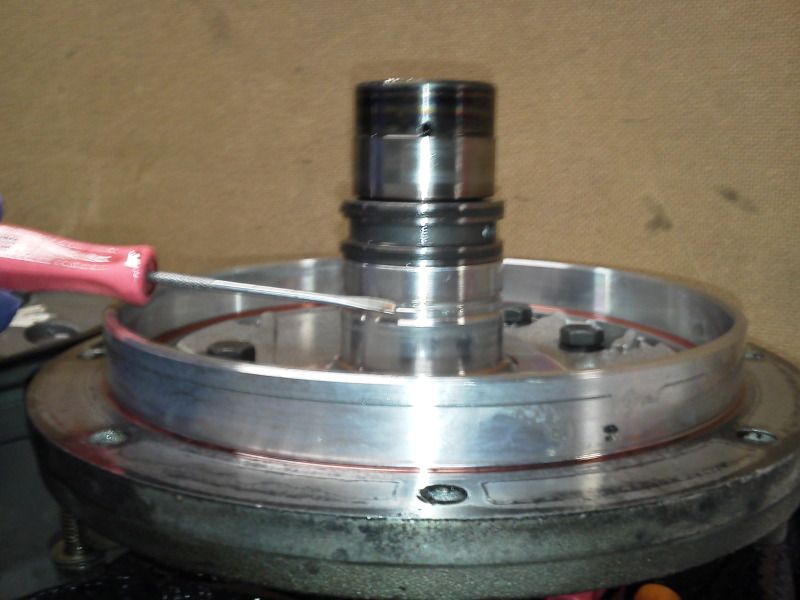 #8. You must remove (piston LB3) the large aluminum piston/basket. . 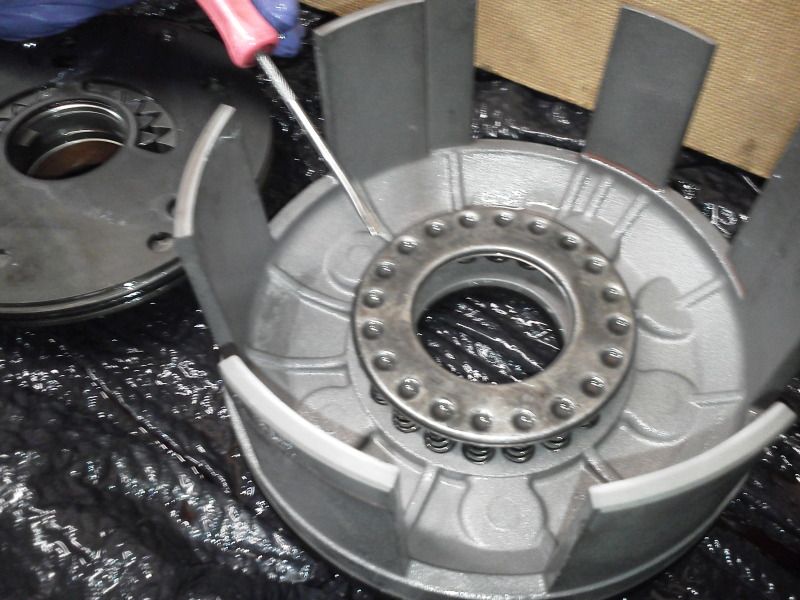 #9. You must remove the 13 MM inner pump face bolts. #10. I use three of them in a triangle pattern (screwed in three turns), to carefully drive out the outer pump face. #11. Put the end of a hammer handle on the bolt head and thump the top (hard) with your hand, go to the next bolt repeating as needed until it comes loose. #12. Remove the three bolts, while holding the pump/face plate. #13. Lower the pump/face plate, and lift off the body. #14. Take special note of the hole pointed out in this picture. . 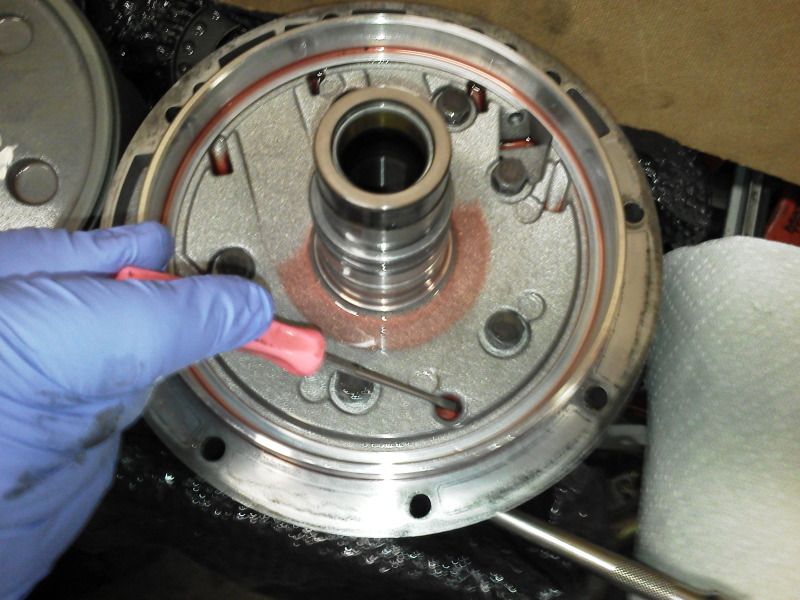 #15. This picture shows the (piston LB3) Alignment Pin that MUST go into the hole during re-assembly. . 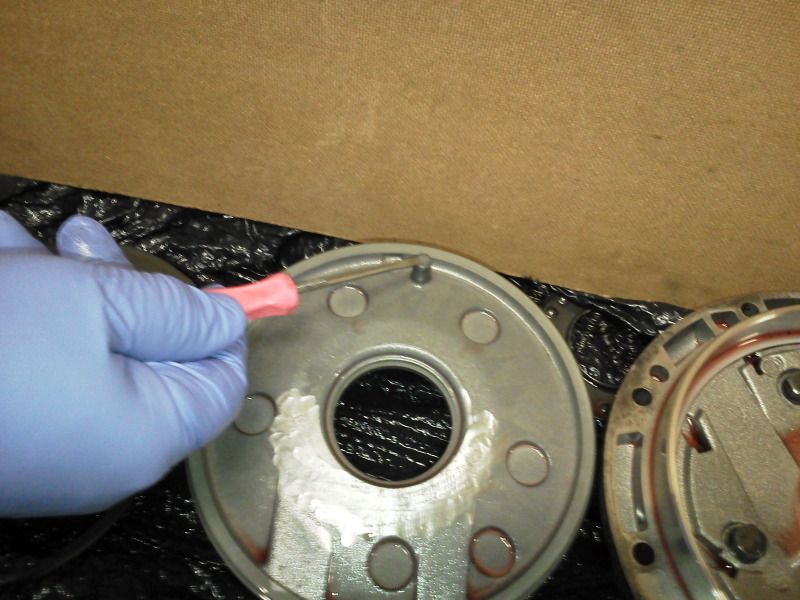 #16. This picture shows From Left to Right: *(LEFT) The pump/face plate with gears and spacer/surface plate. Do NOT remove the gears. *(CENTER) The (piston LB3) large aluminum piston/basket. *(RIGHT) The pump main channel body. . 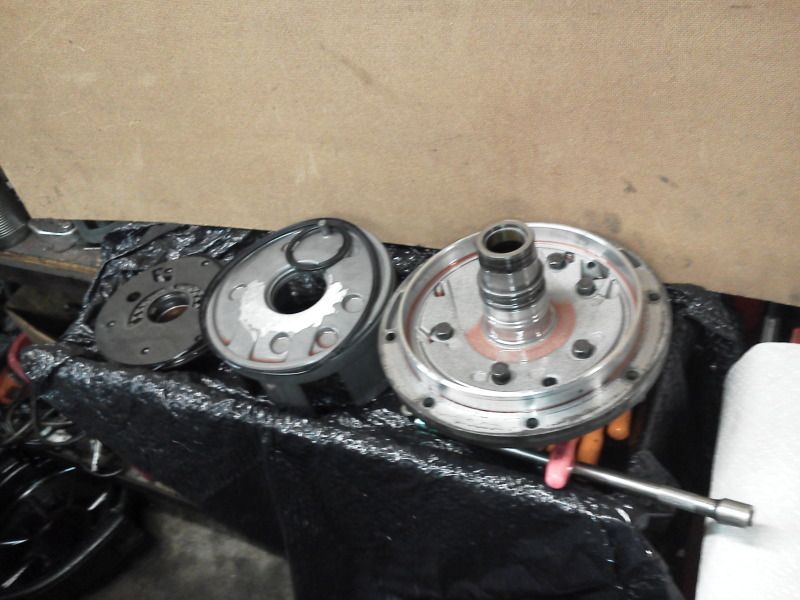 #17. The springs should be removed during service, because they WILL fall out and get lost.. . 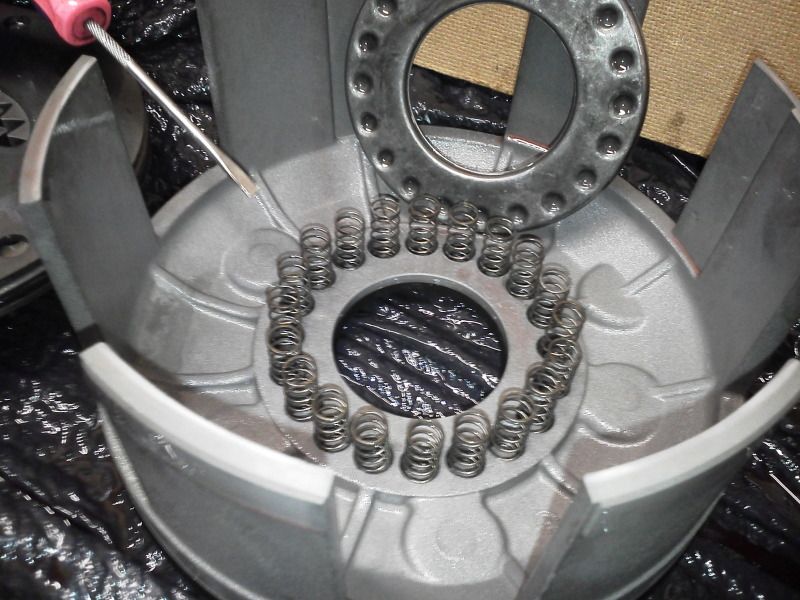 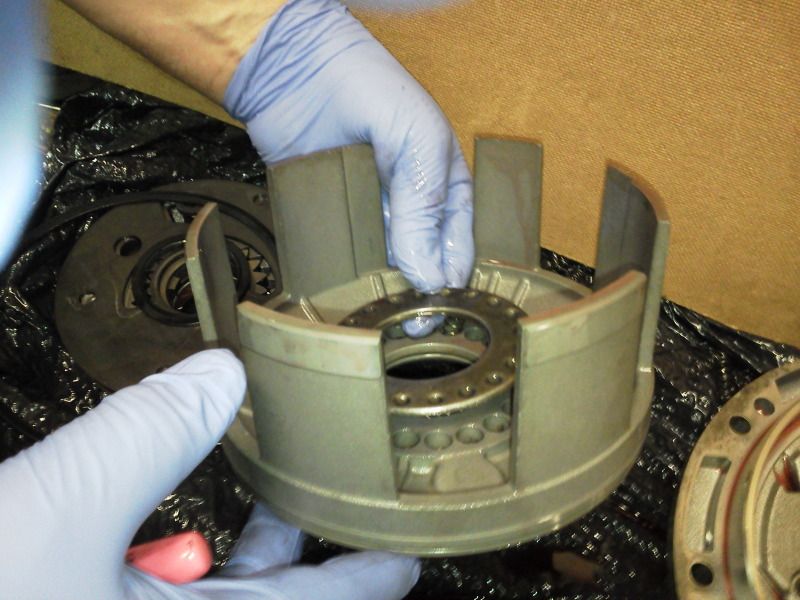 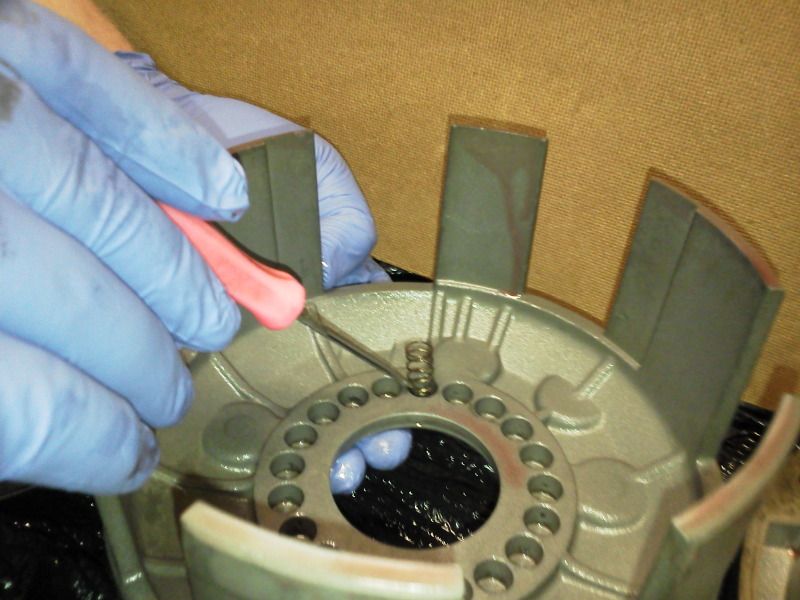 #18. This picture shows the pump/face plate with gears and spacer/surface plate. * Do NOT remove the gears. . 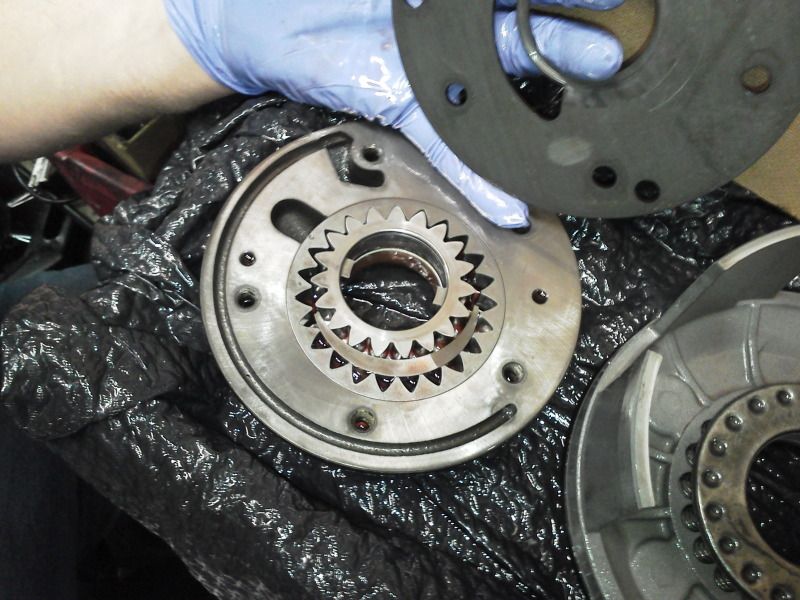 #19. Replace the O-ring on outer edge of the pump/face plate. * Do NOT remove the gears. . 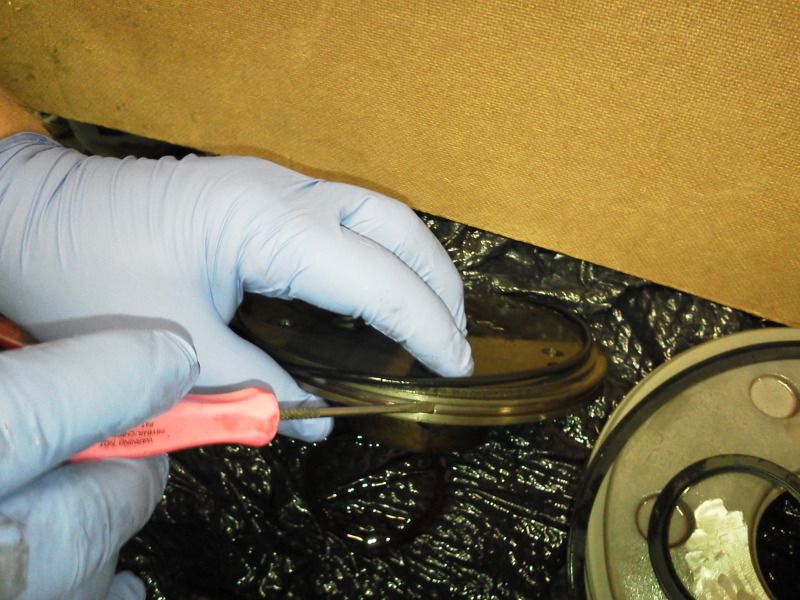 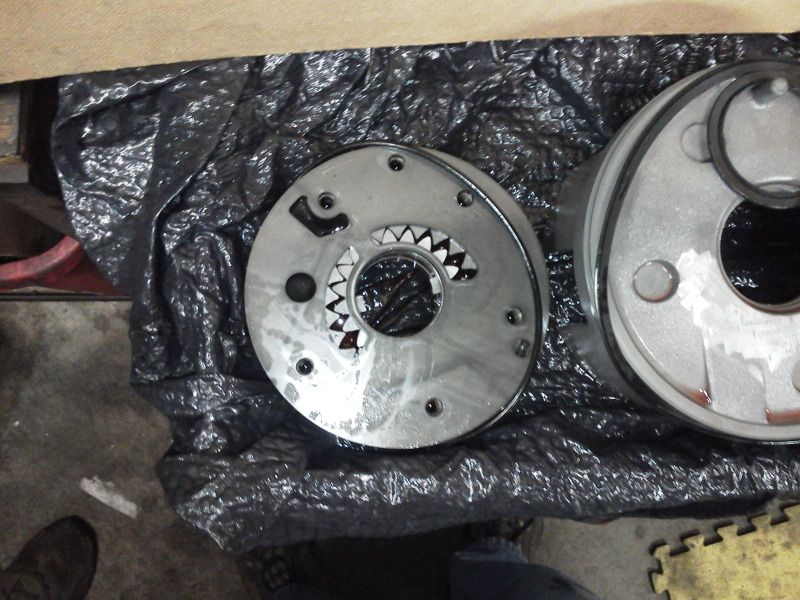 #20. Replace both angle seals (center and outer edge) (piston LB3) the large aluminum piston/basket. #21. WARNING: Both angle seals must have the lip toward the front of the transmission.. To re-seat the pump seal rings, I made two special tools: #A1. was for the small inner rubber pump cover seal, I used 4 mil plastic wrapped around the shaft, and ten inches tall for a good grip. here is another possible option PeachPartsWiki: Replacing Front Crankshaft Seal with "Special Tool" #A2. Was for the large inner rubber pump cover seal, I used 4 mil plastic around 1/3 of the perimeter. . 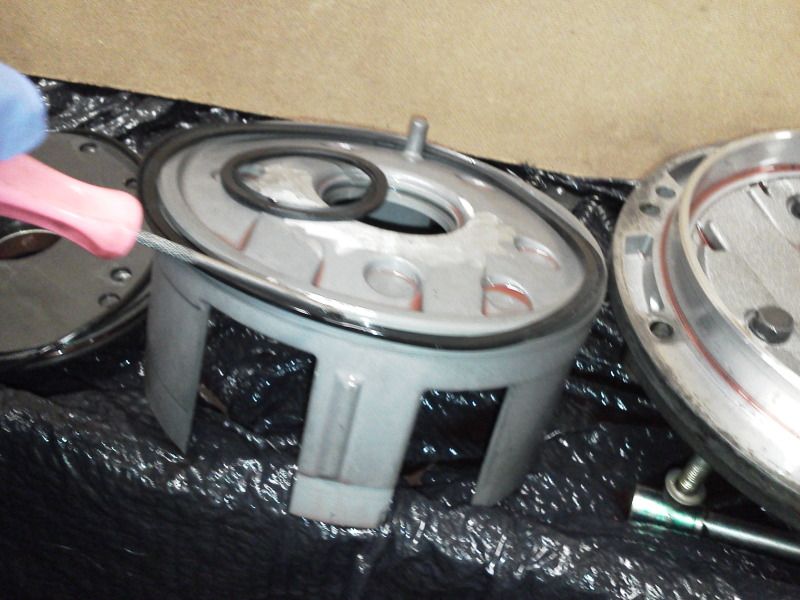   #22. STOP; this is NOT ready for assembly. #23. Everything must be thoroughly lubricated (drowned in ATF) at every step, before re-assembly. 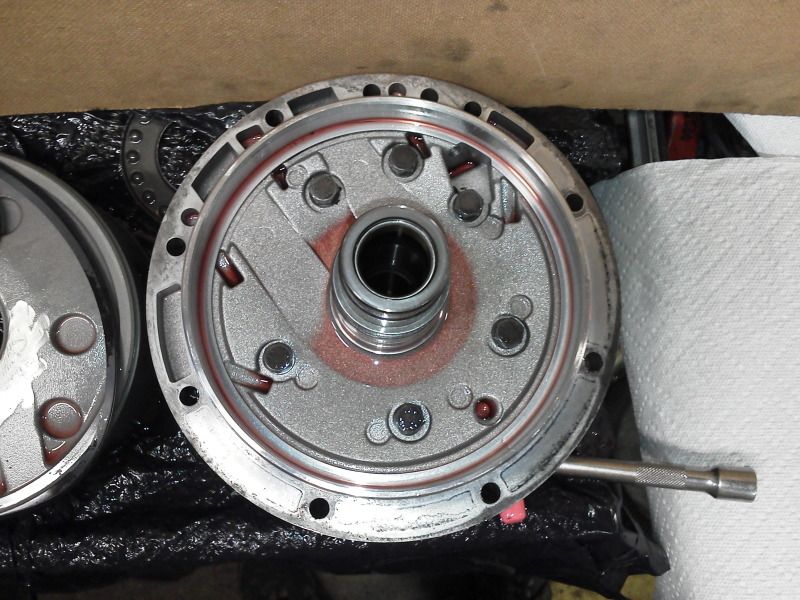  . Last edited by whunter; 06-15-2012 at 11:47 AM. 
|
|
#2
06-15-2012, 12:48 PM
|
||||
|
||||
|
FYI
If you pause for more than a few minutes.
Cover everything with plastic. These parts draw dust particles like a magnet. . Last edited by whunter; 10-16-2012 at 04:09 PM.
|
|
#3
06-15-2012, 01:27 PM
|
||||
|
||||
|
Why mustn't you take the gears apart? (Step 16 and 18)
__________________
1992 W201 190E 1.8 171,000 km - Daily driver 1981 W123 300D ~ 100,000 miles / 160,000 km - project car stripped to the bone 1965 Land Rover Series 2a Station Wagon CIS recovery therapy! 1961 Volvo PV544 Bare metal rat rod-ish thing I'm here to chat about cars and to help others - I'm not here "to always be right" like an internet warrior  Don't leave that there - I'll take it to bits!
|
|
#4
06-18-2012, 02:45 PM
|
||||
|
||||
|
Answer
Quote:
The orientation is critical, and it is easy to install them wrong. .
|
|
#5
06-18-2012, 02:52 PM
|
||||
|
||||
|
Quote:
__________________
1992 W201 190E 1.8 171,000 km - Daily driver 1981 W123 300D ~ 100,000 miles / 160,000 km - project car stripped to the bone 1965 Land Rover Series 2a Station Wagon CIS recovery therapy! 1961 Volvo PV544 Bare metal rat rod-ish thing I'm here to chat about cars and to help others - I'm not here "to always be right" like an internet warrior Don't leave that there - I'll take it to bits!
|
|
#6
06-19-2012, 01:01 PM
|
|||
|
|||
|
Oh goodie! Did you ever manage to put the 722.1 back together?
__________________
80 300SD (129k mi) 82 240D stick (193k mi)77 240D auto - stick to be (153k mi) 85 380SL (145k mi) 89 BMW 535i 82 Diesel Rabbit Pickup (374k mi) 91 Jetta IDI Diesel (155k mi) 81 VW Rabbit Convertible Diesel 70 Triumph Spitfire Mk III (63kmi)66 Triumph TR4a IRS (90k mi)67 Ford F-100 (??)
|
|
#7
06-19-2012, 01:39 PM
|
||||
|
||||
|
Quote:
Just in case => Oh yes that's been done a long time ago. I have another two 722.1s to do as well - the plan is to sell them to fund the 722.3... We'll have to see how that goes though - selling here is pretty tough if you want more than 25 euros for anything... ...so eye iz gonna bling them up a bit two make em look nice...
__________________
1992 W201 190E 1.8 171,000 km - Daily driver 1981 W123 300D ~ 100,000 miles / 160,000 km - project car stripped to the bone 1965 Land Rover Series 2a Station Wagon CIS recovery therapy! 1961 Volvo PV544 Bare metal rat rod-ish thing I'm here to chat about cars and to help others - I'm not here "to always be right" like an internet warrior Don't leave that there - I'll take it to bits!
|
|
#8
06-19-2012, 01:44 PM
|
|||
|
|||
|
^^ Right- got it. So you are planning to use the 722.3..if it's rebuildable. Good move...
__________________
80 300SD (129k mi) 82 240D stick (193k mi)77 240D auto - stick to be (153k mi) 85 380SL (145k mi) 89 BMW 535i 82 Diesel Rabbit Pickup (374k mi) 91 Jetta IDI Diesel (155k mi) 81 VW Rabbit Convertible Diesel 70 Triumph Spitfire Mk III (63kmi)66 Triumph TR4a IRS (90k mi)67 Ford F-100 (??)
|
|
#9
01-11-2013, 06:40 PM
|
|||
|
|||
|
Is there a parts list for this job?
__________________
Current fleet 2006 E320 CDI 1992 300D - 5speed manual swapped former members 1984 300D "Blues Mobile" 1978 300CD "El Toro"
|
|
#11
02-06-2013, 09:12 PM
|
||||
|
||||
|
Answer
Quote:
018 997 04 47 Transmission Pump O-Ring (144 X 3.5 mm) Part # 016 997 14 48 Transmission Gasket Part # 126 271 12 80 Plastic Ring (White), x2 Part # 126 272 09 55 Transmission Seal For Reverse Piston (Large) Part # 126 272 01 92 Transmission Seal For Reverse Piston (Small) Part # 126 272 00 92 .
__________________
ASE Master Mechanic asemastermechanic@juno.com Prototype R&D/testing: Thermal & Aerodynamic System Engineering (TASE) Senior vehicle instrumentation technician. Noise Vibration and Harshness (NVH). Dynamometer. Heat exchanger durability. HV-A/C Climate Control. Vehicle build. Fleet Durability Technical Quality Auditor. Automotive Technical Writer 1985 300SD 1983 300D 1984 190D 2003 Volvo V70 2002 Honda Civic https://www.boldegoist.com/
|
|
#12
03-17-2014, 12:41 AM
|
||||
|
||||
|
Excellent write-up!
__________________
http://i284.photobucket.com/albums/l...aman/Fleet.jpg Peach Parts W124.128 User Group. 80 280SL 85 300SD 87 300TD 92 300D 2.5 Turbo 92 300TE 4Matic
|
 |
| Bookmarks |
|
|


 Linear Mode


