

|
|
|
|
|
|
#61
 05-08-2017, 09:14 AM
|
||||
|
||||
|
Nice progress, Bob!
And some good news.... I have Euro tail lights in my 87 300D. As you discovered, the rear side marker lamps do not exist on the Euro lights/reflectors. However, with BOTH bulbs removed, it does not trigger a bulb-out warning light on the dash. Give it a try! 

|
|
#62
05-08-2017, 08:57 PM
|
|||
|
|||
|
Quote:
Just out of curiosity, what made you (and others) switch to the Euro rears? Do people just like to delete the sidemarkers? Personally I wish I could get rid of the front turn signals as running lights (i.e., only use them as indicators). Is that just as simple as switching from a dual- to a single-filament bulb, or is the actual lens/socket different?
__________________
___________________________________________ 1992 300D 2.5 Turbo
W124.128/OM602.962/4G-Tronic 722.418 Dieselmeken 7,5mm | Sportline Interior My Build Thread
|
|
#64
05-09-2017, 12:03 AM
|
|||
|
|||
|
Quote:
__________________
___________________________________________ 1992 300D 2.5 Turbo
W124.128/OM602.962/4G-Tronic 722.418 Dieselmeken 7,5mm | Sportline Interior My Build Thread
|
|
#65
05-09-2017, 02:24 AM
|
||||
|
||||
|
Quote:
If you have Euro headlights, that lead is used to power the city light.
|
|
#66
05-22-2017, 11:14 PM
|
|||
|
|||
|
Finally got the garage unpacked and organized yesterday, so today I swapped in the front brake pads I've been meaning to do for the past few weeks. Now, for the first time in months, I can drive the car without any warning lights on in the dash! It's been a revolving door of bulb-out, worn front pads, and low windscreen washer fluid lamps.
Pretty easy job. Once I got the car jacked up and the wheels off, I realized that I didn't have the fixed calipers like in the DIY article I studied, so I had to whip out the FSM and look over the procedure for my floating calipers. Easy enough, except I snapped a head off of the self-locking retaining bolt that holds the caliper together on the driver's side. My impact wrench had a low battery and the bolt wouldn't budge, so I tried a breaker bar and the thing just popped. Luckily, I was able to get the pin out and use a a pair of pliers to screw out the few threads that were still in place, and of course the new pads come with new retaining bolts, which was a relief. When I got to the passenger side I made sure to soak it in plenty of WD-40 first, plus charge the battery for my impact wrench a little bit - worked like a charm. It's funny the difference between the first and second time you do something - I probably had the passenger side done in 1/3 the time the driver's side took me. Ran out of time before I got to the rear pads, but I've got them in hand, and have another day off this Friday, so I think I'll tackle them then.
__________________
___________________________________________ 1992 300D 2.5 Turbo
W124.128/OM602.962/4G-Tronic 722.418 Dieselmeken 7,5mm | Sportline Interior My Build Thread
|
|
#67
05-25-2017, 01:29 PM
|
||||
|
||||
|
Quote:
Quote:
|
|
#68
06-05-2017, 01:30 AM
|
|||
|
|||
|
Kind of a lot going on, just not very quickly.
Shortly before doing the front brake pads, there appeared a sort of grinding noise that periodically and varied with engine speed. My suspicion was that it was pulley related. It was suggested to me to inspect the tensioner pulley and sure enough, when I did, I found the bearing to be excessively worn and noisy. I was sort of dreading pulling the drive belt, because I didn't want to have to remove the fan and shroud assembly, which I had read was a painful procedure, and required special tools (ot at least improvisation). Well, it turned out to be extremely easy and straightforward, and nothing out of the ordinary was needed. I just used a hex socket on a ratchet with a cheater bar to help break the initial torque. I think I had the whole thing off in 20 minutes, which includes stopping to check my progress against an online DIY or the FSM. Not bad, considering I'd never done this before. After getting the belt off, I found that I could spin the pulley by hand and it would free wheel for a couple of seconds or more. I also found the entire front end of the engine was caked with a thick coat of gummy motor oil, especially on the tensioner arm, vacuum pump, and AC compressor. I didn't take a "before" pic, but some time spent with an engine degreaser and pressure washer yielded a very clean engine: 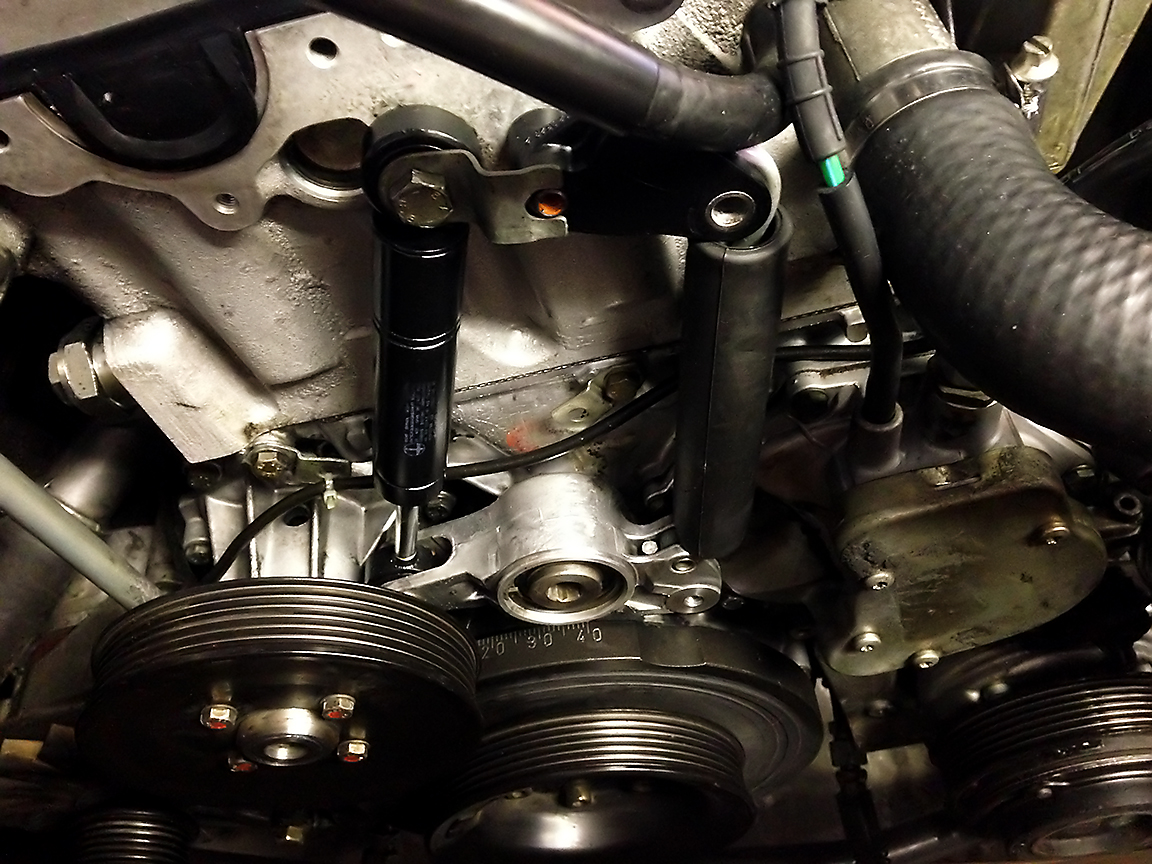 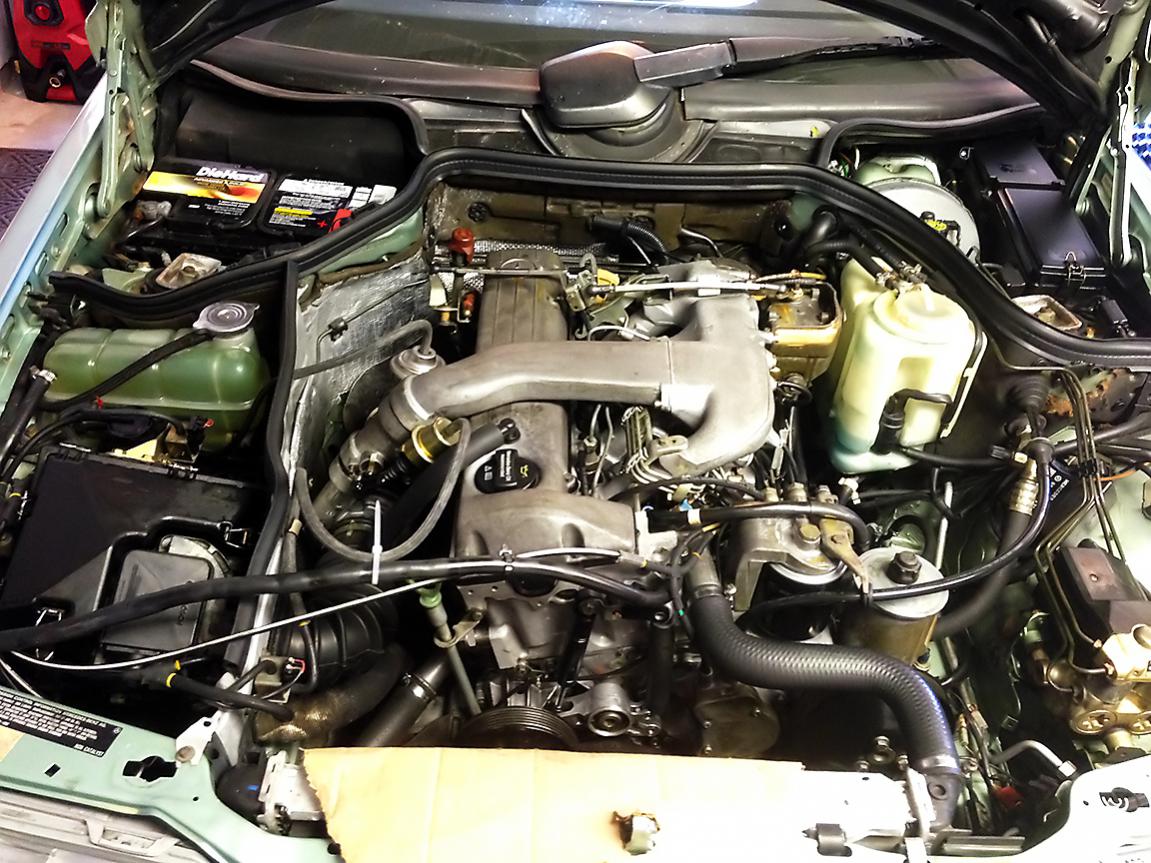 Next I got to ordering some parts: 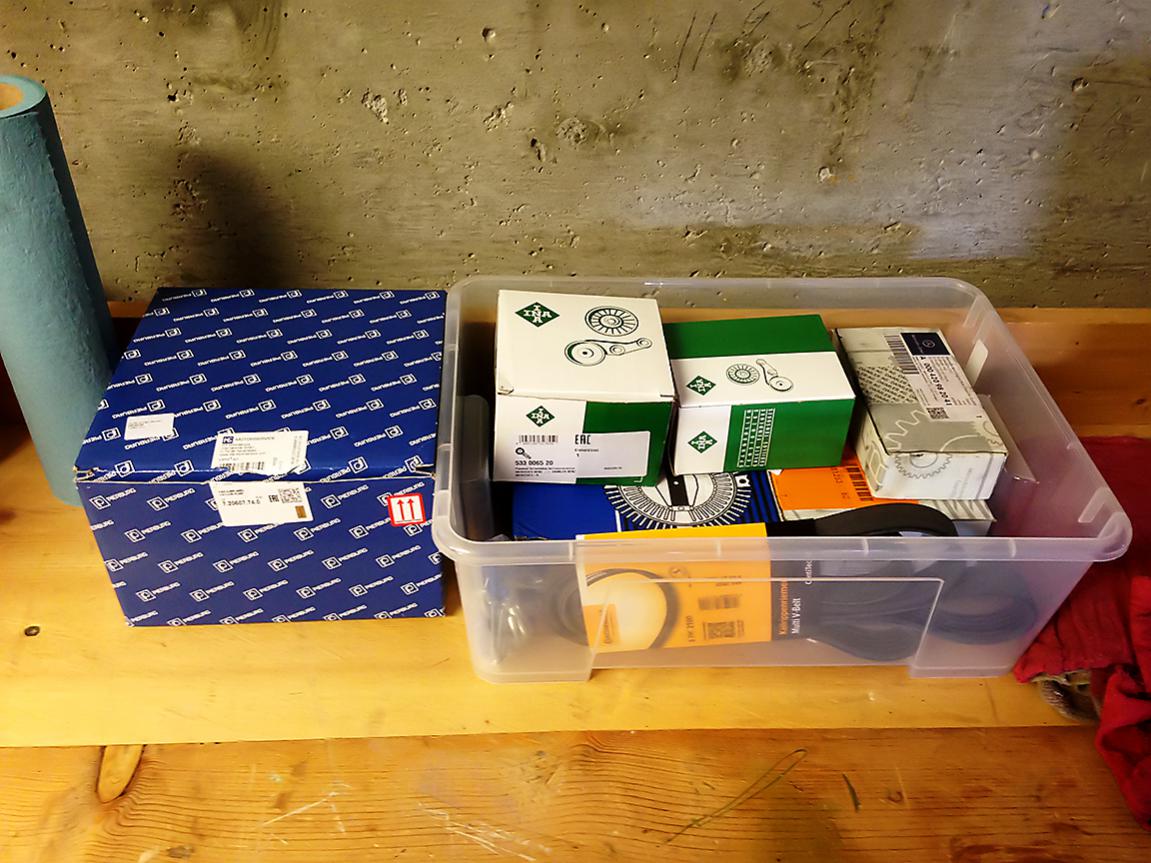 So far, so good, just waiting on a couple more things to arrive until I can get started and wrap this job up.
__________________
___________________________________________ 1992 300D 2.5 Turbo
W124.128/OM602.962/4G-Tronic 722.418 Dieselmeken 7,5mm | Sportline Interior My Build Thread Last edited by Bimmer-Bob; 06-05-2017 at 10:34 AM.
|
|
#69
06-10-2017, 02:09 AM
|
|||
|
|||
|
So, I finally pulled the tensioner arm (had to wait for a 12mm hex socket), and just like the pulley, the bearing was completely shot. I replaced both the tensioner arm and pulley with new INA parts, and replaced the missing dust caps for both.
I also treated myself to a new Continental serpentine belt, and decided to upgrade from the original 9-blade metal fan to the newer 11-blade plastic fan from the OM606, as well as a Sachs fan clutch and replacement fan shroud for my cracked original. Unfortunately, I didn't realize at the time that I could've probably upgraded to a 2-piece shroud, but oh well. While I was there, I figured I'd replace the vacuum pump. I had no idea what kind of condition it was in, other than the fact that it looked like the newer style (no crimped cover) and was obviously an OEM replacement rather than the original OE part from the factory (Star was ground off). It looked like there was a slight leak from the gasket, so that was another reason to pull the thing. It turns out it was the newer style, and the gasket was indeed coming apart in a couple places. It was also stamped with a 1997 manufacture date - the new one was made in 2013. Unfortunately, when I was putting everything back together, I snapped one of the vacuum pump bolts. Hoping the other 5 bolts would seal the pump against the timing case well enough, I just put everything back together, went to bed, and drove the car to work the next day. The good news - the mysterious grinding noise is gone, and the car seems to run a little quieter overall - I think at least some of the ticking was attributable to the worn bearings. The bad news is that I have a new oil leak (from the VP, of course). So the car is parked back in the garage while I wait for six new bolts to arrive, as well as a new gasket (just in case). Probably get the car torn down again over the weekend to see just how bad the damage is - really hoping the bolt didn't snap flush with the timing case, as I'd like to be able to get a pair of pliers on it rather than drill it out. I was briefly pretty upset with myself, but I really think sometimes we just have to make some mistakes, and that this kind of stuff is just part of being a gearhead. It seems like every job has a little setback, especially for a hobbyist like me, and I guess I'm okay with that.
__________________
___________________________________________ 1992 300D 2.5 Turbo
W124.128/OM602.962/4G-Tronic 722.418 Dieselmeken 7,5mm | Sportline Interior My Build Thread
|
|
#70
06-18-2017, 08:34 PM
|
|||
|
|||
|
Finally got the bolt out last night. I ordered a Dremel online, and had to wait for that to ship, and then yesterday finally picked up a cut-off wheel. I used that to cut a slot into the broken bolt, and it turned out easily with a flathead screwdriver. Nice when things go so smoothly!
However, when I went to reinstall the VP, I realized that the replacement bolts I ordered were the right diameter, but the wrong length! They're way too short. I checked the part number, and somehow I had the last two digits off versus what is listed in the EPC. Not sure how that happened, but I've now got six of the proper bolts and washers en route.
__________________
___________________________________________ 1992 300D 2.5 Turbo
W124.128/OM602.962/4G-Tronic 722.418 Dieselmeken 7,5mm | Sportline Interior My Build Thread
|
|
#71
06-24-2017, 01:01 AM
|
|||
|
|||
|
The new bolts and spring washers finally arrived this week, and last night I got the new vacuum pump put back on, with all hardware intact this time. I started the engine without the belt and fan back in place, just to verify nothing was leaking, and the engine made such a racket I swore there was something gravely wrong with it. Looking back, I think it was mostly just because I was starting the engine in my enclosed garage, with the hood up, and the door open - I think I wasn't used to hearing the engine that clearly. And, of course, it was stone cold, not having been started in days, with the pan full of oil, I'm sure.
Anyway, today I finished the job and reinstalled the new parts: tensioner arm and pulley (with dust covers this time), tensioner spring, serpentine belt, OM606 fan and clutch, and fan shroud. Took her for a shakedown afterward - cold start was again a little noisy, but in no time at all the engine was idling smoothly, making good power, and seemed to be operating more quietly overall - I think some of the racket I attributed to the engine was definitely due to the worn tensioner bearings rattling around. And the engine just sounds better somehow under load - I don't know, maybe the new fan is louder or something? I can't really think of what else has changed that might alter the sound of the motor.
__________________
___________________________________________ 1992 300D 2.5 Turbo
W124.128/OM602.962/4G-Tronic 722.418 Dieselmeken 7,5mm | Sportline Interior My Build Thread
|
|
#72
06-24-2017, 05:31 PM
|
||||
|
||||
|
Having worn belt tensioners and assemblies will cause annoying rattles in the engine bay. Remember it's an IDI diesel, it will be clacky and noisy at start but should overall be smooth.
|
|
#73
07-09-2017, 01:34 PM
|
|||
|
|||
|
Good weather and a new dual-action polisher meant time for a full-on exterior detail.
If you're into this sort of thing, here's my workflow: Began with Sonax Full Effect Wheel Cleaner, and then proceeded with Chemical Guys products. I started with Honeydew Snow Foam applied with foam cannon, then scrubbed, rinsed, dried. Then Signature Series Glass Cleaner inside and out, followed up by clay blocking the sheet metal and glass. Then machine-applied (TORQX random orbital polisher) VSS Scratch and Swirl Remover (including polishing the front windscreen) --> EZ Creme Glaze w/ Acrylic Shine --> JetSeal Sealant and Paint Protectant. For an LSP, I hand-applied Liquid Carnauba InstaWax+. I didn't get around to tire dressing, might do so today. The interior was pretty clean already, so I didn't do much, other than a few sprays of Stripper Scent Premium Air Freshener & Odor Eliminator, just for fun. Took a few hours, but looks great, I think! The polishing really freshened up the old paint, especially the lower body cladding. I mean, it's not a show car or anything, but I bet it hasn't looked this good in over 10 years. And going forward, maintenance washes should be a breeze. Here are a couple of pics, plus one of a Petrolicious sticker I picked up a while back. Normally I'm not a sticker-on-cars guy, but with an older car like this, I wanted to show support for one of my favorite vintage car sites, and also kind of show where my head is at with this car - lest it be mistaken for just another clunker! 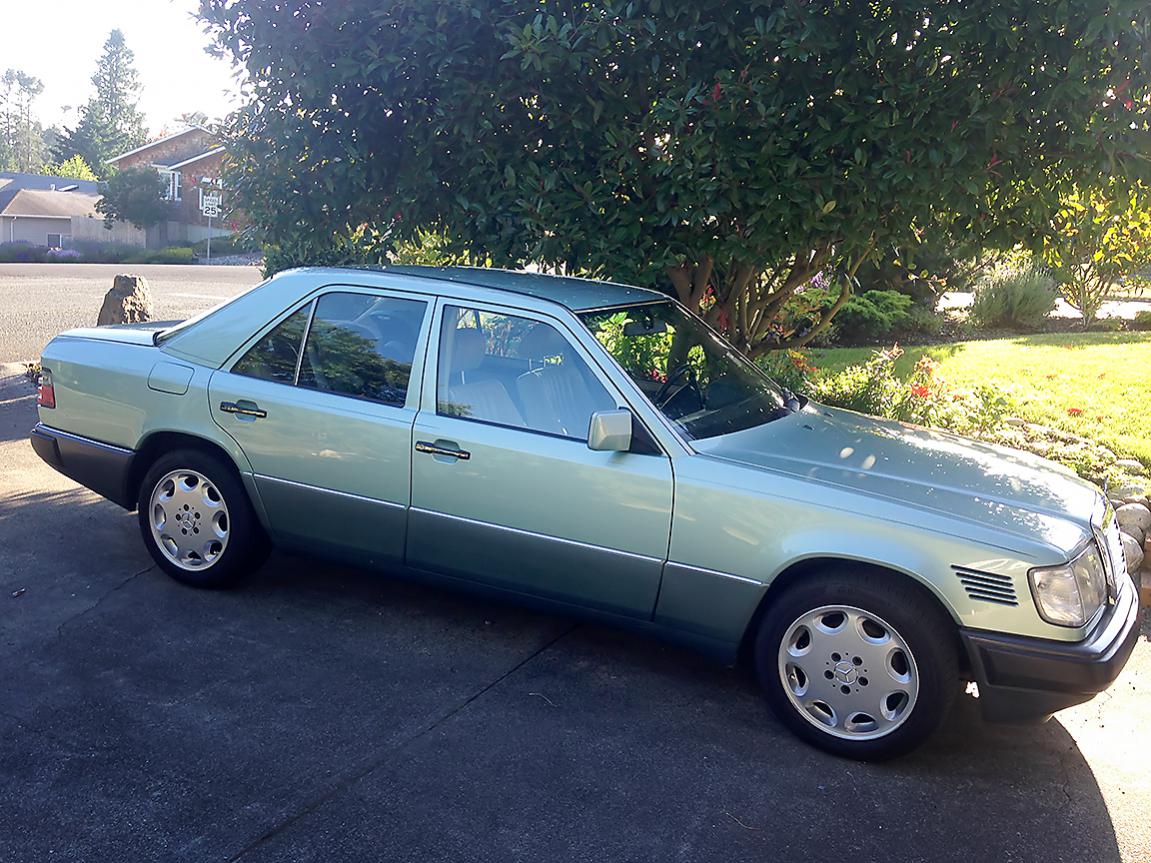  
__________________
___________________________________________ 1992 300D 2.5 Turbo
W124.128/OM602.962/4G-Tronic 722.418 Dieselmeken 7,5mm | Sportline Interior My Build Thread
|
|
#74
09-02-2017, 04:17 PM
|
|||
|
|||
|
Been pretty busy with a big project lately - complete Sportline interior!
My plans for this car have always included some Sportline chassis mods. A while back on eBay, I also picked up the appropriate shift knob and steering wheel, and have just been sitting on them for a while. I never really considered doing the Sportline seating - sure, it would've been cool, but I figured the seats would be impossible to source, and that there were too many bits and pieces (going for outrageous prices on eBay) required that it would just be way too complicated. But still, I kind of lusted after the Sportline seats. My stock MB-Tex seats were just kind of blah, visually, but more importantly they just weren't very comfortable. Besides the complete lack of bolstering, which would've been a problem even when new, they hadn't aged well. The left side of the seat bottom sort of sagged when you sat on it, which I gather is pretty common with these old seats. They were definitely past their prime. Not only that, but I also really wanted seat heaters! Then I ran into a guy parting out a 300E Sportline up in Canada, on the 500E boards. He had a complete Creme Beige interior - seats; rear console box and side pockets; plus the wiring harness, relay, and switches for the heated seats. But he was on the east side of Canada, me on the US West Coast. I actually picked up the steering box from him late last year and figured that would be it. A few months ago I checked back and the seats were still available, and it just seemed less and less crazy the more I thought about it. From what I gathered, the seller was a business owner and had some experience with freight shipping - he was able to get the entire thing onto one pallet, shipped freight for a pretty reasonable price, and that was that. I also picked up the Sportline front sway bar (having already found a used rear bar from a forum member here last year). Shipping was remarkably fast, except that the delivery got hung up at the border and selected for inspection - which cost me about $250. Bummer. But a couple of days later it arrived, and I got everything de-palletized and neatly stacked in my garage: 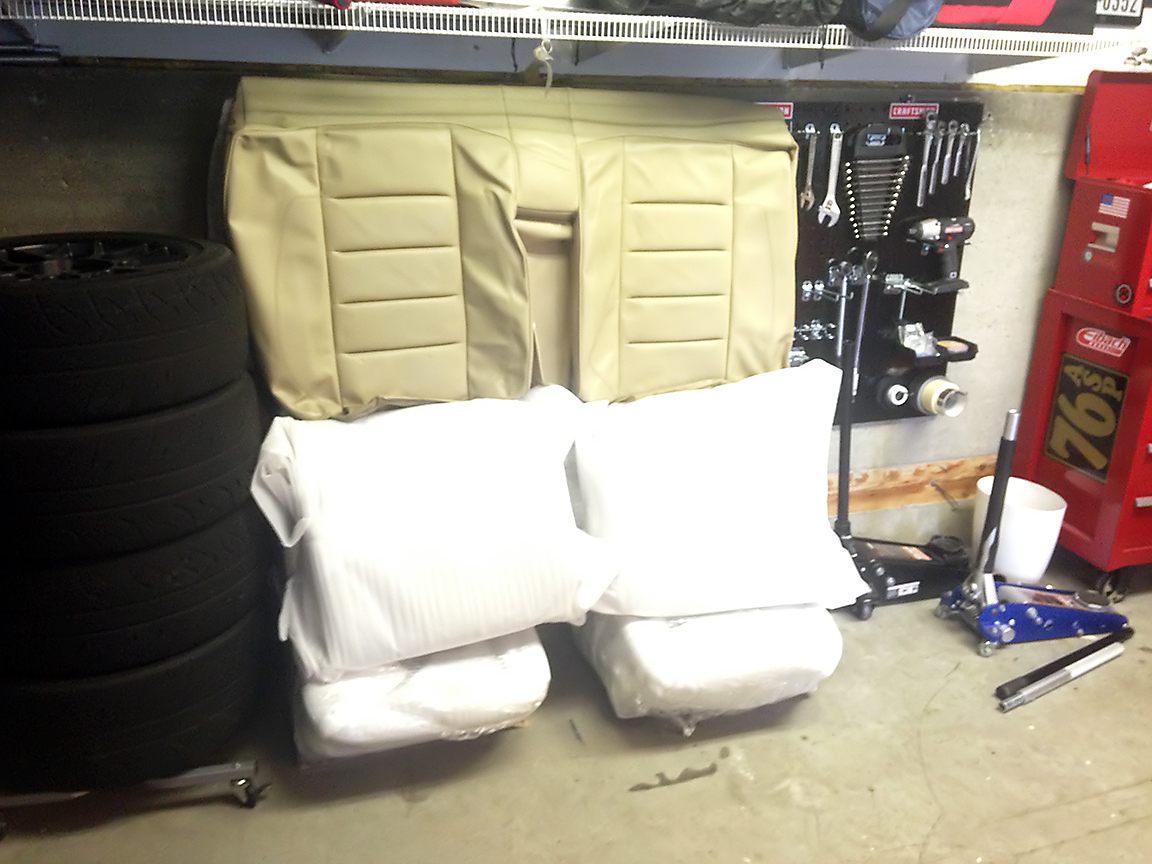 A couple of weeks later I tackled the install. Front seats come out really easy, just five bolts in the floor. The donor seats arrived intact on bases, so it was really easy to swap them in. Well, at least the passenger side was - for the driver's side I had to swap bases, because the donor seat came from a car with memory, which mine doesn't have - so the electrical connections are completely different. Rear seats come out pretty easy, too. I screwed up the little red metal tabs that secure the bench, so I had to reorder a couple of those. For the seat back, I had to pull the cover and horsehair padding off of my stock frame, and reuse it with the Sportline cover, as the donor frame was too large to ship; no matter, the same frame is utilized for both rear seatbacks. Seat heating wasn't too complicated. The wiring harness has to run from the power source in the drivers footwell, underneath the carpet to the driver's side rear seat, where a relay had to be installed. Then of course there are wires running to each seat and to the two switches on the console. There is a second harness that has to run from the driver's footwell, through the firewall, and to an accessory fuse box that has to be installed - luckily my car was pre-wired for some sort of cell phone, and this harness and fuse box were already installed. About the only thing that was not included was the wood console trim with the forward cutouts for the heated seat switches. My console trim was cracked and gross, and I hated looking at it. Several times I shopped on eBay for a replacement, but I kept waffling between buying a piece with or without the cutouts - I knew I wanted heated seats, but would I ever do it? I could never decide, so I just lived with the nasty original trim piece. Once I committed to the Sportline seats, however, the decision was made, so I headed back to eBay and found this gem: NOS Zebrano console trim, completely flawless!  Then of course, there was the steering wheel and shift knob, which as I said I've had for some time, and been storing in the garage. The steering wheel was kind of a PITA to get off. I had to remove the lower dash trim to be able to fit tools behind the wheel, and then for whatever reason I just couldn't get my Torx wrench to grab the bolts holding on the airbag. I ended up using a utility knife to slice the rubber on the back of the steering wheel so that I could see what I was doing (obviously destroying the original wheel in the process). Then I had to swap the original contact ring onto the donor wheel. When I went to tighten the new airbag onto the new wheel, I found it was much easier to use a 3/16" standard screwdriver rather than the prescribed T27 Torx, for whatever reason. The shift knob disassembly is much more complicated than it needs to be. The knob and shaft are integrated as one piece, so you have to remove the thing from the base, all the way below the shifter gates. I ended up cracking one of the tabs on the shifter gate, and there is a rubber boot underneath that was falling apart, so I replaced both pieces with new. I also had to order a couple of tiny rubber bushings that sit at the base of the shift knob, because my 3-year-old climbed into the car while I was working and lost one. Oh, and I also replaced the stereo fader switch. The stock one was in really poor cosmetic condition, it looked much worse then the rest of the switchgear for some reason. I considered ordering a new part, but decided against it when I saw the price ($50-$60!). I found a decent one on eBay for $10, which is actually a better match cosmetically with the rest of the switchgear than either the original, or a brand new part would have been. But now, it's all done! So far, everything seems to work, except for the driver's side headrest motor. I think I have it figured out - I just need to somehow reuse the connector from the stock seat, maybe splice it in or something. I would've done so already, but my battery went flat while working on the car and isn't taking a charge. I have no idea how old it is, so I'm just going to replace it. The other small issue is that the new console trim was a very tight fit, and I'm not 100% sure all the window switches, etc. are fully seated - I'll have to check once the new battery is put in. Anyway, enough talk! I'll put some before-and-after pics in the next post.
__________________
___________________________________________ 1992 300D 2.5 Turbo
W124.128/OM602.962/4G-Tronic 722.418 Dieselmeken 7,5mm | Sportline Interior My Build Thread Last edited by Bimmer-Bob; 09-02-2017 at 09:39 PM.
|
|
#75
09-02-2017, 04:27 PM
|
|||
|
|||
 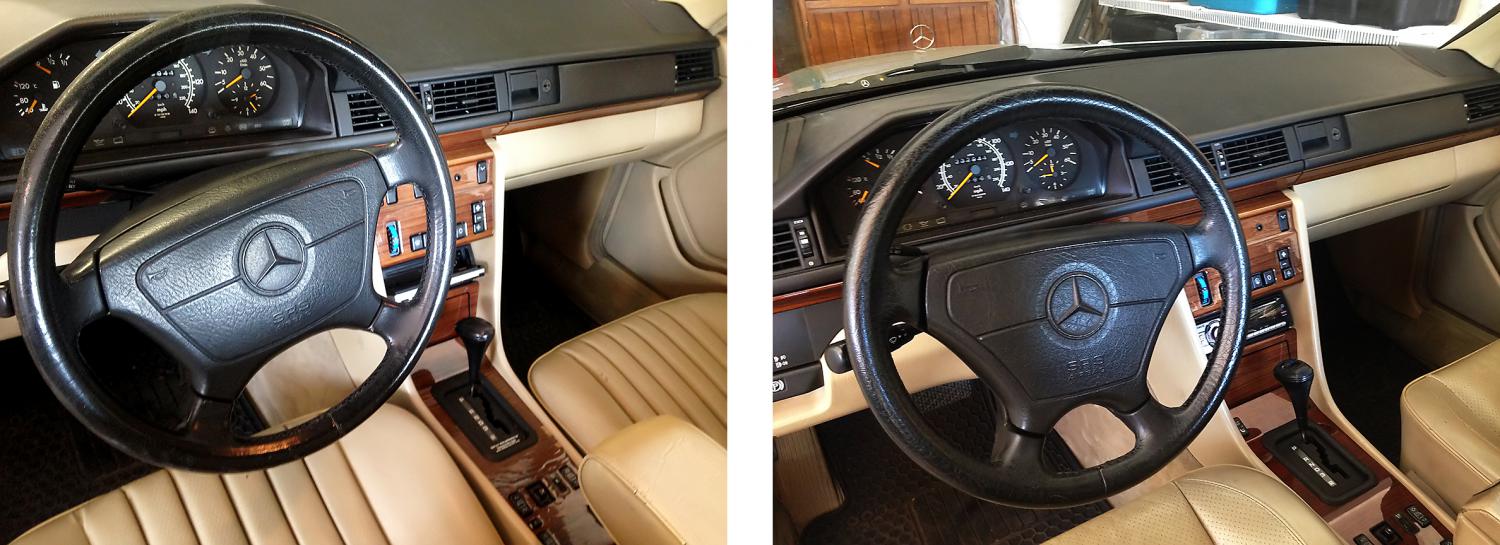   So what do I think? The seats are amazing! I really didn't have huge expectations - I mean, I wanted them to be better than the originals they were replacing, but that was pretty much a given. I figured they'd probably still be kind of saggy and squeaky (after all, they're not new, either) but they are incredibly firm and supportive, and the bolstering is wonderful. Really top quality seats. Even the back seats are super comfy and sporty feeling. Really, I don't think it's impossible to overstate how much of an improvement they are. The fact that they're leather and heated is just icing on the cake. They're in very good cosmetic condition, too. There was a small tear in one of the driver's side bolsters, apparently, which the seller had professionally repaired by an upholstery shop. The steering wheel is nice - it's not very much smaller, I think only an 1/8" or 1/4" less diameter. I was kind of expecting it to be a little smaller, and with a thicker rim. We'll see how it feels in use, once I get this new battery. The overall improvement, though - in terms of comfort, smell, aesthetics - I mean, the car is just transformed. I have other stuff planned for this car, but I think getting this piece done is really going to go a long way to keep up my motivation to continue.
__________________
___________________________________________ 1992 300D 2.5 Turbo
W124.128/OM602.962/4G-Tronic 722.418 Dieselmeken 7,5mm | Sportline Interior My Build Thread
|
 |
| Bookmarks |
|
|


 Linear Mode


