

|
|
|
|
|
|
#1
 02-05-2009, 01:51 AM
|
||||
|
||||
|
anatomy of a 603 VCV
Replacing valve body springs and tweaking the transmission vacuum amp helped soften stiff shifts but not enough for the way I drive. In the backwards way I do things, I saved the easy fix for last. It wasn't until I had done all the difficult fixes that I attached a vacuum gauge to the modulator line, thus discovering the modulator never saw more than 5" Hg under even the lightest throttle. I further discovered that there was absolutely no vacuum supplied to the amplifier through the VCV. This is particularly stupid of me since I'd already sorted out an 87 SDL with this exact problem!
Long story short, where the SDL had a disfigured pad, this VCV had a big old hole (well not so big since the pad is only 5.5mm in diameter) through the pad. I fashioned a replacement pad out of a piece of bicycle tire inner tube which is thicker but not twice as thick as the original pad material... based on what's left of it, anyway. So what pad is this? Keep reading... The VCV is held to the left/US driver side of the IP by two bolts that take a 10mm wrench. There is an adjustment to consider when installing the VCV which I won't get into here 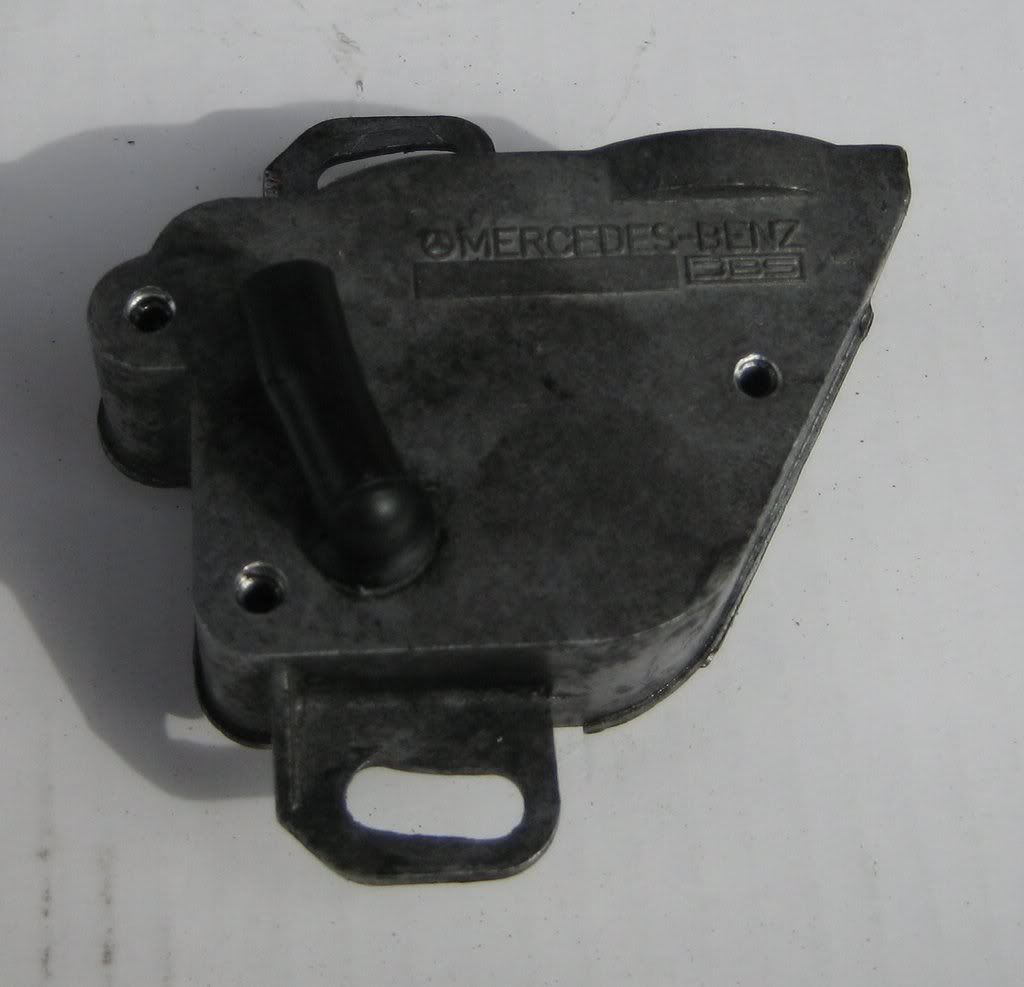 I used a 3/16" bit to grind off the rivet heads and countersink the holes for the screws I planned to use. The screws were planned, countersinking was an unexpected bonus  FWIW, my great contribution to MB DIY-hood is discovering that common wallplate screws will self-thread perfectly into these drilled out rivets! FWIW, my great contribution to MB DIY-hood is discovering that common wallplate screws will self-thread perfectly into these drilled out rivets!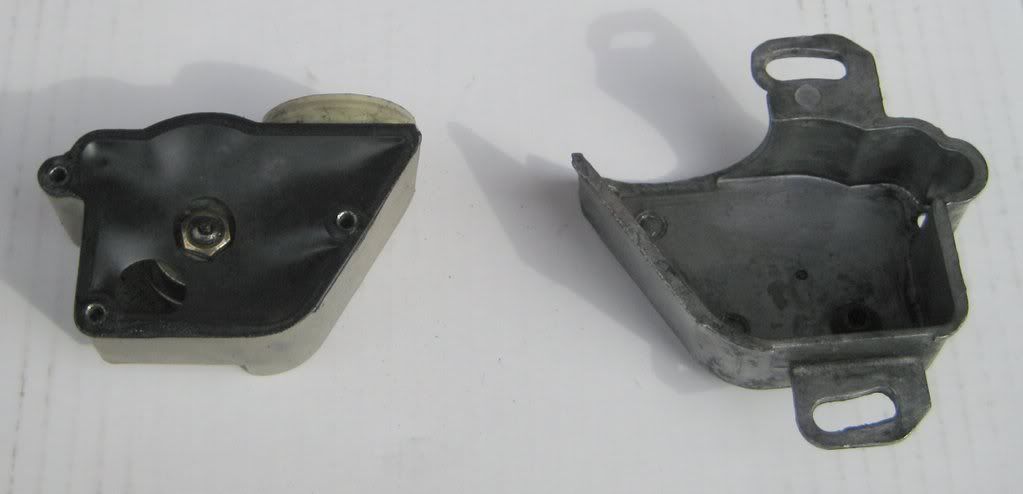 When you pry apart the aluminum cover from the plastic case of the VCV, the open face of the VCV has a rubber sheet over it. The hole in the lower left corner corresponds with the vent fitting. The nut at the center has a pin that slots into the aluminum case. 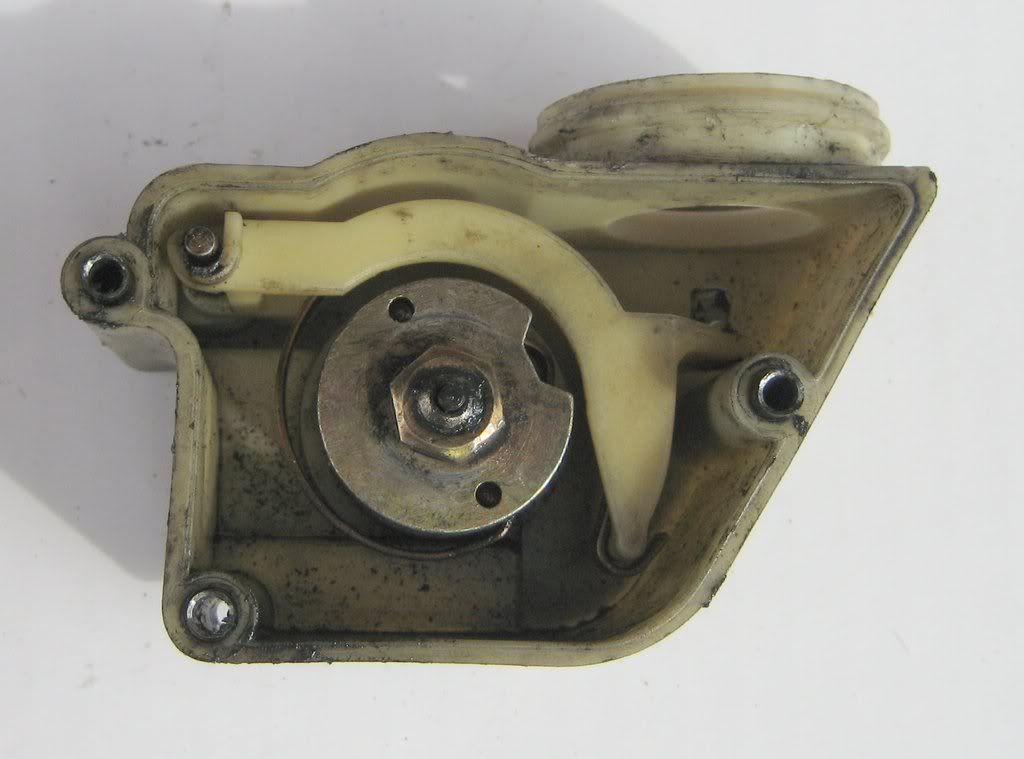 This is the negator spring and plugner of the VCV. VCV valve train already removed.  This is VCV valve train. The parts are out of order as I discovered when I put the VCV back together. The big spring goes between the black cap and the flower (doesn't look like a flower in this pciture), not between the valve train and the plunger as suggested. The outer edge of the diaphragm is rounded on one side and flat on the other. The flat side goes against the black cap. The plastic ring keeps the shape of the diaphragm. 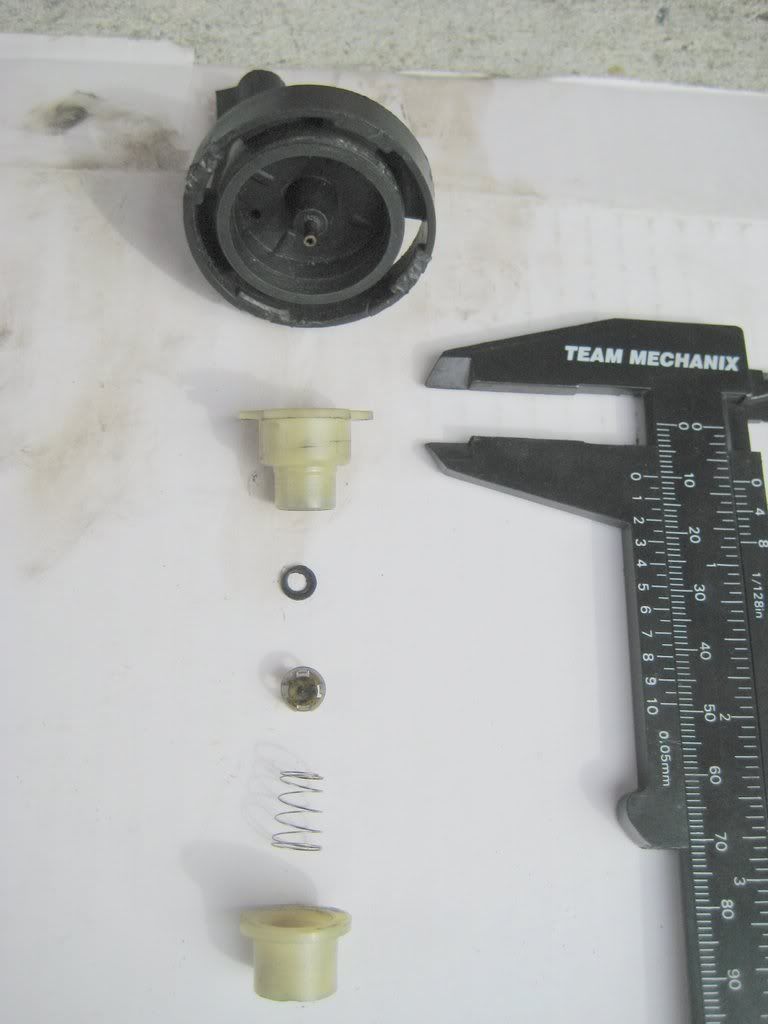 This is the business end of the VCV. The tangs of the black cap are chewed up because it's a real PITA to release it from the plastic VCV body. You can see the vacuum supply nipple in the center, that's a metal tube, and directly to the left is a port leading to the amplifier fitting. The o-ring is what's left of what should be a solid rubber/foam pad that is pressed against the metal tube to cut vacuum to the amplifier. The pad goes into the holder (you're looking into the holder in this view) which has 4 tabs to hold the pad. The holder sits on the spring inside the cup below the spring. The cup retains a plastic ring and diaphragm (not shown in this picture) against the flower thing above. It doesn't look like a flower in this picture either. 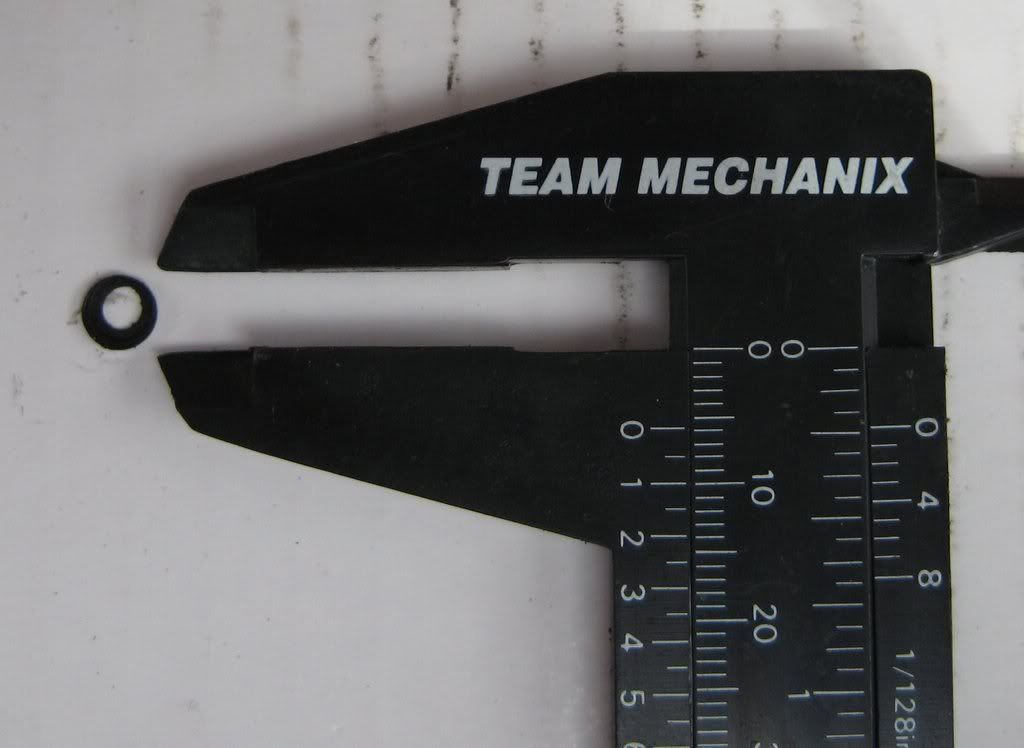 This foam/rubber pad should be solid. A piston pushes this pad against the vacuum source nipple to cut vacuum to the chamber and thus to the port leading to the amplifier. 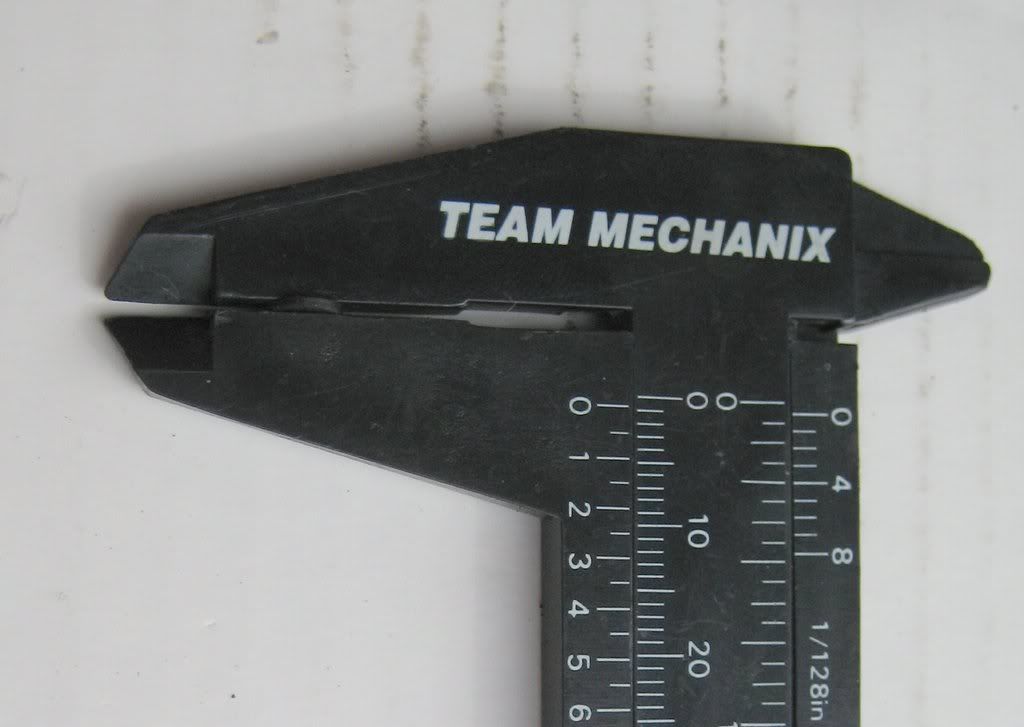 Pad thickness. Technically, you don't have to open the VCV to replace the pad but it's really difficult to pry the tabs of the black cap through the slots on top. 2 or 3 of the tabs are shielded by the aluminum cover when the VCV is together. I'll bet you wish I'd cleaned it before taking pictures Sixto 87 300D 
|
|
#2
02-08-2009, 12:42 PM
|
||||
|
||||
|
__________________
Bill Wood - Retired Webmaster My Personal Website 1998 Mercedes E430 2010 Toyota Sequoia My Photo Albums
|
|
#3
02-08-2009, 12:49 PM
|
||||
|
||||
|
Nice write-up, Sixto. Hope I never have to go inside my VCV, the parts count is way too high!
__________________
 "Buster" in the '95 Our all-Diesel family 1996 E300D (W210) . .338,000 miles Wife's car 2005 E320 CDI . . 113,000 miles My car Santa Rosa population 176,762 (2022) Total. . . . . . . . . . . . 627,762 "Oh lord won't you buy me a Mercedes Benz." -- Janis Joplin, October 1, 1970
|
|
#4
02-08-2009, 06:53 PM
|
|||
|
|||
|
On my 86 300sdl, the black vacuum hose that sticks out of the vcv is crumbling. Do you have to take the valve apart to change the hose? or can it be pulled out and a new one placed in the hole?
Thanks for this great article! John
__________________
John 1986 300sdl 1985 380se
|
|
#5
02-08-2009, 06:59 PM
|
||||
|
||||
|
That's a vent so the vacuum pump draws cleaner cabin air instead of dirtier engine bay air. You can pull off and press in the rubber fitting so it can be replaced without touching the VCV. Finding a replacement is the challenge since MB doesn't list it as a separate part. Browse your auto parts store generic small parts selection for something that will fit.
Sixto 87 300D
|
|
#6
02-08-2009, 07:06 PM
|
||||
|
||||
|
The rubber part with the right angle bend is NLA but you can find the same part without the bend. I have a post on it here somewhere. . . OK, according to gsxr, "The 90° fitting is not available separately, but can be replaced with a straight (180°) fitting from an M103 fuel pressure regulator, which happens to be similar. Part number is 000-078-02-81."
__________________
"Buster" in the '95 Our all-Diesel family 1996 E300D (W210) . .338,000 miles Wife's car 2005 E320 CDI . . 113,000 miles My car Santa Rosa population 176,762 (2022) Total. . . . . . . . . . . . 627,762 "Oh lord won't you buy me a Mercedes Benz." -- Janis Joplin, October 1, 1970
|
|
#7
02-08-2009, 07:17 PM
|
|||
|
|||
|
Thanks for the replies!!! I will replace this when I undertake my most ambitious project yet on my car....the removal of my intake manifold and replacement of my glow plugs. I replaced number 6 and number 3 earlier this winter, but now I have two more that are sub-par.
At the same time I will perform Jeremy's procedure for after glow on my car. I haved saved your article for reference. After those items are complete, I will try and figure out where I am leaking power steering fluid. Unfortunately, I believe it is coming from the steering box itself. I have no other leaks at all on this car and it dismays me to see it marking its territory. John
__________________
John 1986 300sdl 1985 380se
|
|
#8
08-28-2016, 09:40 PM
|
||||
|
||||
|
Here's a video I made of the internal operation of this device. I still don't understand how it regulates vacuum though
 https://www.youtube.com/watch?v=5zkiqgrQHbg -J
__________________
1991 350SDL. 230,000 miles (new motor @ 150,000). Blown head gasket  Tesla Model 3. 205,000 miles. Been to 48 states! Past: A fleet of VW TDIs.... including a V10,a Dieselgate Passat, and 2 ECOdiesels. 2014 Cadillac ELR 2013 Fiat 500E.
|
|
#9
08-28-2016, 10:53 PM
|
||||
|
||||
|
Thinking of vacuum as a commodity, vacuum comes down the center tube of the cap into a plenum that leads to the transmission modulator. Increased throttle action presses a foam/rubber pad into the far end of the tube so less vacuum gets to the plenum.
Sixto 83 300SD
|
|
#10
08-29-2016, 07:23 AM
|
||||
|
||||
|
That's what I thought too... but the rubber pad doesn't touch the piece it seals against until it's pressed all the way in.
|
|
#11
07-17-2017, 12:01 PM
|
|||
|
|||
|
Just wanted to add one helpful hit here. The vacuum inlet on my VCV was clogged with the "donut hole" from the "o-ring". As was mentioned, the "o-ring" should actually be a solid piece. When mine wore, the center was sucked into the vacuum orifice, where it clogged. This can actually be relieved on the car by using something like a jeweler's broach to ream out the tube. It has to be long and very thin, because the orifice is tiny.
|
 |
| Bookmarks |
|
|


 Linear Mode


