

|
|
|
|
|
|
#1
 04-29-2013, 05:35 PM
|
||||
|
||||
|
Hello New old guy here,
I posted this in Pelican Parts before the change over to PeachParts so I figured I post it again. My son busted the driver side rear window regulator, after searching, I found the New Regulator was $384 or discounted at around $184, hmmmm, I don't think so. The regulator motor was fine it was the damn plastic wheel that crumbled or maybe the plastic slider, luckily it was the wheel. I dremeled it off, went to home depot and replaced it with a patio door replacement wheel that bolts on. Works perfectly! 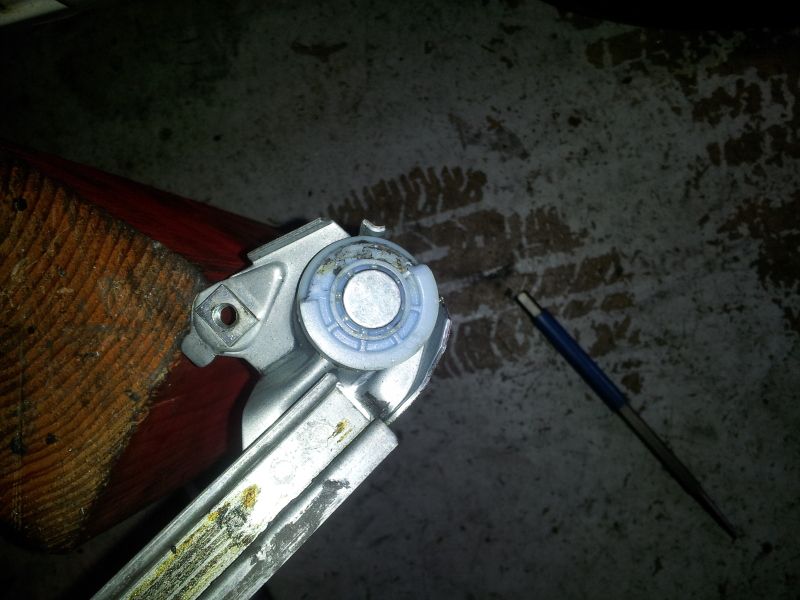 $7.00 plus tax 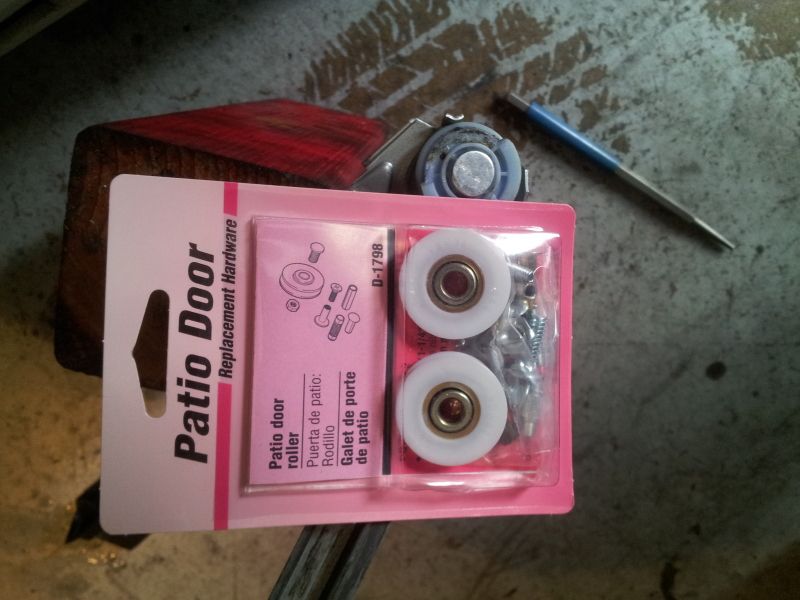 Operated it off the car to insure it is all well, ALL WELL! 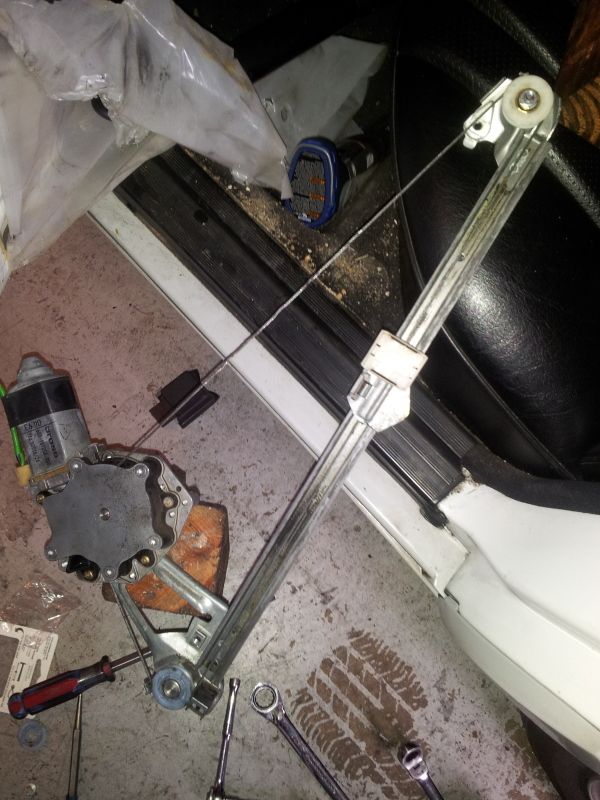 Details: Please forgive if this has been posted before, don't kill the Noobie :jaw: Symptoms Window does not move and a Grinding Noise as one uses the switch. Panel Removal Use a 10MM socket to remove the bolt from the top portion of the pull handle ( it so happens to be the top portion of the window regulator ). Using a needle nose, hold the door latch rod and remove from back of the chrome door release lever. Once released slide the lever handle cover forward and pull away from the panel. Now here is the tricky part, resist the urge to pull the panel from the door, they are not installed by plastic push pins/tabs like GM's and Japanese cars, instead they are hooked in by plastic tabs. It requires you slide the panel up about 1/2-1" to remove from the door. Don't pull away just yet, you will notice the switch is hooked up to the panel, gently push it out of the panel, You will need this hooked up for the test. Remove the window felt guide. Window Regulator Here you should see what the issue is, If lucky, your cable will be un-wound, if not it will be the Plastic Slide assembly. If it is the slide assembly, you will need to rebuild it or buy a new regulator. I rebuilt the passenger side with JB weld, 2 years later still working  Let's say you are lucky and it is the cable un-wound due to a broken top or bottom wheel. Remove the 3 nuts and 1 bolt that holds the regulator in the door. Raise the regulator with the window to release from the top mount bracket and now release the black stay tab on window to the sliding assembly, this is how you seperate the window from the regulator. TAKE CARE not to allow the glass to slam down the door, it is very expensive if it shatters. Grab the glass and slide it all the way up and tape in place. Now with the regulator freely floating around in the door. Manuver the top portion back in an angle so the regulator will come out motor first, release the tab holding the switch so you can get enough slack on the wires to pull out the door to work on the wheel/s. Observe which wheel is trashed and commence using a sanding tool on a dremel and grind the smaller back side rivet of the wheel, take care to only grind away the rivet and not the assembly or it will weaken it. Make certain the OD of the new wheel is close to the right size, you do not want to go too large or it will most likely bind on the assembly. Use the pic above for reference if you go to Home Depot or take the broken one with you to the hardware store. I liked the packet because it had the bolt/nut. I just added a lock washer for security. Now that you got the wheel on you will notice the cable seems shorter and will not fit over the wheel. This is a good thing, because the cable requires adequate tension. If you recall the 3 nuts that were removed, they were mounted on rubber clad two way bolts, remove the two that are on the assembly, route the cable on and re-mount the bolts with some tension, one to align and the other for the tension. Note the bottom wheel requires the cable to be routed over a metal guide tab, make certain it is in the proper position. Now test to insure the cable and slide moves as designed. That's it, install in reverse order. Jim
__________________
05 CLK320 Cabrio 85 911 Carrera Targa 96 Lexus ES300 
|
|
#2
04-29-2013, 11:02 PM
|
||||
|
||||
|
This should be a sticky.
__________________
1983 300SD "Guderian" 1987 MR2 2015 Camry 2015 Chevy Spark 2006 Hyundai Tucson
|
|
#3
04-29-2013, 11:51 PM
|
||||
|
||||
|
Great fix for a simple problem.
-J
__________________
1991 350SDL. 230,000 miles (new motor @ 150,000). Blown head gasket  Tesla Model 3. 205,000 miles. Been to 48 states! Past: A fleet of VW TDIs.... including a V10,a Dieselgate Passat, and 2 ECOdiesels. 2014 Cadillac ELR 2013 Fiat 500E.
|
|
#4
04-29-2013, 11:53 PM
|
||||
|
||||
|
Good job DRACO!
By the way, here's how I fixed the broken plastic slider on my 190E. My cable was tangled up in the spool, so I had to rewind the cable onto the spool. I purchased part #2107200042 from my indy for $13.50 to replace the broken slider. Broken assembly. 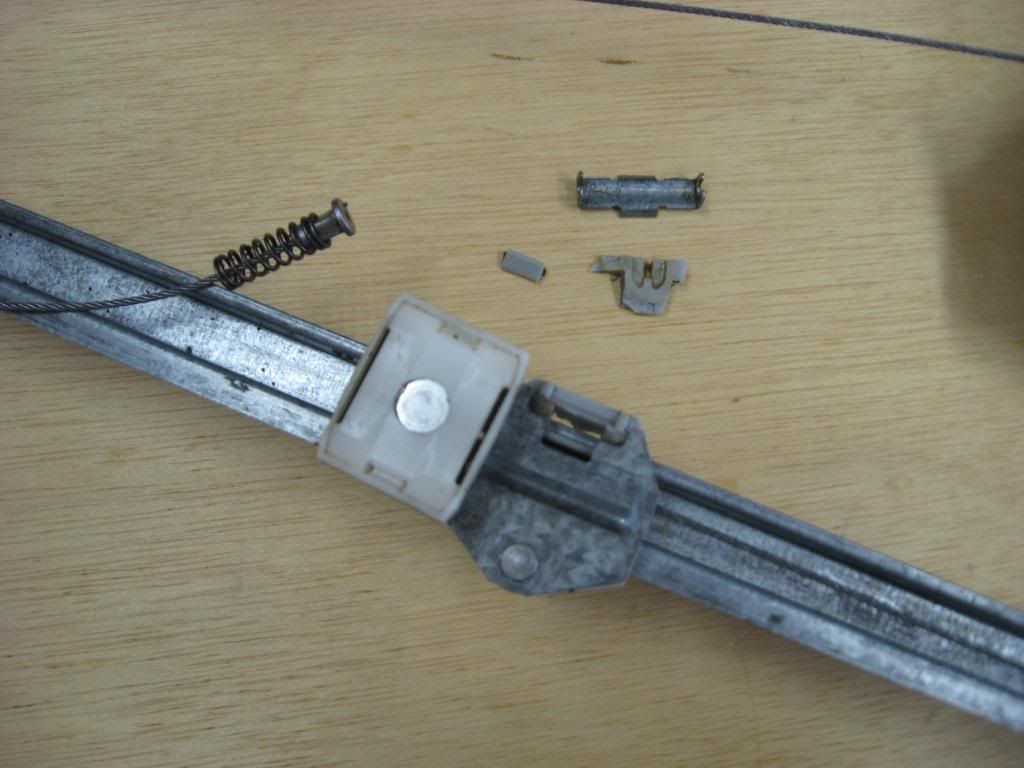 New part on left, broken slider on right. 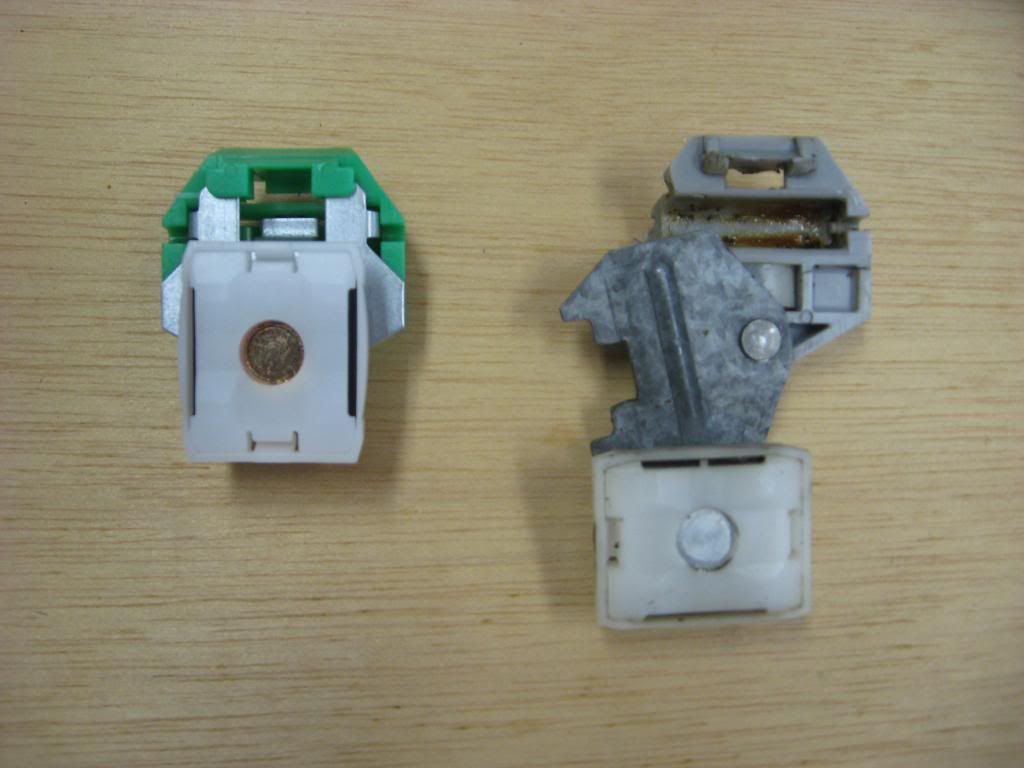 I drilled out the rivets on both sliders. 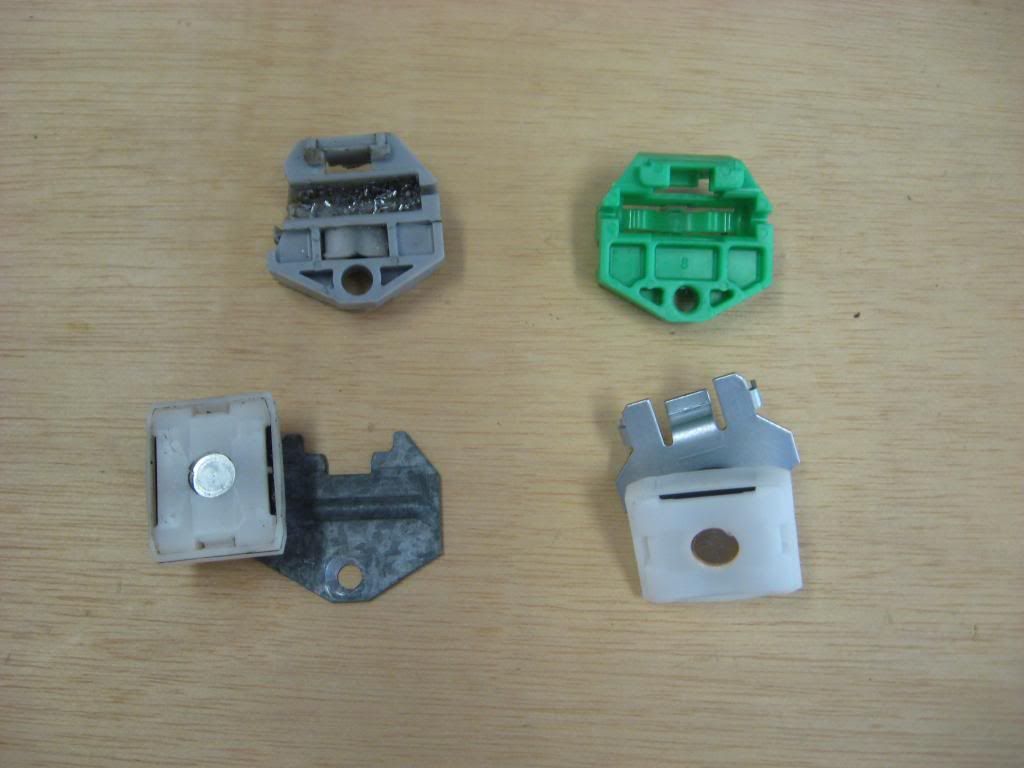 The new green slider will replace the old grey one. 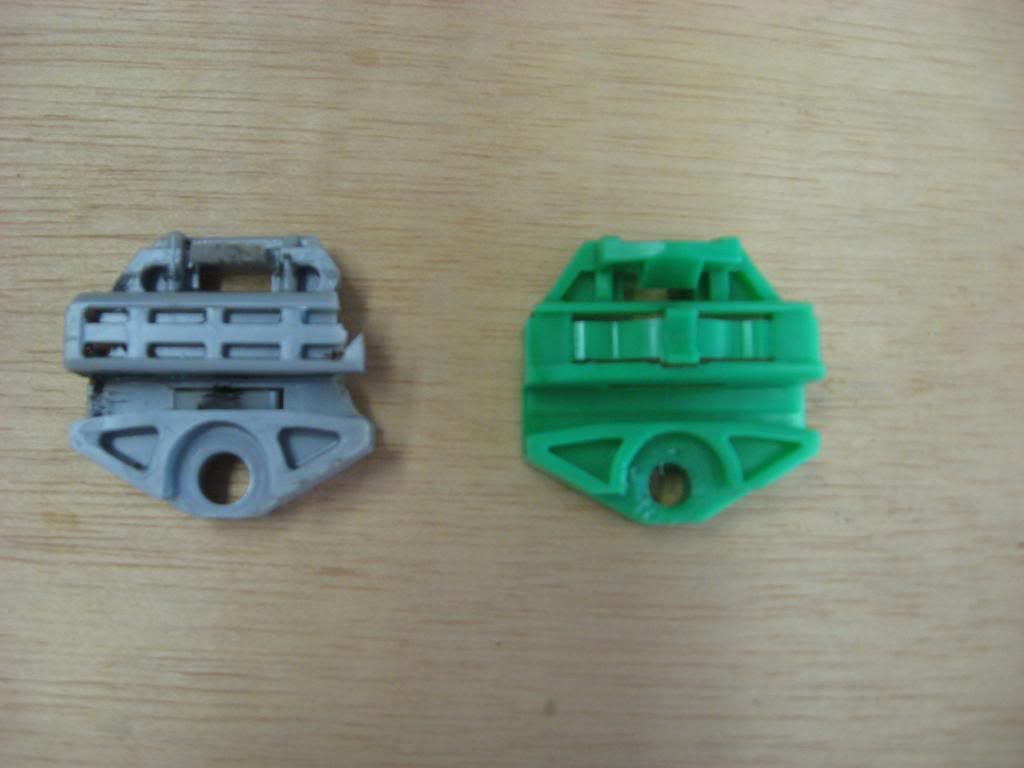 Re-installed the cable/springs/metal clip into the new green slider and attached the old cover and jaw. Do this with the cable off of the top nylon wheel. The new slider will snap into place on the guide rail. 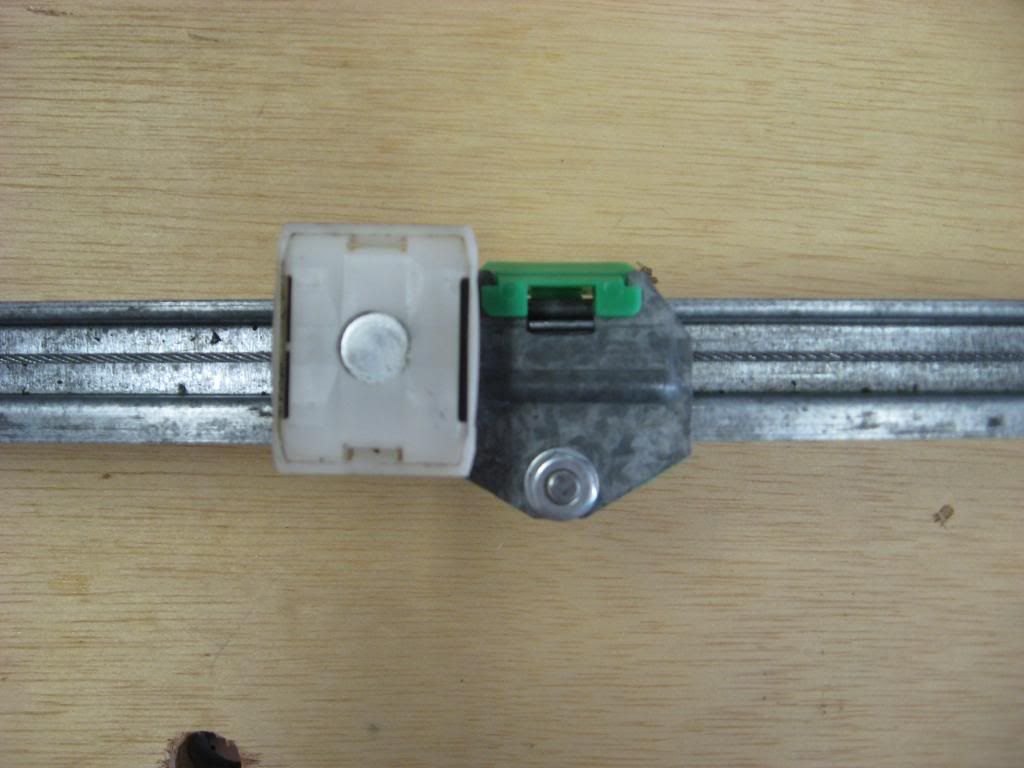 The hardest part is putting the cable back onto the top nylon wheel due to the tension. I was able to get it started in the groove and used needle nose pliers to turn the wheel and feed the cable into the groove. 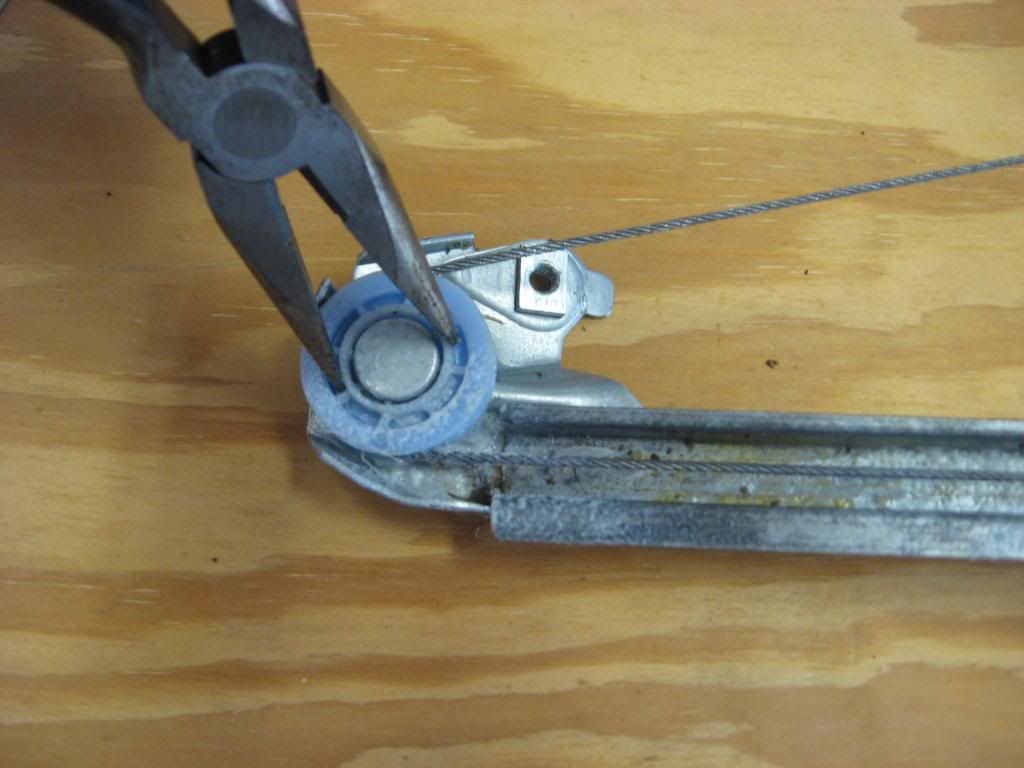 Finished product. Re-installed the window regulator and everything worked perfectly. 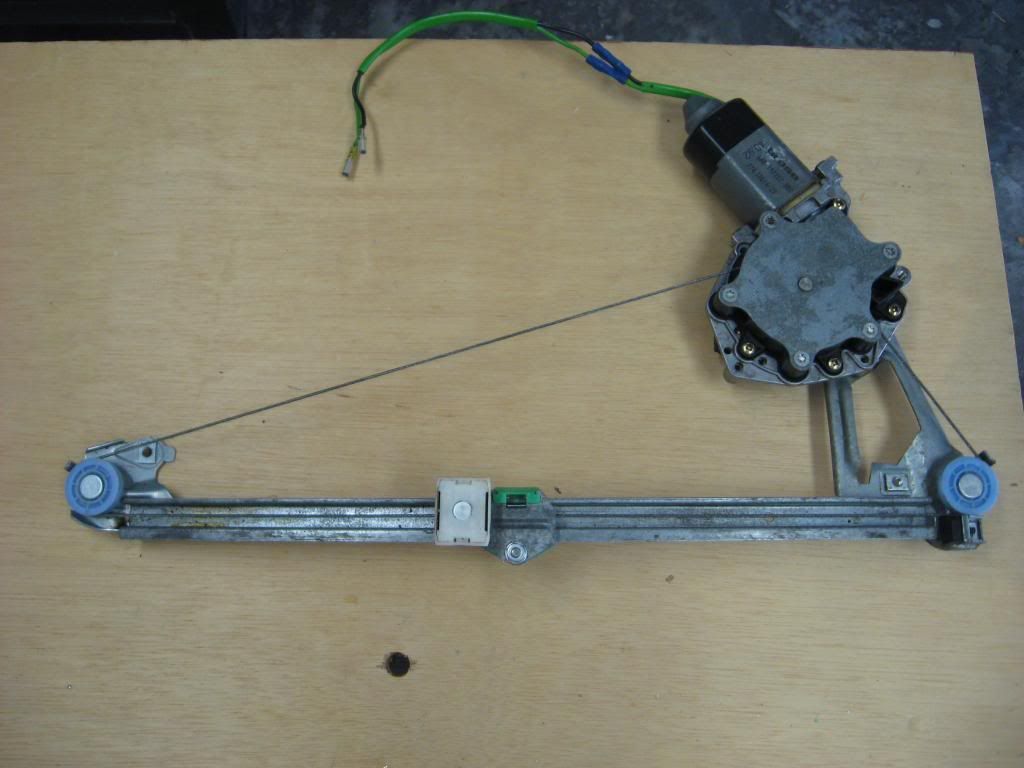
__________________
 1993 190E 2.3 2001 SLK230 1971 LS5 (454) Corvette Convertible
|
|
#5
04-30-2013, 12:52 AM
|
||||
|
||||
|
Nice, a great supplement to the fix
__________________
05 CLK320 Cabrio 85 911 Carrera Targa 96 Lexus ES300
|
 |
| Bookmarks |
|
|


 Linear Mode


