

|
|
|
|
|
|
#1
 12-31-2012, 01:22 PM
|
||||
|
||||
|
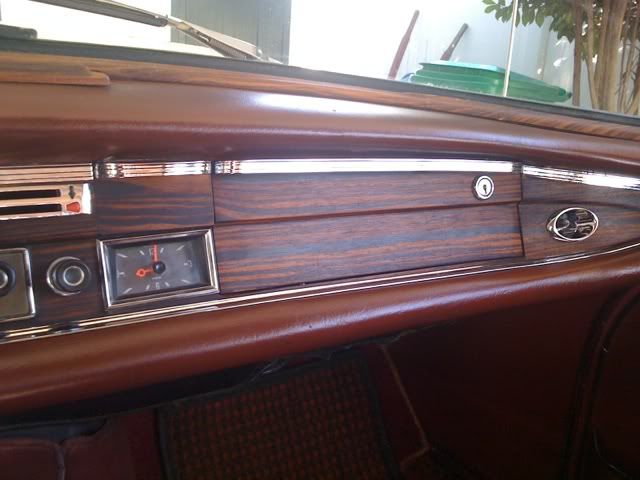
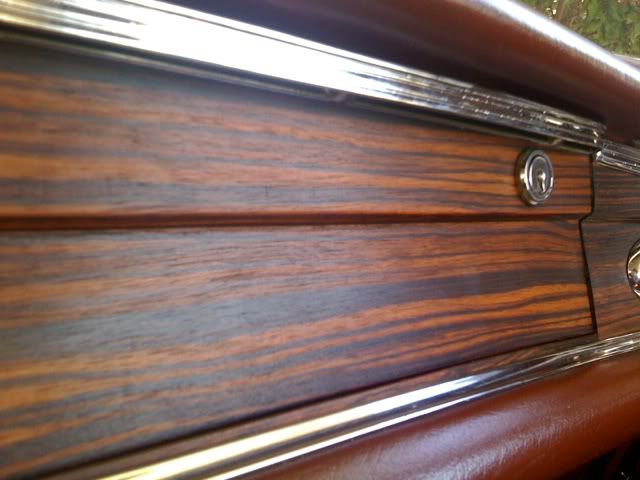
Wood Trim Refinishing
I just got my 72 250C back from the shop after some expensive transmission works. She shifts very smoothly now. After that expense, I'd like to tackle a project I can do myself.
That said, I'd like to refinish the wood trim. From experience repairing German table radios I know Germans used a polyester based finish which was nearly indestructible. The underlying wood expands and contracts at a different rate than the finish eventually cracking it. They applied it thickly, almost a mm! Normal finish removers have no effect on it. Sanding is out of the question, as the veneer is extremely thin. So the question is, how do I remove this old, stubborn, cracked finish? 
|
|
#2
12-31-2012, 01:40 PM
|
|||
|
|||
|
I refinished my '71 250C with excellent results using "Premium Stripper". It comes in a 18 oz spray can made by Klean-Strip. It's been a few years but I think I bought it at Wal-Mart or Home Depot, maybe both. I just followed the directions. Spray it on, let it sit for 10-15 min. I then hosed off all that would wash off.. I then scraped off the soft residue that was left with a soft plastic spatula. Had to do the entire procedure about three times to get each piece totally clean. Be careful and take your time. The veneer is very thin and mounted to a stiff piece of aluminum.
Hope this helps
__________________
Charlie.
|
|
#3
12-31-2012, 01:59 PM
|
|||
|
|||
|
Same here, high grade stripper left until dry, did it several times to get most of the clear off. After that I went in while the last bit was still wet and used #0000 steel wool to wipe away any remaining clear. This won't remove any noticeable wood so it's pretty safe. I too used a plastic scraper, but one from the paint supply section, metal would easily gouge the thin veneer. On mine I simply buffed smooth using the #0000 wool then applied a wax to seal so my car is not "correct" per MB originality but I much prefer the shotgun stock appearance of the semi-matte wood trim. I will never have to worry about cracking again, just oil once in a while like a fine piece of furniture.
__________________
1962 220SE W111 Coupe, 2nd owner http://img.photobucket.com/albums/v3.../SideSmall.jpg The Coupe Group (W111/112 coupes and cabs) official website The Coupe Group on Facebook MotoArigato: Roadworthy News & Humor
|
|
#4
01-05-2013, 08:53 AM
|
|||
|
|||
|
Quote:
Ad
|
|
#5
01-05-2013, 04:58 PM
|
|||
|
|||
|
I've had good luck stripping old finishes with a product called Citristrip. It's non-toxic and amazingly effective--more than the Kleanstrip stuff, in my experience. Just follow the directions on the label.
Like others have said, use only a plastic scraper with no sharp edges to clean off the majority of the residue, then you can go in with steel wool to carefully remove any remaining residue. You might use a stiff synthetic bristle brush if finish remains in the grain and seems difficult to remove. I would also use an oil finish. I prefer several coats of tung oil cut about 50/50, let dry about 24 hours, 0000 steel wool between coats, and finish off with a buffing of paste wax. With enough coats you can develop a deep sheen that resembles the original glossy finish but without the problems of a conventional film finish that will eventually crack. A wax finish alone will not provide the aesthetic depth or protection of something like tung oil. BTW--veneer like this does not exactly "move" like solid wood, nowhere near enough to cause problems with the original MB finish as you describe. It's simply age and temperature variations that caused the finish to undergo stress and eventually fail. Last edited by Coastal220; 01-05-2013 at 05:18 PM.
|
|
#6
01-05-2013, 05:18 PM
|
|||
|
|||
|
exactly-polyester. you can easily defeat it by carefully sanding thru 80% of it then soaking in acetone overnite.--it will just flake off .
or if it is all cracked and flaked halfway off-you can just try soaking alone. Got me some cheap dash wood for my W123 300D
|
|
#7
01-05-2013, 08:13 PM
|
|||
|
|||
|
I would caution against "soaking" the vintage wood trim in anything; the wood's soft grain cells may very well absorb solution, degrade and "pop" into a fuzz that if hard to get smooth or lay back down. The sub-layer veneer glues are also not as strong as the newer glues used in 116s and 123s, etc. Not sure whether the 114/115 trim falls into the newer or older 108/111/113, etc, style of wood trim
The trim pieces in the "got me some cheap trim" link above are more modern epoxy-polyurethane treated and have a more stable glue to bond the wood to the substrate and not the same all-wood layup using water soluble glues as the older trims. That's not to say the wood won't ever warp and pull away, but that's not a surface veneer issue. Also, remember that some damage occurs "from below"--the bottom sides of the old trims were not treated or sealed, and leaky windscreen rubber would introduce moisture to the bottom, which would wick up through the veneers and water-soluble glues, and damage from within. Good luck...take pics. 
__________________
Looking for Early 108 windshield surround wood in decent-to-good condition.
|
|
#8
01-06-2013, 11:34 AM
|
||||
|
||||
|
Thanks everyone for the input on how to remove the old finish. Removing the glove compartment door was easy. The old finish on it was so flaky the that I could mostly pick it off. The stubborn bits responded well to a hair drier.
I've already removed the old finish and applied wood grain filler to the bare wood. My next question is, how do I get the other pieces off the dash? The bit on the passenger side offered me no clue as to how to get it off, and the piece on the driver's side looks even more daunting. But I'm committed. There must be a way to remove these wood pieces without taking out the entire dash!
|
|
#9
01-06-2013, 12:45 PM
|
|||
|
|||
|
I agree with Palolo--soaking, especially in something strong, could be a bad idea. Which is another reason Citristrip is nice; it is thick like yogurt and doesn't run and bleed all over the place.
Please do take pictures.
|
|
#10
01-06-2013, 04:21 PM
|
|||
|
|||
|
Quote:
__________________
1962 220SE W111 Coupe, 2nd owner http://img.photobucket.com/albums/v3.../SideSmall.jpg The Coupe Group (W111/112 coupes and cabs) official website The Coupe Group on Facebook MotoArigato: Roadworthy News & Humor
|
|
#11
01-06-2013, 10:12 PM
|
|||
|
|||
|
Marrs,
I love the flat look even with one coat--in my opinion much nicer that the gloss. It's like a fine piece of Danish furniture. You did a nice job. If the original poster desires more sheen than the photos but still the honest look of oil just apply several coats of tung oil with a steel wool buffing (in the direction of the grain) in between coats. Paste wax after it's fully cured.
|
|
#12
01-07-2013, 02:05 PM
|
|||
|
|||
|
Quote:
 Marrs, your dash looks great. Do you have a pic from the back seat showing side-to-side?
__________________
Looking for Early 108 windshield surround wood in decent-to-good condition.
|
|
#13
01-07-2013, 06:16 PM
|
|||
|
|||
|
Quote:
|
|
#14
01-07-2013, 07:50 PM
|
|||
|
|||
|
RE: panZZer
In my experience you don't want to go nuts experimenting on 40 year old veneer and glues unless you are okay with potential loss and/or problems. The most intelligent thing to do is TEST the stripping product on a small area which is the least visible (though this may not be an option in you case). Wood is a natural material and not always predictable. There can be great variations within the same species, sometimes even the same tree depending on where, how, and when the material was cut. There is no such thing as "WON'T phase it SLIGHTLY" when it comes to this type of work. Acetone probably will not strip the finish without upsetting the glue. Last edited by Coastal220; 01-07-2013 at 09:03 PM.
|
 |
| Bookmarks |
|
|


 Linear Mode


