

|
|
|
|
|
|
|||||||
 |
|
|
LinkBack | Thread Tools | Display Modes |
|
#1
 03-07-2012, 10:16 PM
|
||||
|
||||
|
I Have The Windshield In (1965 W111 220S), Now How Do I Seal It?
I installed a new headliner in my roommate's 1965 W111 220S and am currently installing the glass. I tried URO and Febi seals; they were both junk and didn't fit, so I got some from Mercedes-Benz (the aftermarket headliner was horrible, too--I had to go to Mercedes for a proper one as well).
I did a lot of research on windshield installation before attempting to do it myself. From what I've read, it seems proper to first install a bead of plumber's putty in front of the spot weld flange, install the glass, seal, and trim as one piece, then use 3M bedding compound to seal between the body and seal, then the seal and glass. This is what I did and it all snapped into place. The trouble began when I cut the tip off of the bedding compound tube, placed it into a caulking gun, squeezed, then realized that there is a foil seal inside the tip. I tried to remove the tip to get to the seal but it broke off. I cut the tip off of a second tube of bedding compound and poked at the foil seal with an awl but was only able to poke a bunch of holes in it. It took a lot of pressure to get any sealant to come out. I then realized that the seal fit too tightly against the body and glass on the top and sides to get the tip in there. I was able to get it in between the glass and seal at the bottom, but it took a lot of effort to get any sealant inside, then all it seemed to do was keep the seal away from the glass and make gaps. The sealant got all over the place and it was so thick and tacky that I wasn't able to wipe it off. It seemed to set immediately. I couldn't get it off until I decided to try WD40, which actually worked. I removed the sealant from the seal, glass, and body, then spent several hours removing it from between the seal and glass. I finally removed almost every trace of sealant, even between the seal and glass. This just isn't working. I thought I was going to be done with the rear windshield today but now I have no idea how to get the sealant in there. I'm about ready to call a glass installer to come over and finish the job. I've spent countless hours on this car and it never seems like it will end. I can't get the tip of the sealant tube in most of the places it needs to go and it seems way too thick and doesn't flow. I also hate working with this stuff because it is so messy and it seems only WD40 will remove it. The tube also exploded in the caulking gun because it took so much pressure to get anything out of it. What's the trick to getting the sealant in after the glass is installed? Is there a special application tool? I feel like giving up.  
__________________
Stop paying for animal enslavement, cruelty, and slaughter. Save your health and the planet. Go vegan! I did 18 years ago. https://challenge22.com/ DON'T MESS WITH MY MERCEDES!  1967 W110 Universal Wagon, Euro, Turbo Diesel, Tail Fins, 4 Speed Manual Column Shift, A/C 1980 W116 300SD Turbo Diesel, DB479 Walnut Brown, Sunroof, Highly Optioned, 350,000+ Miles 
|
|
#2
03-07-2012, 11:16 PM
|
|||
|
|||
|
I feel your pain, man. When I did my back windshield, I opted to not seal between the pinch weld and seal because I couldn't see how I could do it without making a tremendous mess. I had installed/reinstalled the glass many times and wasn't sure if I was going to have to take it out again.
The plumbers putty is a good idea, however, and if I had thought of that I would have done it. It's easy to clean up. As it was, I just coated the pinchweld with petroleum jelly to protect the few small spots where I had scraped down to metal while removing the original sealant. The original putty, by the way, had many voids where water could have gotten in and was obviously not a perfect seal. As for the glass to seal and seal to body joints, are you sure that this is required? None of my MBs have had any sealant there from the factory. That's a pretty tight joint normally. Along the bottom where the garnish trim provides water shedding where it locks into the seal, I would think it particularly unnecessary. When my glass was all installed (finally), I did notice a tiny gap about 18 inches long between the seal and body along the top where there was an irregularity in the body that I couldn't close by manipulating the rubber. So I opted to run a bead of black butyl rubber in that channel along the entire top and feathered-out down the sides. I tooled it with a tiny spatula I have and cleaned-up a few ugly spots (weeks later after it set-up) using an eraser after lightly cutting a parting line with a utility knife. Looks good and I no longer have water weeping out under the corners after washing the car. The smaller you can trim the tip of the caulk tube and still allow it to flow the better. Also better to do it on a warm day or preheat the tubes. Anyway, you may be pretty well finished after having used WD40 to clean up the rubber. I doubt anything will stick to it until some time has passed. Good luck, Scott, and keep us informed.
__________________
1981 300TD 310k miles 1970 280sel 172k miles 1966 230 Fintail 162k miles "Where are we going? And why am I in this hand basket?"
|
|
#3
03-07-2012, 11:17 PM
|
|||
|
|||
|
My guess is that the application temperature was way too low. I wouldn't try this when it is colder than 50°. Best condition is when the temp is above 60° for at least 24 hours prior to application. It is also possible that the sealant was too old. You didn't specify which 3M product you used, but it probably should have been 8509. That stuff runs out of the tube at the proper temperature when it is good. Cleanup is tedious, but it comes up easily with a little bit of paint thinner on a rag. Lots of clean rags required.
__________________
'79 240D
|
|
#4
03-08-2012, 01:03 AM
|
|||
|
|||
|
I haven't done mine yet but I have always been under the impression that the factory seal doesn't require any other sealant, it fits well enough to keep water out. Someone will correct me. Also, the gap at the top is supposed to be there, it's an air outlet for interior volume which allows air flow via the headliner perforations through the car and out the back which aids in quicker heating and cooling and essentially does away with the need for flaps that other cars have to equalize air when closing the doors with windows up for example. Lay your head against the glass from the outside and shine a flashlight up into the opening and you will see it's a specifically formed space. If you're having that much trouble call the glass guy, install is usually very cheap, as low as $40 (if you know a guy) to no more than $100 if you are providing the glass and seal.
__________________
1962 220SE W111 Coupe, 2nd owner http://img.photobucket.com/albums/v3.../SideSmall.jpg The Coupe Group (W111/112 coupes and cabs) official website The Coupe Group on Facebook MotoArigato: Roadworthy News & Humor
|
|
#5
03-08-2012, 03:45 AM
|
|||
|
|||
|
I've never used sealer on a windshield, and never had a leak with a fresh seal, including aftermarket ones.
__________________
1968 230S Automatic, Elfenbein 1975 O309D Executive Westfalia Camper Bus, Blau/ Weiss 1972 280SEL 4,5 Dunkelrot 1966 VW Type 34 "Grosser" Karmann-Ghia 1963 VW 1500 Variant Pearlweiss 1969 VW Variant Automatic, Perugruen 1971 VW Squareback Automatic, Clementine Orange 2001 E320 4Matic Wagon- Our belated welcome to the 21st century! Polar White 1973 280SEL 4,5 Sliding Roof "The Bomb", Dunkelblau.
|
|
#6
03-08-2012, 09:01 AM
|
|||
|
|||
|
I've had a couple problems with after market seals on my 114's. Usually at the lower corners. Carpenterman is correct with using the butyl rubber. Don't use any silicone based sealer as the acidic reaction while it is curing will actually promote further rusting and corrosion of the metal. I don't see plumbers' putty as lasting very long as it seems to harden up with exposure to sun and extreme temperature changes.
|
|
#7
03-08-2012, 12:37 PM
|
||||
|
||||
|
The factory service manual says to put sealer between the glass and seal after installation and I can see why they say that because at the bottom on each side the seal doesn't fit tight. The seal will harden with age, whereas the sealant won't. All of the seals I have removed have had a thin layer between the seal and glass--though it may have been added at a later time.
I don't know how they get the sealant into such a tight place or how to even use the tubes. I'm using 3M bedding compound 8509. I'm not sure how to heat it up and it seems above my technical expertise, so I'll probably just have a glass shop come over if they can do it in the rain. After using the WD40 I used several applications of degreaser followed by water. I'm not sure what this air outlet gap is. I don't see any gaps myself. The seal fits tight on the body in all places. The factory used plumber's putty and that's what people on this website have recommended. It's supposed to be non-hardening, though after 40 years it will have hardened due to age. It seems like it's always too cold here to do something. Why is it that it's always winter time when I have to do stuff? Thanks for the comments, everyone.
__________________
Stop paying for animal enslavement, cruelty, and slaughter. Save your health and the planet. Go vegan! I did 18 years ago. https://challenge22.com/ DON'T MESS WITH MY MERCEDES! 1967 W110 Universal Wagon, Euro, Turbo Diesel, Tail Fins, 4 Speed Manual Column Shift, A/C 1980 W116 300SD Turbo Diesel, DB479 Walnut Brown, Sunroof, Highly Optioned, 350,000+ Miles
|
|
#8
03-09-2012, 01:34 AM
|
||||
|
||||
|
I took my 250C to a glass shop in Federal Way due to leaks. He told me he didn't want to deal with it as he didn't want to be "married" to the job.
I handed him $50, he handed me a plastic tool to clean the gunk from between the glass and the seal and told me to bring the car back the next day. I did and he used a caulking gun to shoot some sort of sealer (might have been bedding compound) between the glass and seal. He didn't seem worried about it oozing out. The he sprayed a ton of glass cleaner around the seal and wiped it clean. It never leaked again. Michael
__________________
Usta haves '69 250/8, '76 280C, 1971 250C 114.023, 1976 450SEL 116.033 Current have, 1983 300SD 126.120
|
|
#9
03-09-2012, 02:37 AM
|
||||
|
||||
|
Michael, that is very encouraging. I have both windshields in and have a glass installer coming tomorrow to put sealant between the seals and glass. I am hoping my liberal application of plumber's putty in combination with the tight seal to body fit will be enough to prevent leaks.
__________________
Stop paying for animal enslavement, cruelty, and slaughter. Save your health and the planet. Go vegan! I did 18 years ago. https://challenge22.com/ DON'T MESS WITH MY MERCEDES! 1967 W110 Universal Wagon, Euro, Turbo Diesel, Tail Fins, 4 Speed Manual Column Shift, A/C 1980 W116 300SD Turbo Diesel, DB479 Walnut Brown, Sunroof, Highly Optioned, 350,000+ Miles
|
|
#10
03-09-2012, 02:59 AM
|
||||
|
||||
|
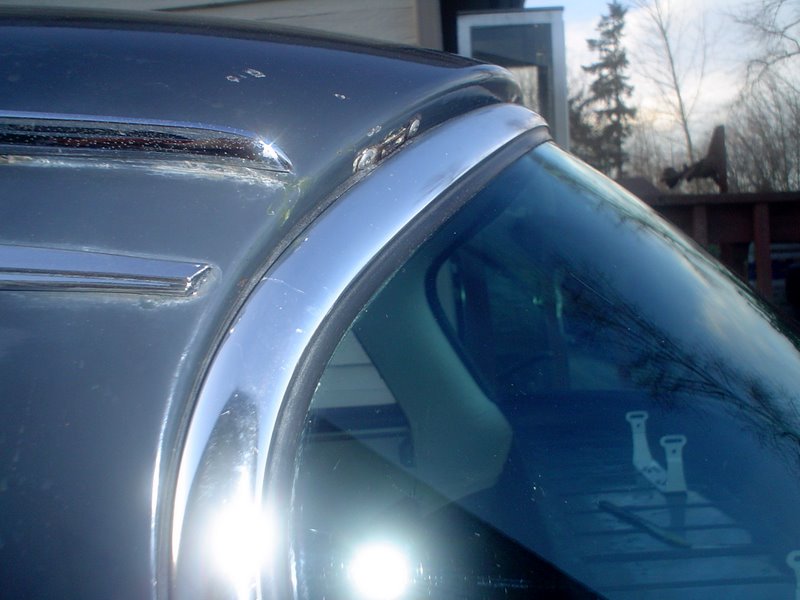
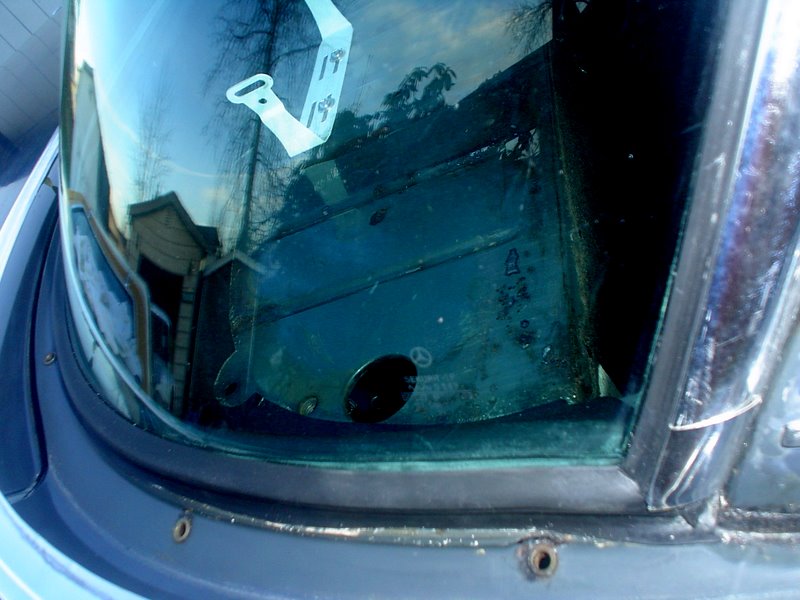
Here are closeup pictures of the rear windshield seal. It fits snugly on the body and glass, short of the lower right corner. Sharp eyes will notice that it is factory tinted glass. I made a new vinyl covering on the inside for below the glass.
__________________
Stop paying for animal enslavement, cruelty, and slaughter. Save your health and the planet. Go vegan! I did 18 years ago. https://challenge22.com/ DON'T MESS WITH MY MERCEDES! 1967 W110 Universal Wagon, Euro, Turbo Diesel, Tail Fins, 4 Speed Manual Column Shift, A/C 1980 W116 300SD Turbo Diesel, DB479 Walnut Brown, Sunroof, Highly Optioned, 350,000+ Miles
|
|
#11
03-09-2012, 03:10 AM
|
||||
|
||||
|
The front windshield went in the same as the rear, with plumber's putty in front of the pinch weld. It's amazing how much more flexible the MB seals are than aftermarket, and how they seem to pull in the trim instead of popping it out. I am very happy with how well the genuine seals fit. I am paying a glass installer to come out tomorrow to seal between the seal and glass. I'm at a point where I would rather pay someone to finish it than to mess with that icky sealant again. I guess the lower trim will snap in while trying to lift the seal lip over it?
    
__________________
Stop paying for animal enslavement, cruelty, and slaughter. Save your health and the planet. Go vegan! I did 18 years ago. https://challenge22.com/ DON'T MESS WITH MY MERCEDES! 1967 W110 Universal Wagon, Euro, Turbo Diesel, Tail Fins, 4 Speed Manual Column Shift, A/C 1980 W116 300SD Turbo Diesel, DB479 Walnut Brown, Sunroof, Highly Optioned, 350,000+ Miles
|
|
#12
03-09-2012, 03:12 AM
|
||||
|
||||
|
In other news, I'm happy with how the headliner turned out.

__________________
Stop paying for animal enslavement, cruelty, and slaughter. Save your health and the planet. Go vegan! I did 18 years ago. https://challenge22.com/ DON'T MESS WITH MY MERCEDES! 1967 W110 Universal Wagon, Euro, Turbo Diesel, Tail Fins, 4 Speed Manual Column Shift, A/C 1980 W116 300SD Turbo Diesel, DB479 Walnut Brown, Sunroof, Highly Optioned, 350,000+ Miles
|
|
#13
03-09-2012, 05:26 AM
|
|||
|
|||
|
Quote:
The first pic below shows the rear glass (on a coupe mind you) for orientation, the second pic shows the windshield trim at top center with a flashlight to illuminate the rubber seal (mine is brittle and needs replacing too but works for this purpose), and the last pic shows the same area with the camera set flat against the glass as I suggested you do with your head to see the vent, notice how the seal seats against the glass but the trim fits to the clips above it? Maybe you only need to move the trim up and the seal is ok where you have it. By the way never spray your hose or power washer upwards in this area, only cascading down from above and don't let anyone wash your car without making them aware of the vent, even some dealers and indies don't know it's there, that's why so many of these cars have rotten or moldy parcel shelves and water stained headliners. EDIT: I want to be clear that I don't know if the sedans have the vent, but regardless, the trim is in the wrong place. Hope this helps you in some small way. 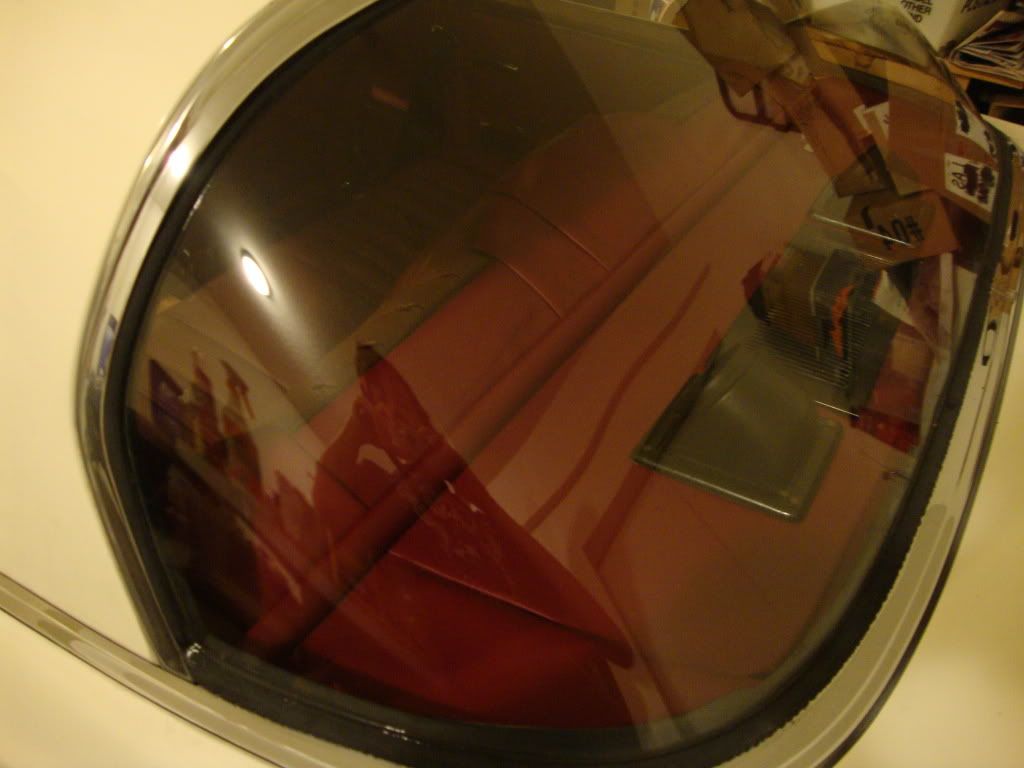 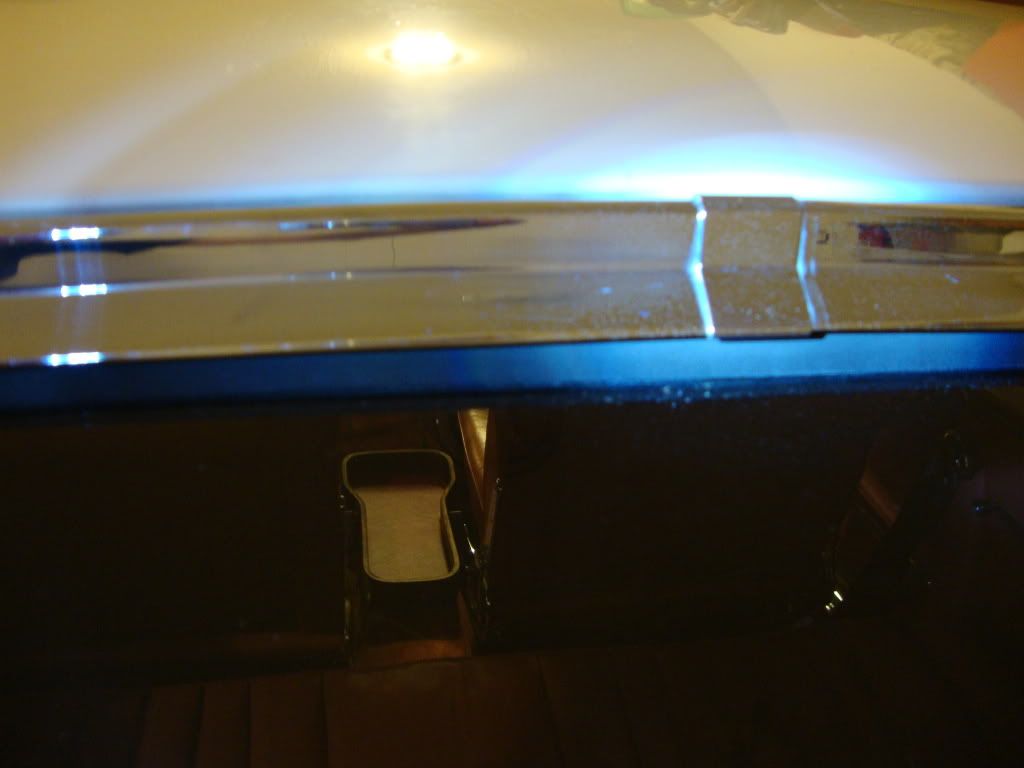 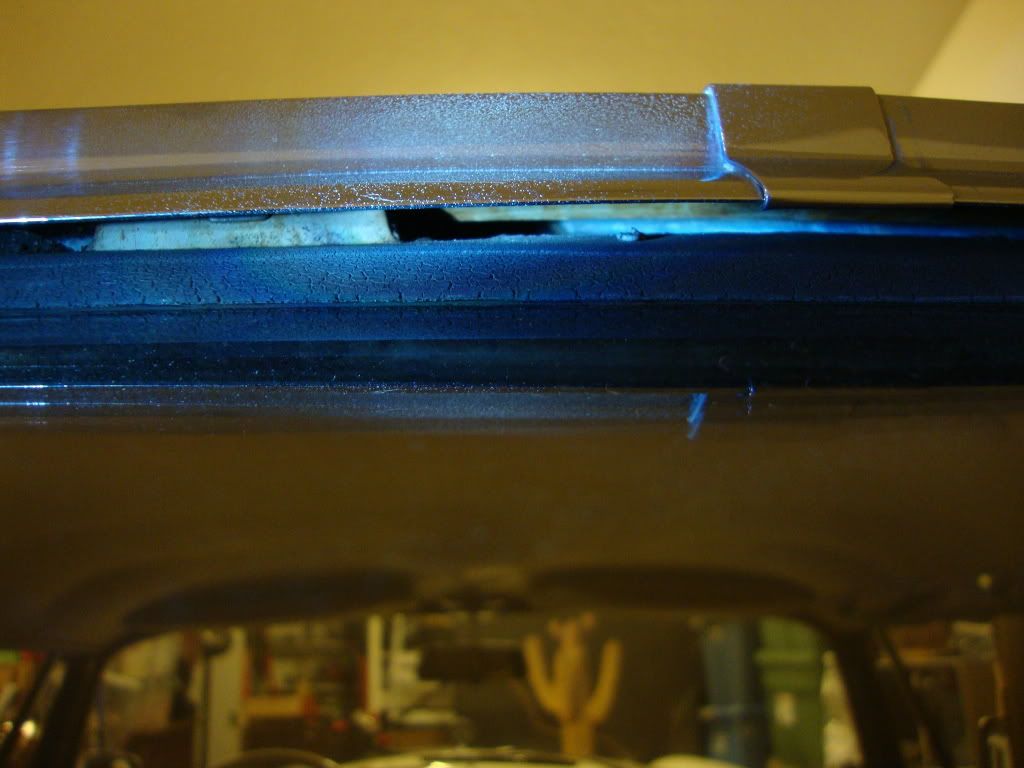
__________________
1962 220SE W111 Coupe, 2nd owner http://img.photobucket.com/albums/v3.../SideSmall.jpg The Coupe Group (W111/112 coupes and cabs) official website The Coupe Group on Facebook MotoArigato: Roadworthy News & Humor
|
|
#14
03-09-2012, 08:18 AM
|
|||
|
|||
|
Looks good. I would just use a thin bead of that watery purpose-made clear silicone RTV between the glass and seal (not near the metal). It is hardly noticeable and does the job. Some better things have come along since MB wrote the manual. I do use the bedding compound on the metal side of the glass when needed, but it flows pretty well in the summers in Florida.
__________________
80 300SD (129k mi) 82 240D stick (193k mi)77 240D auto - stick to be (153k mi) 85 380SL (145k mi) 89 BMW 535i 82 Diesel Rabbit Pickup (374k mi) 91 Jetta IDI Diesel (155k mi) 81 VW Rabbit Convertible Diesel 70 Triumph Spitfire Mk III (63kmi)66 Triumph TR4a IRS (90k mi)67 Ford F-100 (??)
|
|
#15
03-09-2012, 02:09 PM
|
||||
|
||||
|
Thanks for the concern, but the trim is indeed in the correct place. It pops into the seal and is not movable once installed. Those clips are for an additional piece of trim that sets in above the seal. Also, I don't think that the sedans have this vent.
__________________
Stop paying for animal enslavement, cruelty, and slaughter. Save your health and the planet. Go vegan! I did 18 years ago. https://challenge22.com/ DON'T MESS WITH MY MERCEDES! 1967 W110 Universal Wagon, Euro, Turbo Diesel, Tail Fins, 4 Speed Manual Column Shift, A/C 1980 W116 300SD Turbo Diesel, DB479 Walnut Brown, Sunroof, Highly Optioned, 350,000+ Miles
|
|
| Bookmarks |
|
|


 Linear Mode


