

|
|
|
|
|
|
#181
 09-22-2016, 10:32 AM
|
||||
|
||||
|
Quote:
__________________
Current: 2021 Charger Scat Pack Widebody "Sinabee" 2018 Durango R/T Previous: 1972 280SE 4.5 2014 Jeep Grand Cherokee Limited "Hefe", 1992 Jeep Cherokee Laredo "Jeepy", 2006 Charger R/T "Hemi" 1999 Chrysler 300M - RIP @ 221k 
|
|
#182
09-24-2016, 11:01 PM
|
||||
|
||||
|
Quote:
During the course of modifying my crossmember I accidentally (good thing) reinforced the bracket. I see in one of your pics how the metal cracked in the bend area of the bracket, even with how I strengthened this bracket I guess mine could crack there. But I think how I supported the bracket is basically the same result and the MB fix. I'll have to keep an eye on it after the swap is done. 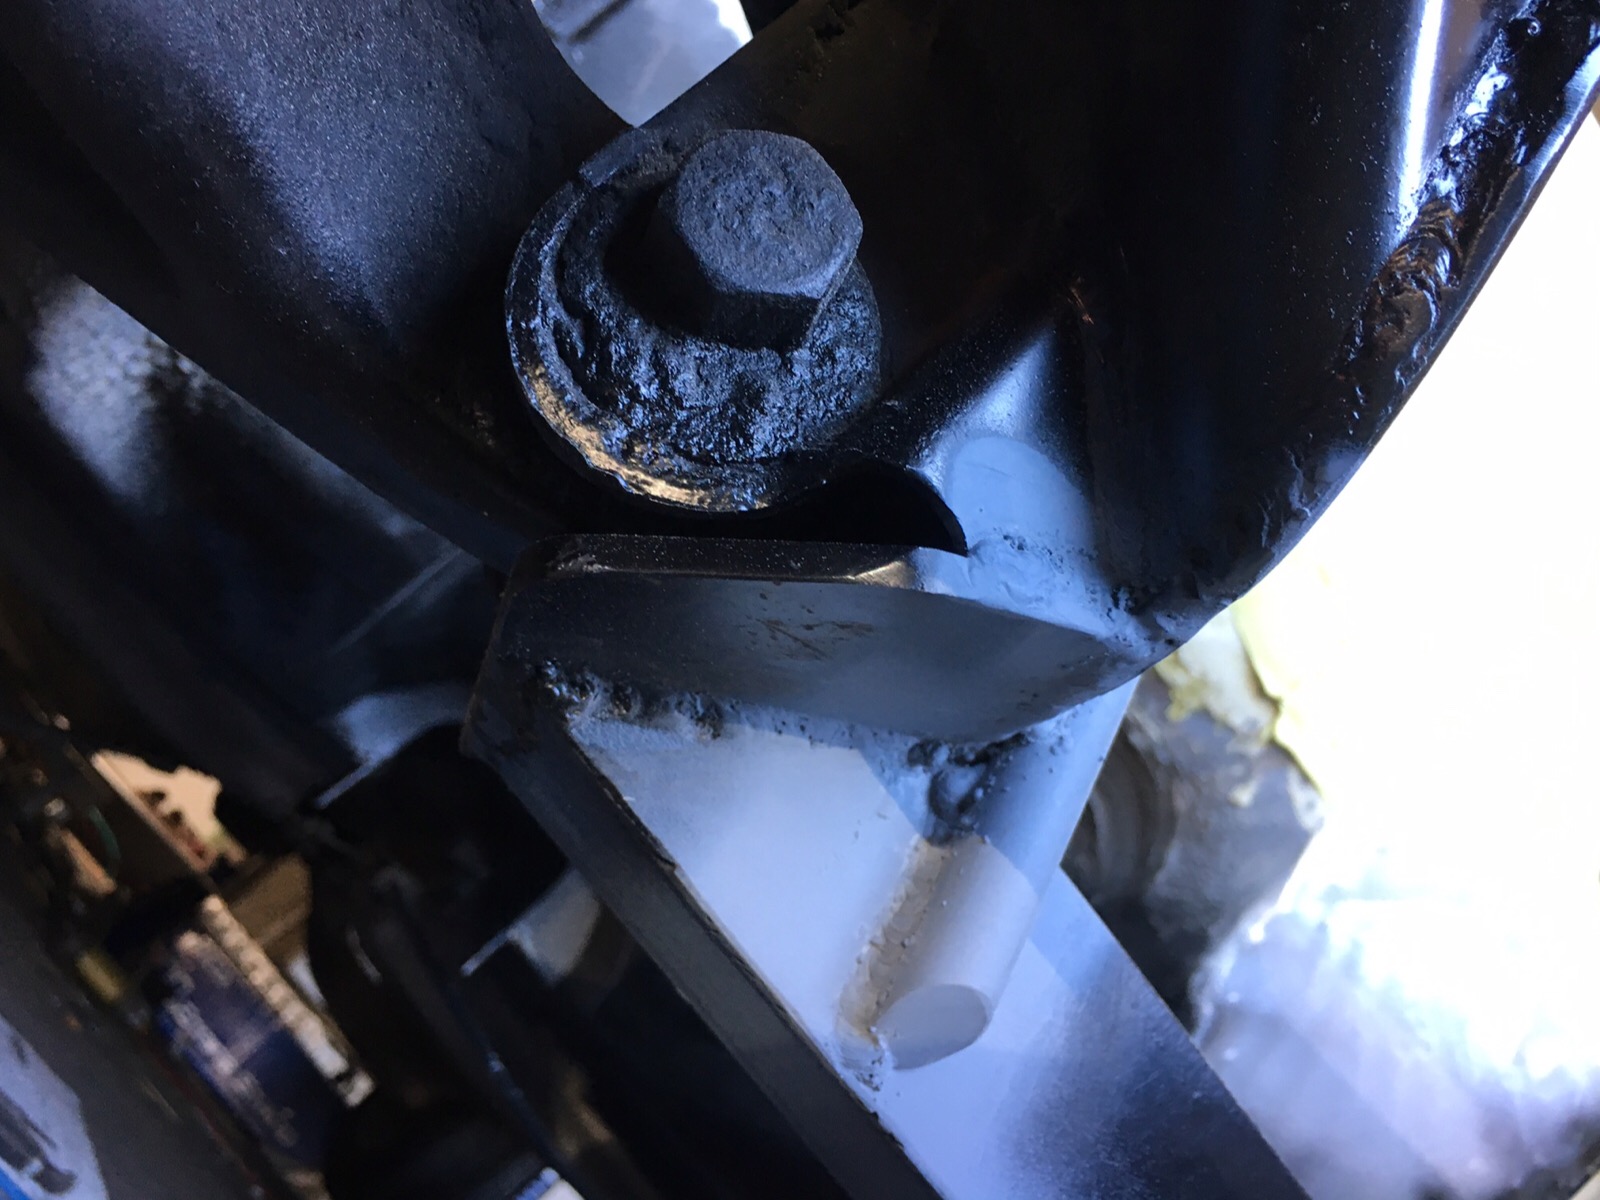
__________________
"In wine there is wisdom, in beer there is strength, in water there is bacteria."
|
|
#183
09-24-2016, 11:10 PM
|
||||
|
||||
|
Quote:
 It should have 3 times the horsepower! I just replied to Fonzi with a pic and info on how I supported the bracket. And I hoping that I have increased the strength of the subframe and frame rails overall that there will be less movement/flex put on the control arm brackets. I'm really hoping that because I pushed the new engine rearward, moved the battery to the rear, swapping out the steering box to rack and pinion, aluminum radiator, and other weight saving/moving strategies that the weight on the front axle will actually be less that it was before.
__________________
"In wine there is wisdom, in beer there is strength, in water there is bacteria."
|
|
#184
09-24-2016, 11:12 PM
|
||||
|
||||
|
Today I worked on grinding down the welds and started spreading filler and sanding. Paint day getting closer!

__________________
"In wine there is wisdom, in beer there is strength, in water there is bacteria."
|
|
#185
09-24-2016, 11:15 PM
|
||||
|
||||
|
Drivers side. The factory sheet metal is kind of wavy, taking a bit of time and planning to smooth the sides.
__________________
"In wine there is wisdom, in beer there is strength, in water there is bacteria."
|
|
#186
09-25-2016, 02:20 PM
|
|||
|
|||
|
Quote:
Now I see. I didn't realize your work was so close to that location. I'm not sure the portions of the gussets that you might be able to weld in would be able to do much good. It does look like a significant portion of the defective subframe is still not reinforced, but the overall length of the metal in question is shortened. It looks like a very small piece of metal to reinforce those tabs might still be beneficial to ensure you don't lose all your work on that subframe. Here's the area it looks to me you would want to fill in:  I don't know what the back side look like, but generally the gussets make it so the tabs do not extend at all vertically. They are essentially fully boxed in. It does look like the area has gotten tighter with your modifications. That won't make it any easier. But your skill level looks very good to me, and if you decide you want to do it, I'm sure you want have any problem. If I come across the set of gussets I have, I will take a picture and see if I can get you some of the dimensions. With that subframe, it's clear you will want to keep an eye on it anyway. The positions of metal that you might want to weld in to strengthen the tabs would be considerably smaller than full size gussets. I know you've got a lot more to do. I drive around my cars with I reinforced subframes, needing to update them, but I haven't put so much effort (or any) into mine. So I'm not too concerned with the idea of replacing mine.
__________________
Past mb: '73 450sl, '81 280slc stick, '71 250, '72 250c, '70 250c, '79 280sl, '73 450sl, parted: '75 240d stick, '69 280s, '73 450slc, '72 450sl,
|
|
#187
09-29-2016, 10:36 PM
|
||||
|
||||
|
Quote:
After your post I looked at welding where you marked in red. But when I strengthen this area I'll make up some brackets like you posted, just modified to fit my subframe. I think minimal benefit to strengthen the existing tabs if the metal tears with fatigue.
__________________
"In wine there is wisdom, in beer there is strength, in water there is bacteria."
|
|
#188
09-29-2016, 10:54 PM
|
||||
|
||||
|
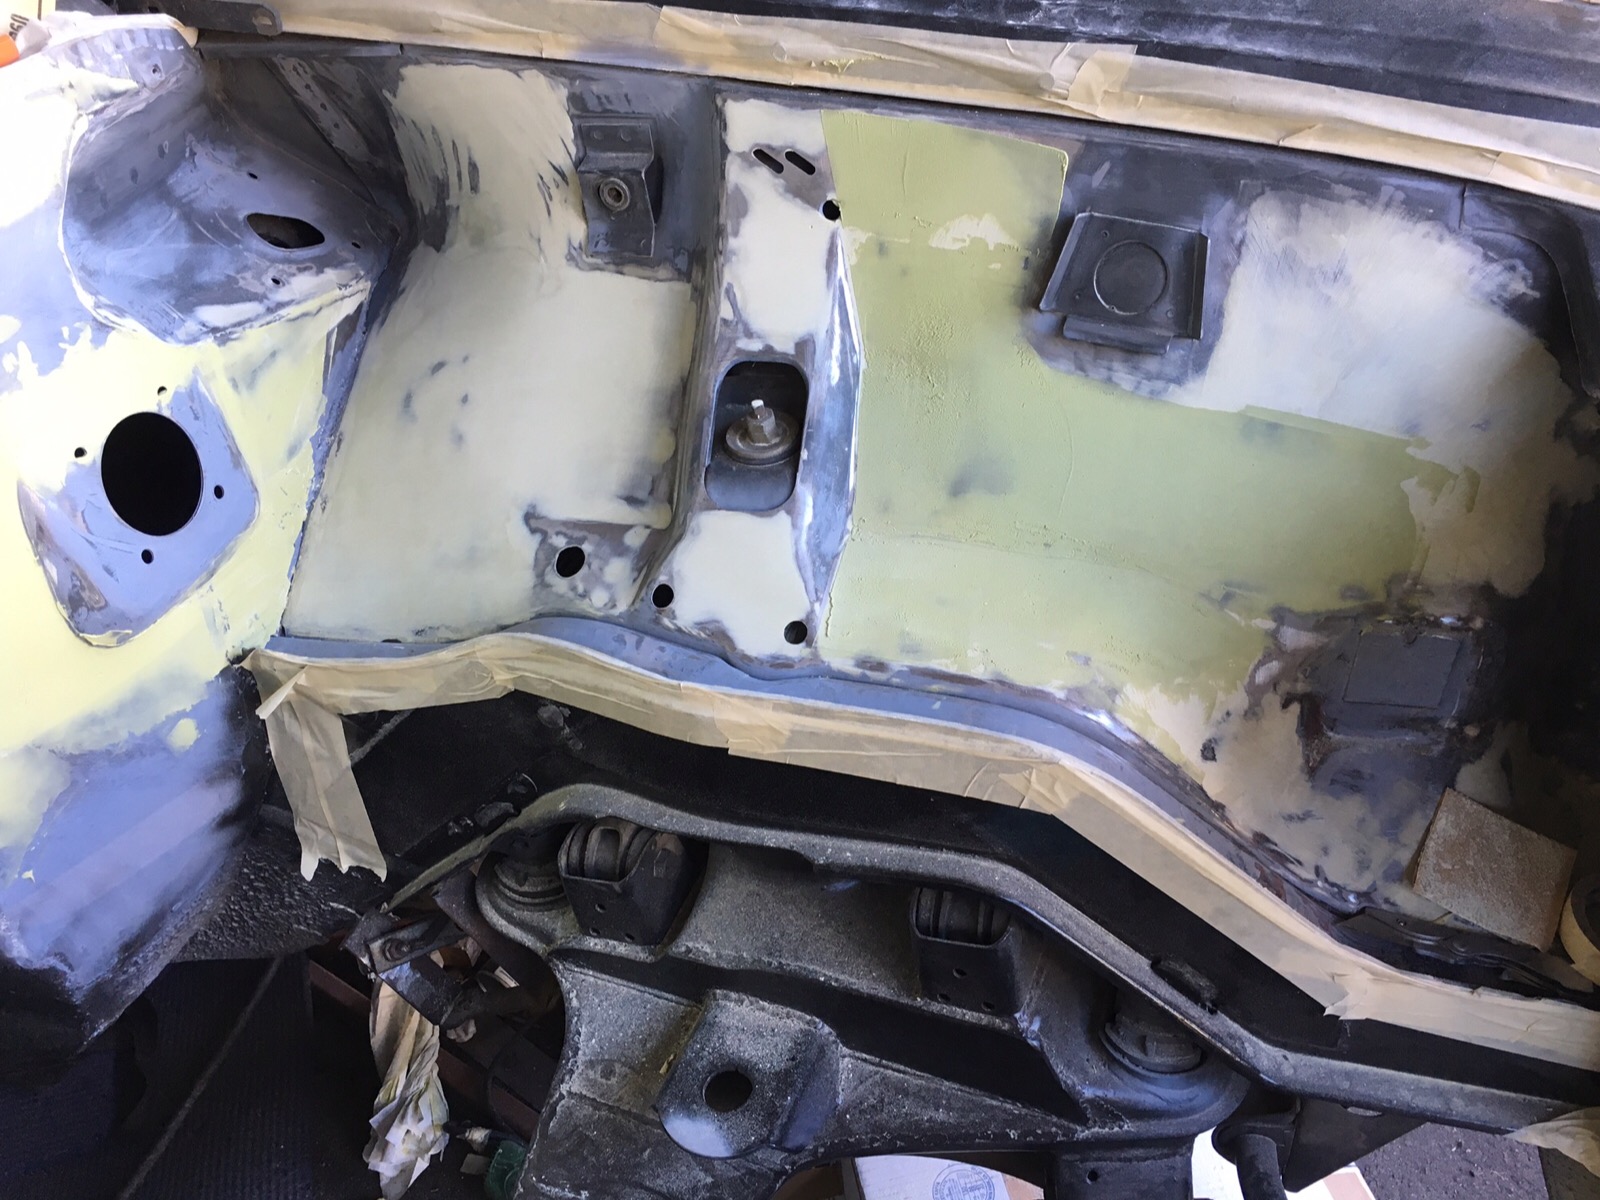
I've been working on bondo every night for a couple hours getting the firewall, inner fenders, and radiator support smoothed and shaped. A couple more patches to sand and I need to clean up the garage and get ready to spray some primer. As you can see I kept the filler light, using the surrounding metal as a guide.
I've used Cromax line of primers, base coat, and clear coat on my last few projects with great success. Made by Axalta Coatings now, formally DuPont before they sold out. I'll be using their 2K high build primer. Kind of like sprayable filler. If all goes well I should be able to spray out the color this weekend. 
__________________
"In wine there is wisdom, in beer there is strength, in water there is bacteria."
|
|
#189
09-29-2016, 11:41 PM
|
|||
|
|||
|
Thumb up on using the "Rage" line of filler! Good stuff. Please don't refer to it as "Bondo". Have a little pride.
The 2K primer is the only way to go. Stuff sticks like glue, wears like iron, covers like a raincoat and sands into a fine undercoat. I used to choke at the price until I used it a few times and realized how much money it was saving me in time and effort. Use a GOOD respirator though. The stuff doesn't care if it is lung tissue or metal, it is going to bind to it. 
__________________
Whatever story you're telling, it will be more interesting if, at the end you add, "and then everything burst into flames. ― Brian P. Cleary, You Oughta Know By Now
|
|
#190
09-30-2016, 02:55 AM
|
|||
|
|||
|
Quote:
 -Dmitry
|
|
#191
09-30-2016, 07:44 PM
|
||||
|
||||
|
Quote:
I was afraid some people might know the word "Bondo" better than filler. And obviously I agree with your assessment of the 2k primer. Great stuff. Sprayed out 3 coats today. Need a couple touches of sanding, filler, and spot priming this afternoon, and wait to wet sand all in the morning. Although you can sand after 2 hours I find less shrinking later if you wait overnight. I'm pretty happy with the overall look of the engine bay. I've left just enough "defects" so that it should look stock after paint. By defects I mean some "ripples" in the metal and a few spot welds. But way smoother. 
__________________
"In wine there is wisdom, in beer there is strength, in water there is bacteria."
|
|
#192
09-30-2016, 07:46 PM
|
||||
|
||||
|
Quote:
I have everything from my last couple of projects so I think I'm good, but you never know. Thanks again.
__________________
"In wine there is wisdom, in beer there is strength, in water there is bacteria."
|
|
#193
10-01-2016, 11:02 PM
|
||||
|
||||
|
I was successful in getting color on the engine bay today! Glad that's done, ready for the engine!
I used Chroma Base and Chroma clear products. Wet sanded everything with 400 grit, good water clean-up, then wipe down with adhesive remover, tack, 3 coats of base, 2 coats of clear. Color is Grigio Ferro, a Ferrari color. Slightly lighter than the stock color, more alive, with a good amount of metallic and pearl. Body lines are pronounced in varying light. After its drivable the next step will be to paint the rest of the car this color.    
__________________
"In wine there is wisdom, in beer there is strength, in water there is bacteria."
|
|
#194
10-01-2016, 11:09 PM
|
||||
|
||||
|
And for reference, here is where I started from
 Sent from my iPad using Tapatalk
__________________
"In wine there is wisdom, in beer there is strength, in water there is bacteria."
|
|
#195
10-03-2016, 12:09 PM
|
||||
|
||||
|
The engine block has been hot tanked, magnafluxed and measured. There was some pitting in the walls, so went 30 over. Pistons have been ordered and arrived and delivered to the machine shop last Thursday.
Hopefully everything will be back in my hands for assembly in the next week or so. Since this is a Chevy engine, and this is a Mercedes site, I am documenting the engine build portion here for those interested; LQ4/4L80 swap 1969 Mercedes - LS1TECH In the meantime I'll continue the rest of the build here as I move onto completing the engine bay, steering, interior tunnel, and installing the new gas pedal.
__________________
"In wine there is wisdom, in beer there is strength, in water there is bacteria."
|
 |
| Bookmarks |
|
|


 Linear Mode


