

|
|
|
|
|
|
#76
 07-15-2016, 12:24 AM
|
||||
|
||||
|
Quote:
As I haven't been able to find any published similar conversions everything at this stage is speculation. I'll spend part of Saturday working out some of the details. I ordered the rack yesterday from an Oreily and will be able to pick up close to home tomorrow. I'll continue to post my progress. I received the call today that my engine is ready to be picked up at the dock. Yea!
__________________
"In wine there is wisdom, in beer there is strength, in water there is bacteria." 
|
|
#77
07-15-2016, 12:28 AM
|
||||
|
||||
|
Quote:
I have ordered the Cavalier rack, will be playing with it Saturday. They has two different ratios available, 2.5:1 and 2.8:1. I read some posts by others that they felt the 2.5:1 was too fast, so I ordered the 2.8:1. We will see in a couple months if I have regrets. But at less than $100 for either one, not much of a risk.
__________________
"In wine there is wisdom, in beer there is strength, in water there is bacteria."
|
|
#78
07-15-2016, 02:19 PM
|
|||
|
|||
|
Quote:
Too fast or slow is relative to the length of the steering arms at the spindles. Longer steering arms will give slower steering.
|
|
#79
07-17-2016, 01:27 PM
|
||||
|
||||
|
Quote:
And in the case of this Mercedes there is even one more variable. The pitman arm and the ???arm on the passenger side leverage/increase the distance of travel also. Yesterday I re-installed the steering box and connected the drag link and tie rod to map out the sweep and location of the inner tie rod points to be able to duplicate with the rack and pinion. The sweep of the pitman arm moves the drag link a total of 6 3/8". Yet, because of the leveraged way the tie rods are connected to the drag link, the tie rods actually move a total of 8 1/4". 
__________________
"In wine there is wisdom, in beer there is strength, in water there is bacteria."
|
|
#80
07-17-2016, 01:51 PM
|
||||
|
||||
|
As I mentioned, yesterday I mapped out the location and travel of the drag link/inner tie rod ends to be able to duplicate with the new rack and pinion.
Lucky for me the existing drag link is mounted level with the car and runs in a straight line. Although it moves slightly forward and slightly rearward, from center, due to the arch/swing of the pitman and ???arm. Now that I have a map, so to speak, I removed the balance of the old steering system. This weighed a total of 8 lbs, plus the 35 lbs for the steering box = 43 lbs total. I have to say that the existing system was pretty well designed. When driving the car I never thought it needed to be replaced. Now I will have to live with a larger turning radius or modify the steering arms at the spindle to get it back. Here is my "map" probably won't make sense to anyone else. But I took my reference points from the engine mount location on top of the crossmember, outside bolt location, and the center of the crossmember. 
__________________
"In wine there is wisdom, in beer there is strength, in water there is bacteria."
|
|
#81
07-17-2016, 03:51 PM
|
|||
|
|||
|
Quote:
|
|
#82
07-17-2016, 11:51 PM
|
||||
|
||||
|
Quote:
I understand that the travel will be the same, but I understand that changing the location of the inner tie rod end would change bump steer. Am I incorrect? Seems pretty common in these swaps to build a bracket to locate the inner tie rods. 
__________________
"In wine there is wisdom, in beer there is strength, in water there is bacteria."
|
|
#83
07-17-2016, 11:56 PM
|
||||
|
||||
|
Since the engine gets delivered to my house tomorrow I figured I better get some more prep done today.
Pulled out the steering column, removed all the sound deadening, and cleaned all the glue residue from the front floorboard and firewall. Then I found a couple more spots of rust. 
__________________
"In wine there is wisdom, in beer there is strength, in water there is bacteria."
|
|
#84
07-18-2016, 12:00 AM
|
||||
|
||||
|
Eventually you have to stop tearing things apart, cleaning and actually start moving forward and building!
Since I was in the footwell I might as well start there. Made a cardboard template of the first area of rust to cut out, then cut the patch, then cut the hole. 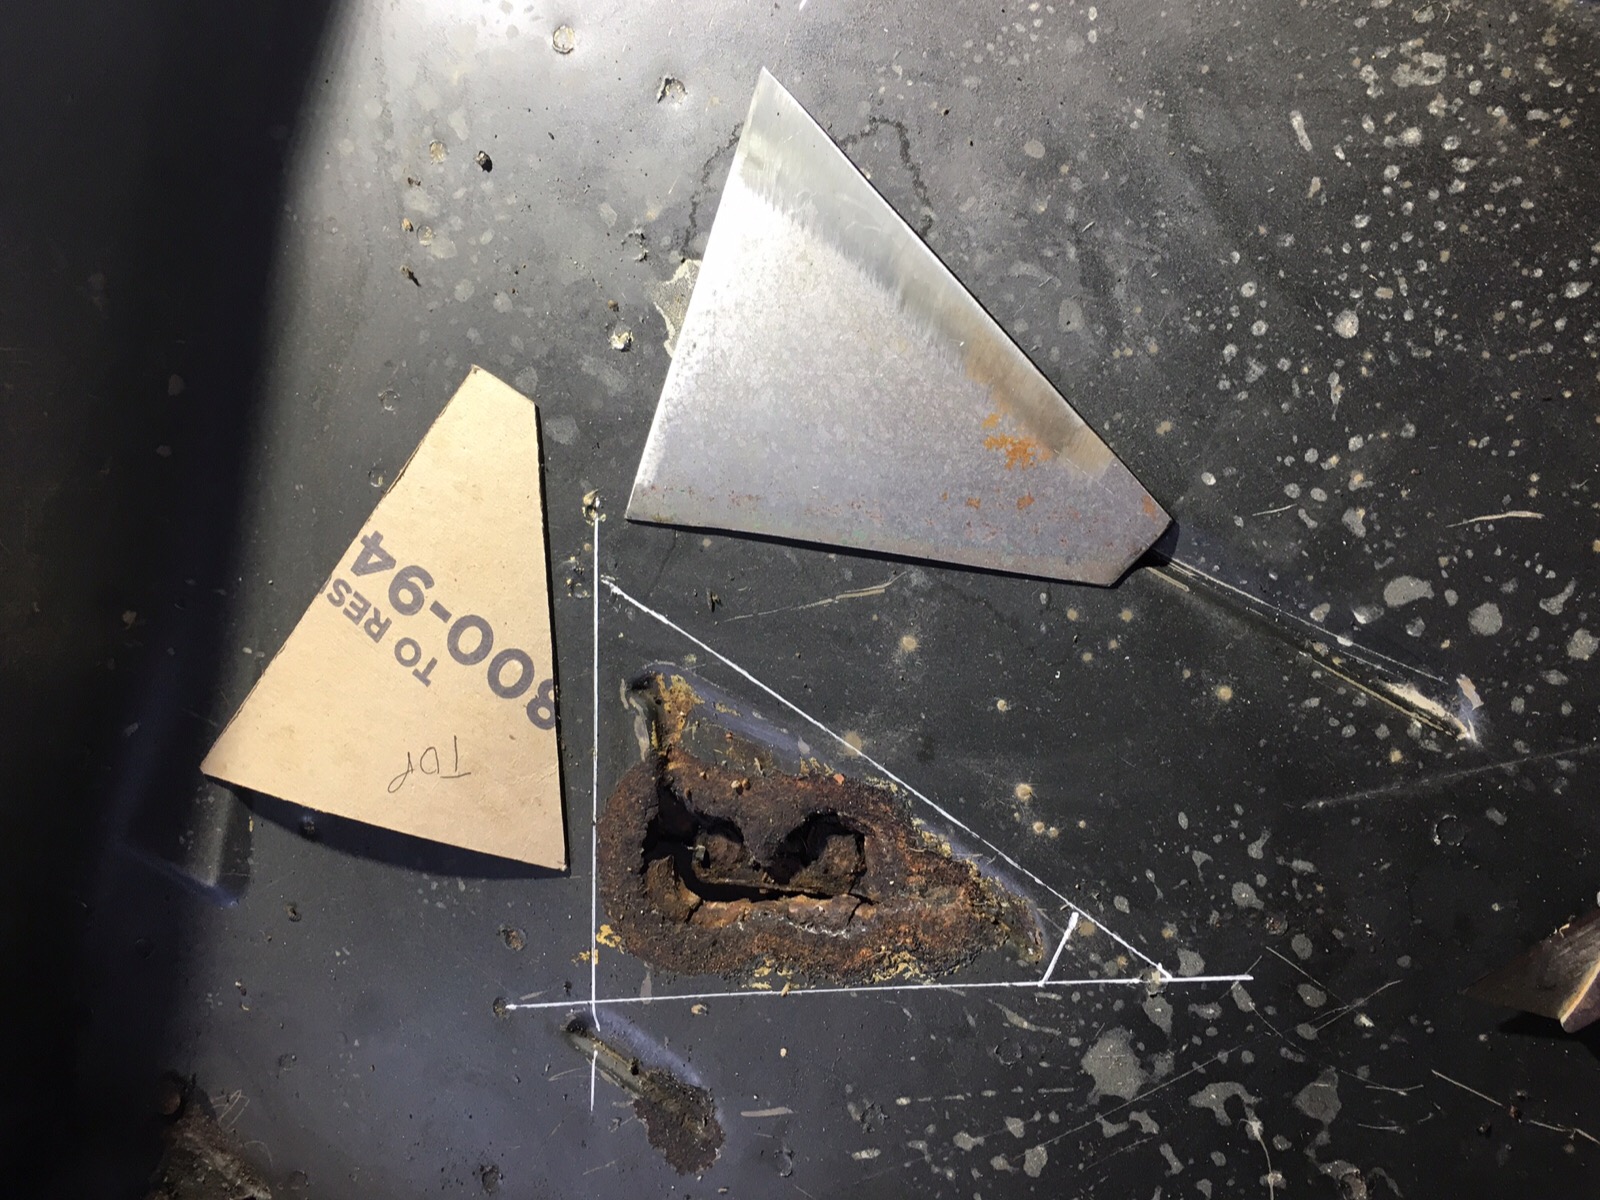
__________________
"In wine there is wisdom, in beer there is strength, in water there is bacteria."
|
|
#85
07-18-2016, 12:06 AM
|
||||
|
||||
|
Then weld it in.
I'll be the first to admit I'm a very novice welder. I have a small Lincoln 120v gas less welder. Since I have done a couple projects I've learned to make sure to cut the pieces as close together as possible and "stitch" the pieces together. With spreading out the welds to keep from warping the panels. Been a couple years since I had the welder out, so the floor boards was a good place to get in some practice time. 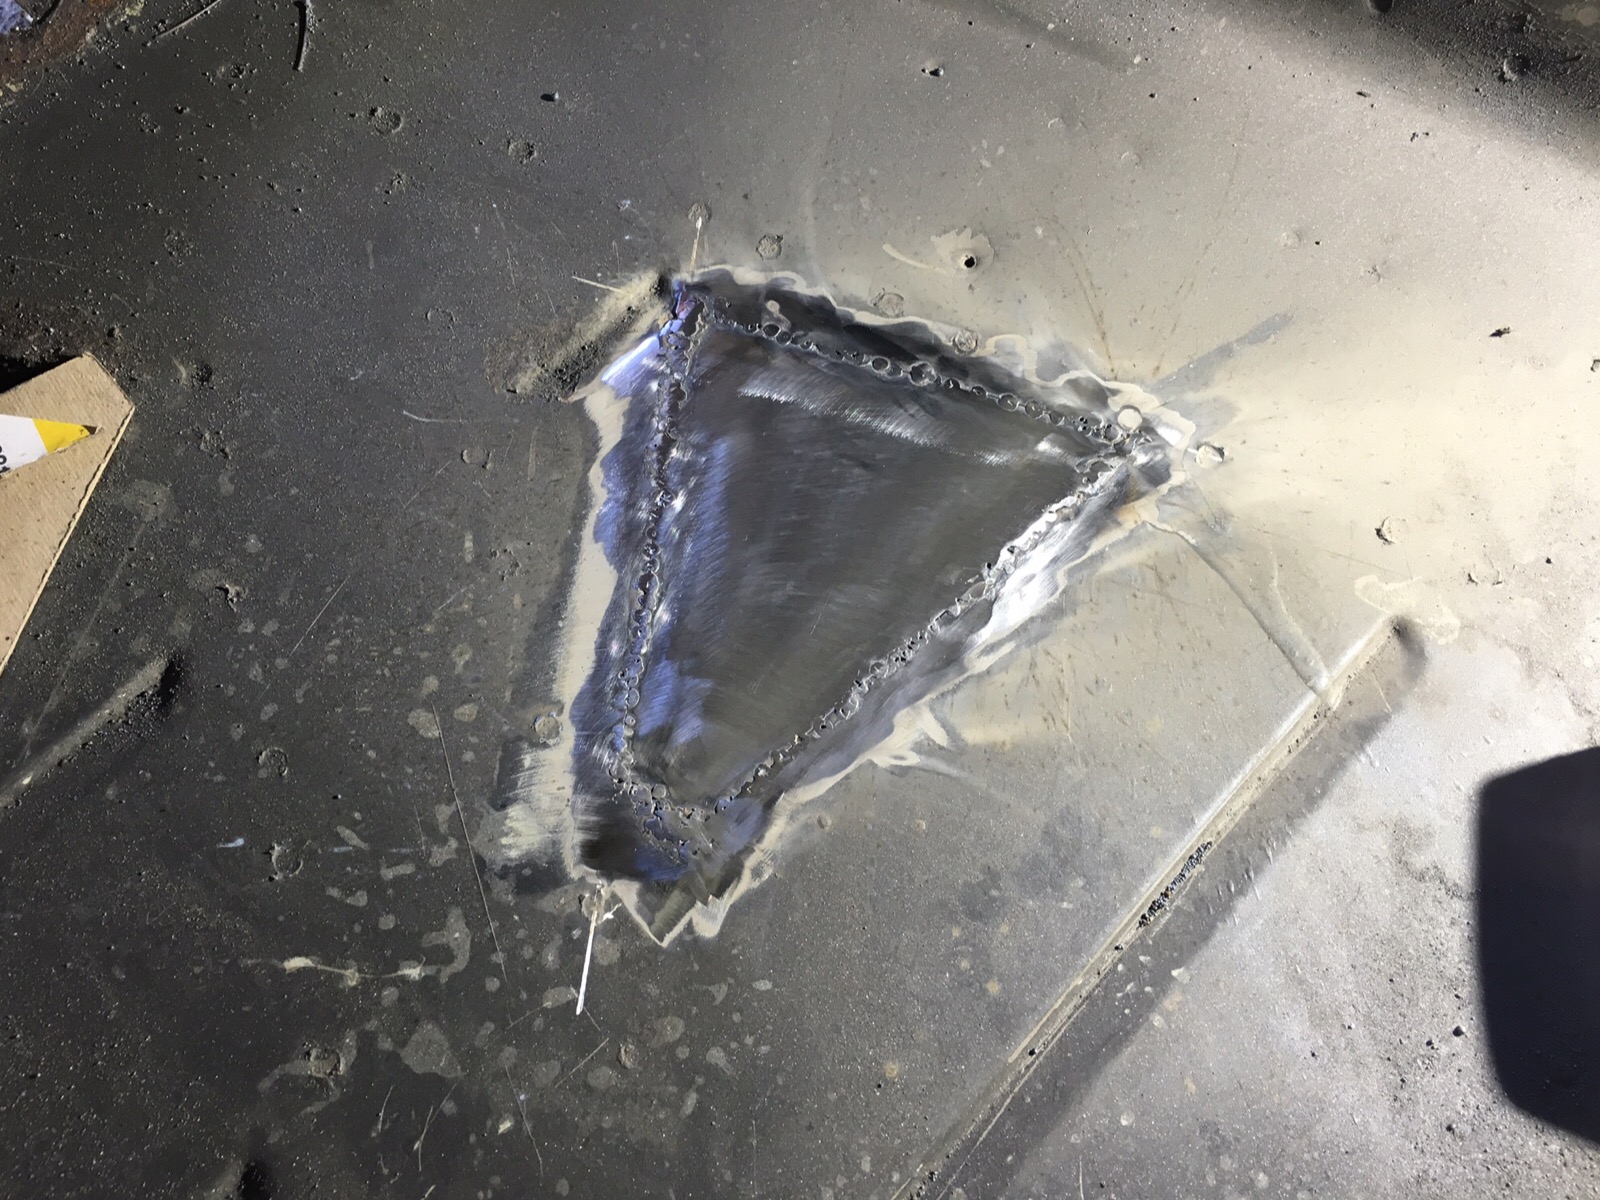
__________________
"In wine there is wisdom, in beer there is strength, in water there is bacteria."
|
|
#86
07-18-2016, 12:13 AM
|
||||
|
||||
|
Since I had out all the tools and had pre cut the firewall panels I tacked on a couple
 I'll fit and tack the last panel before I test fit the engine so I have a point to mark and measure from.
__________________
"In wine there is wisdom, in beer there is strength, in water there is bacteria."
|
|
#87
07-18-2016, 12:21 AM
|
|||
|
|||
|
Quote:
|
|
#88
07-19-2016, 02:57 AM
|
||||
|
||||
|
Quote:
Anyone know where I can buy the brackets to hold the Cavalier rack and pinion? I can't find a part number on GM parts websites, none on EBay, and I've asked a couple of the junk yards I've bought parts from. Zip so far.
__________________
"In wine there is wisdom, in beer there is strength, in water there is bacteria."
|
|
#89
07-22-2016, 02:25 AM
|
||||
|
||||
|
Been a very busy week at work, but also busy with parts coming in for this build.
The engine assembly came in. Although I bought it out of Alabama you can definitely tell the truck spent most of its time up north.  Excited to start striping it down and getting it fit.
__________________
"In wine there is wisdom, in beer there is strength, in water there is bacteria."
|
|
#90
07-22-2016, 02:34 AM
|
||||
|
||||
|
Motor mounts arrived along with a front sump oil pan. With the pan I can fit it in my best estimated location and give a basis for further measurements before I keep trying to put it in and take it out.
The crossmember had to be severely notched. Going to take some planning to not only put the strength back but make it stronger. 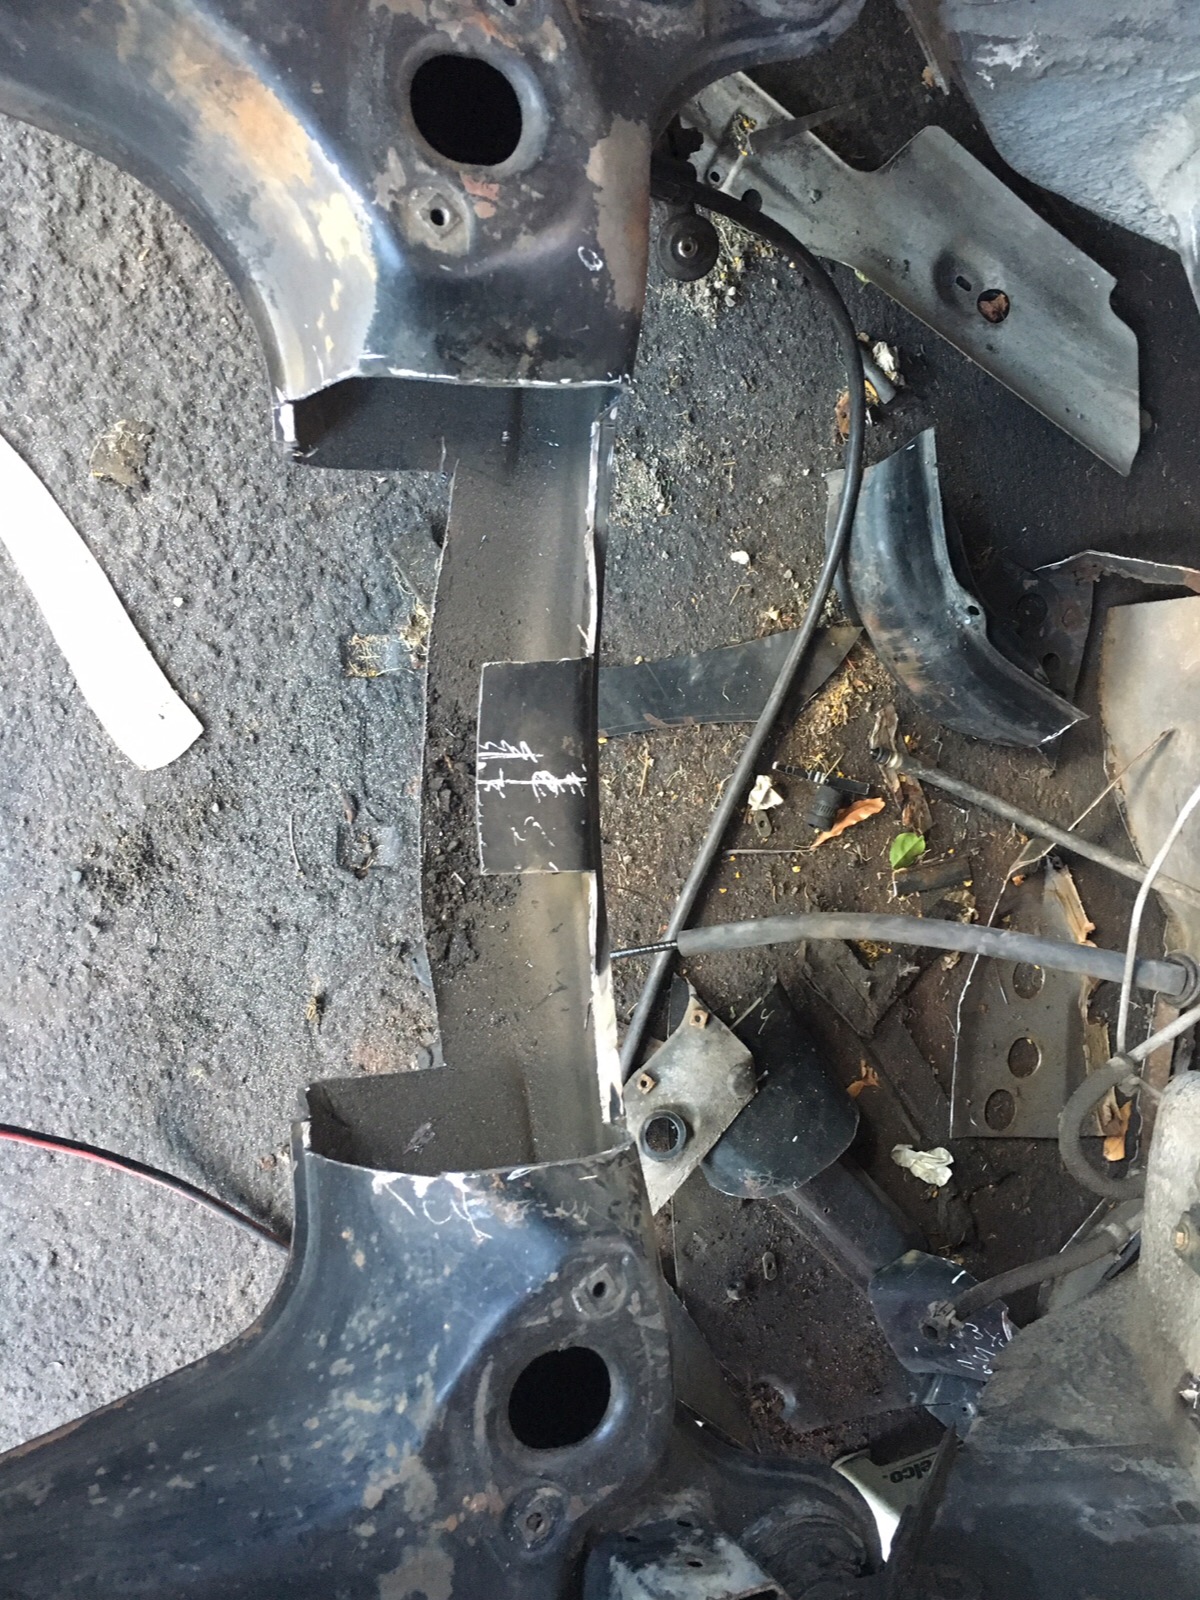 The motor mounts I bought are of a similar design as the outgoing ones. So my plan it to mount in the same location.
__________________
"In wine there is wisdom, in beer there is strength, in water there is bacteria."
|
 |
| Bookmarks |
|
|


 Linear Mode


