

|
|
|
|
|
|
#1
 05-25-2010, 04:01 PM
|
||||
|
||||
|
I could use some help with a w123 front end rebuild
I have my 1985 300TD up on jack stands in my garage to do a few projects.
At the last PA inspection I had the driver side tie rod assembly replaced and the front end aligned. It seemed OK but still felt sloppy. The garage that did the alignment said it felt great for a car with so many miles. The problem is that since that time, the passenger side tie-rod boots have both split, the driver side lower ball joint boot has split, the upper driver side ball joint boot is starting to ooze and the outer lip of the lower control arm bushings are falling off. The upper control arm bushings seem solid but they have cracks as do the guide rod mounts. I already have the tie rod assembly for the passenger side, the center link and the steering damper. I plan to get the upper control arms as complete assemblies with the bushings and ball joints already attached. I'll get the bushings needed for the sway bar attachments too. I'll also get the lower ball joints and the lower control arm bushing kits. I will have to locate a proper spring compressor for rent and a ball joint tool. My questions are as follows: 1. Is there anything I'm overlooking? 2. Will I need to rent/buy any other specialty tools? 3. Are there any forum members in my area with experience in this work that would be willing to do this with me? We can discuss compensation, but decent meals and beverages will be provided in any case. 
__________________
Chad 2006 Nissan Pathfinder LE 1998 Acura 3.0 CL OBK#44 "Pleasure in the job puts perfection in the work." - Aristotle (384-322 B.C.) SOLD 1985 300TD - Red Dragon 1986 300SDL - Coda 1991 - 300TE 1995 - E320 1985 300CD - Gladys 
|
|
#2
05-25-2010, 04:18 PM
|
|||
|
|||
|
I did this job last year in my driveway. 1980 300D.
Completely removed upper and lower control arms. Did new rotors (mine were very, very thin) and new wheel bearings. I gave myself one day for tear down and inspection, another day to put it back together. Took an extra day to get those lower ball joints in place. After I was all done and there was still some play in the wheel I ended up replacing the steering box. With the right tools it all went smooth. One thing I did not replace/rebuild was the idler arm. Could not get the original bushing out at all. (passenger side piece that holds other end of center link).
__________________
80 300D 340K Owned 30 yrs 83 300SD 440K Owned 9 yrs - Daily Driver 150mi/day 02 Z71 Suburban 117,000 15 Toyota Prius 2600 miles 00 Harley Sportster 24k 09 Yamaha R6 03 Ninja 250
|
|
#3
05-25-2010, 06:04 PM
|
|||
|
|||
|
I have replaced a few ball joints. Had to remove the steering knuckle. Was not hard after the first one. I "rented" a front end kit from Advance Auto. They make it available and just refund your charge card when you are done, so no need to buy all those tools. I had a local garage press the new ball joint back into the steering knuckle.
I have not gotten in any deeper than that. I did not need a spring compressor to remove the steering knuckle. Cannot say for sure whether you need one to go deeper. Richard
__________________
85 300D 75K Anthracite Grey 0-60 in 13 seconds **For Sale** 84 300D 333K Black (The Velveteen Rabbit) 0-60 in 14 seconds 00 Toyota Sienna 208K (Sold) 15 Subaru Outback 43K 11 Subaru Outback 67K 98 Ford Taurus 100K (Gertie - Was Grandma's - drove it to church and shopping - really) Daughter's car now. 30 Model A Ford 2 Door Sedan (Sold) 0-60 in . . . Never reached 60 
|
|
#4
05-25-2010, 09:59 PM
|
||||
|
||||
|
The biggest issue will be the lower ball joints. I had a shop replace one while in situ, the way to go as far as I'm concerned, everything else is straight forward.
Maybe a spring compressor if you're removing the LCA's for new bushings, if you have the FSM, make sure with that.
__________________
83 SD 84 CD
|
|
#5
05-26-2010, 04:21 PM
|
||||
|
||||
|
Passenger side outer tie rod boot:
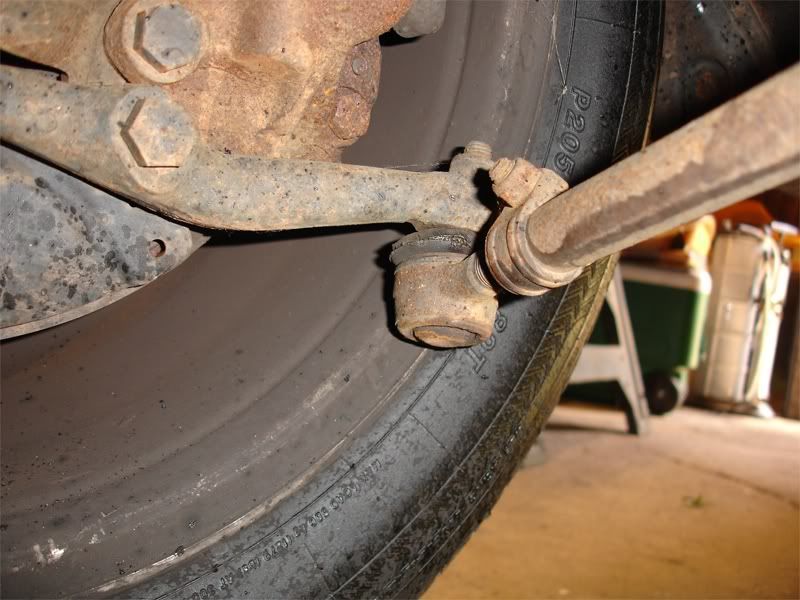 Passenger side inner tie rod boot: 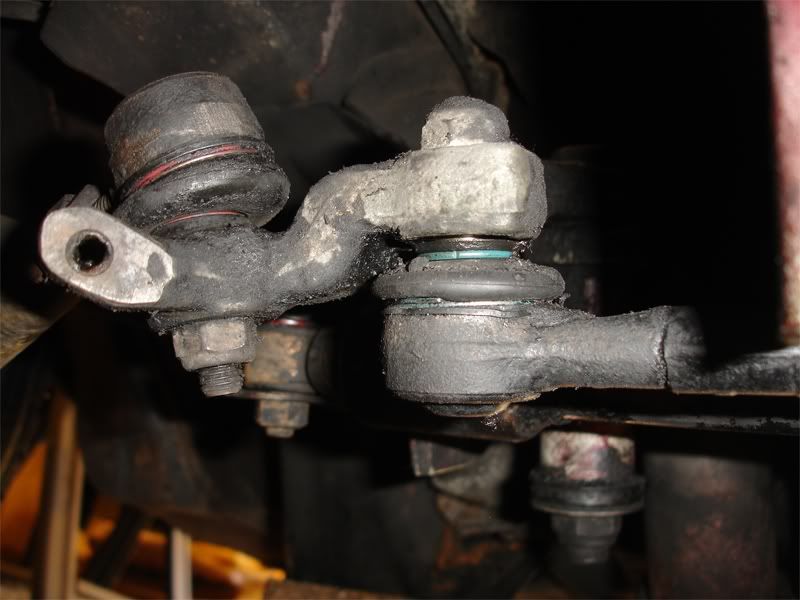 Passenger side lower ball joint: 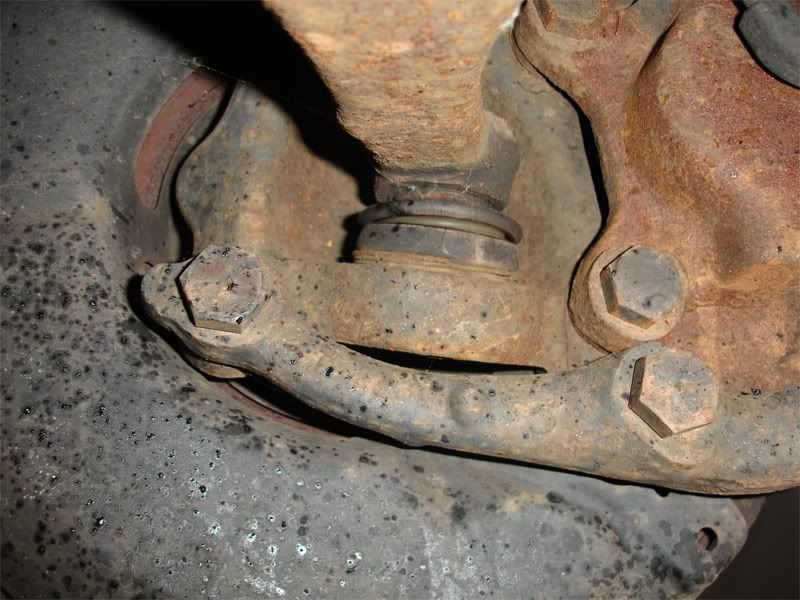 Passenger side lower control arm bushing: 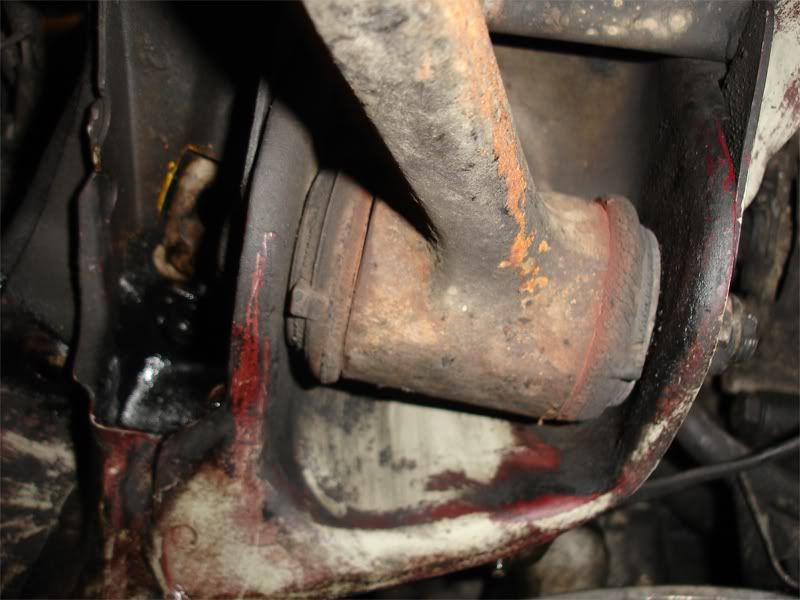 Passenger side upper control arm: 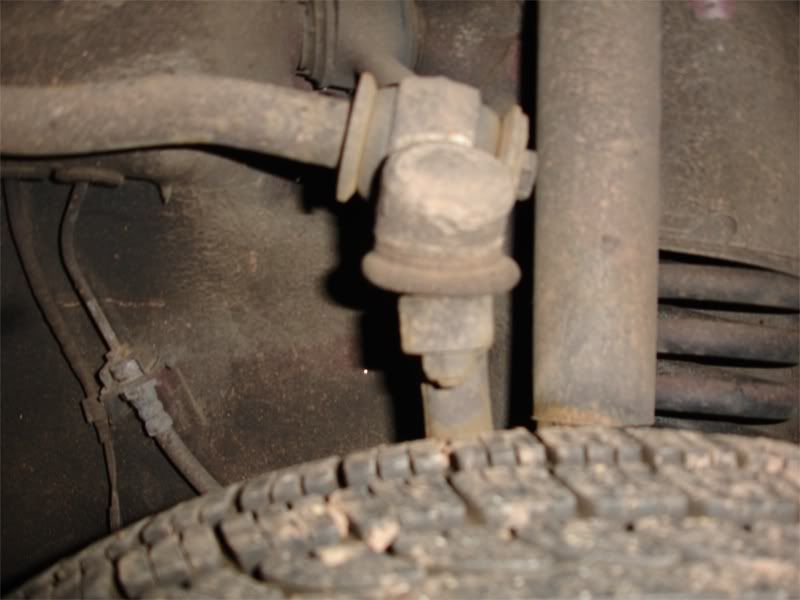 Oil filter housing: Leak could be coming from either of the red circled areas: 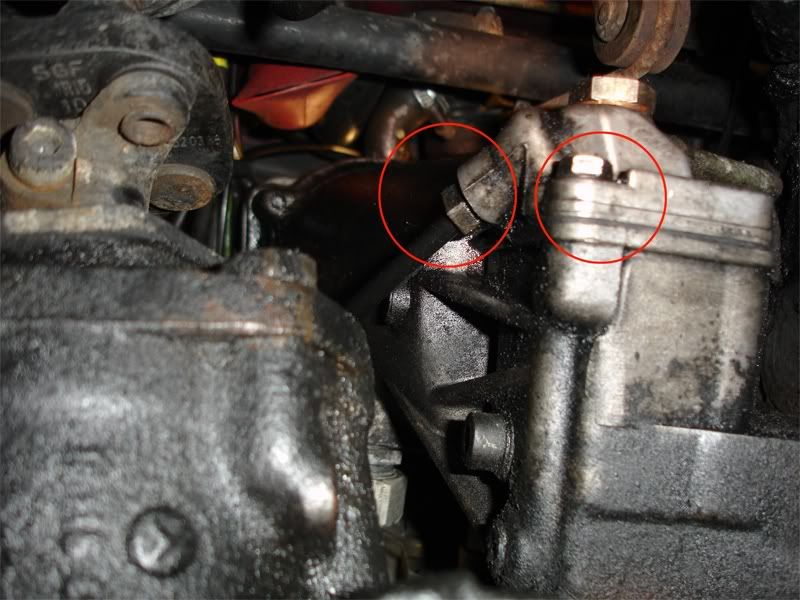 Driver side lower ball joint: 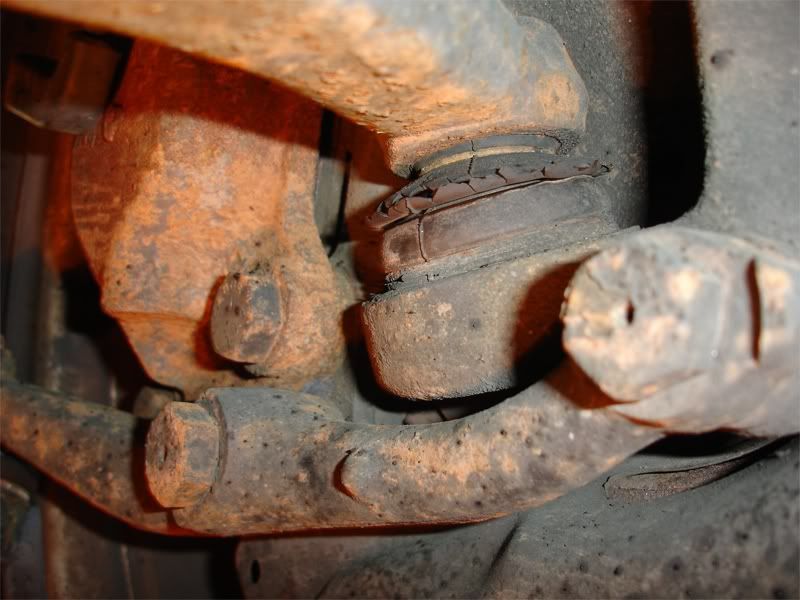 Driver side lower control arm bushing: 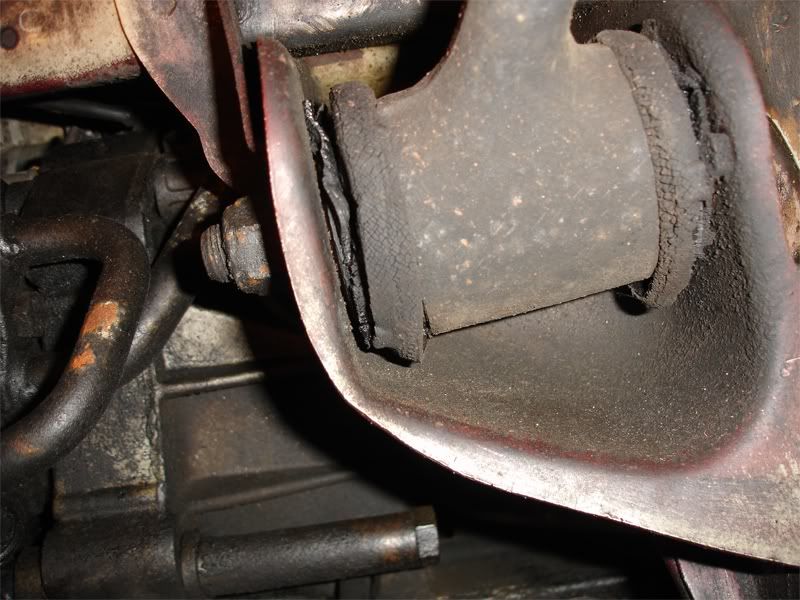 Driver side upper control arm. Notice the oozing at the red circle: 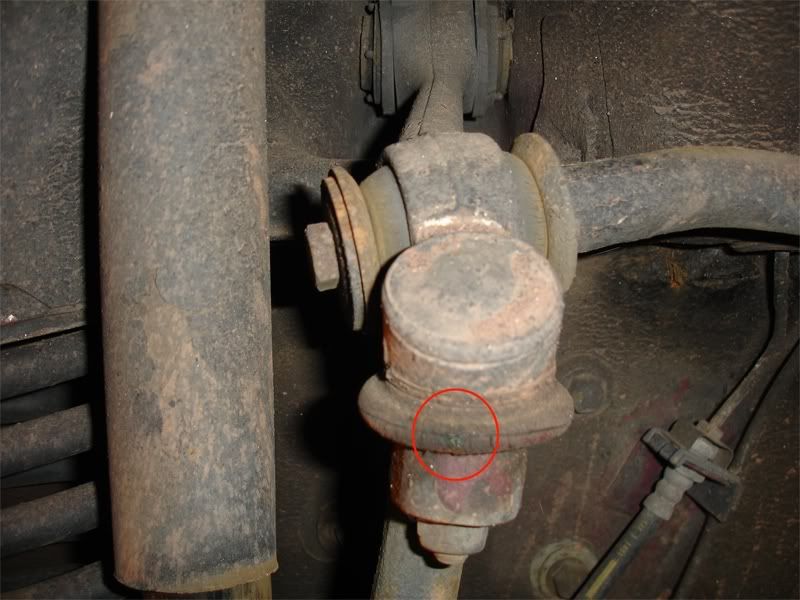 The guide rod mounts and where they attach to the lower control arm seem very solid and I don't think I need to replace them unless it's a necessary part of the procedure.
__________________
Chad 2006 Nissan Pathfinder LE 1998 Acura 3.0 CL OBK#44 "Pleasure in the job puts perfection in the work." - Aristotle (384-322 B.C.) SOLD 1985 300TD - Red Dragon 1986 300SDL - Coda 1991 - 300TE 1995 - E320 1985 300CD - Gladys
|
|
#6
05-26-2010, 10:54 PM
|
||||
|
||||
|
You have some work in front of you. Have fun.
__________________
83 SD 84 CD
|
|
#7
06-09-2010, 09:07 AM
|
||||
|
||||
|
Here's what's up next:
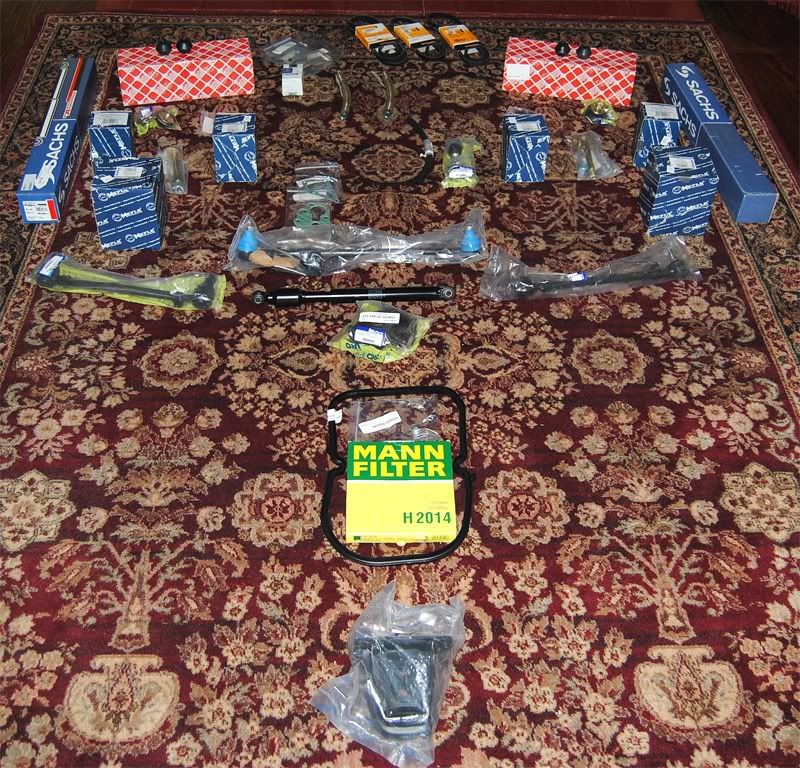 This stuff will help me make that happen: 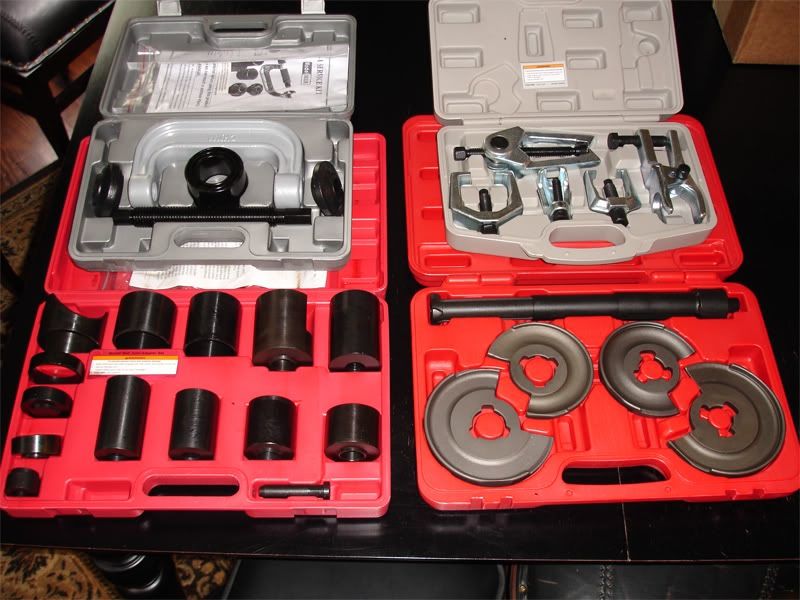 awesome 
__________________
Chad 2006 Nissan Pathfinder LE 1998 Acura 3.0 CL OBK#44 "Pleasure in the job puts perfection in the work." - Aristotle (384-322 B.C.) SOLD 1985 300TD - Red Dragon 1986 300SDL - Coda 1991 - 300TE 1995 - E320 1985 300CD - Gladys
|
 |
| Bookmarks |
|
|


 Linear Mode


