

|
|
|
|
|
|
#1
 12-30-2011, 05:15 PM
|
|||
|
|||
|
W115: Removed the IP today. Here's what I found.
Despite new injectors, timing chain, purge, and fuel filters, I was getting a 100yd cloud of thin grey smoke under load.
I didn't have any nailing and the fuel economy is about 25mpg over rolling WV hills. As per the FSM, I rotated the crank to 45BTDC on the compression stroke. After all the hoses and nuts were removed, I carefully slid out the IP. The FSM says that the key notch on the driver should be shifted 2 teeth from the mark on the IP. I have three. At a guess, one spline might account for about 6 degrees of timing. Would that cause my smoking issue? Also, I suspect that I have diesel mixing with the IP oil. I sucked out the old oil 1500 miles ago and topped it off with fresh but diesel came out of oil fill cap as I was looking it over. Is that a simple fix? Anyway, I'm dropping it off at the (relatively) local Bosch shop tomorrow. Even if my problem was incorrect timing, after almost 40 years it's due for a look over. Anything I need to point out about the W115 that they might need to know about?
__________________
1974 240D "Boldie" 170K.- New timing chain/freshly rebuilt IP/replaced valve seals/injectors/upgraded stereo/new Bilsteins with Yokohamas/fresh paint and rocker panels plus lots of welds. 
|
|
#2
12-30-2011, 09:06 PM
|
||||
|
||||
|
Quote:
If the Elements (Plungers and Barrels) are worn more Fuel passes buy them. However, if your Engine starts OK after it is hot you are Injecting enough Fuel to start so you can keep running the IP; just suck out and change the Oil in the IP more often.
__________________
84 300D, 82 Volvo 244Gl Diesel
|
|
#3
12-30-2011, 10:23 PM
|
|||
|
|||
|
The early pump had a diaphram that may cause the problem. They deteriorate with age. I do not know all the effects of them deteriorating. This may or may not be one. The replacement part is scarce I believe as well.
|
|
#4
12-30-2011, 10:36 PM
|
|||
|
|||
|
Quote:
The Bosch shop said they were still available in the $50 range. We'll see. I'll try to provide a breakdown of the pricing when I get everything running.
__________________
1974 240D "Boldie" 170K.- New timing chain/freshly rebuilt IP/replaced valve seals/injectors/upgraded stereo/new Bilsteins with Yokohamas/fresh paint and rocker panels plus lots of welds.
|
|
#5
12-30-2011, 10:37 PM
|
|||
|
|||
|
Quote:
I have a rebuild kit laying around that came with the car. I might as well have the shop use it, anyway. Thanks!
__________________
1974 240D "Boldie" 170K.- New timing chain/freshly rebuilt IP/replaced valve seals/injectors/upgraded stereo/new Bilsteins with Yokohamas/fresh paint and rocker panels plus lots of welds.
|
|
#6
01-26-2012, 08:50 PM
|
|||
|
|||
|
The IP is back from the shop and going in tomorrow. I'm bumping this to the top for pre-installation feedback as well as to have a reference for future readers.
I've culled this information from lots of old posts as well as the FSM. If you're in the know, please double check to insure that I'm saying is accurate. Since there seems to be a lot of IP installation/timing questions, I'll take pictures as I do the install and post them later so that this can to serve as another "how to". 1. Ensure that the crank is set to 45 BTDC on the compression stroke. 2. Set the IP cam two teeth before start of delivery as per FSM for the OM616. 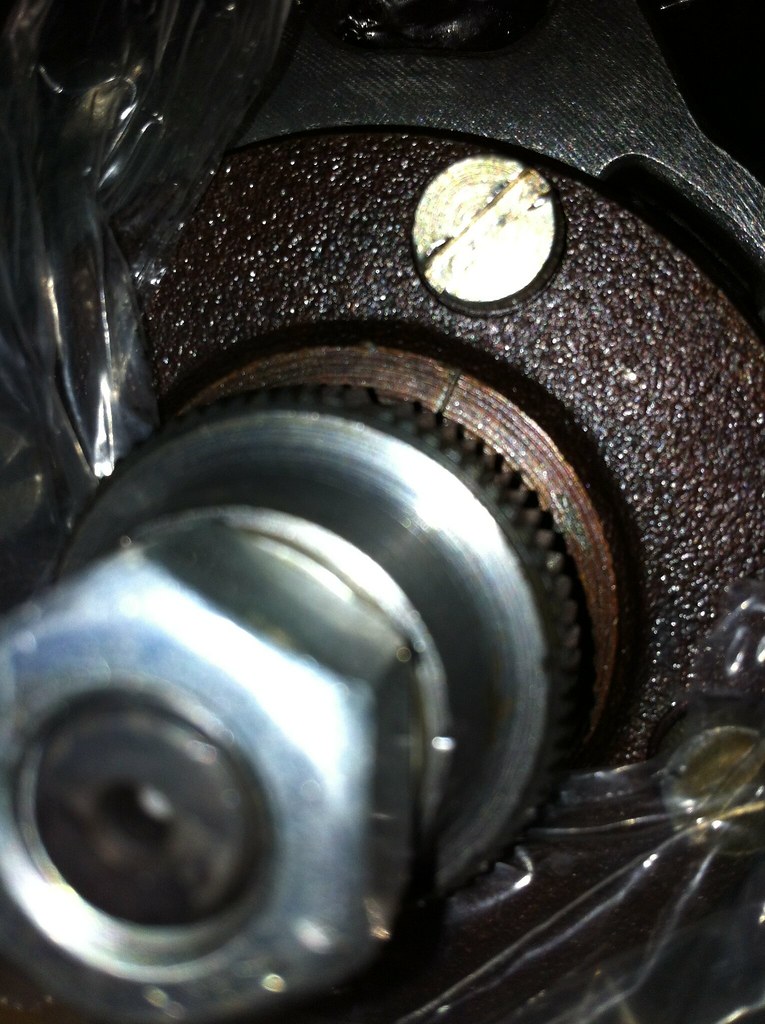 3. Open oil drain plug on the left side. Add small amounts of oil until it begins to flow from the plug, then tighten the drain. It should take about 1 pint of regular engine oil or whatever you're adding to the crank case. I figure it's easier to do this now rather than once it's back in the engine. 4. Install coupling on the IP. I understand that there's no key on the 616 so it doesn't really matter how it slides on (????) 5. Install your mounting gasket and carefully slide the IP into position on it's 3 mounting bolts. Try to center the IP on the bolts to ensure the most accurate spline to spline alignment with the engine. 6. Hand tighten the 3 mounting nuts and reattach the rear bracket to the engine block. This asssumes that you undid the entire bracket when you removed the IP as opposed to removing the rear mounting bolt at the governor. You might want to loosen this bolt while it's still on your workbench as it will be difficult to "pivot" the IP later while dialing in the timing with the drip method. 7. Reattach all 4 fuel clear fuel lines. 8. Reattach start/stop cable to the governor. Make sure you have full motion when pulling the start/stop switch...especially in the stop direction should you have a runaway condition on start up. 9. Reattach tickler arm. 10. Open the throttle and keep it secured in the full open position. I like to use a zip tie to hold the linkage in place. 10. Do not reattach the vacuum line to the rear of the pneumatic governor yet. It needs to be left off for the drip timing procedure. 11. Rotate the crank to the 24 BTC position...21 degrees from where you are now. Some people will say that 23-27 degree range is ok. 12. Remove #1 delivery element. Carefully remove the spring and then the valve inside. Again, this might be easier to do while on the bench. Maintain cleanliness!! 13. Attach drip tube and tighten to 35 nm. 14. Apply steady pressure to the hand pump. Since the fuel lines are empty, it might take a few (dozen) strokes to fill up. Eventually, and unless you got incredibly lucky with the installation, you should see a steady stream of fuel from the drip tube. 15. Keep pumping the hand pump while pivoting the IP towards or away from the block until one drop per second is achieved. This is begin of delivery and marks the spot where your timing should be exact. 16. Once found, mark the IP housing and the engine block so that you know where it is should it become misaligned later. 17. Start tigtening up the 3 front mounting nuts. The one on the very bottom is difficult to get to. Some people will recommend using a 90 degree wrench, others will get to it from the wheel well. I use a combination of a long 1/4" extension, socket, and swivel in conjuction with an inspection mirror and come from the firewall. Once it's mated with the nut, attach rachet and tighten. Don't forget the rear bolt. You might have to get to it from underneath, but it's possible to reach it from the firewall side as well. 18. Reattach any hoses or glow plug bars that you may have removed to gain better access. 19. Double check that you still have one drip per second. 20. Remove the drip tube and reinstall the delivery valve, spring, and element. You might also want to include a new washer. Tighten in sequence to 30 nm - 30 nm- then to 35 nm. 21. Install fuel injector hard lines. Note that you may have to bend the lines to get them into their new positions. 22. Install vacuum line at the pneumatic governor. 23. Remove the zip tie from the throttle linkage. 24. Bleed the fuel lines and ensure that you have no leaks. 25. Have someone standing by the emergency shut off or ready to disconnect the fuel lines. I understand that bad things can happen during an IP rebuild or when installing an unknown used one. 26. Glow and start. 27. Bleed air from the fuel system as needed. 28. Enjoy??? Feeback please. Otherwise I'll be going into this tomorrow with some false assumptions.
__________________
1974 240D "Boldie" 170K.- New timing chain/freshly rebuilt IP/replaced valve seals/injectors/upgraded stereo/new Bilsteins with Yokohamas/fresh paint and rocker panels plus lots of welds.
|
|
#7
01-27-2012, 01:57 PM
|
|||
|
|||
|
Anyone know how different this install might be from the w123 procedure? There needs to be a good solid thread for both cars since they're among the common here. I might swap mine out with a known good part to see if I can improve some idle issues, but that's totally another topic. Good luck keep us posted with results!
|
|
#8
01-27-2012, 02:51 PM
|
||||
|
||||
|
Sorry Dave . . . while watching this thread, I totally forgot about the diaphram near the exhaust manifold. It was discontinued in models after 1976 ('76 was last year). Mine had similar problem, and after Pierre Hedary bought it from me, he changed that diaphram, and VOILA, no more smoke!!! You may wish to contact Pierre and ask him about that, and exactly where it is, what the part number is, etc. He's in Titusville, FL (guru at our GTGs).
__________________
1983 300D, the "Avocado" 1976 240D, 4-spd the "Pumpkin", SOLD to Pierre 1984 190D, 2.2L, 5-spd, my intro to MBZ diesels, crashed into in 2002
|
|
#9
01-27-2012, 03:57 PM
|
|||
|
|||
|
Quote:
Also the IP is put on its mark and the engine is put at 24º BTDC (or 26º for the 200D) during installation. Some W123 pumps can be locked during installation, that makes it easier. The pneumatic governor of the W115 and early W123 IPs can leak at the diaphragm or the poppet cam shaft (red circle). Leakage will cause smoke and low mileage. 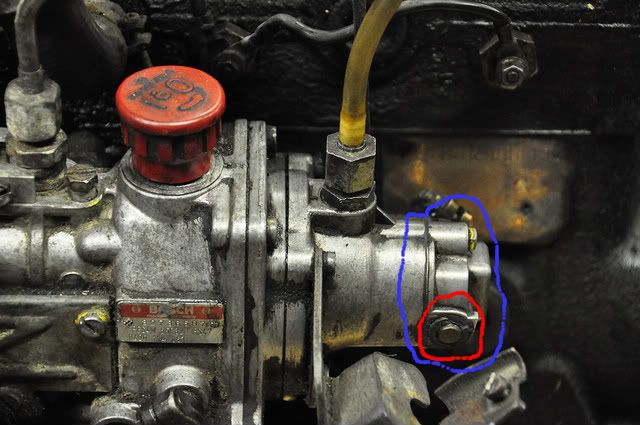
|
|
#10
01-27-2012, 09:59 PM
|
|||
|
|||
|
Quote:
I took some pictures today and will probably post an entirely new thread under an easily identifiable title so that future readers can stumble across it more easily.
__________________
1974 240D "Boldie" 170K.- New timing chain/freshly rebuilt IP/replaced valve seals/injectors/upgraded stereo/new Bilsteins with Yokohamas/fresh paint and rocker panels plus lots of welds.
|
 |
| Bookmarks |
|
|


 Linear Mode


