

|
|
|
|
|
|
#1
 04-27-2014, 11:31 AM
|
||||
|
||||
|
Rebuild/refurbish Instrument Cluster
Hey everyone,
I saw reference to a comment once about if you have the cluster out it'd be a good time to refurbish it. I've not been able to find that "reference" again, and don't even know it if talked about what that process would be or not. What would be done to do that? What should I be doing with mine before I put it back in there? Also, do I use the speedo from the manual car with the manual transmission or does it matter? 83 300TD Turbo Diesel with automatic instrument cluster...and 82 300TD NA with manual instrument cluster with no tach. I do want the tach.
__________________
1983 W123 300TD US spec Turbo engine, with Euro bumpers and manual climate control, and manual transmission. 
|
|
#2
04-27-2014, 11:34 AM
|
||||
|
||||
|
X 2 ... I am getting a 2:88 cluster for my DD and I need to re-furbish and make a few changes. Any links .... ?
|
|
#3
04-27-2014, 11:43 AM
|
||||
|
||||
|
I haven't seen that reference before. However there are some things I can think of:
Info on doing most of these things can be found on here if you search for those specific topics.
__________________
1979 300D 040 Black on Black - 1985 300D Maaco job (sadly sprayed over 199 Black Pearl Metallic) on Palamino http://i.imgur.com/LslW733.jpg The Baja Arizona Oil Burners Send a message if you'd like to join the fun  Left to Right - UberWasser, Iridium, Stuttgart-->Seattle,, mannys9130 Visit the W123 page on iFixit for over 70 helpful DIY guides!
|
|
#4
04-27-2014, 11:53 AM
|
||||
|
||||
|
Maybe this writeup by Yak?
http://www.peachparts.com/shopforum/attachments/diesel-discussion/96963d1319936662-painting-cluster-needles-cluster-refurb-w123.pdf
__________________
Graham 85 300D  ,72 350SL, 98 E320, Outback 2.5 ,72 350SL, 98 E320, Outback 2.5
|
|
#5
04-27-2014, 03:34 PM
|
|||
|
|||
|
Too bad we didn`t discuss this at the GTG yesterday.
The Speedometer is geared to the Differential gear ratio. The Diff gear ratio is stamped on the lower left corner of the Diff case looking at it from the rear. scrape off the grease and grime. It is the last 3 numbers. Dosn`t make any difference if it is from a manual or auto trans as far as to the w123. Usually there are not the broken gear problem as that happens to the W126 spedos`s. The W123 usually has the problem with the Pot metal gear slipping on the shaft with the numbers. Diesel Giant has a good DIY on fixing the problem. Where he shows using a Screwdriver to roughing up the Shaft. I use a set of needle Nose Vice Grips to cut some ridges on the shaft. Then when the Gear is put back on, it bites into the ridges. he shows using some lock-tite, I didn`t, and it has worked in out 240 for the past 3+ years w/o any problems. Some mention to use Super Glue but if it goes where you don`t want it could cause another problem. How to Repair Your Broken Odometer I tried to use Scotch tape to hold the wheel number assy together, (as he shows) but if there is any oil on the numbers it won`t hold. I finally just pulled off the brass bushing, pulled out the shaft, kept the wheels in their prospective order on a clean white towel, cleaned them to get the yrs of dust and oil film if the Oil Gauge had leaked in the past. May have to use the VC is a couple time around the shaft where the Pot Metal gear lives to get some good ridges. Push the shaft back in, sliding on each number wheel as you go and lining them up in the window of the Face plate. Tap the Brass bushing back on the end of the Shaft. This is the PM Gear. 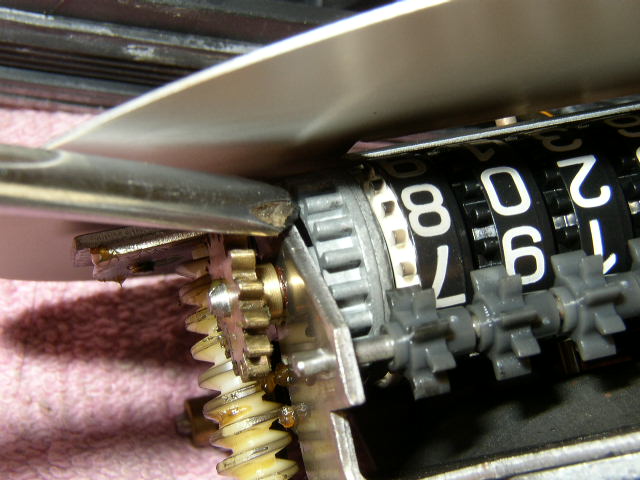 This is where is slips 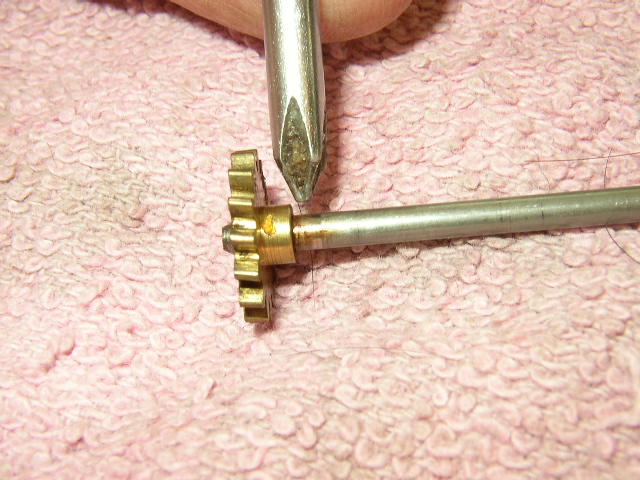 I removed the needle and face plate when I did mine. I used two Spoons with tape on the back side so the face wouldn`t get scrapped up. Pry up and the needle will pop off. First, lift the needle up over the resting pin and see where it rests. There is a small white spot on the face edge between the pin and the 6 o`clock position. replace the Needle in this same spot. The needle is moved on it`s Shaft by a small Spring which is driven by a magnet. If the needle was not reading correctly (fast or slow) repositioning it back on the shaft (left or right) will tighten up the Spring or loosen it a bit. Remove the 2 small Screws and the plate comes off. Just made it easier for me. I got my numbers off some, so instead of pulling the Shaft back out, I used a small File and filed off the bulged out sides of the Shaft where it has been flattened that the Grey Cogs ride on. Then you can put the numbers where ever you want them. Push the Shaft back in as you place the grey Cogs. This shows the end of the Shaft to the left of the Brass Bushing. 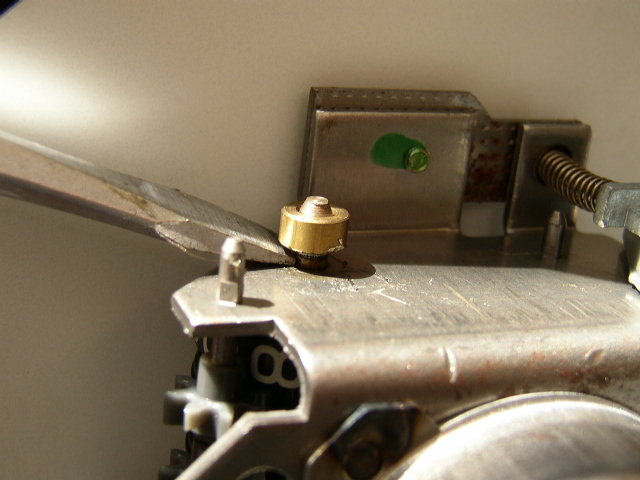 I used a stripped off a piece of electric wire insulation smaller than the shaft, and pushed it on to keep the Shaft in place. This shaft doesn`t really spin, so hasn`t been a problem. Charlie
__________________
there were three HP ratings on the OM616... 1) Not much power 2) Even less power 3) Not nearly enough power!! 240D w/auto Anyone that thinks a 240D is slow drives too fast. 80 240D Naturally Exasperated, 4-Spd 388k DD 150mph spedo 3:58 Diff We are advised to NOT judge ALL Muslims by the actions of a few lunatics, but we are encouraged to judge ALL gun owners by the actions of a few lunatics. Funny how that works
|
 |
| Bookmarks |
|
|


 Linear Mode


