 |
 |
 |
 |

|


|
|
|
|
|
|
#1
|
|||
|
|||
|
The C280 that Mercedes could have built?
When I read that this area was for long term projects I figured I was posting the right place so here we go....
This project is based on, mostly, Mercedes Benz oem parts that can be specified through the EPC system for reference. The chassis is a 2002 C230K (203.747) Non-sunroof car The power plant is a 1999 V280 (638.244) Vito van engine (104.900), AKA VR6 via VWAG The transmission is a 2002 C230K 6 speed (716.668) I have searched the web exhaustively for any pertinent swap information on this application and came up empty, time after time, so apparently I am the only idiot that has ever envisioned, or actually attempted, this combination? I admit that I am very partial to Mercedes and VAG products and have spent many years tinkering with them. The 203 six speed coupe is a fun car to drive and the VR6T engine with about 400 whp should make it even funner. This first build will be a LOW BUDGET, OFF ROAD "Big Turbo" version that will be the template for a subsequent, emission compliant, street version. I will try to post as many pictures as I can for reference and provide specifications. Because we are pioneering this build it will probably take some time to get to the end result but it is a work in process and still in the shade tree development stage at this time. Any positive comments or suggestions are welcomed and appreciated. |
|
#2
|
|||
|
|||
|
It is doubtful the VW engine will bolt to the MB trans, you will need to make an adapter or use the VW trans.
Do some research on what trans and bell housing was used in the MB van application. |
|
#3
|
|||
|
|||
|
The 12 valve VR6 engine definitely doesn't bolt up to the MBZ RWD transmission as it was never intended for any rear wheel drive vehicle and the Vito vans are front wheel drive. I did some research and it looks like the V280 vans were fitted with a complete VW powertrain with just a few Mercedes only parts such as the intake manifold and engine cover. We are working on a custom adapter plate just for this application as no one has created one that will adapt the MB trans to the VW engine.
There are several other engineering challenges involved with this conversion which include, clutch and flywheel, starter, custom rear sump oil pan, custom oil pump cover and pick up tube, engine mounts, and cooling system plumbing, just to name a few that I am aware of, and I'm sure there will be many more. Because of the 203 front cross member and steering rack location you cant even set the VR6 down low enough into the chassis, for a mock up, without removing the oil pan and the lower half of the oil pump. [IMG] 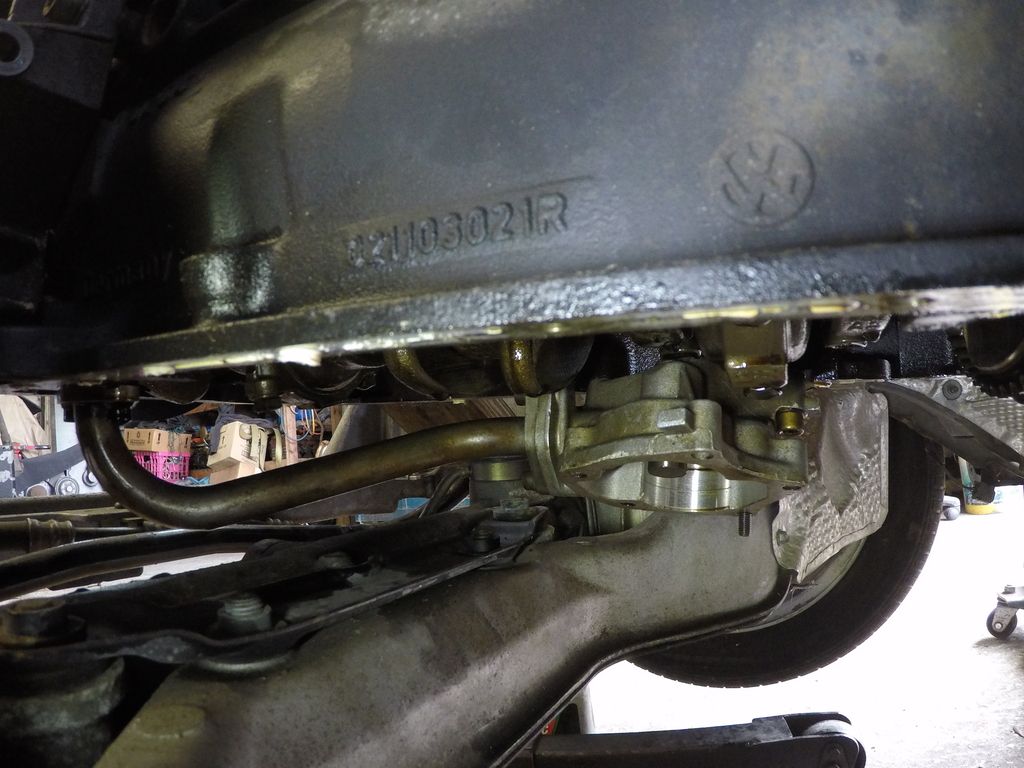 [/IMG] [/IMG]We started to make a prototype of the oil pump cover that will be made out of a four inch square piece of T6061 aluminum thats 1.5 inches thick. Drilled and tapped it to bolt onto the upper half of the oil pump, then drilled the passages for the pressure relief valve and spring which is from a big block Chevrolet oil pump. [IMG] 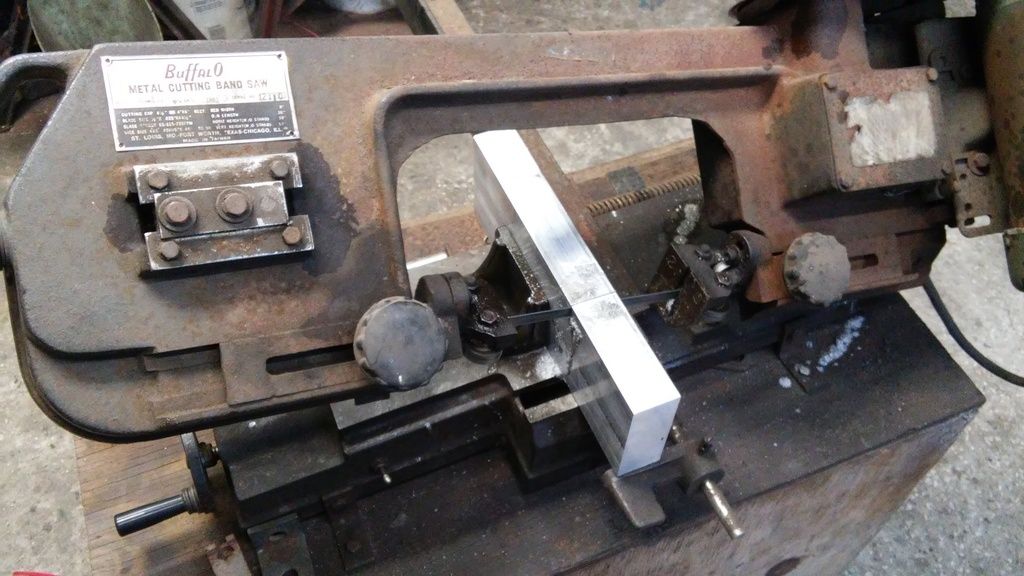 [IMG] 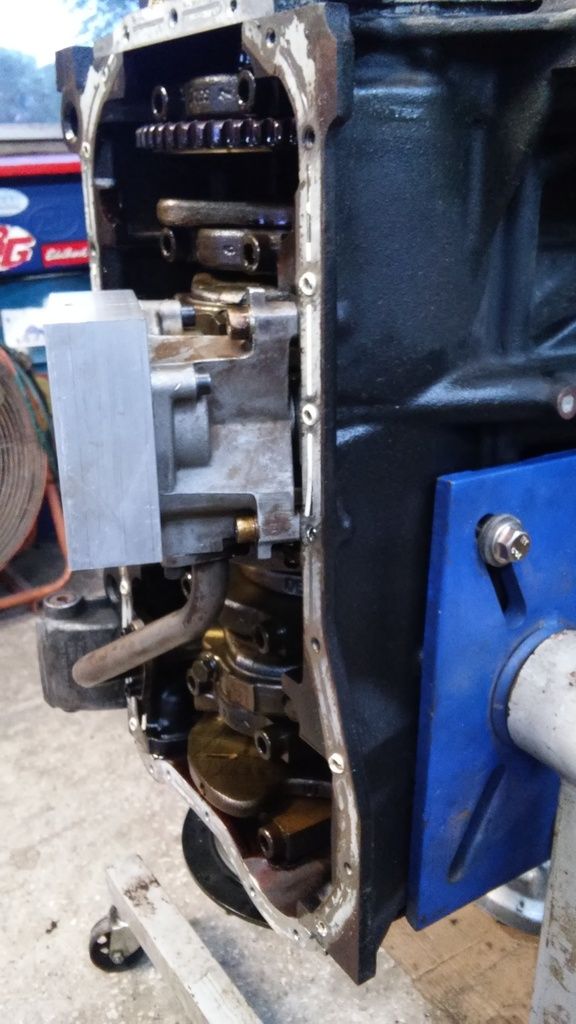 [/IMG] [/IMG]We will trim the pump cover with a disc grinder to optimize clearance for the custom oil pan and a final tested version will likely be a decent CNC piece that could be duplicated if any other enthusiasts should want one. For the oil pan we will start off with a steel MK3 VR6 oil pan, cut the front sump section off of it, and fit a rear sump section from a small block chevy oil pan onto it. [IMG] 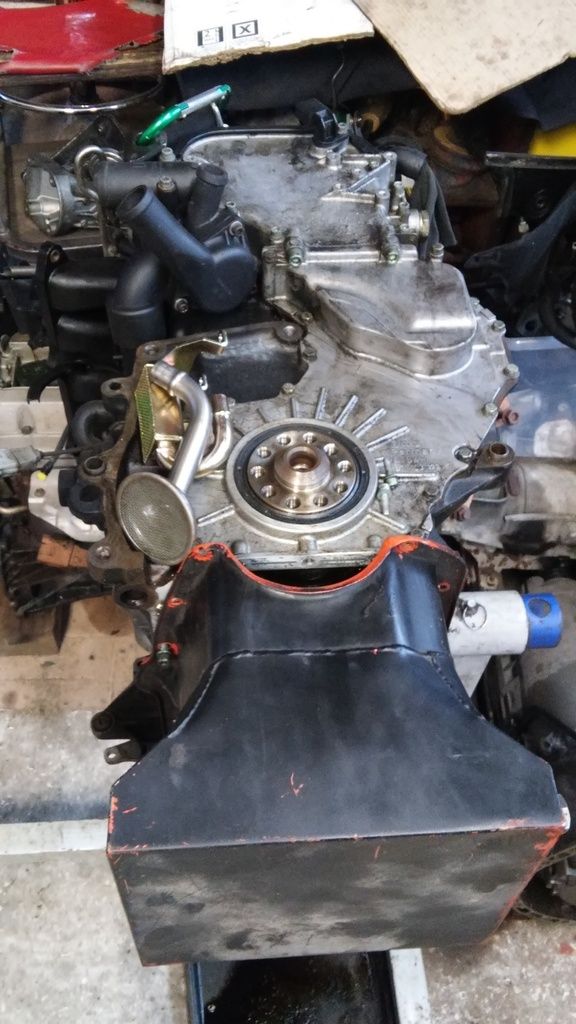 [/IMG] [/IMG]Although we wont be using the upper half of the SBC oil pan, the width is correct and it does bolt onto the VR6 pan rails. More to come.. |
|
#4
|
|||
|
|||
|
After lots of measuring, checking and comparing we have formulated a plan for some of the other challenges this build has presented. Been focused on mating the transmission to the engine and factoring in the flywheel, clutch and starter.
Comparison of the M111 dual mass flywheel to a 24 valve VR6 dual mass FW, both with 240mm discs, will use the MB 716 disc in the VR clutch set up after modifications... [IMG] 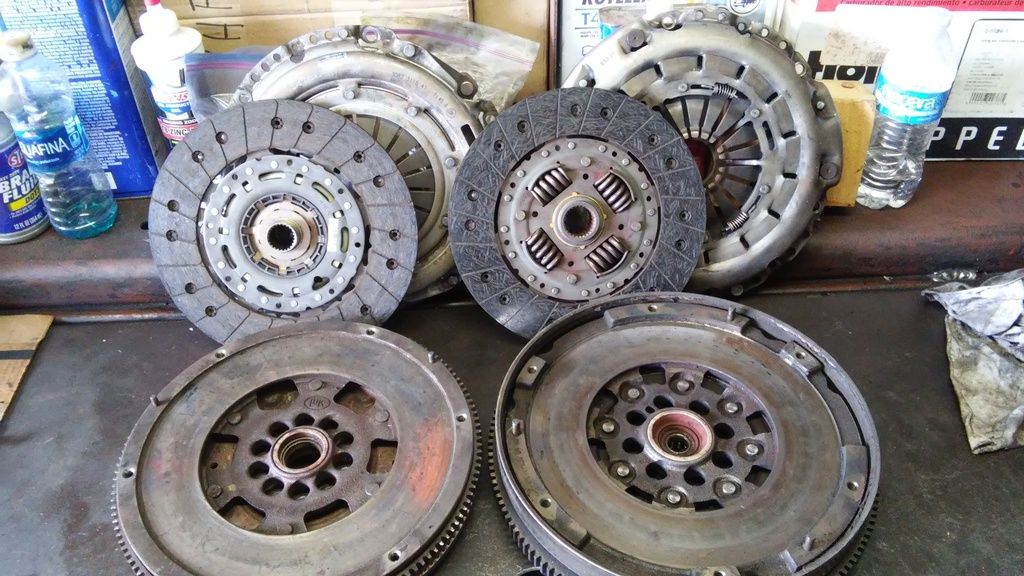 [/IMG] [/IMG]The VR6 flywheel was designed to have the starter Bendix engage from the transmission side and the starter rotates counter clockwise but this swap will require a starter mounted on the engine side and rotating clockwise. We will accomplish this by making an engine adapter plate that will accommodated the small block chevy mini starter which will engage the M111 ring gear, from an automatic flex plate, mounted to the VR6 DM flywheel. Adapter plate, overlaid in cardboard and prototyped in 3/4 inch plywood, [IMG] 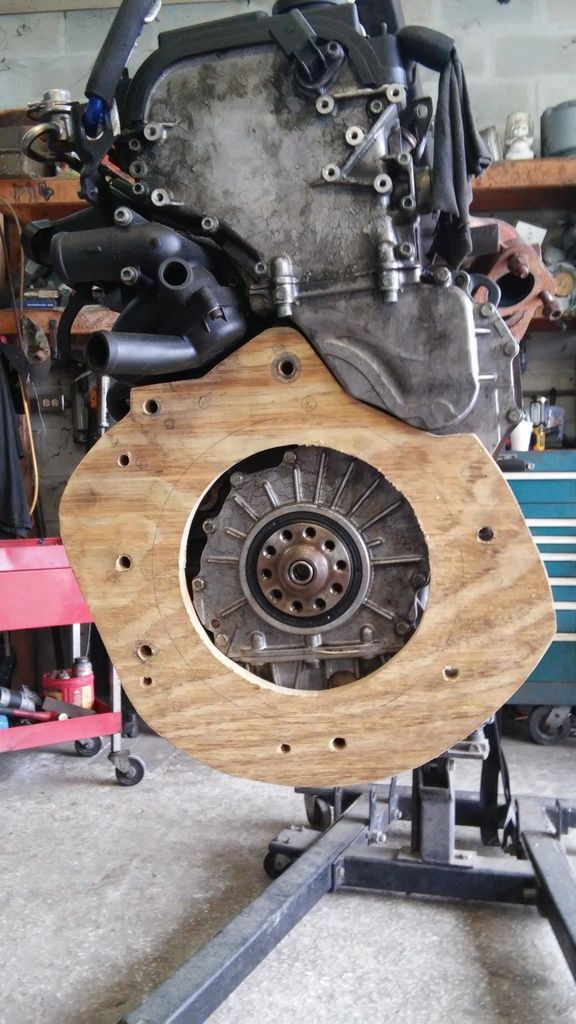 [/IMG] [/IMG]VR6 DM FW opened up to remove ring gear and test fitted with M111 automatic ring gear that can be engaged from the engine side. [IMG] 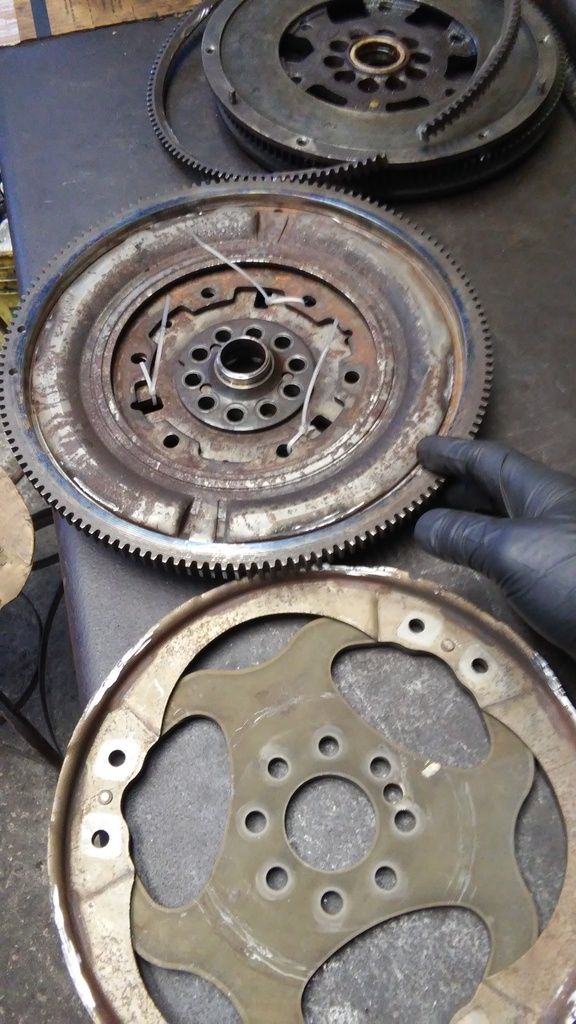 [/IMG] [/IMG]Input shaft pilot bearing taken out of a 95 F150 shell, it fits the MB 716 input and the VR6 crank pilot bore perfectly, [IMG] 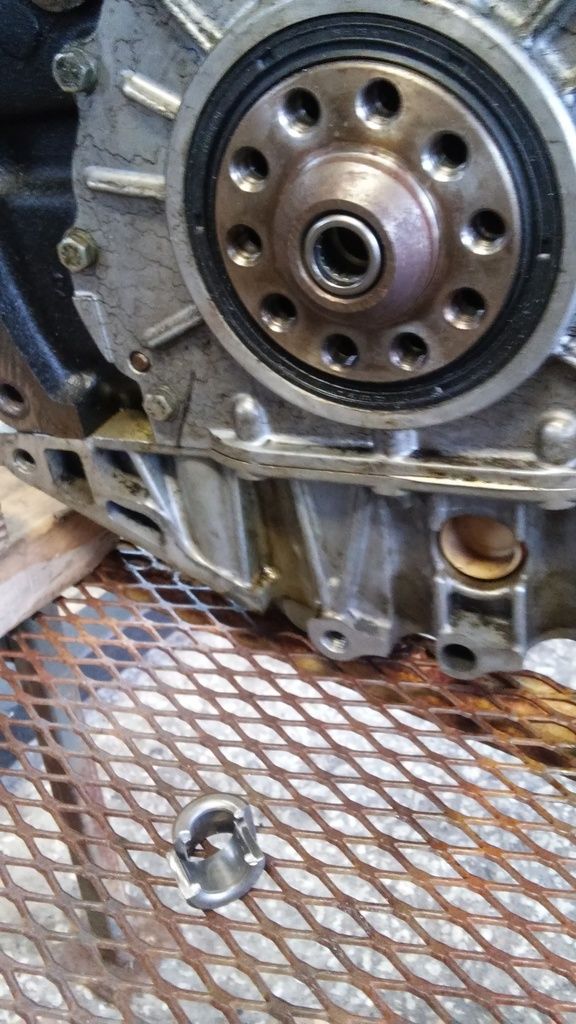 [/IMG] [/IMG]Transmission input to engine, [IMG] 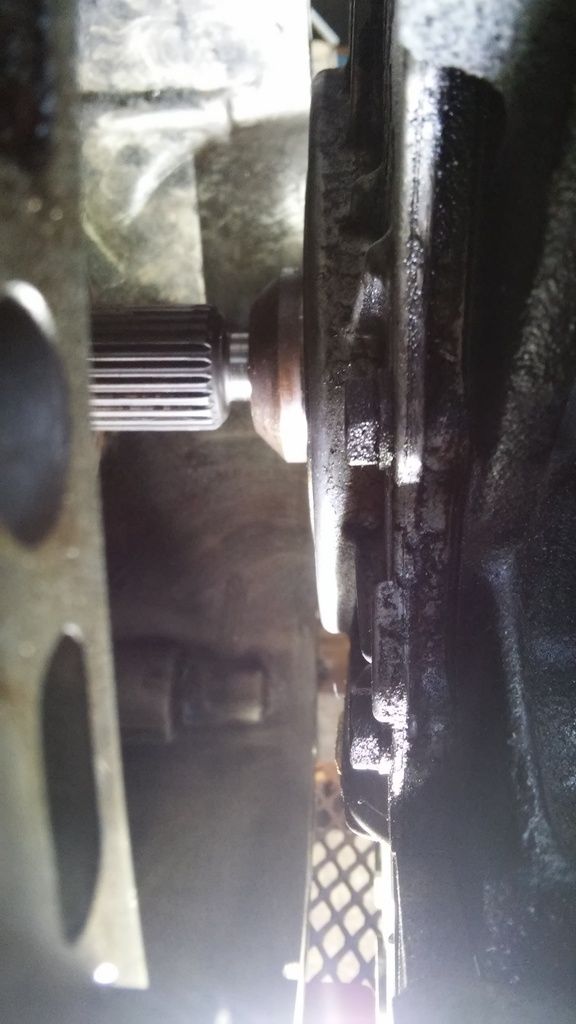 [/IMG] [/IMG]Starter should be here next week. |
|
#5
|
|||
|
|||
|
The starter was on back order for a while so we decided to push on with coupling the engine to the transmission, putting it in the car and fabricating the mount arms. The engine is officially mounted into the chassis, the starter has finally arrived, and we are working on the oil pan.[IMG]
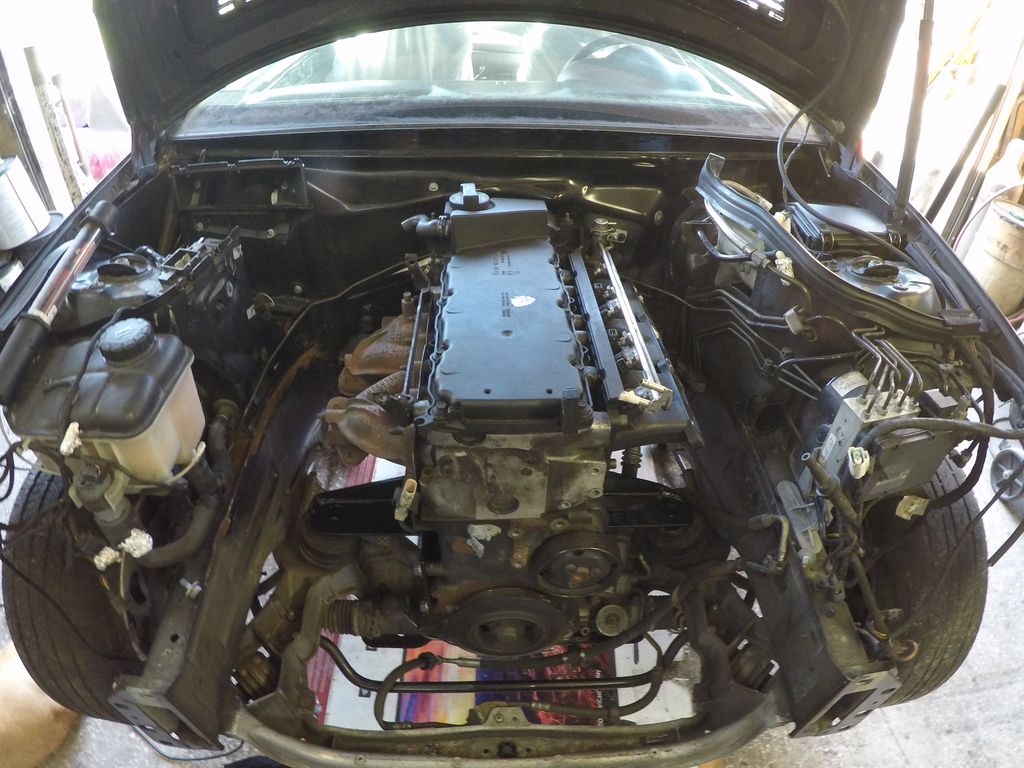 [/IMG] [/IMG][IMG] 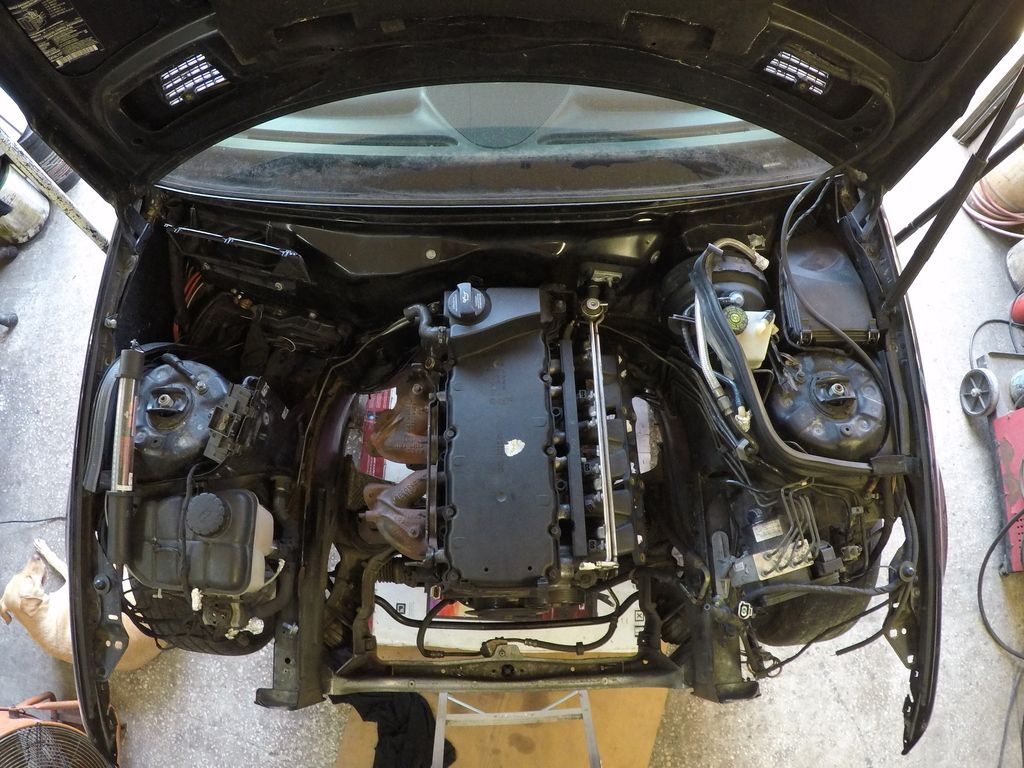 [/IMG] [/IMG][IMG] 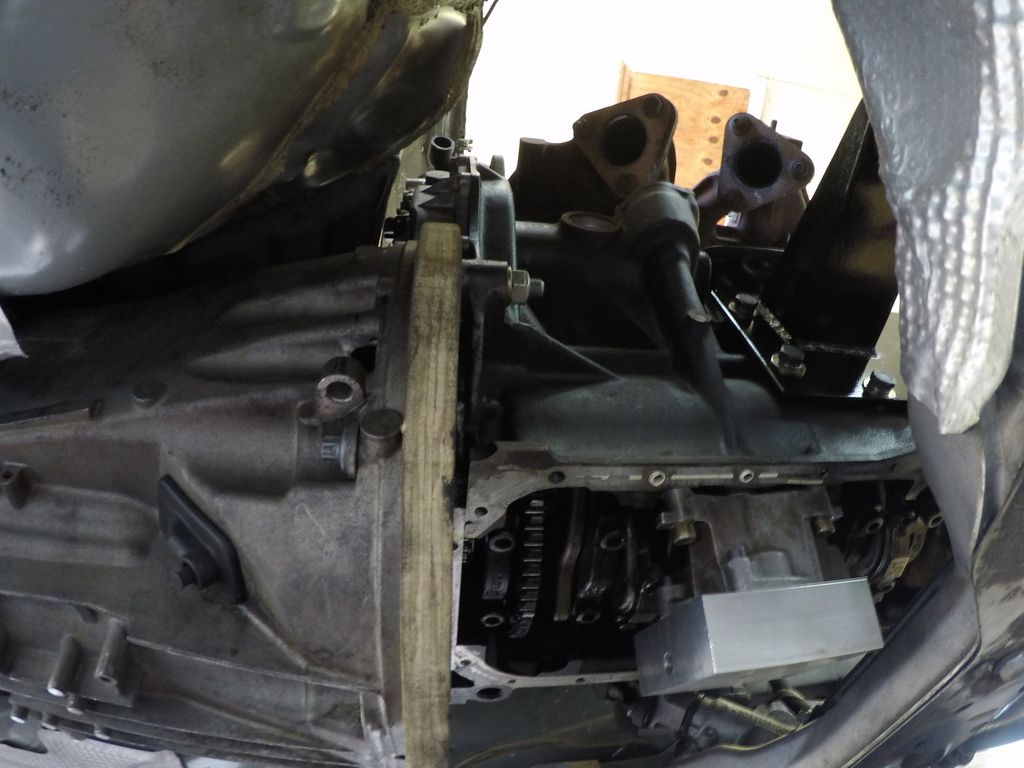 [/IMG] [/IMG][IMG] 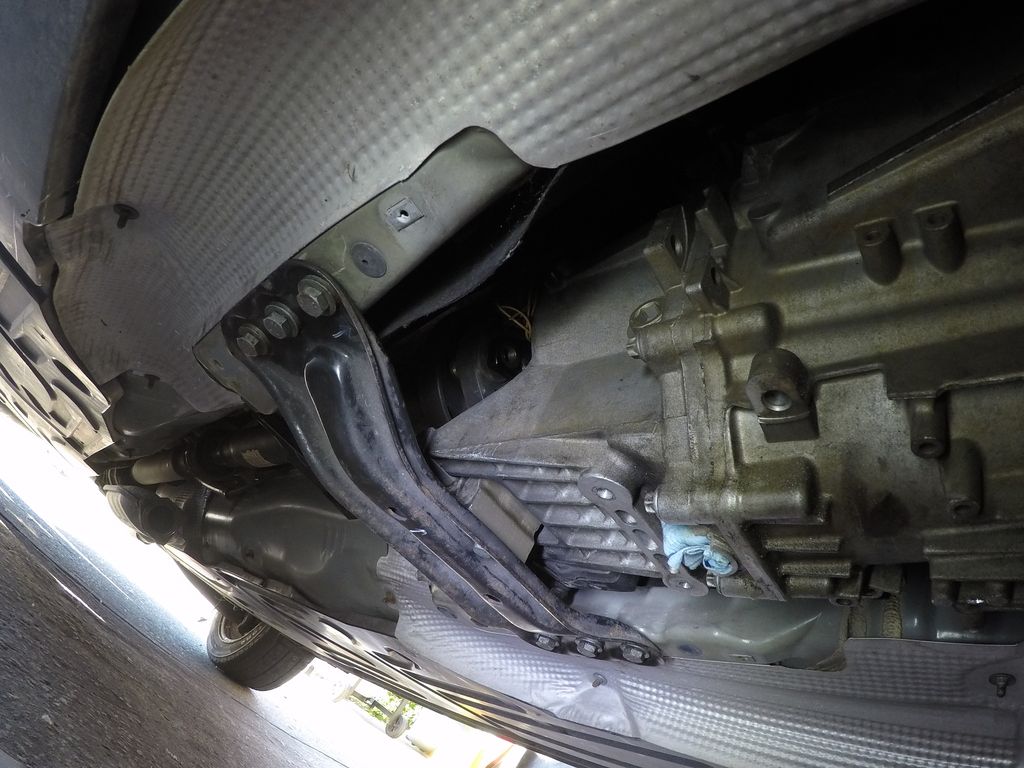 [/IMG] [/IMG][IMG] 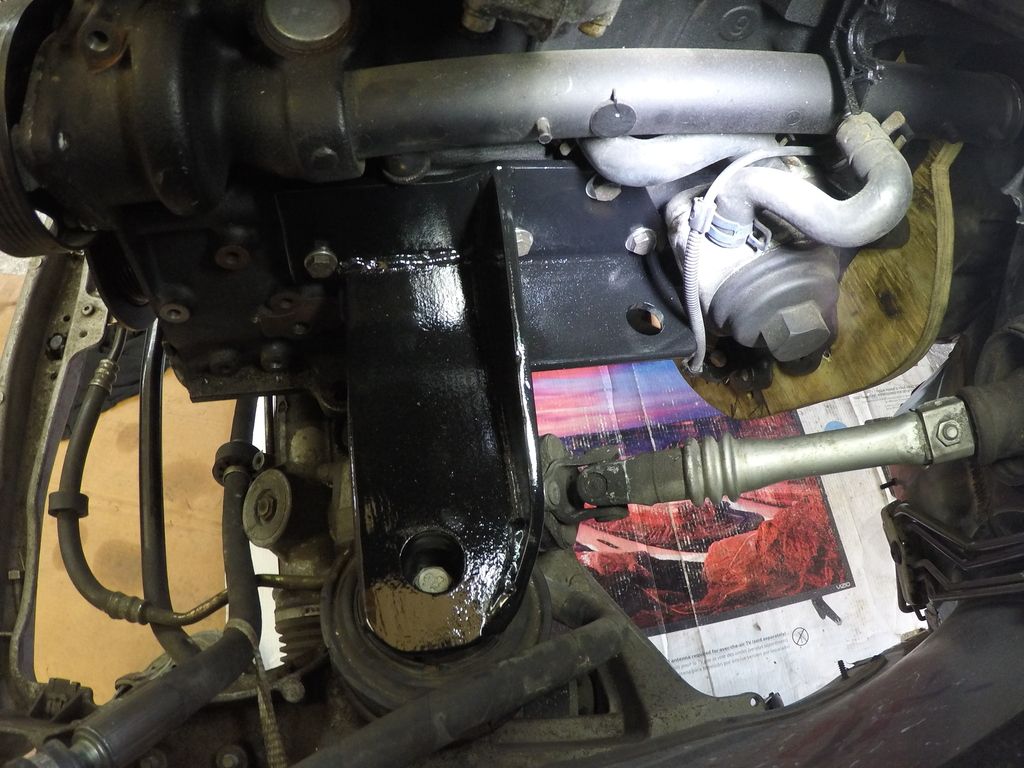 [/IMG] [/IMG]The engine sits way back in the chassis which should improve launches as well as handling and NO massaging of the firewall bulkhead was necessary. |
|
#6
|
|||
|
|||
|
Hey, I like mix and match.
On the VW motor, are the crank / flywheel bolt circles the same as the MB? I do see that one bolt appears to be pulled in to clock the flywheel, how about the FW center hole diameter? The clutch cover on the right is a self adjusting type, is that MB or VW? There was a few year old one when I bought my 99 Ranger. The clutch would drag and sometimes go twang because the self adjuster would slip. I ended up installing a non self adjusting one and let the release bearing take up the adjustment. |
|
#7
|
|||
|
|||
|
The flywheels have different bolt patterns and crank pilot sizes, the VW VR6 has 10 bolts and the MB M111 has 8. The self adjusting clutch PP is from a MB M111 but VW uses a similar unit on the R32 GTI. We will use the non adjusting Sachs unit pictured above but with the friction disc from the M111 clutch, BTW many of the VW manual transmissions have a stubby input shaft and do not use a pilot bearing, the MB 716 unit uses a pilot bearing mounted in the DM flywheel and a very robust input shaft size.[IMG]
[IMG] 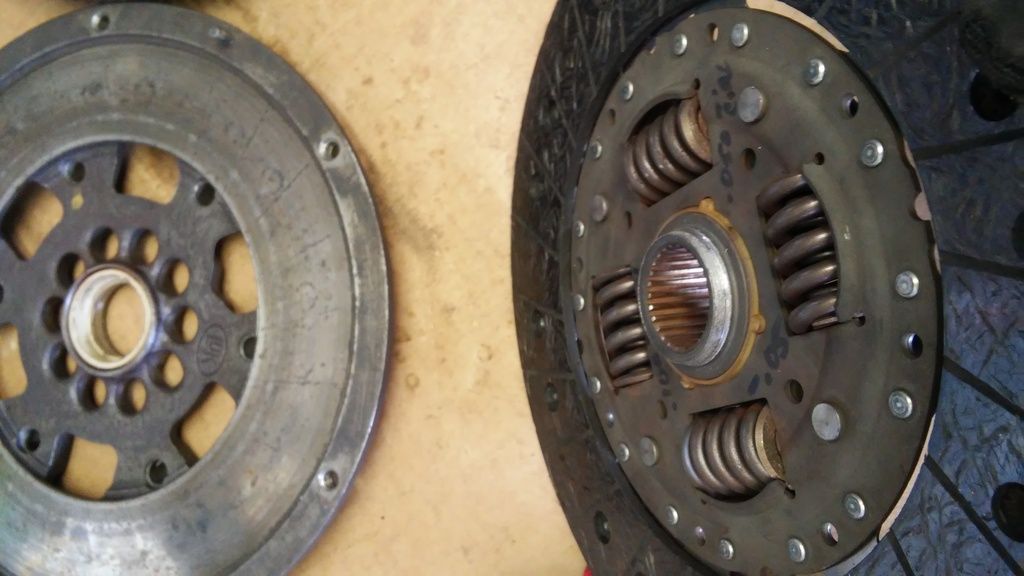 [/IMG] [/IMG]MB 240mm disc, trimmed on FW side of hub, on brake lathe, to allow it to fit in VW DMFW. 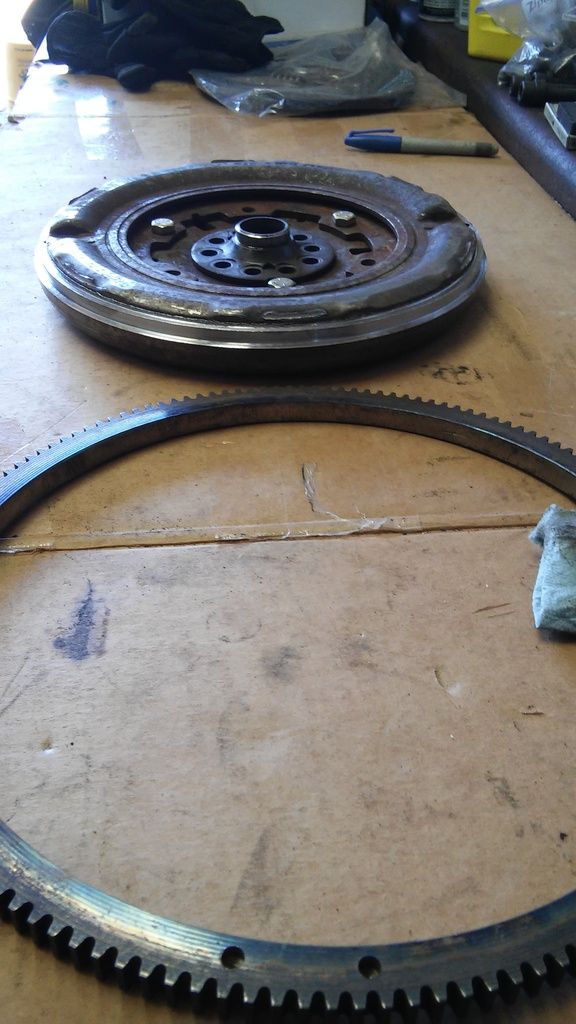 [/IMG] [/IMG][IMG] 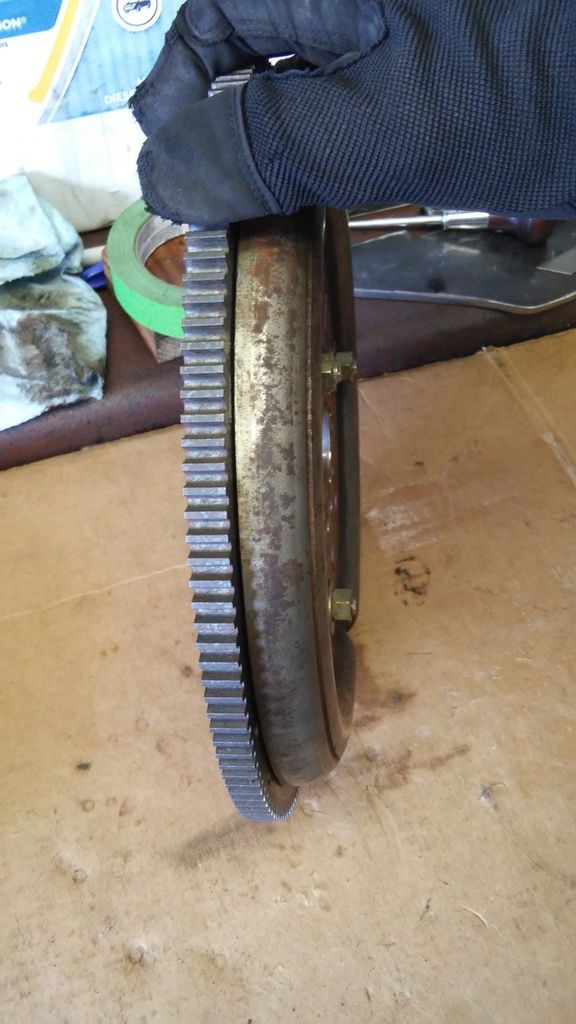 [/IMG] [/IMG]VW 24V VR6 DM flywheel almost ready, after cutting a step, on a brake lathe, so the MB M111 722.6 automatic ring gear could be fitted. We didn't have $1500 for custom oil pan so we made one, for free, with junk that was laying around the garage. Started with a cheap MK3 VR6 steel oil pan and figured out a way to cut and bend a sump without special equipment. [IMG] 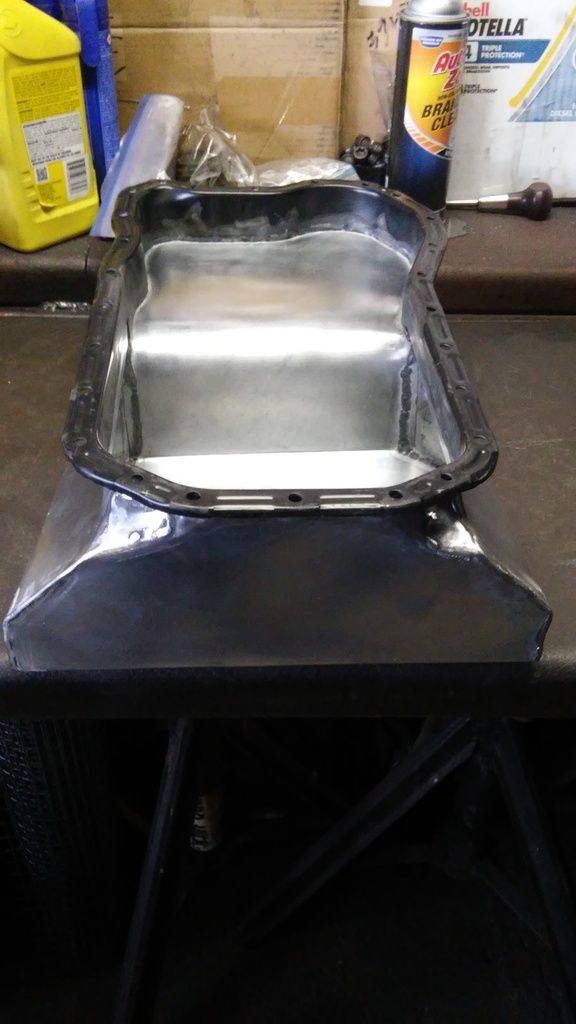 [/IMG] [/IMG][IMG] 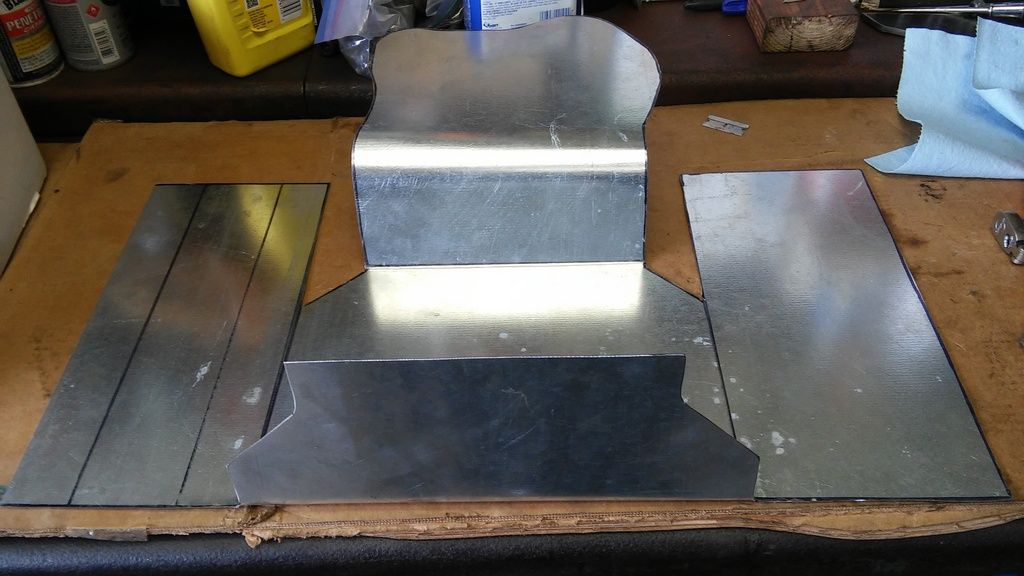 [/IMG] [/IMG]This is what the finished version looks like, not as nice as the $1500 ones, that don't exist, but should work ok. Best of all its a rear sump VR6 that fits in the CL203 chassis. [IMG] 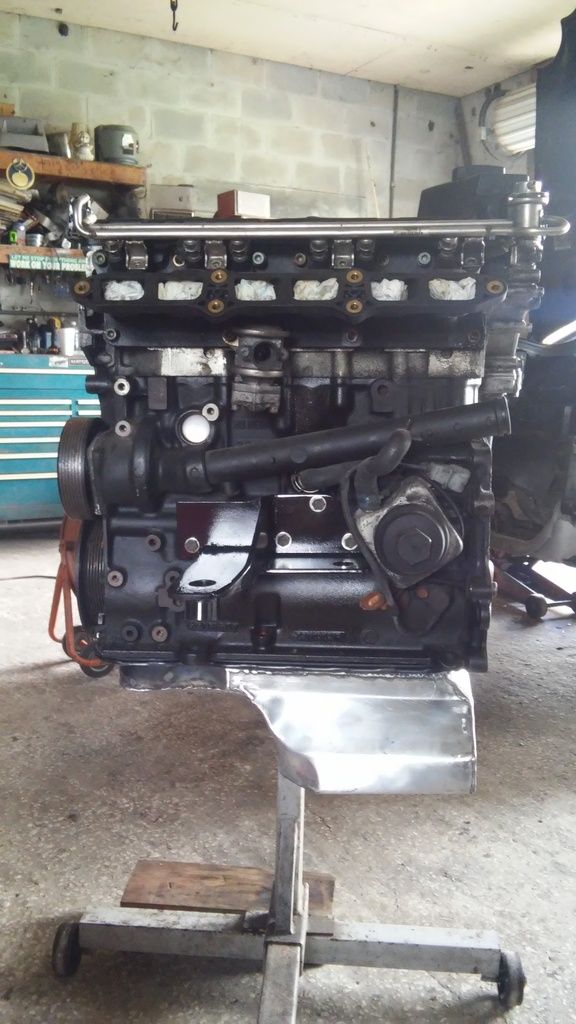 [/IMG] [/IMG]VR6_IN_A_ MERCEDES-BENZ ! Last edited by Junkyarddawg; 07-14-2017 at 02:15 PM. Reason: Chassis designation |
|
#8
|
|||
|
|||
|
Oops, I should have counted the bolt holes.
|
|
#9
|
|||
|
|||
|
The dual mass flywheel is not preferred for high powered engines but because this is a low budget project we are just using stuff that we have laying around, sort of a import rat rod type of build. Just good fun and all it takes is a little skill, some random parts laying around, a junkyard and a big imagination. Because the rivets had to be drilled out to separate the two halves of the flywheel we decided to drill, tap, and helicoil the clutch surface half in order to bolt it back together.
[IMG] 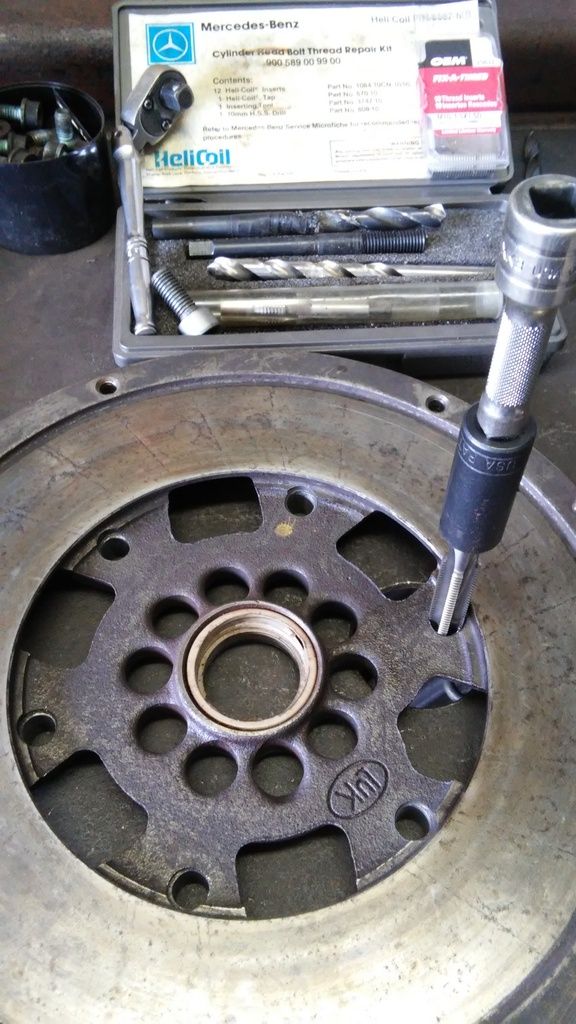 [/IMG] [/IMG][IMG] 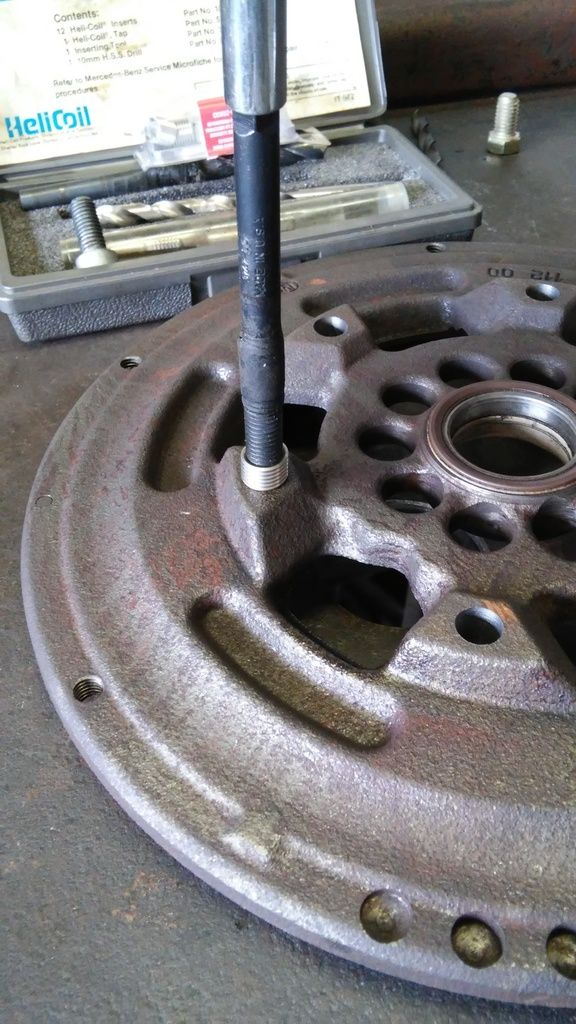 [/IMG] [/IMG]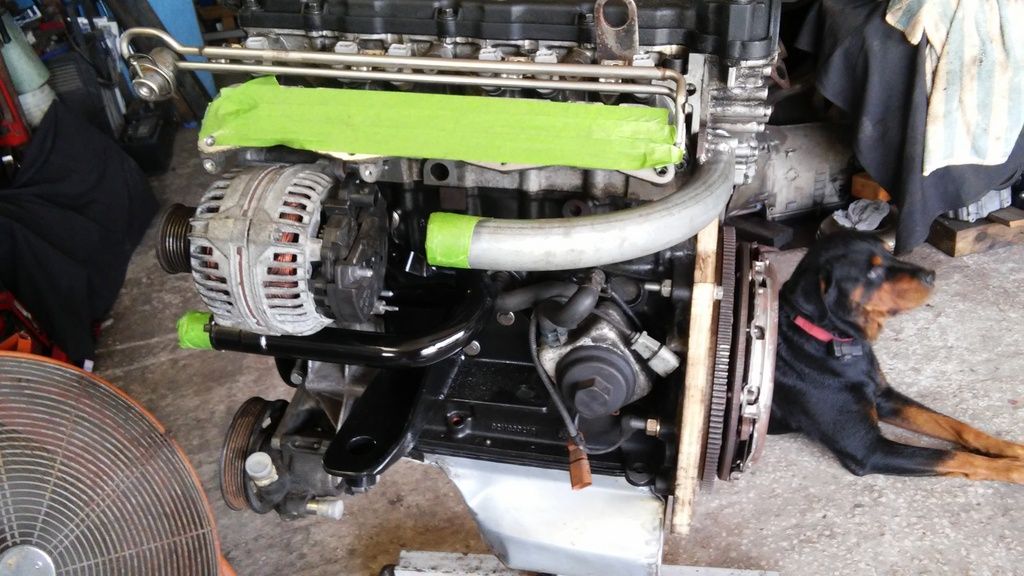 [/IMG] [/IMG]We came up with a coolant pipe solution made out of some steel plate and EMT pipe at the upper and made a coolant pipe from a combination of a 22R and a DSM 2.0L coolant pipes cut and welded for the lower. There is not enough room at the rear of the engine to use the factory coolant pipe and thermostat housing and we do not want to modify the firewall. [IMG] 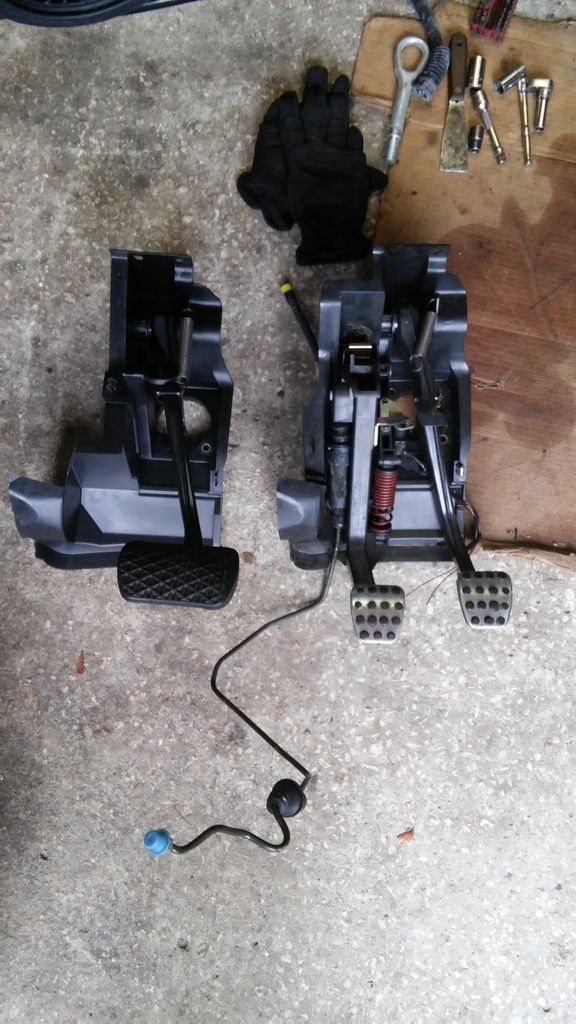 [/IMG] [/IMG]Because our car was an automatic we had to swap out the pedal cluster from a manual car, this was the easiest pedal box swap we have ever seen and all the holes for the hydraulic lines are present in the car from the factory you just have to remove the rubber plugs. [IMG] 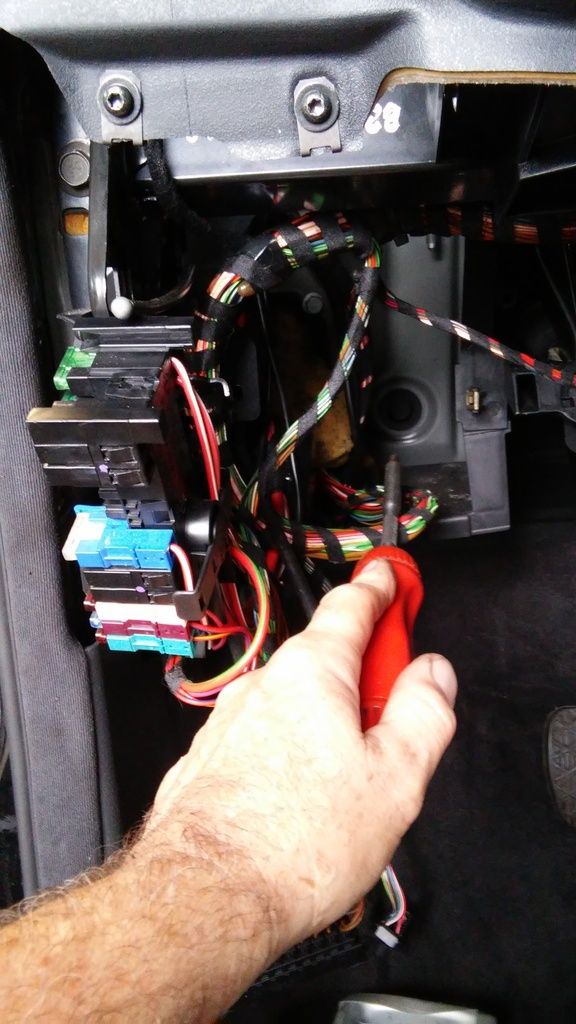 [/IMG] [/IMG]
|
|
#10
|
|||
|
|||
|
A small update on this project.
[IMG] 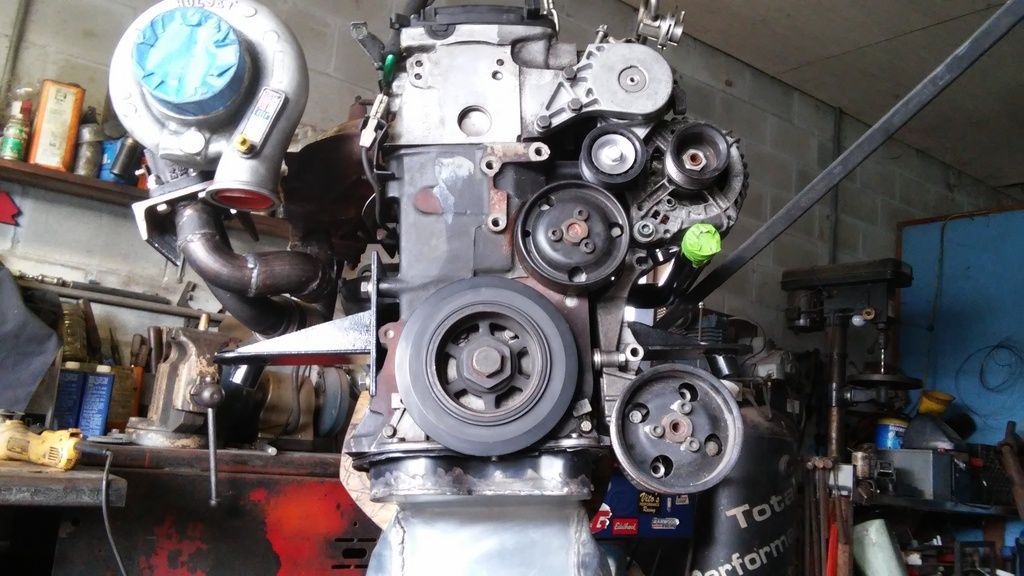 [/IMG] [/IMG]We got a chance to put an exhaust manifold together so the Holset HX35 could be fitted to the engine and the chassis. [IMG] 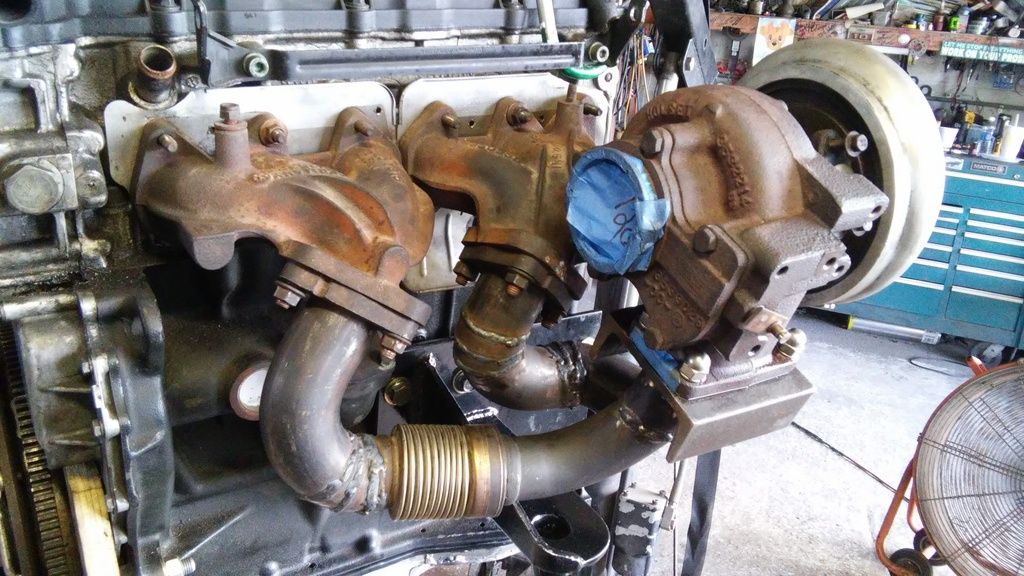 [/IMG] [/IMG]Not the nicest manifold ever built but it should work, best of all it was made with junk materials we had laying around, some old ford 7.3TD up pipes, a VW GTI down pipe, and some 4 inch C-channel. The holset came from a 5.9 cummins. |
|
#11
|
|||
|
|||
|
Yea, more good stuff.
I'd run a strap from vertical stud on both manifolds to the passenger side of the turbo to prevent cracking of the welded pipes. |
|
#12
|
|||
|
|||
|
Quote:
We also started to put an intake manifold together. [IMG] 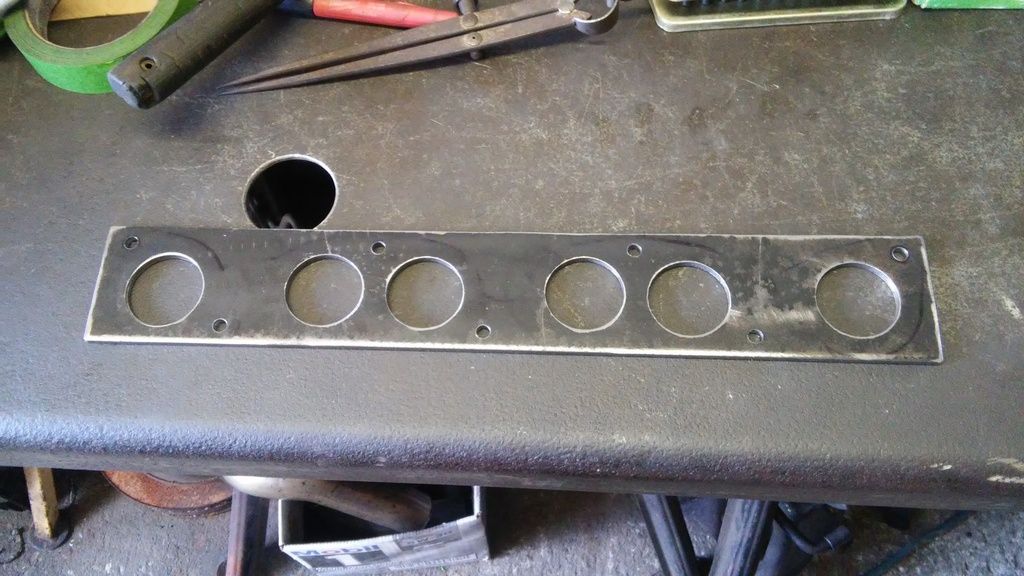 [/IMG] [/IMG]Started with a plate of 3/16 steel, traced the gasket pattern then drilled it, tapped it, and bored 1.5 inch holes with a hole saw. [IMG] 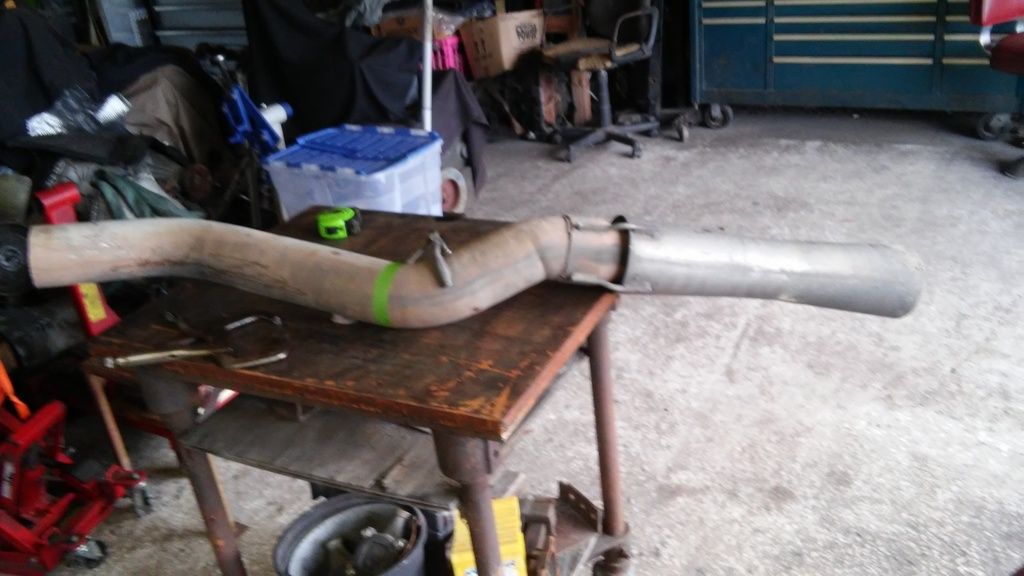 [/IMG] [/IMG]Cut a section of pipe from an old Duramax tail pipe. [IMG] 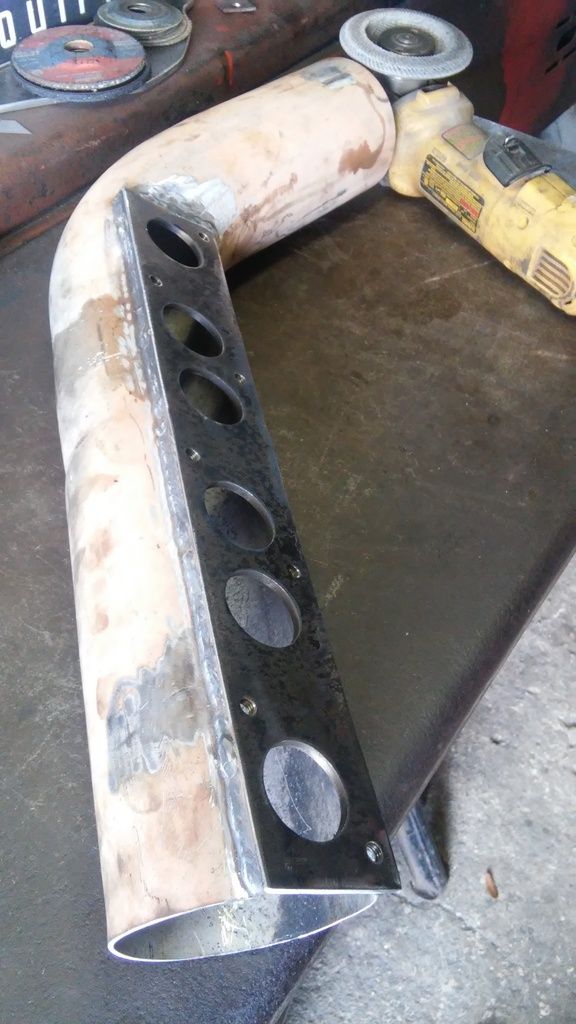 [/IMG] [/IMG]Welded it together [IMG] 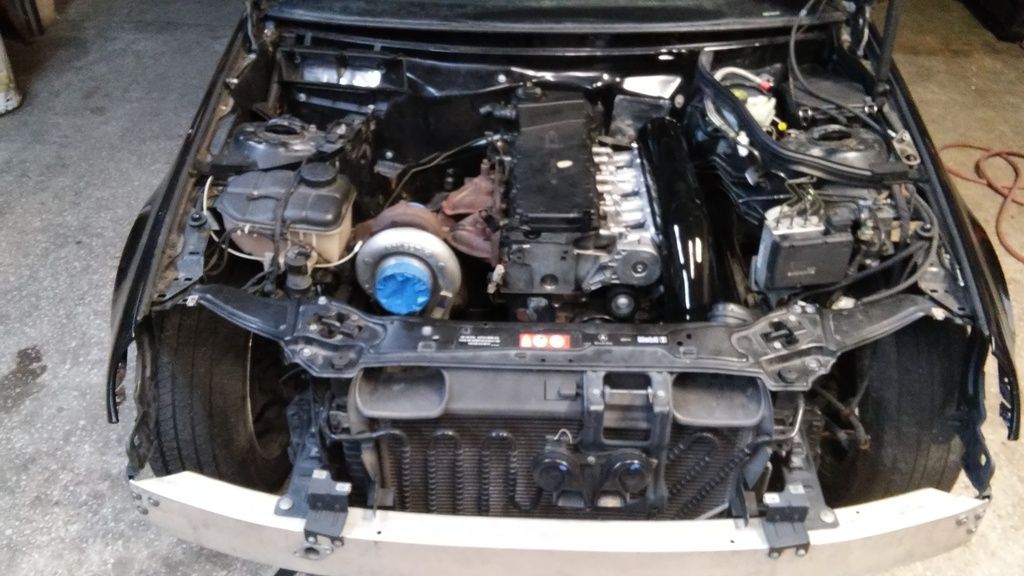 [/IMG] [/IMG]Then fitted it onto the engine in the car to see how it looks. We will be fitting a larger throttle body onto it from a VW Toureg 3.2L. |
|
#13
|
|||
|
|||
|
Looks great! What are you doing for engine management?
__________________
68 280SL - 70 280SL - 70 300SEL 3.5 - 72 350SL - 72 280SEL 4.5 - 72 220 - 72 220D - 73 450SL - 84 230GE - 87 200TD - 90 190E 2.0 - 03 G500 Nissan GTR - Nissan Skyline GTS25T - Toyota GTFour - Rover Mini - Toyota Land Cruiser HJ60 - Cadillac Eldorado - BMW E30 - BMW 135i |
|
#14
|
|||
|
|||
|
Thanks for the reply DieselPaul we appreciate it.
The engine will be running on ME7.1 which is a VAG DBW version that has been modified by Attwood from United Motorsports. The stage 2 turbo tune will be used initially and it supports around 20 psi with 42# injectors. Once we get everything ironed out will likely go to stand alone. Currently working on wire harness integration. Will post more pictures soon. |
|
#15
|
|||
|
|||
|
Project update
Been a while since last post and now that the hurricanes has slowed down we have resumed some activities. Finally got a piece of 6061T6 plate in 3/4 inch to start crafting the engine to trans adapter plate but encountered some trouble when attempting to cut it. After some brain storming we decided to just try an old Skill saw with a carbide tipped blade and wow it cut that plate like butter. That allowed us to make all straight cuts to get the basic size. [IMG] 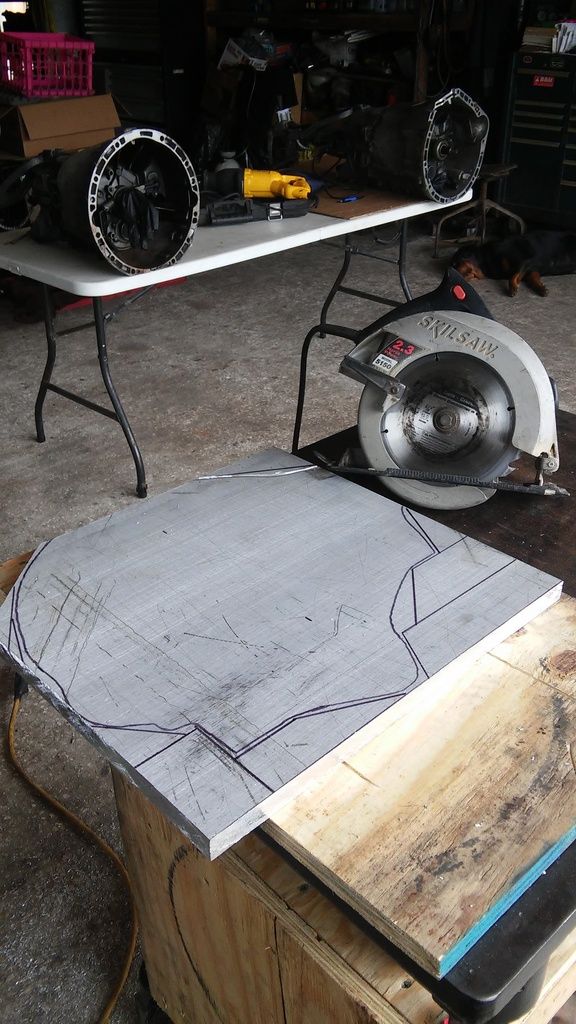 [/IMG] [/IMG]Then we used a manual milling machine to shape the plate by hand. [IMG] 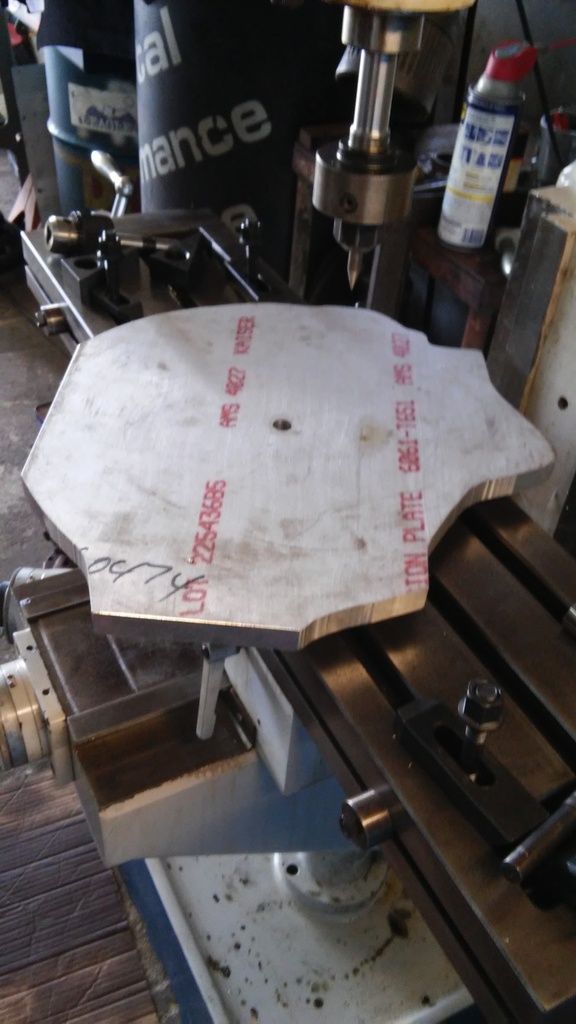 [/IMG] [/IMG]Next step was to locate and center the input shaft and bell housing pin holes so we can properly transfer punch the bell housing bolt holes. [IMG] 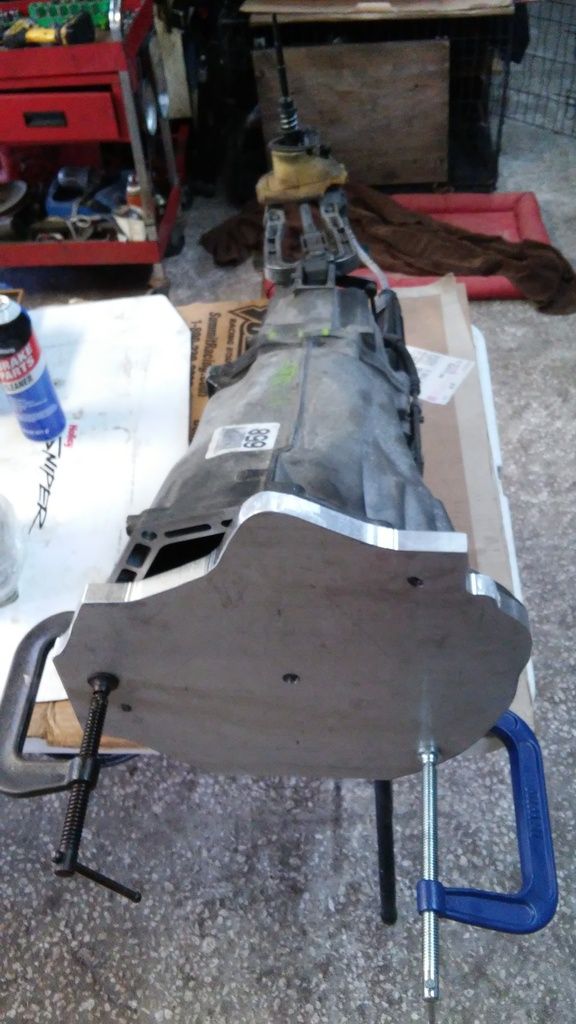 [/IMG] [/IMG]Once we get the bolt holes drilled and tapped we will move on to fitting the plate up to the VR6 engine flange. We are making the foot print of the engine adapter plate to allow for use of the M112/M113 style bell housings so that any of the 716 six speed manual transmissions can be adapted to the engine. [IMG]  [/IMG] [/IMG]We also decided to convert the dual mass flywheel to a single mass style unit by welding the the damper plate to the drive plate. But don't try this at home! Eventually we will craft our own custom flywheel for this application. [IMG] 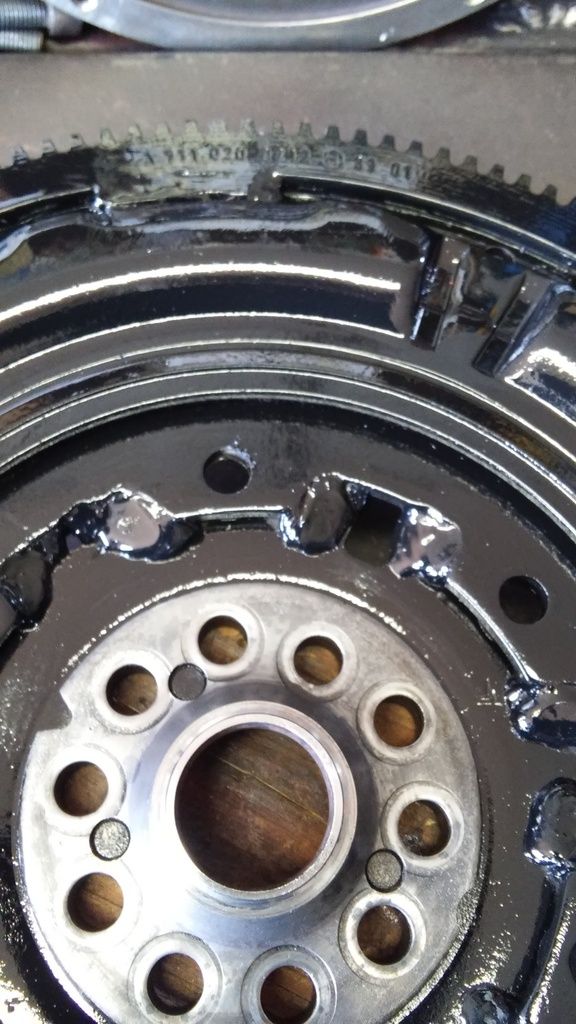 [/IMG] [/IMG]The unit was then bolted back together and rebalanced. [IMG] 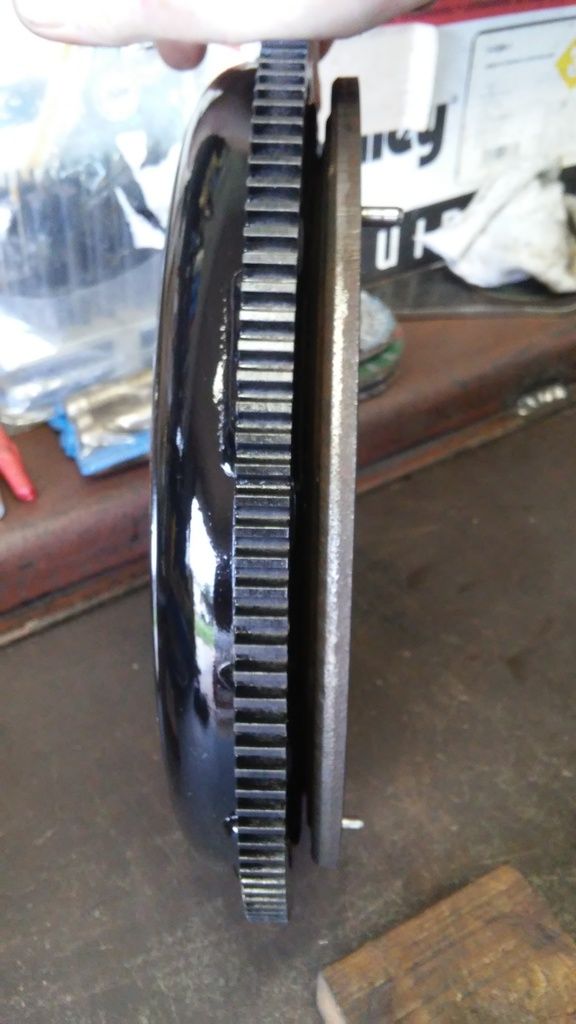 [/IMG] [/IMG][IMG] 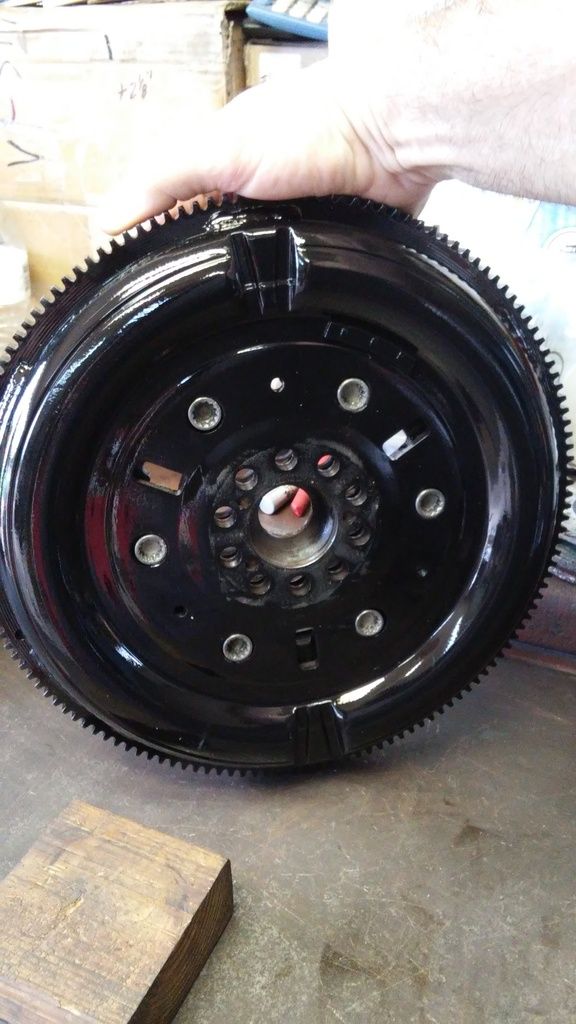 [/IMG] [/IMG]More updates will follow and thanks for looking. |
 |
| Bookmarks |
|
|