

|
|
|
|
|
|
#76
 01-30-2017, 02:51 PM
|
|||
|
|||
|
This is what I use for those little jobs too small to mess about with cleaning a paint gun.
Preval Complete Spray Gun 2.1 Oz - Ace Hardware & Home Centre, Maldives
__________________
Whatever story you're telling, it will be more interesting if, at the end you add, "and then everything burst into flames. ― Brian P. Cleary, You Oughta Know By Now 
|
|
#77
01-30-2017, 04:38 PM
|
|||
|
|||
|
Quote:
|
|
#78
01-30-2017, 04:50 PM
|
|||
|
|||
|
I finished cleaning up the engine bay today. I polished the right side as I had done on the left side. However, because of the battery being there, the finish wasn't as good on that side. After completing the polish, I waxed everything including the edges of the hood and the fenders as well as the radiator support.
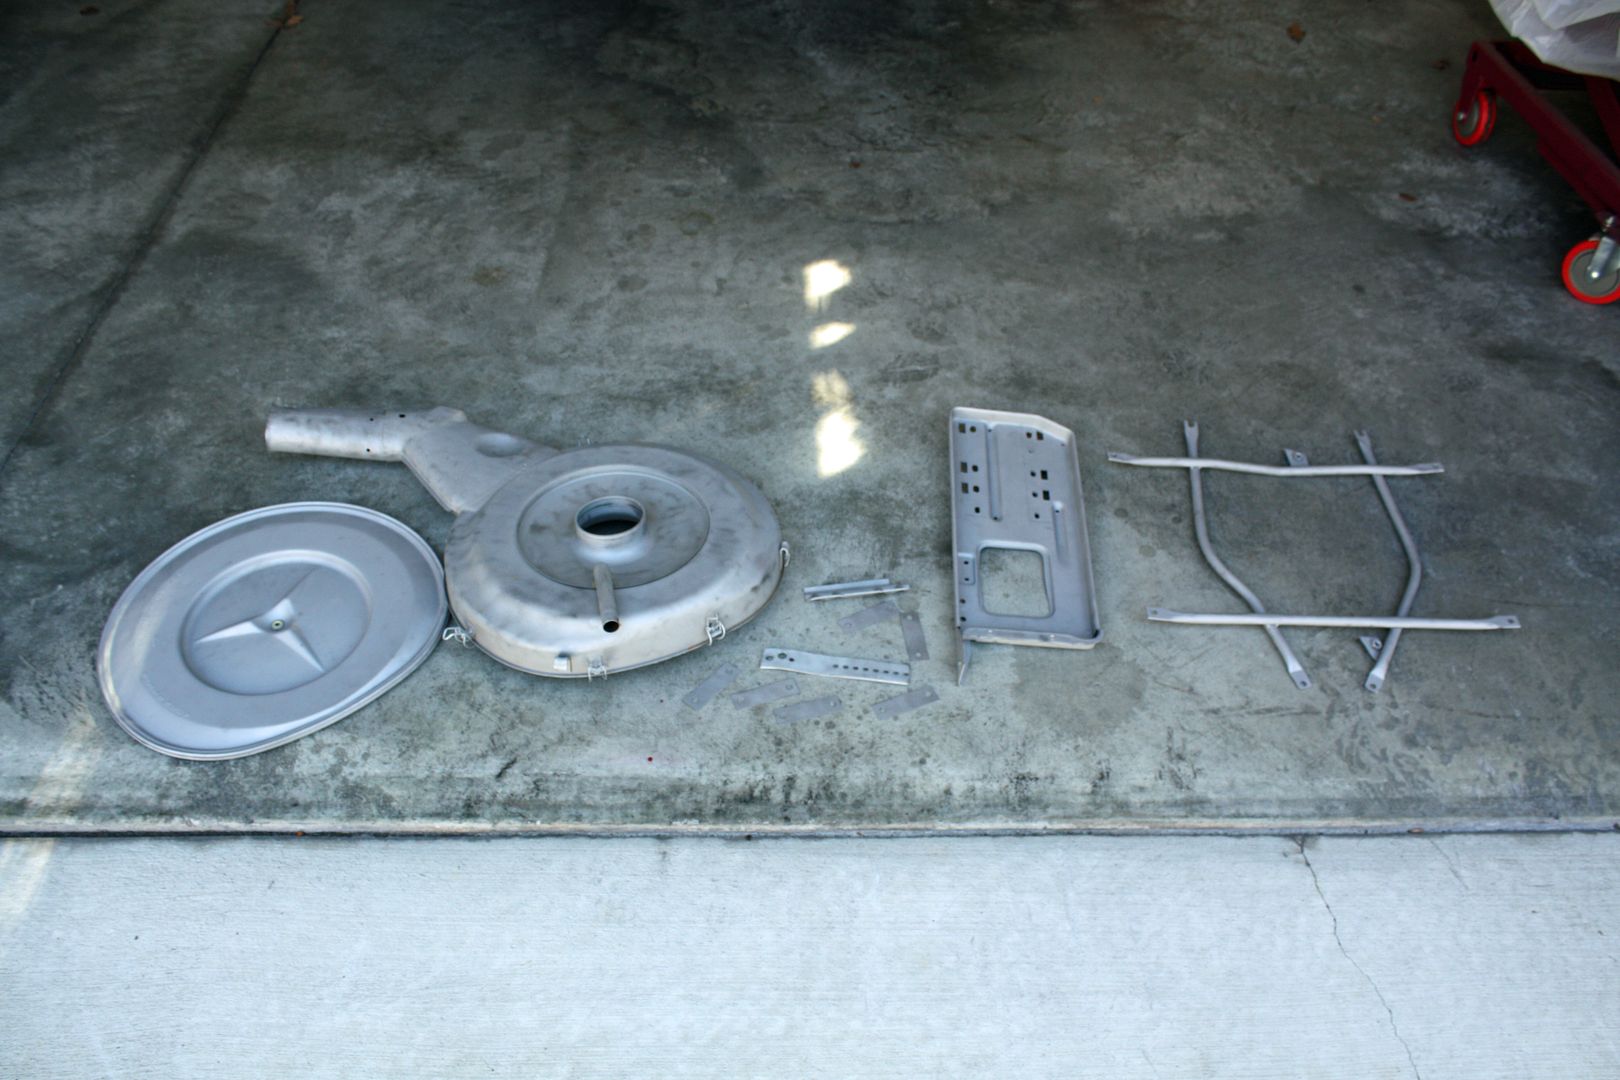
  Since I had the hub caps off the car, I spent some time on cleaning them up today. Three of them are aluminum with one being steel. I used chrome polish on the steel hub cap and aluminum polish on the other three as well as paint polish on the painted areas. I then waxed all four of them. Two of the aluminum caps has some curb rash and the paint is different on the steel cap, the lower right one in the photo below.  Last Thursday, I picked up the parts that had been refinished in yellow zinc. Tomorrow I can pick up the powder coated parts and I will be ready to put the engine bay back together.  In anticipation of replacing the exhaust, I have sprayed penetrating oil on the exhaust bolts.  
|
|
#80
01-31-2017, 04:49 AM
|
|||
|
|||
|
Quote:
|
|
#81
01-31-2017, 10:36 AM
|
|||
|
|||
|
I took the wheels to a local tire place to have them balanced. We soon found out why I had some vibration as, on one of the wheels, the bolt holes had been hogged out so much that the wheel probably would not center. The spare wheel was fine but the tire was a different brand from the four others, so we switched tires. I am looking for a wheel if anyone has a good one.

|
|
#82
01-31-2017, 03:14 PM
|
|||
|
|||
|
Beautiful job so far! I notice in post 8 there seems to be some plumbers tape pieces, were those used in the battery tray? Mine has those as well and I assumed it was just some crappy repair work but then again the tray holes do not line up with my battery size 49.
__________________
1972 280SE 4.5 
|
|
#83
01-31-2017, 03:27 PM
|
||||
|
||||
|
Wow; just great work.
|
|
#84
01-31-2017, 05:16 PM
|
|||
|
|||
|
Quote:
As for the plumber's tape, I am not sure what you are referring to.
|
|
#85
01-31-2017, 05:57 PM
|
|||
|
|||
|
Between running around getting the tires balanced and picking up the freshly powder coated pieces, I didn't have a lot of time to spend working on the car. The powder coated pieces look great. Also, my new carpet kit arrived today. These parts as well as the new hood pad are being stored in my bedroom.
   I did have time to install a new set of plug wires as well as a new distributor cap. I had also ordered a new rotor but the one on my distributor was different and, I assume, part of the electronic ignition. I will have to see where I can get one like it. The old plug wires were not in very good condition. Since the spark plugs were replaced only four thousand miles ago, I did not replace them. However, I did pull all eight plugs to see that they looked like. They all looked like the one in the photo below and I was pleased with that.  ' '     I did have time to re-locate the ignition box. I found a great place on the side of the radiator support. I ran out of time to finish it up as it was time for my wife, the dog and I to take our two mile walk.  
|
|
#86
01-31-2017, 07:24 PM
|
|||
|
|||
|
Quote:
__________________
1972 280SE 4.5
|
|
#87
01-31-2017, 08:02 PM
|
|||
|
|||
|
Quote:
|
|
#88
01-31-2017, 08:53 PM
|
||||
|
||||
|
The rotor is just the "Rev limiter rotor" - it can be replaced with a "Straight" style one.
__________________
Current: 2021 Charger Scat Pack Widebody "Sinabee" 2018 Durango R/T Previous: 1972 280SE 4.5 2014 Jeep Grand Cherokee Limited "Hefe", 1992 Jeep Cherokee Laredo "Jeepy", 2006 Charger R/T "Hemi" 1999 Chrysler 300M - RIP @ 221k
|
|
#89
01-31-2017, 09:04 PM
|
|||
|
|||
|
Quote:
|
|
#90
02-01-2017, 06:43 PM
|
|||
|
|||
|
It was "fiddly" day today. First up was finishing the wiring on the ignition box. Whoever installed it coiled up the excess wire rather than cut it to size. After doing the measuring, I both crimped and soldered the new connections. These connections were made at the coil and a separate harness that went to the distributor. On previous Porsche's, I had experienced plastic covers for the coil. Mercedes has one for their coils as well. I also used shrink wrap on some of the existing harness that had cracking protective coverings.
          With that side finished, it was time to move on. Among the parts I have ordered were new hood bumper stops as the old ones were, as they say on "Wheeler Dealers", perished. As was the air cleaner mount.    Two of the emission hoses also needed to be replaced. According to the records, the fuel hoses are not very old and they all appeared to be in good condition.   The alternator arm was one of the pieces that I had coated with yellow zinc.  In preparation for working on the right side of the engine bay, I spent the remainder of the day cleaning up the hardware.   
|
 |
| Bookmarks |
|
|


 Linear Mode


