Vacuum Control Valve Replacement
on the 1987 300D (OM603.96)
by sixto
08/16/09
603.96 VCV replacement, Bowden cable adjustment
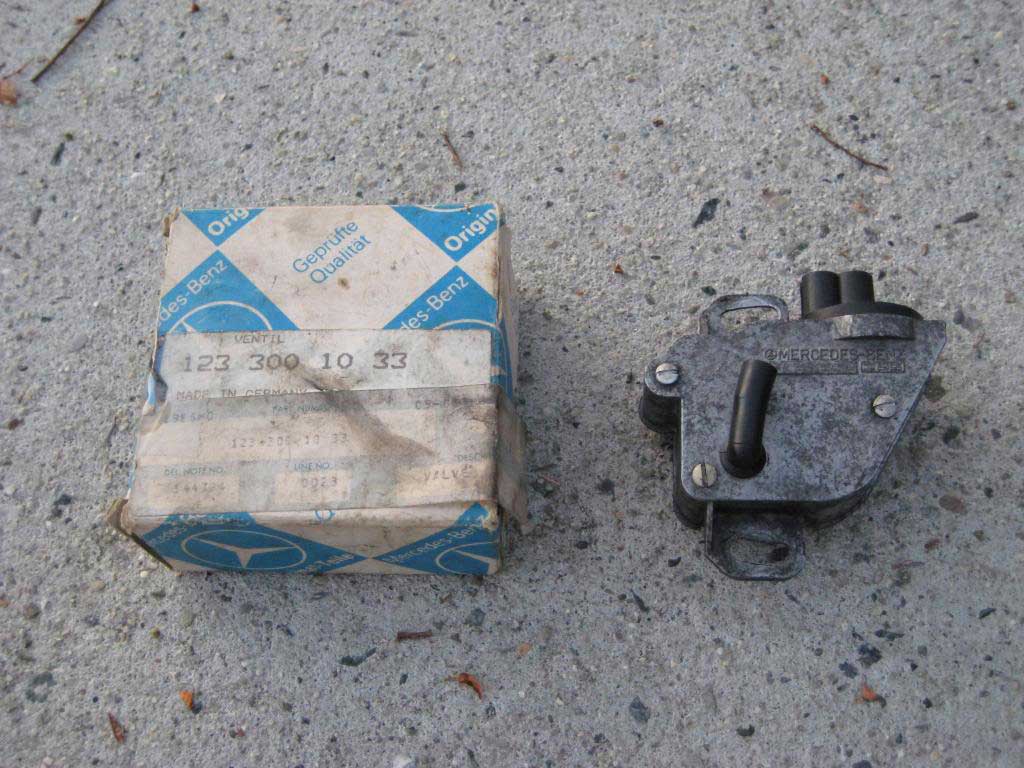
The original VCV I refurbished didn't hold. I found a NOS VCV, p/n 123 300 10 33 vs current p/n 140 300 08 33, and installed it. Here's how it went -
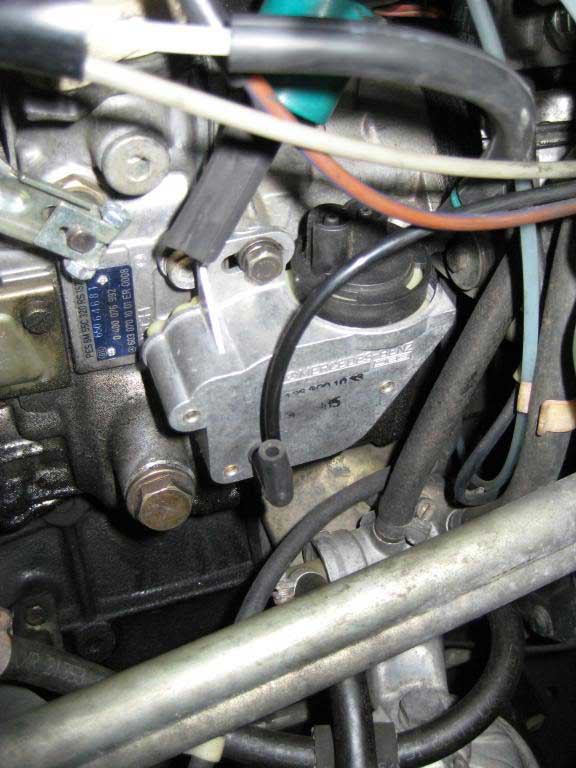
Original VCV in place. Note ghetto wallplate screws holding it together after refurbishing. Note also simplified vacuum line arrangement since I removed the BFS.
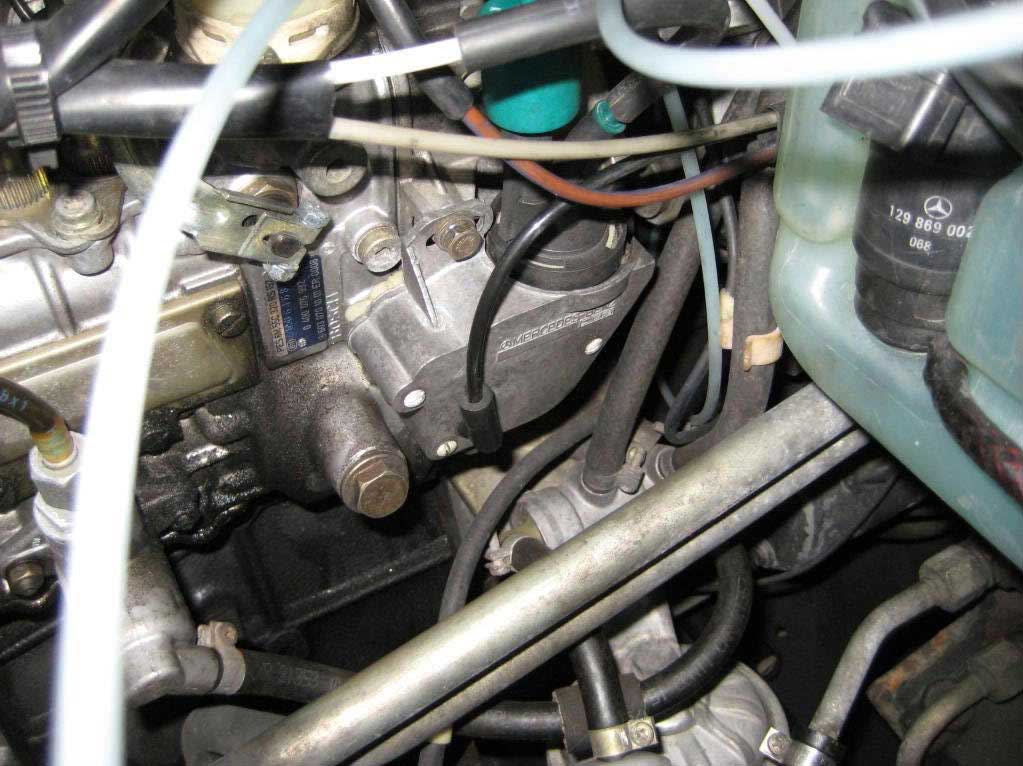
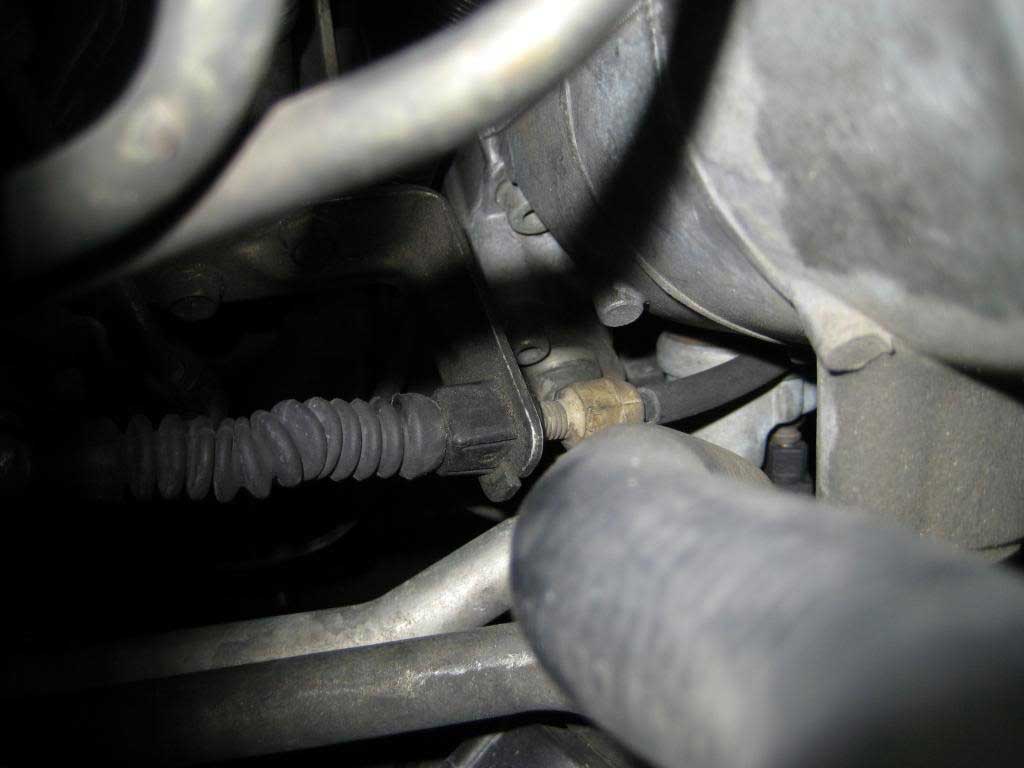
The first thing to do is note the vacuum lines connected to the VCV, label then remove them. There are two lines connected at the top. One has a rubber hose with a tab that corresponds with a notch in the VCV forward fitting. This line has a green damper and goes to the BFS or in my case to the transmission modulator. The other is supply vacuum from the pump into the aft fitting. There's also the black vent line on the driver side of the VCV.
Since this is my nth time, I removed the bolts first. The lower bolt isn't so easy to see or get to because of the oil cooler lines. I used a short 10mm socket on a ratchet until the bolt was finger tight (loose?) then continued by hand (finger?). My ratchet and socket are too deep to loosen the bolt completely and still clear the oil cooler lines. Maybe a 1/4" drive arrangement will work better -
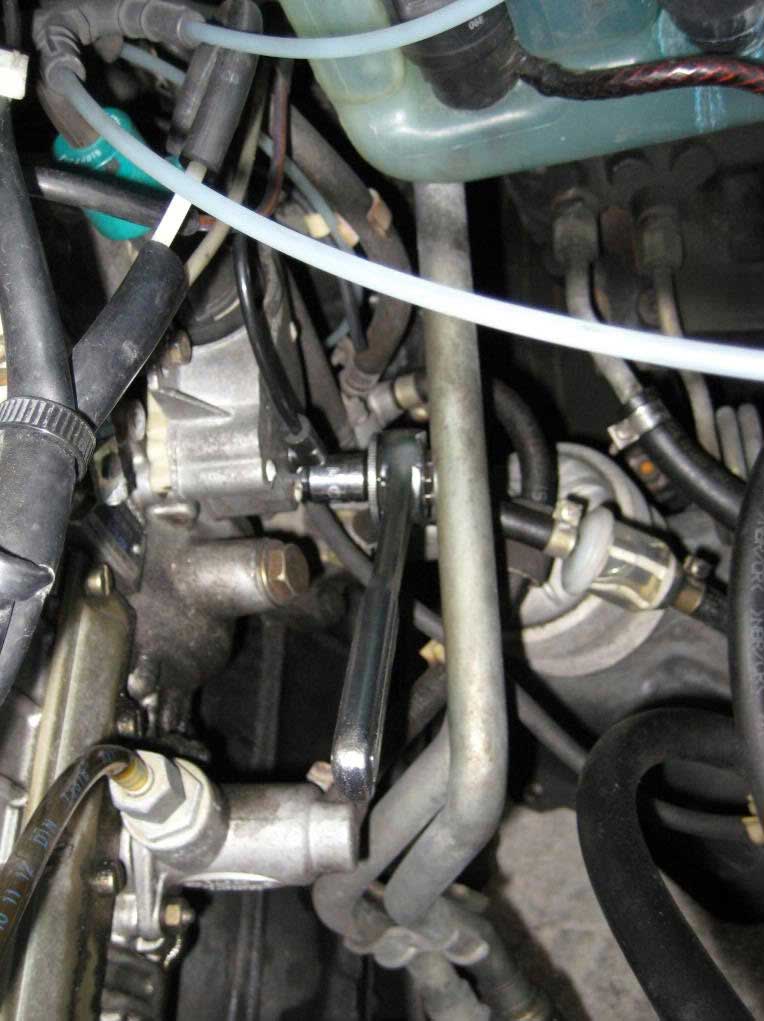
The upper bolt is easier to get to. I used a deep 10mm socket on a ratchet -

With the bolts off, the VCV will easily come off the IP if it doesn't just fall off -

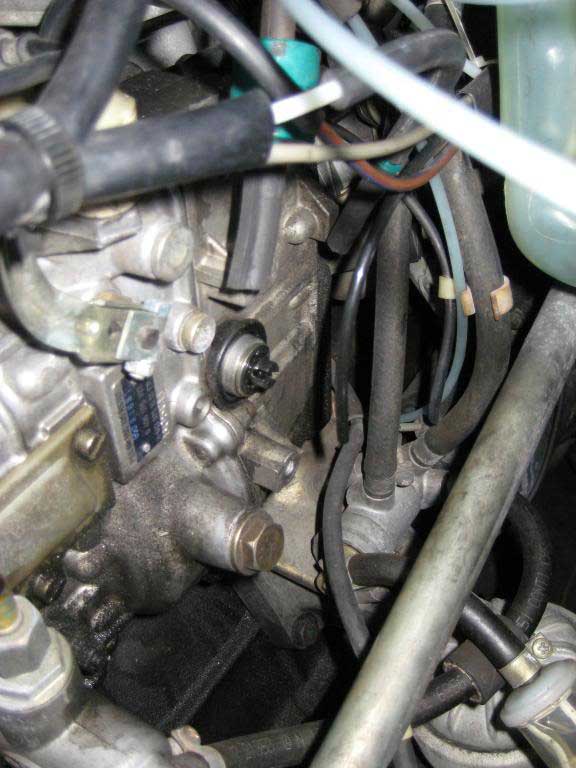
Here's the IP with the VCV removed. The EPC calls out a seal or dust cover. Since there are no leaks, I'm not going to do anything further. There isn't even much to clean with the VCV off the IP. Maybe I cleaned the IP the last time the VCV was off -
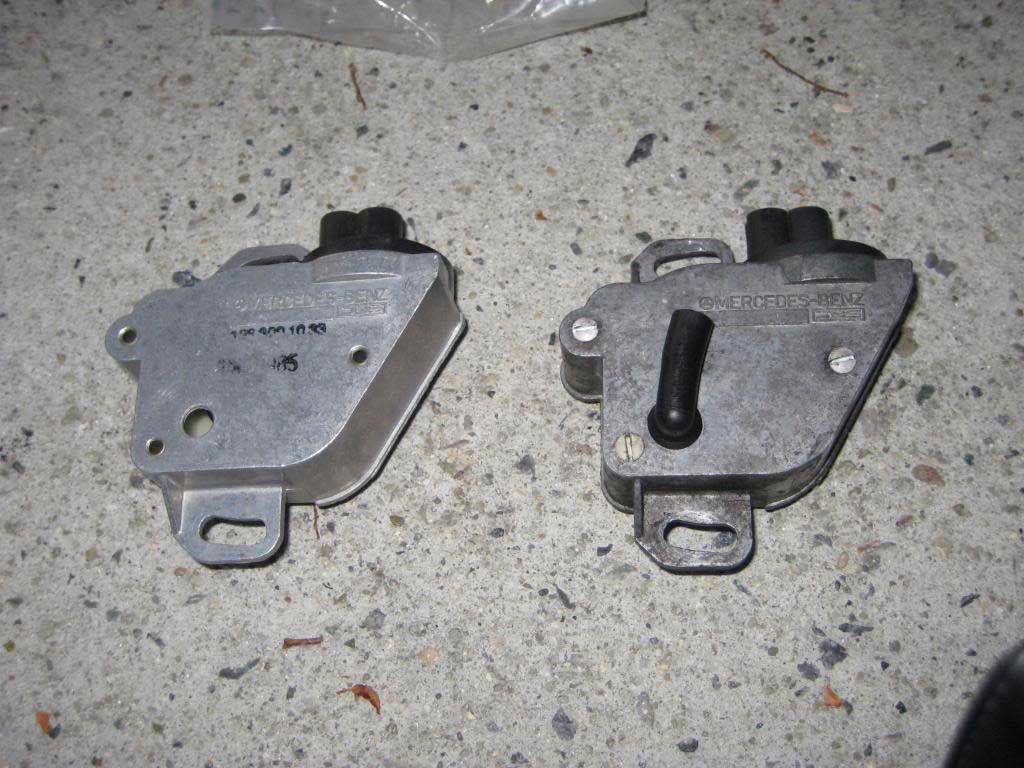
The box of the NOS replacement next to the original VCV -
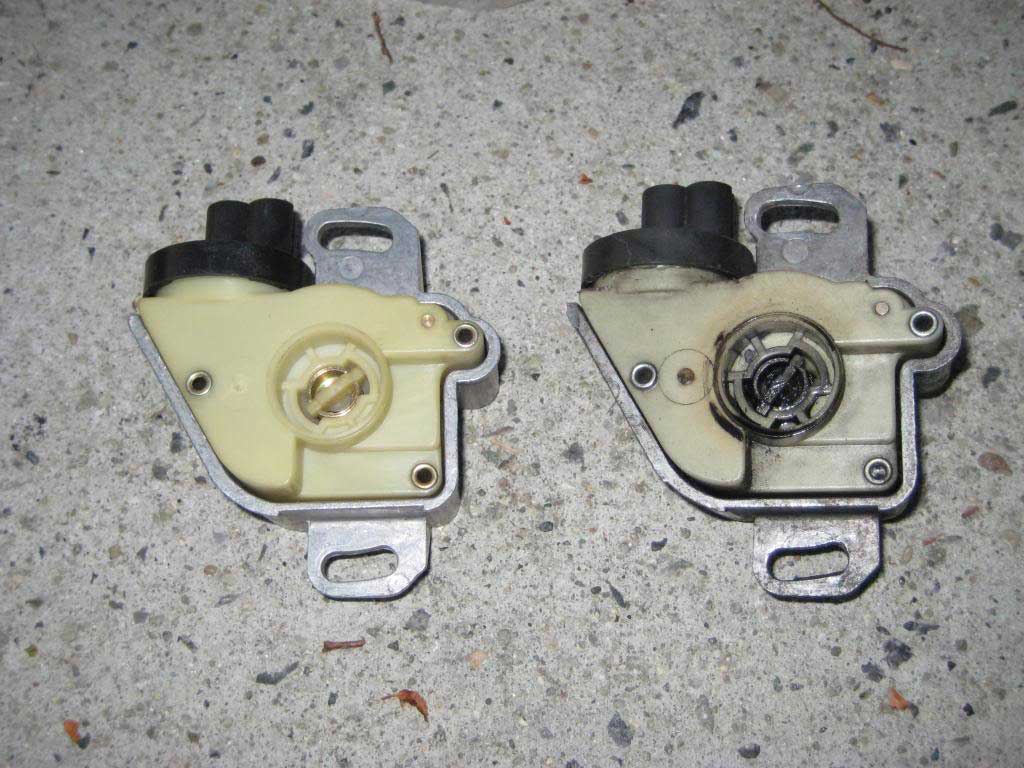
The NOS replacement VCV next to the original VCV. The replacement didn't come with a vent fitting. The replacement has the part number stamped rather than etched into the case -
Flipside. Hmm... maybe it needs a new seal -
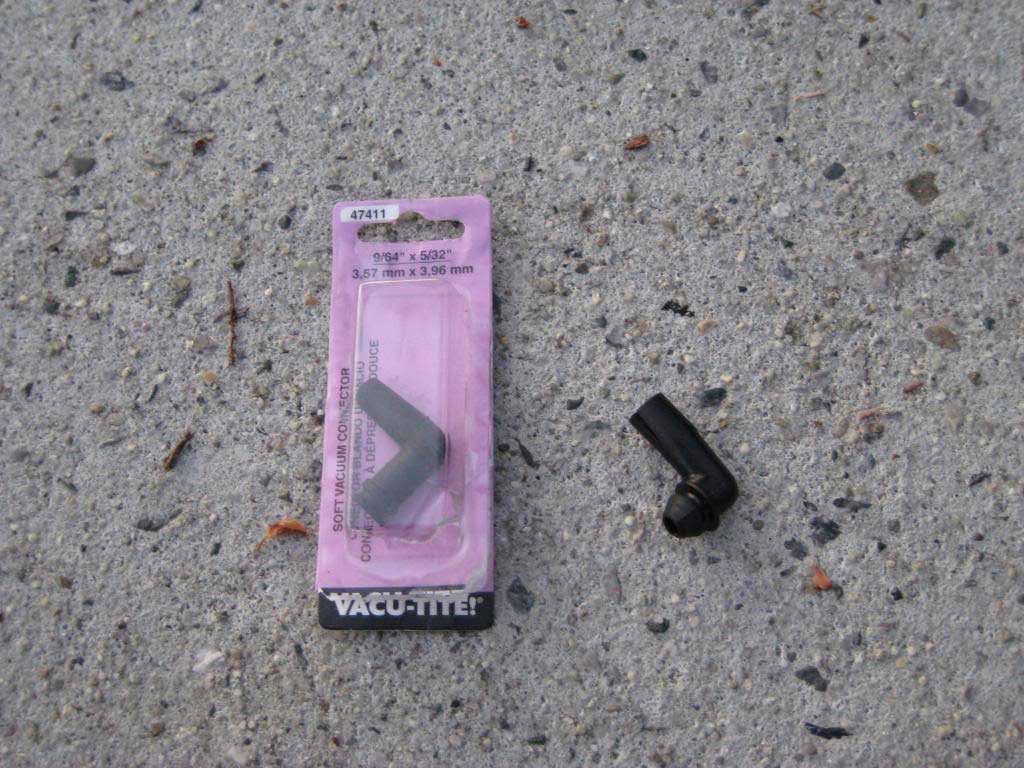
MB no longer sells the right angle vent fitting. You can get a straight fitting from MB but I found this one at the auto parts store. It's a VACU-TITE! 47411. I understand 47410 might be a better fit but I couldn't find one in stock -
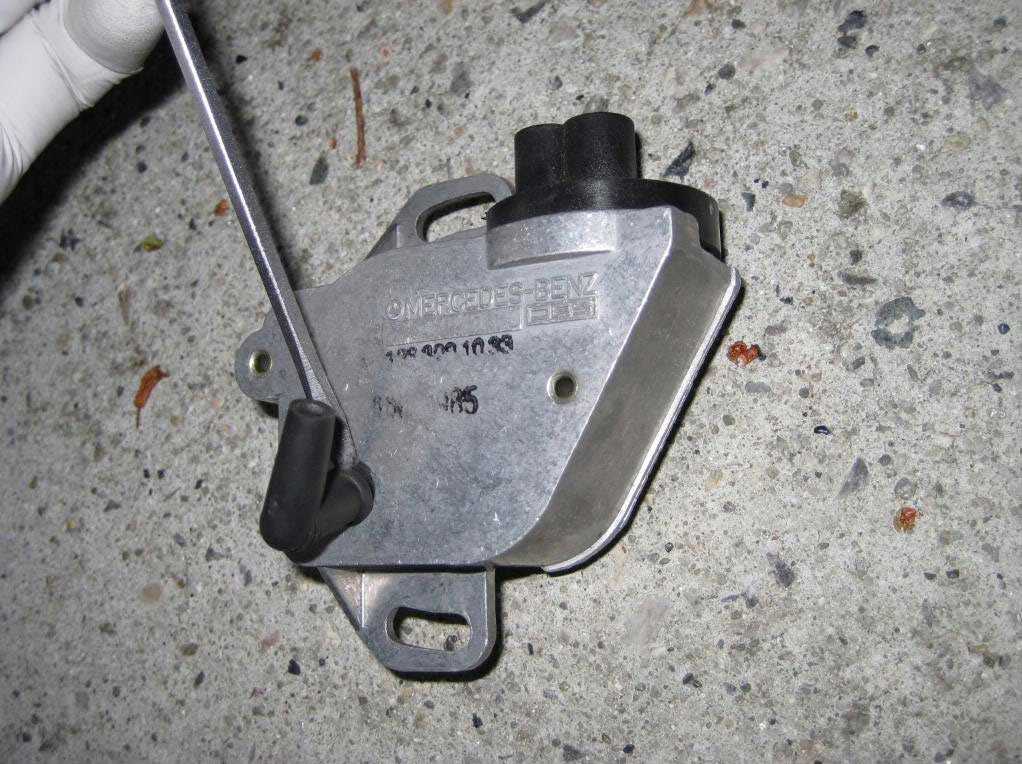
The replacement stands off the VCV a little further but it looks more original than sticking straight out. Note the split in the vacuum line receiving end of the old fitting -

The replacement fitting presses onto the VCV case but I needed some help pushing the flange completely into place -
[Sir David Attenborough accent] The replacement VCV is offered to the IP. There's a tongue-into-groove fitting that slips into place with a little wiggling. Aim the VCV mounting slots for the IP holes -
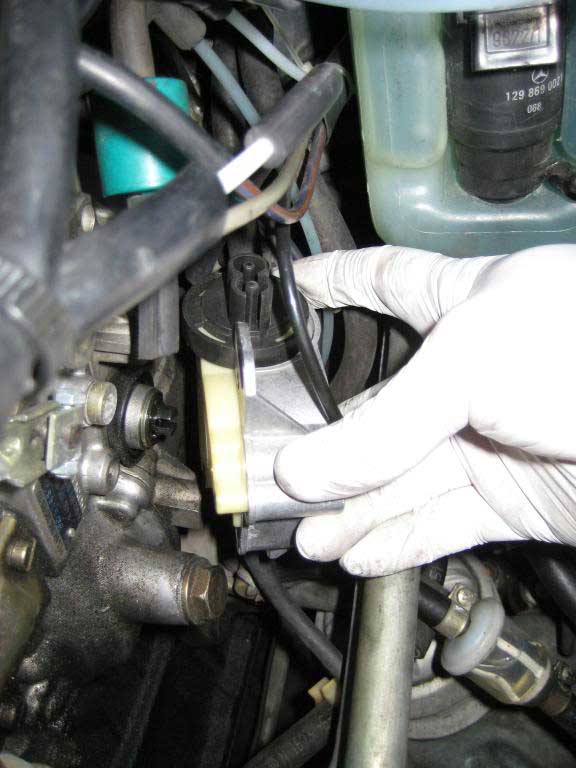
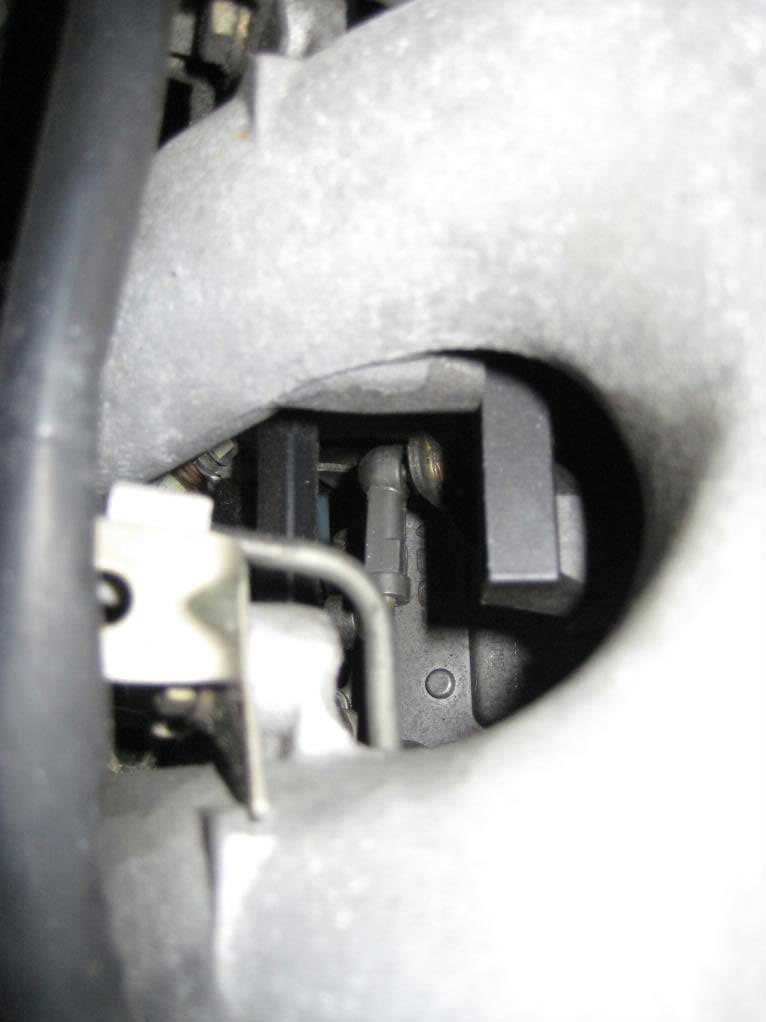
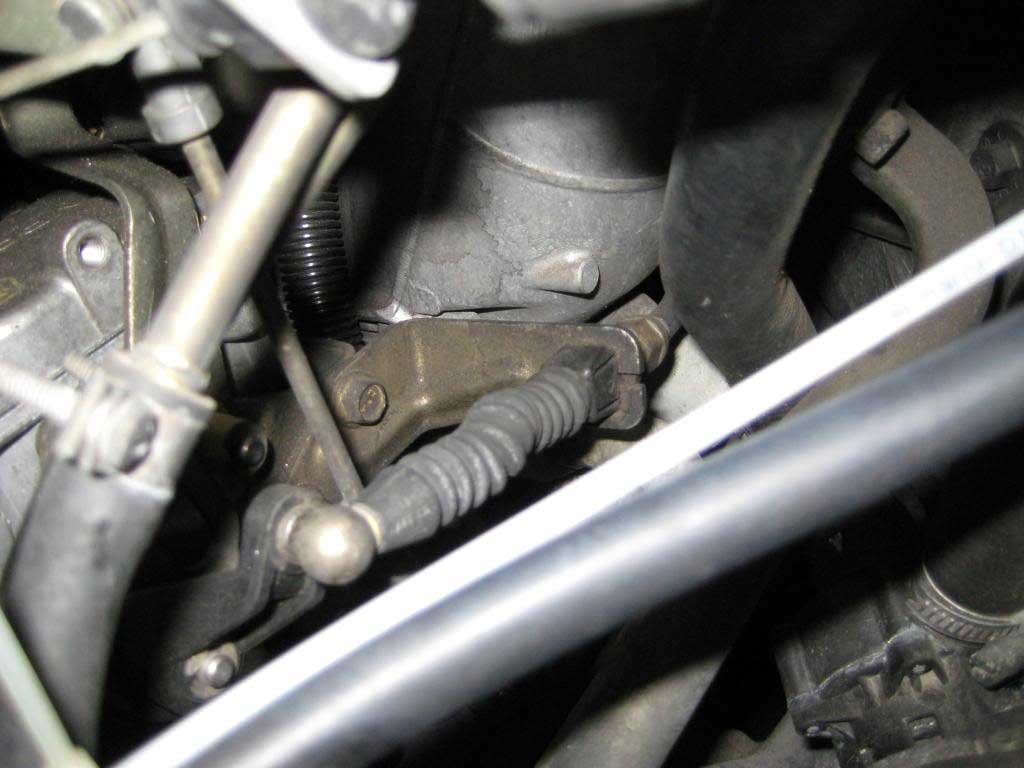
I set the bolts just looser than finger tight so the VCV turned freely in place about the adjustment slots. Adjustment is done with the throttle at WOT. I work alone so the throttle pedal is out of the question. I can't slide the washer reservoir forward while working on the VCV so that's out of the question as well. There's pretty easy access to the linkage between the cruise actuator and IP through the #4 and #5 intake runners -
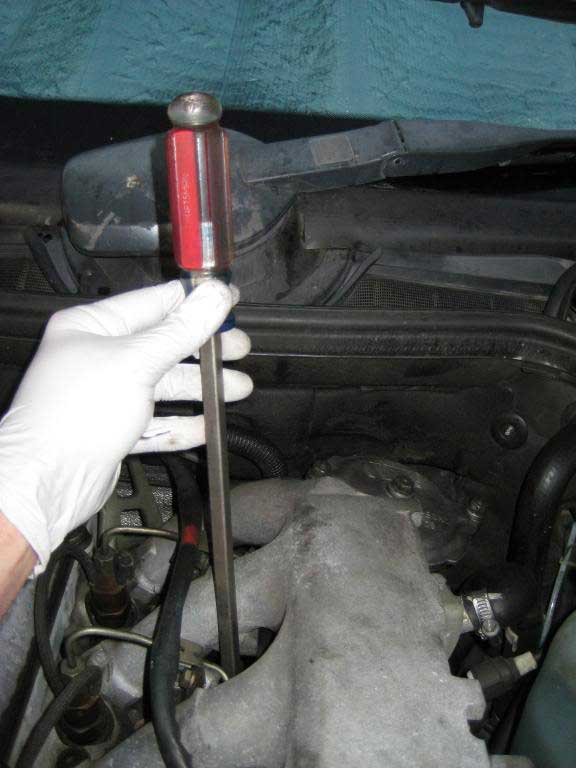
I set the tip of a long screwdriver on the ball-and-socket joint and pushed the screwdriver aft which pushes the linkage forward -
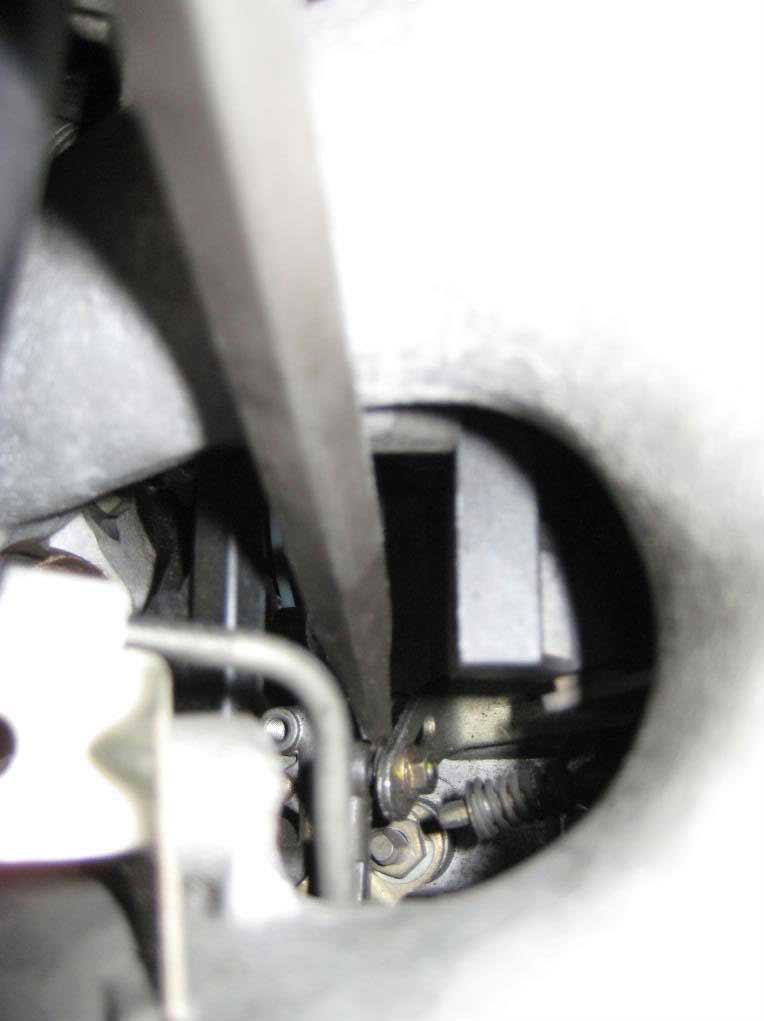
It doesn't take much force to hold the throttle at WOT -
Adjustment calls for turning the VCV CW until there is tension against the IP at WOT. I held the IP in the adjusted position firmly with one hand and tightened the bolts with the other hand. Here's the VCV in adjusted position -
Hook up the vacuum and vent lines and it's done!
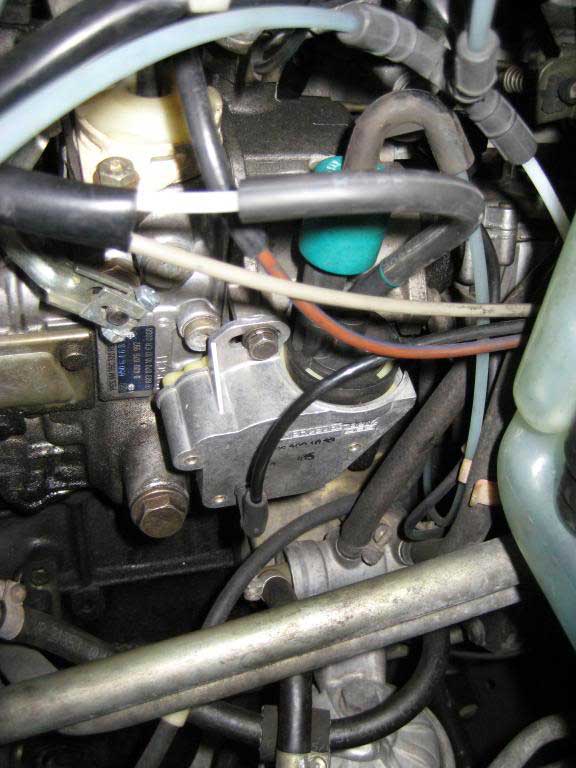
Here's the engine bay without the BFS. I hooked up a line to the vacuum reservoir. I don't notice a difference with and without the reservoir with the BFS removed -

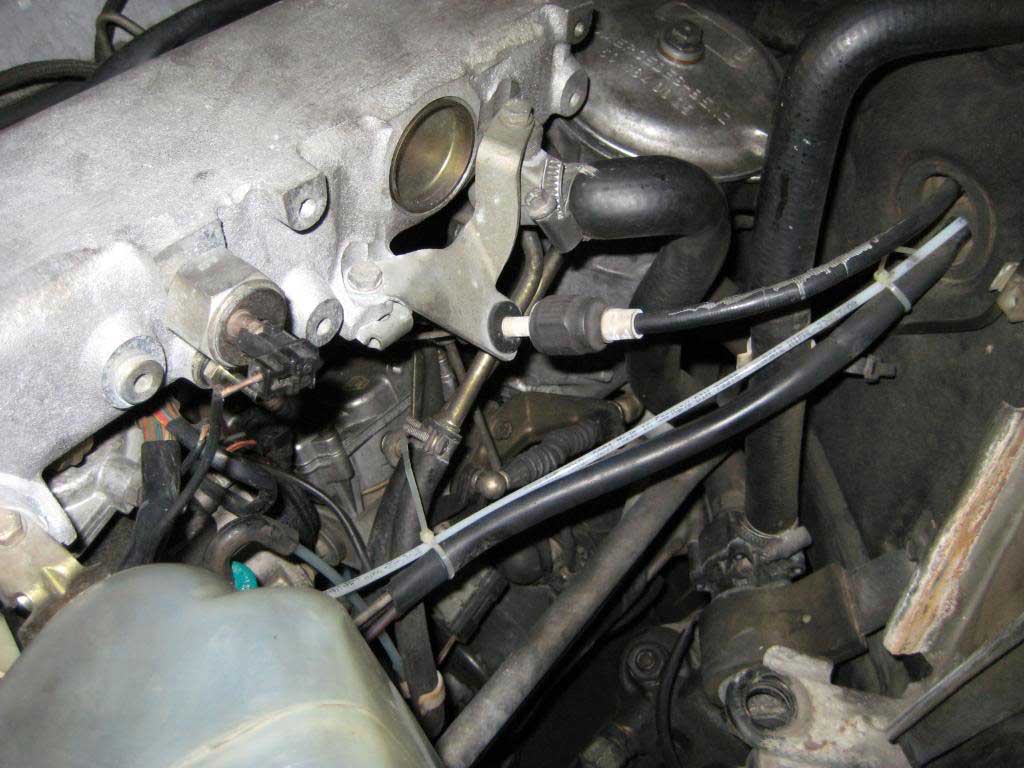
Since we're on the topic, I slid the washer reservoir forward for some Bowden cable pictures. Here's the Bowden cable attachment to the throttle linkage -
Zooming out for better orientation of the Bowden cable attachment. You can see the throttle cable coming into the throttle linkage from the firewall -
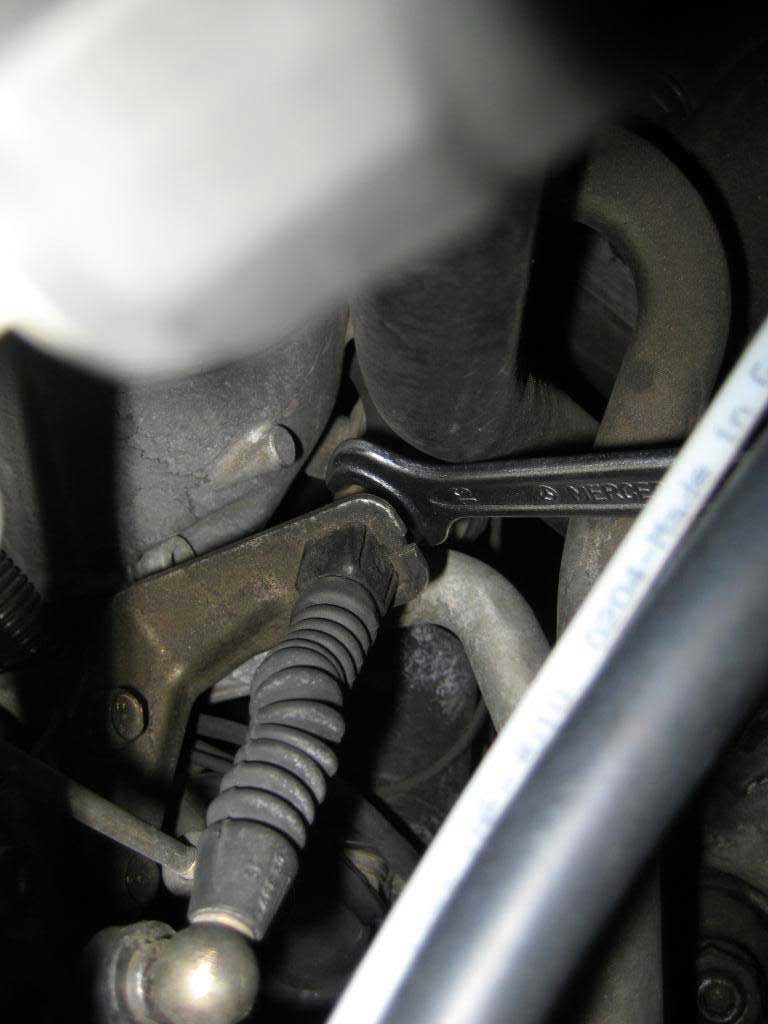
Here's a peak down the forward edge of the oil filter housing to see the Bowden cable adjustment nut -
Here's the 13mm wrench from the tool kit on the Bowden cable adjustment nut -
I don't have technically accurate advice on adjusting the Bowden cable. It's quite sensitive. You can feel the difference in shift points with just a half turn. I haven't checked the FSM in a while but I think the key is to set the cable so the shift points are just shy of the governor cutoff with the pedal at but not engaging the kickdown switch. I have WOT shifts at 4400 rpm which is well short of the governor. I backed into that setting in the process of spacing the light throttle 3-4 shift to where it feels right to me.
Sixto
87 300D
Discuss this DIY here.
-sixto
CategoryDiy