Sun Visor Replacement
on the 1988 560SL
by dmorrison
4/7/05
Needed to replace the sun visors in the 88 560SL for a couple of years now. And it's embarrassing to say that the sun visors have been riding along with me in the trunk for just about as long. So here are the photos and description of how to do it.
A side note. I also bought the brushed aluminum piece on the top of the windscreen to replace it. The PO had dented the unit using a cheap hoist for the top. However as I discovered while doing this job that the windshield may have to come out to replace the aluminum piece.

The number one reason I had to replace the visor. The hinges for the door had broken and the door was gone. ALSO glue form the unit was seeping out the vinyl causing then to look pretty bad.
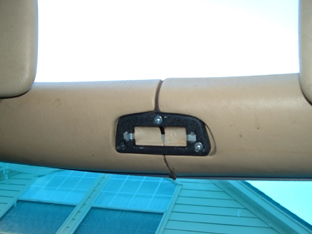
Remove the mirror by forcing the left or right edge downward and to the side of the car. The mirror is held in by spring loaded ball bearings. Don't be afraid to really force it. Reinstalling it requires placing one ball bearing in the opening and then forcing the other ball into position. Remove all three Phillips head screws that you will find under the mirror in it's base.
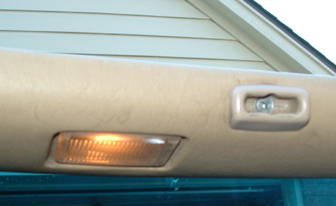
Remove the visor inside mount from its reciever and then remove the Phillips head screw located in the receiver. Remove the light by prying with a flat head screwdriver on the inside ( towards the center of the car) edge of the light. It will rotate downward. Unplug the two electrical connectors.
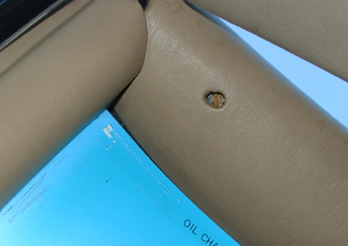
Located towards each A pillar is a recessed Phillips head screw in the upper trim piece. Remove the screw, or at least unscrew it. Mine stayed in the molding piece. Now pull the molding trim piece towards the center of the car to remove it. The passengers side molding is moved towards the center of the car to remove it.
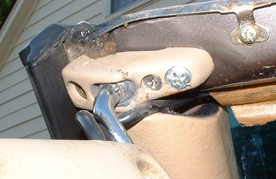
Once the upper trim is removed you will see the base of the visor and the wiring. You will have to remove the tape holding the wires against the windshield upper frame( note where the tap is for reassemble). Then remove the two outer edge ( not the center one) Philip screws on the visor base ( the larger screw goes on the outside hole).
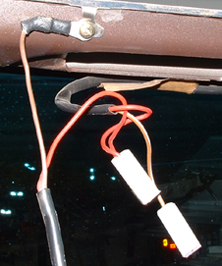
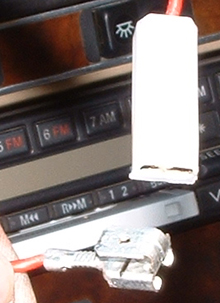
To remove the visor completely the you have to separate the mirror light positive wire completely. The photo shows the jump piece the Mercedes uses on the wire harness. Pull the plastic covered unit of the exposed metal connector. I had to use pliers to hold the connector while pulling the plastic covered unit off.
To complete the removal of the visor wiring you have to remove the ground wire which is screwed to one of the top aluminum hold down points. You will have two small Phillips screws to detach, one for each visor.
To assemble just do it in the reverse order.
Some notes on reassembly:
Again make sure you know where the tape goes or you run out of wire when you put the light assembly back in. Just re-tape the wires with the same size and place and you will be OK.
Clean everything with Vinylex while it is apart. these parts are vinyl not leather.
I had to remove the recessed screw in photo #4 for reassembly.
To install the trim piece. 1st mount the visor with the 2 screws. 2nd route the wire and tape it into position. 3rd slide the trim piece into the a pillar opening, while positioning the wire and screw the visor recessed base ( photo #3) into its how to hold the unit. 4th install everything else and enjoy.
-Dave
CategoryDiy