Replacing the Ignition Switch
on the 1993 500SL (R129)
by LeaUK
4/9/06
Morning all - well evening to some too
 First things first, please note my car is RHD!
So here's how I changed my switch (note, just the switch not the mechanical lock mechanism itself).
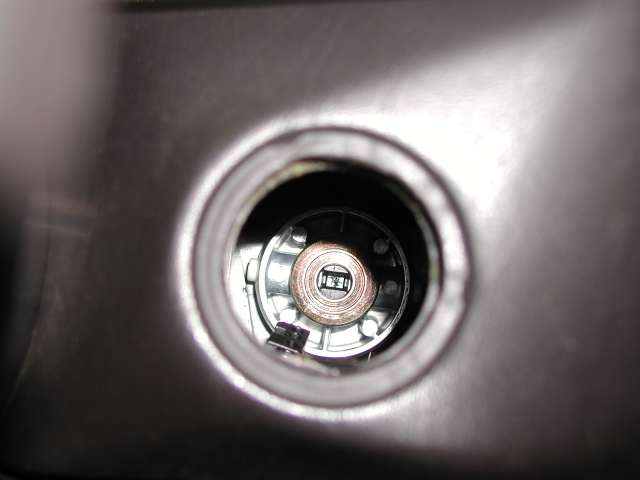
1. Unscrew ignition inner trim ring from dash using claw type wrench - this subsequently releases the outer ring.
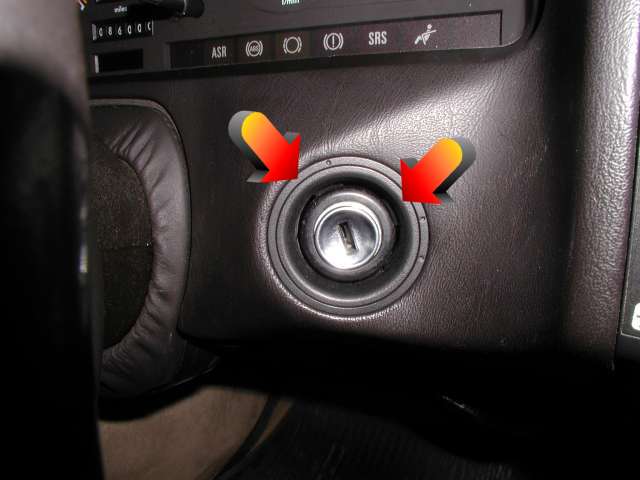
2. Turn to ignition to position 1 and make sure the steering wheel is nowhere near the steering locked position (not sure if this is necessary but I was being careful).
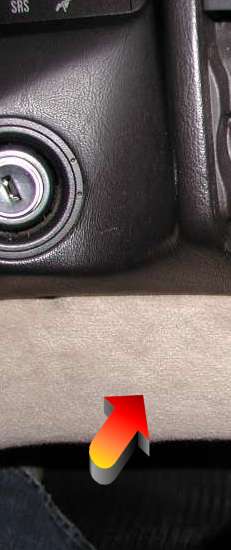
3. Removed cover below instrument panel
4. Remove the bar - makes life a little easier
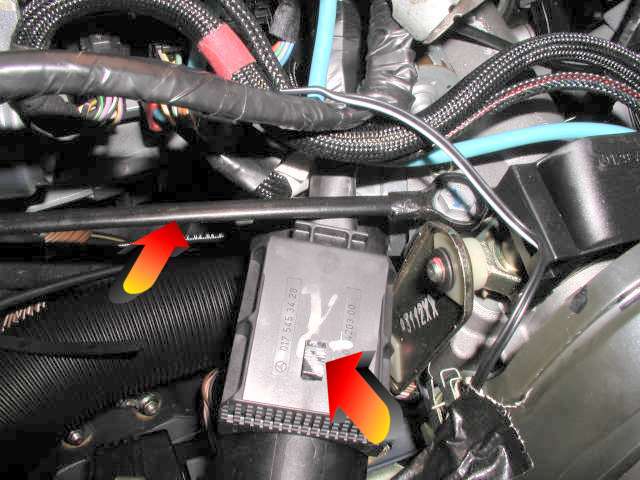
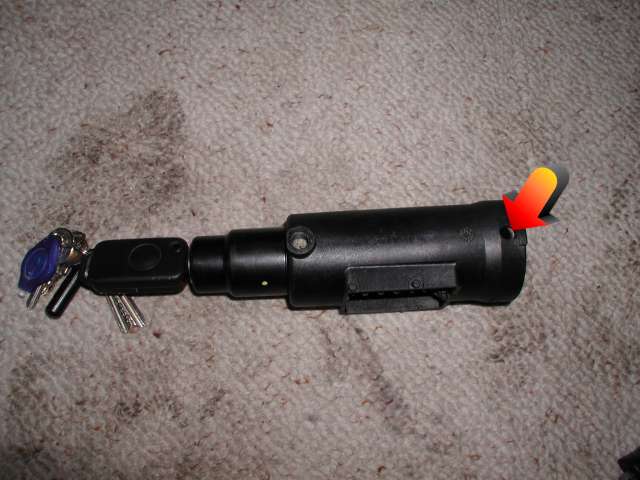
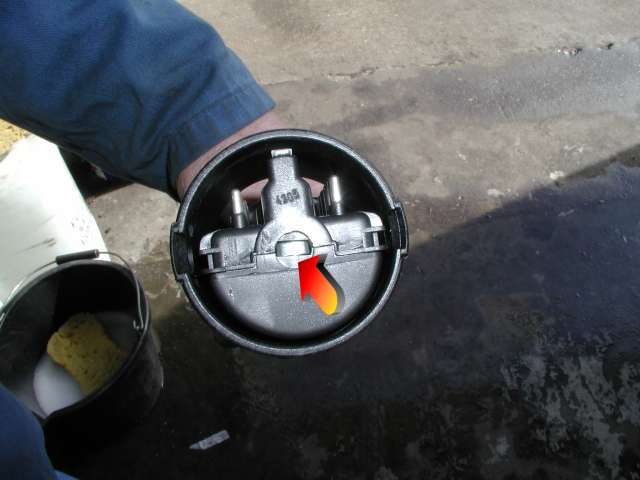
5. Press in the safety catch (button in the middle) of the switch connector holder and slide in direction of lock cylinder. - see image above
6. Missing picture, but the protective black plastic sleeve (houses the lock and electrical switch see piccies below) has two holes through it nearest the metal steering lock, use a piece of u shaped 2mm brazing rod (or similar) to push the white plastic pins inwards (doesn't need much force or movement). Simultaneously wiggle the protective sleeve in the direction of the lock cylinder, then as it moves, remove the u tool and wiggle such that it becomes disconnected from the steering lock.
7. Making sure the sleeve is completely separated from the steering lock, turn the key to pos 0 and remove the key.
8. Detach control cable for the parking lock. Must have forgot to take a snap but you won't miss it if you look up at the ignition assembly - it's nearest your key and tightened to 5Nm.
For vehicles as of 04/95 this changes to a bayonet fitting
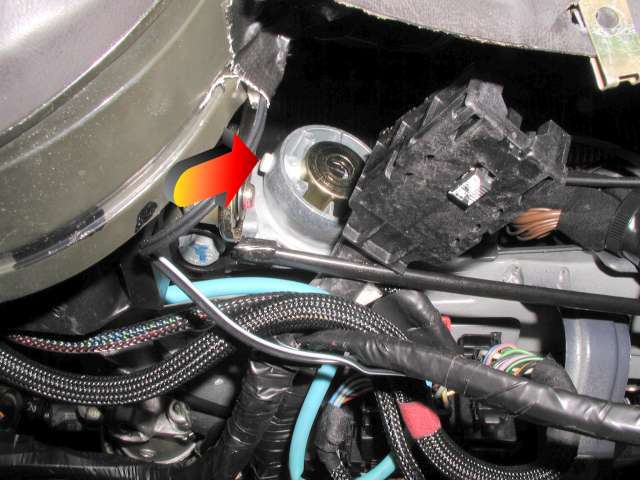
Look at the piccy below, the arrow shows one of the pins I mentioned earlier, the other is on the opposite side, imagine the protective sleeve still attached. The protective sleeve will become detached easily.
NOTE - DO NOT touch the steering lock part (see metallic part in the piccy below) once the sleeve has been removed - it MUST NOT MOVE! Tip, once the sleeve has been removed and if you're fiddling about rather close to the steering wheel ask a colleague to assist by holding the wheel (for that just in case feeling). I believe this isn't necessary but I wanted to be safe rather than sorry.
The sleeve will partially slide into the dash hole then (unless you have an extremely short key) and the whole sleeve can be fed down and inwards and subsequently removed.
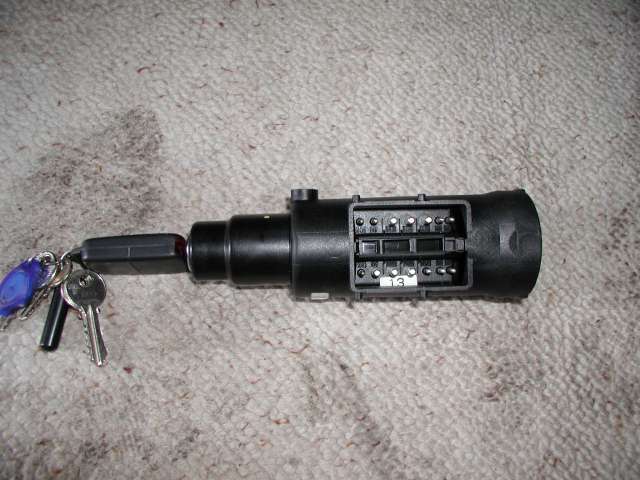
9. The protective sleeve, switch and lock look like this - see the holes for the steering lock white pins .
and
10. Here's the switch after being removed from the protective sleeve. The small catch should be depressed and then the switch can be simply pushed outwards from the sleeve.
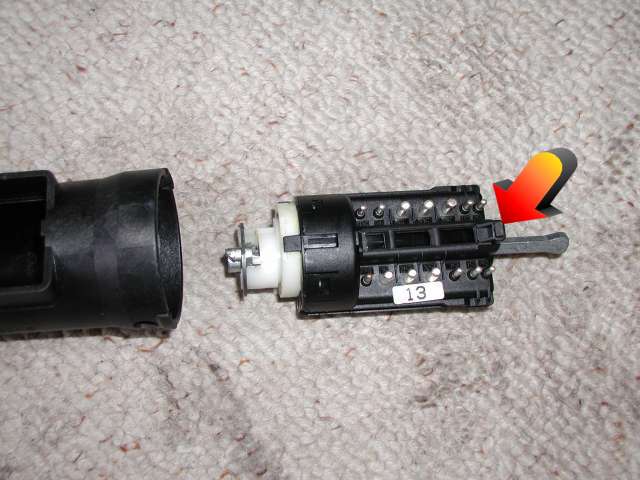
11. Replace electrical switch by pressing into sleeve until the locking detent locks into position, but note the end has to be rotated (screwdriver) and aligned with the steering lock bar that protrudes.
This was the most fiddly as the new switch took a little wiggling to get the alignment. Keep in position 1 when removing the switch and this made things a little easier. Then to replace, I changed to pos 0 but it didn't seem to matter. The white plastic cam (see picture above the last) needs to be removed from the old switch and placed on the new. Maybe it's available as a spare but I can't see it on the EPC so I suspect comes with the protective sleeve at 175GBP !!!!!
12. Replace key into lock and turn to position 1 (remember, the steering lock was left in pos 1). Replace protective sleeve assembly onto steering lock and repeat sequence above but in an opposite manor.
See the official guide attached, it may help.
Hope this is of use to some...
WARNING: Please don't blame me if it's not the same on your car or that by following this guide you trash your lock, I cannot be held responsible in anyway. Please use an authorised dealer if you feel it's not within your scope.
ALSO:
After writing this post I suddenly thought that this information could be used by criminals to help steel our precious cars, so please let me know your thoughts about removing it
-LeaUK
CategoryDiy