How to Refurbish Mercedes Switches
by 83mercedes
7/5/06
As you may or may not know, the switches in Mercedes vehicles can be troublesome after so many years, and replacements are not cheap. However, rather than buy new switches, I have created a detailed, step-by-step process to refurbish the switches at no cost and hopefully get your electronic accessories working again. The switches tend to get buildups inside which reduce the functionality of their mechanisms and sometimes make them stop working or only work after many tries. The following procedure shows how to remedy these problems after disassembling these fairly simple units, and gets your switches working like new. It applies to almost all switches used in Mercedes W123 and W126 chassis vehicles, and possibly other chassis vehicles as well.
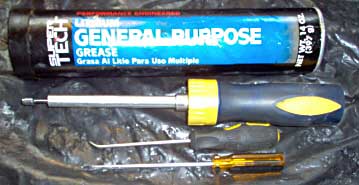
TOOLS REQUIRED: Clean work area, very small, thin-blade, flathead screwdriver (eyeglasses one would be good, or small electrical type), dental-type pick(s), appropriate grease (I used lithium), and a telescoping magnetic wand (not necessary, but helpful).
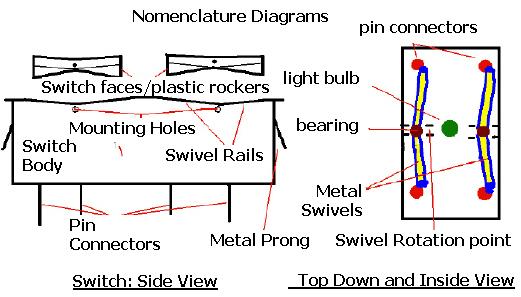
For ease of communication, I have constructed nomenclature diagrams with all parts in question labeled.
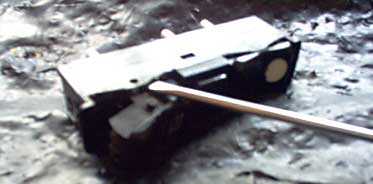
1. Remove the switch from its console. Whether the switch is in your shifter area, the wood up in the dash, or around your AC controls, the principal of removal is the same. The panel must be removed, either partially or completely, to allow you access to the underside of the switch. This varies for each panel and model, so I will not go into each procedure.
Once you have gained access to the bottom of the switch, reach up or look up under the switch. You will see or feel the two securing metal prongs, one on the forward and one on the rearward side of the switch.

Depress both prongs simultaneously and push up the switch from below. The switch should pop up and out easily. Now unplug the electrical connection and leave the connection hanging in the appropriate spot so you don't forget which plug it goes to.
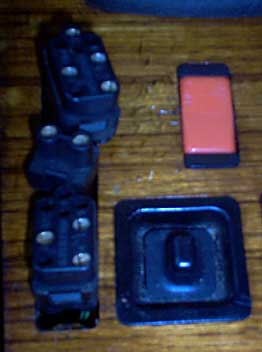
You now have the assembled switch body in hand.
2. Pop out the switch faces/plastic rockers. Slide the flat head of the small, thin screwdriver between the switch body and the plastic rocker to the side of the mounting hole in the switch body.
Gently pry out and up. Holding upright, gently repeat on the other side.
It should have easily popped out. Be careful not to the spill any of the internal components. If it is a window switch, repeat the procedure for the other rocker. Set the plastic rocker(s) aside.
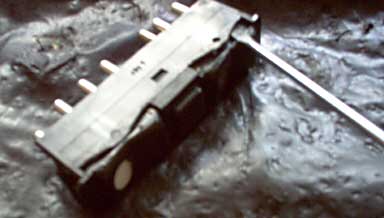
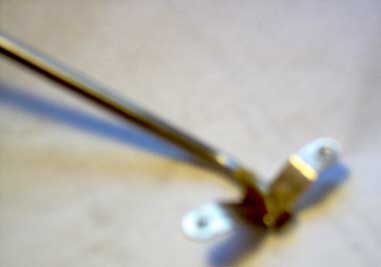
3. Tap out the ball bearings and electrical actuators/metal swivels. SOMEWHERE WHERE THERE IS NO RISK OF LOSING THE BEARINGS (don't ask how I know), upturn the switch and tap it gently on a hard surface until the two bearings and metal swivels fall out.
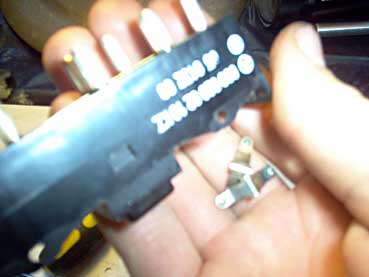
The swivels are the brass-colored, v-shaped metal actuators that will fall out.
Set all loose components aside. BE CAREFUL WHERE YOU PUT THEM! It's not fun crawling around on the floor looking for ball bearings, trust me. If you do lose them, a magnet can be helpful.
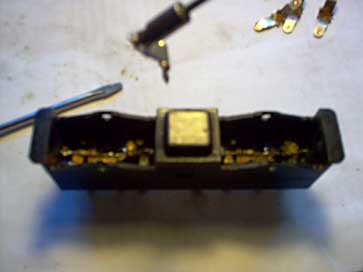
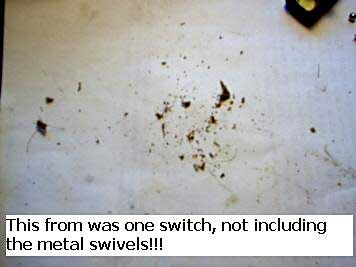
4. Clean the internal components and swivel rails of the switch. Now, if your switch is like mine were, there will probably be crap inside the body on your pin connectors, on the metal strips connecting your pin connectors to each other (if the switch has those), on the swivel rails, and just lying around in the body of the switch. I believe this stuff just filters in over the years and gums everything up. Maybe I had a slob for a previous owner. Regardless, get all fouling out, but CAREFULLY. Use your flathead screwdriver to gently scrape the swivel rails clean if they are dirty or grimy.

Use your pick(s) as a dentist would; to scrape off any offending material from hard to reach places.
THE NUMBER ONE CULPRIT IS THE TOP OF EACH PIN CONNECTOR INSIDE THE SWITCH. This is the point where the metal swivel hits and makes the switch go on or off, up or down, etc., when you press it.

IF IT IS GRIMY, IT MAY BE YOUR PROBLEM. Use the pick to carefully scrape the dirt, carbon, whatever it is off until you see clean metal, but not further. Periodically shake the switch upside down to get out all the debris you have dislodged. Once you are satisfied that the inside of the switch and the swivel rails are impeccably clean, move on.
5. Clean the electrical actuators/metal swivels and ball bearings. Typically, after 20 or so years of service, the grease that Mercedes put in the middle of these metal swivels for the ball bearing will gum up, get crusty, and impair the operation of your switch. Use a Q-tip or similar cleaning tool to get all the dirt, grime, and old grease off of the metal swivels. PAY SPECIAL ATTENTION TO THE ENDS OF THE SWIVELS.

These are what actually come into contact with the pin connectors and transmit the charge. Rub the ball bearings clean. All bare metal should be visible. A de-greaser may be necessary for especially stubborn buildups, although I found scraping with the flat-head screwdriver provided better results. When finished, set all components aside.
6. Grease the electrical actuators/metal swivels. Using your flat-head screwdriver, scoop up a small dab of grease and apply this to the middle of the metal swivel, where it comes together in the bottom of the "v" shape.
Use the grease sparingly; this is not exactly a high-stress bearing and excess will clot up and make it nasty again.
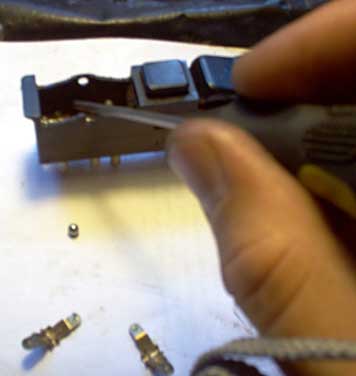
7. Reassemble the unit. This is where the magnetic wand helps. Using the magnetic wand, lower each metal swivel into the body of the switch until the bottom of the "v" rests in the actuator rotation points.
Use the flat-head screwdriver the separate it from the magnetic wand and lightly make sure it is in place. If you are without the wand, you could use very small pliers or simply drop it into place (though that gets frustrating). Once the metal swivels are in place, drop each ball bearing into the "v," where it should be sitting in its little dab of grease. Now that you have that positioned, take your switch face/plastic rocker and lower it evenly down into the switch body so that it rests on top of the ball bearings. Snap it into place. Test the movement of the switch. If something feels funny, remove the plastic rocker and check that everything is in place. Lower it back in carefully and straight down so that it engages the ball bearings.
8. Install the switch in vehicle. Orient the assembled switch into its original position and reattach the vehicle plugs to the pin connectors on the bottom of the switch. Slide the switch down into its spot. You do not need to depress the prongs.
Now your switch(es) should work like new! I've had great success with this procedure, and I hope you do too (mine were nasty, see.
Best of luck!
Discuss this DIY here.
-83mercedes
CategoryDiy