Replacing the Differential
on the 1983 300D (W123)
by DeliveryValve
3/3/07
After a long thought, I took the plunge with the 1984 300SD's 3.07 differential. There are several factors to this decision. First, I drive mostly within the city with a lot of stop and go. I love the acceleration I get on this car, so I don't want to mess with that setup at this point in time. Second, is the whining noise of the current rear end has become louder every week for the past month. Third, I only paid $40.00 for this differential so it is a cheap replacement. Fourth, to satisfy my original question 'Would an early w126 Differential fit on a W123? Lastly, I don't have to change out my speedo.
I documented the differential swap with some narration and pics.
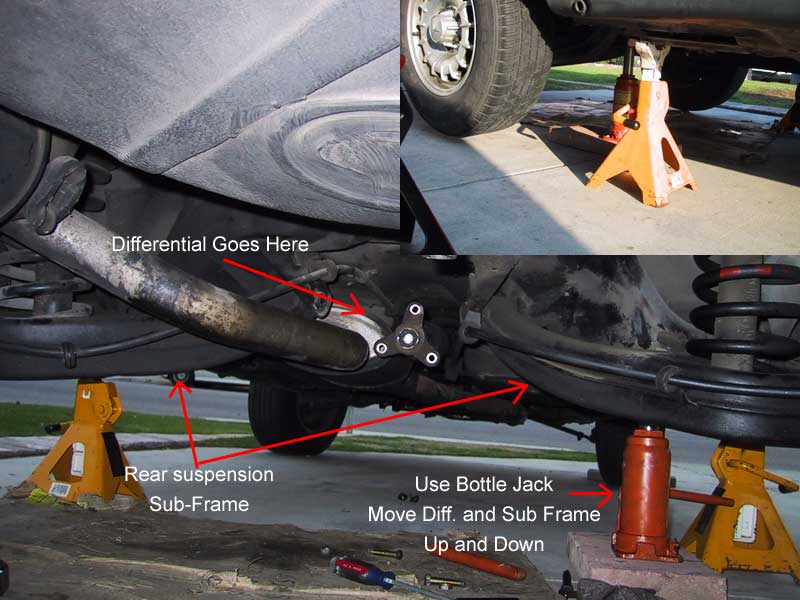
1. Chock front wheels, Jack up rear of car, put on jack stands on the body hard points, place a bottle jack on rear suspension sub-frame, (as noted on the first pic) and remove rear wheels.
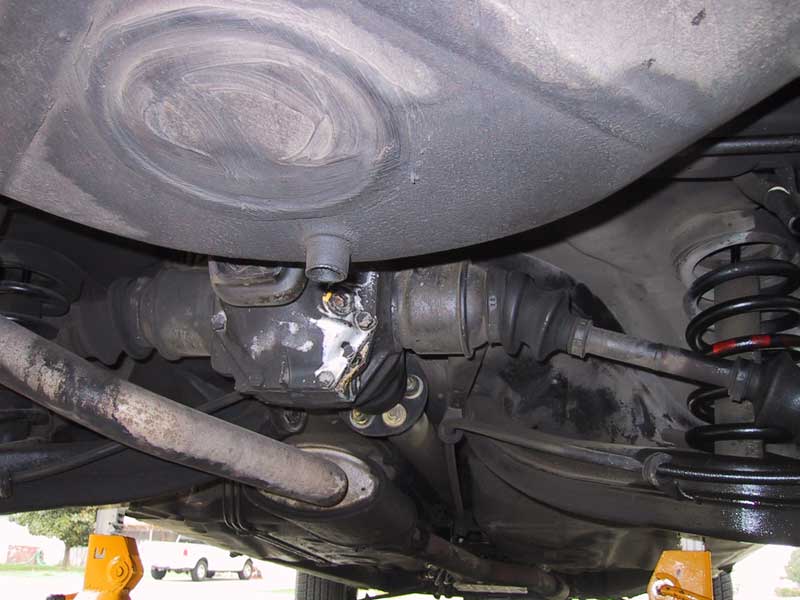
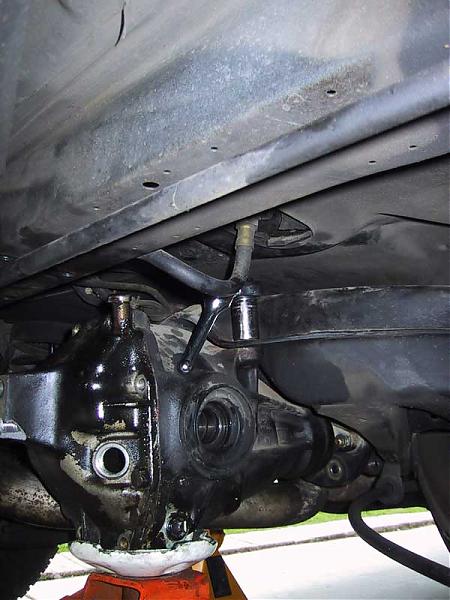
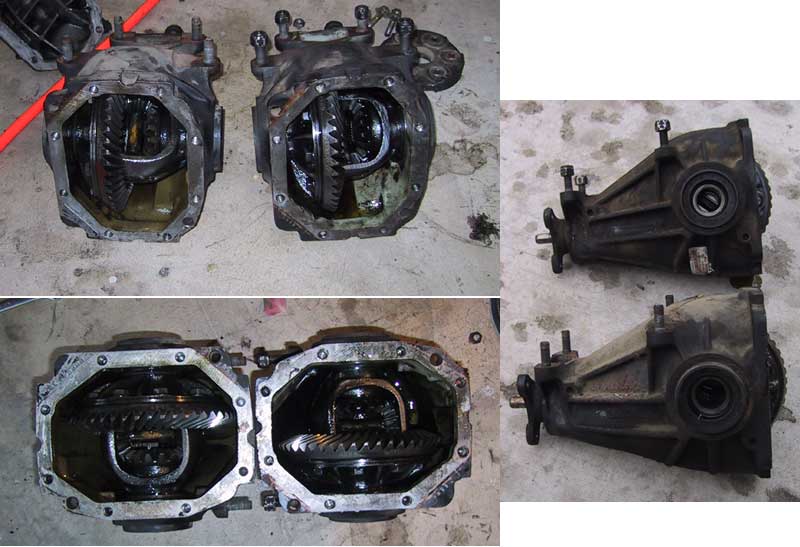
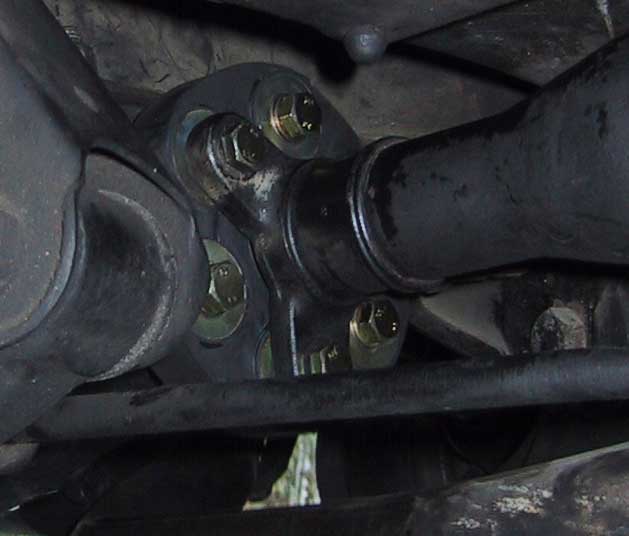
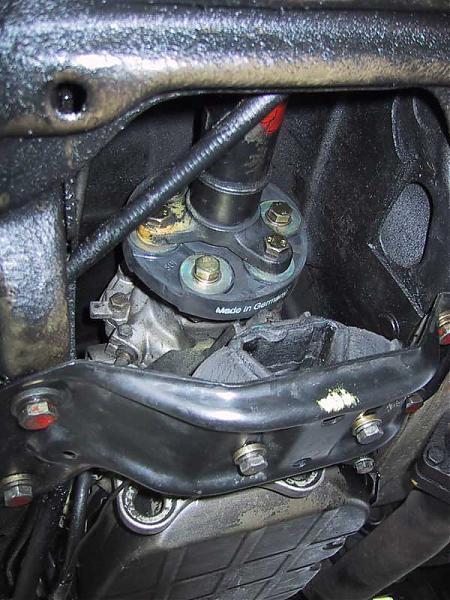
2. These next picture is my current 1983 300D 3.07 Differential prior to replacing my old axles.
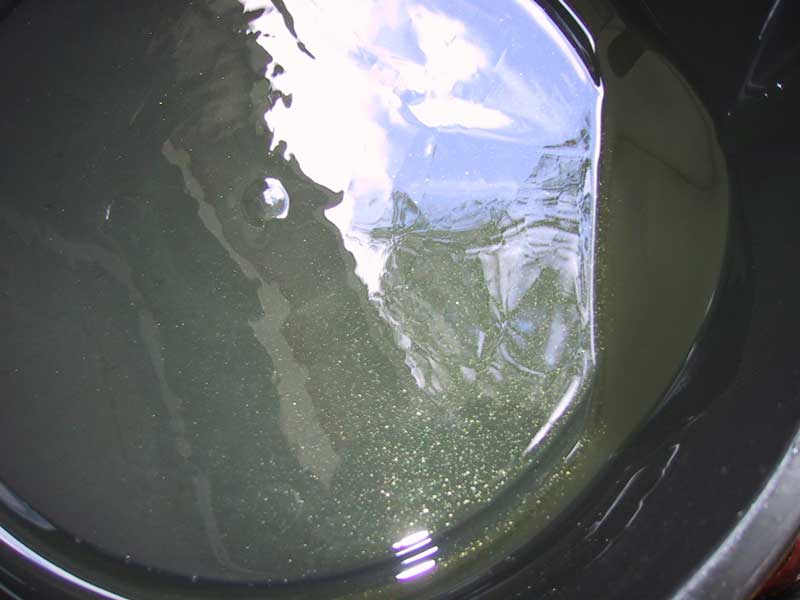
3. Drain the fluid using a 14mm Hex bit. I got a set of hex bits (12, 14, 17mm) for $10.00 at Autozone with a lifetime warranty. The bolt is most likely on there tight, so I used the hex bit with my impact wrench. You can use a breaker bar also. Here is a shot of the gear oil after 300 miles of use. See the metal shavings?!!?
This link talks about Gear Oil, Hex Bits and has a shot of my differential when I was changing out the axles originally.
Next, you have to remove the axles. One thread to note that has some great related information is from Jeremy5848. He has some good tips in removing and reinstalling the axles.
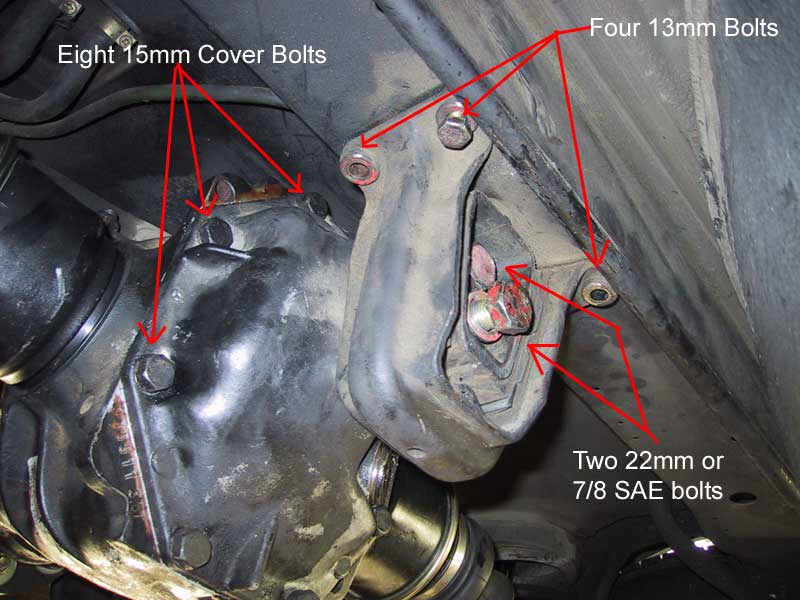
4. In order to get to the axles you will need to remove the rear mount and differential cover. There are two 22mm Bolts (I actually used a 7/8 sae socket) to the cover and mount, four 13mm to the mount and body, and eight 15mm cover bolts as shown in the pic. To get to the upper cover bolts, simply lower down the sub-frame using the jack.
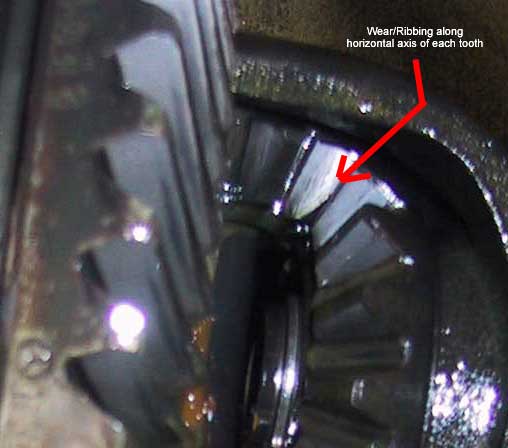
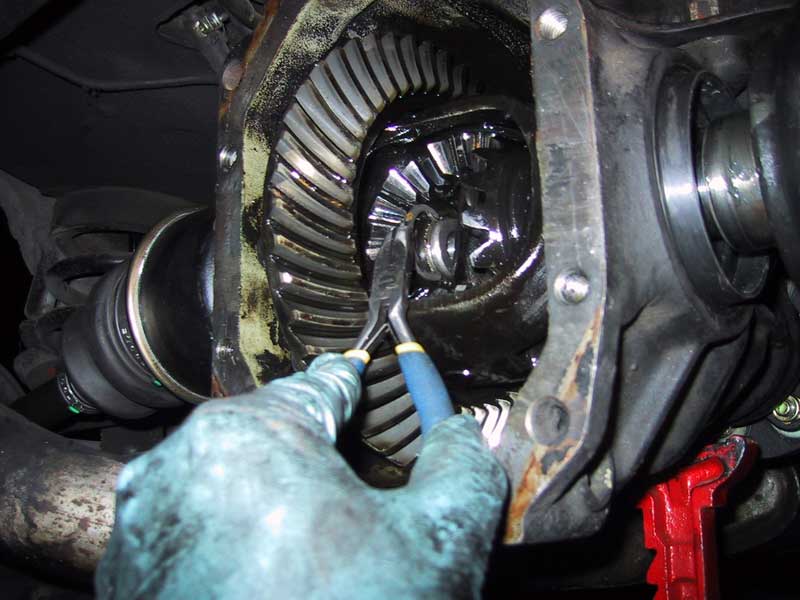
5. Here is a shot of my differential gear. The gear had these horizontal gouges on each tooth. I wonder if it is the cause of the whining sound?
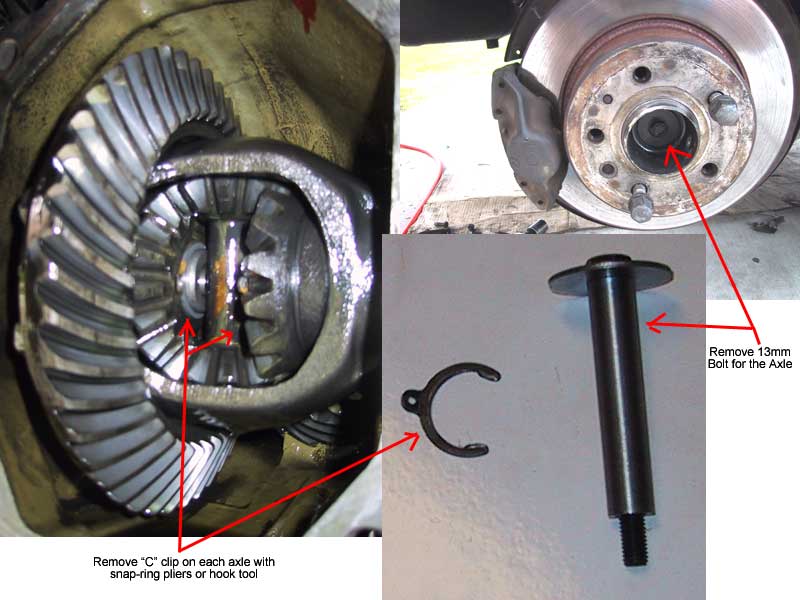
6. Next step in removing the axles is to remove the 'C' clips in the differential which hold the axles in place with a snap-ring plyers or a hook tool and the 13mm bolt on the hub of each wheel.
7. Drive the axles out of the hub using a thick rod and using a prybar on the other side.

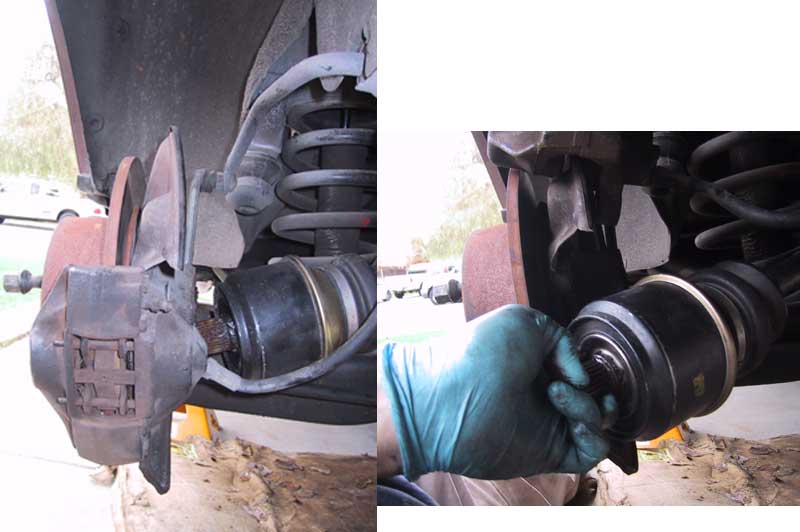
8. You will have to remove the caliper in order to get the axle out. Also, you will need to jack up the sub-frame/differential to its highest point and let the suspension drop to the lowest point in order to get the axles out of the hubs. It is a tight fit.
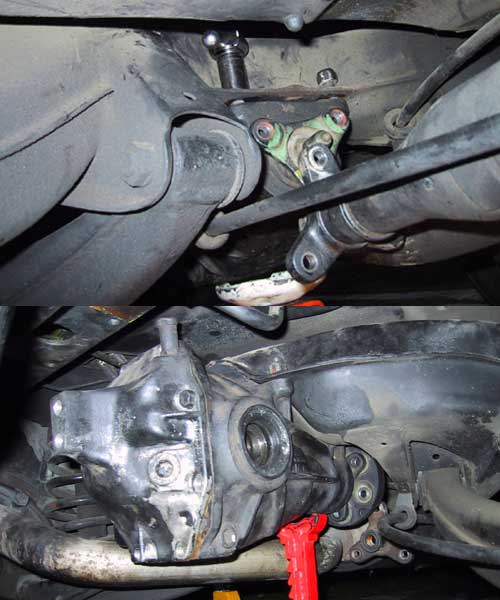
9. With the axles out, remove the 15mm bolts for the driveshaft support bearing. I used a 15mm swivel socket. This will allow you to slid the driveshaft towards the front once you unbolt it from the differential flex disk.
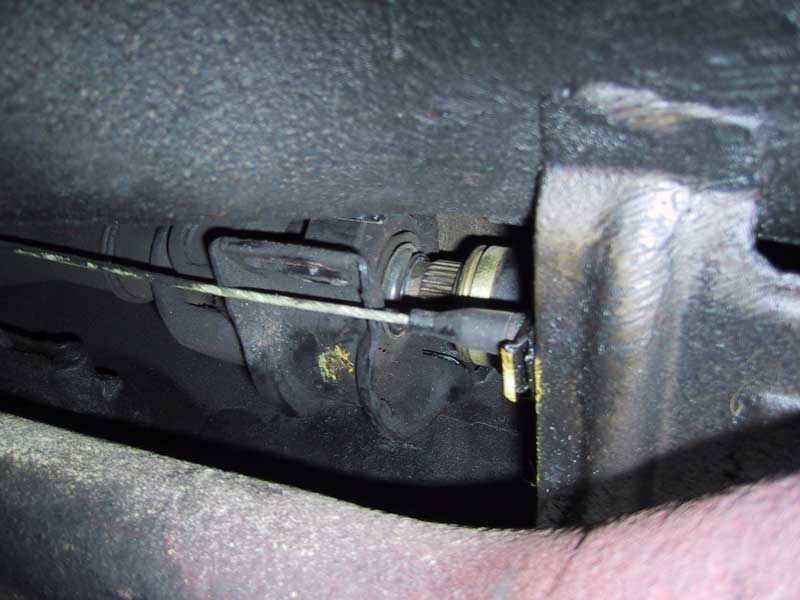
10. Remove the flex disk. There is a 15mm bolt and a 17mm nut. Use a prybar to separate the disk from the driveshaft.
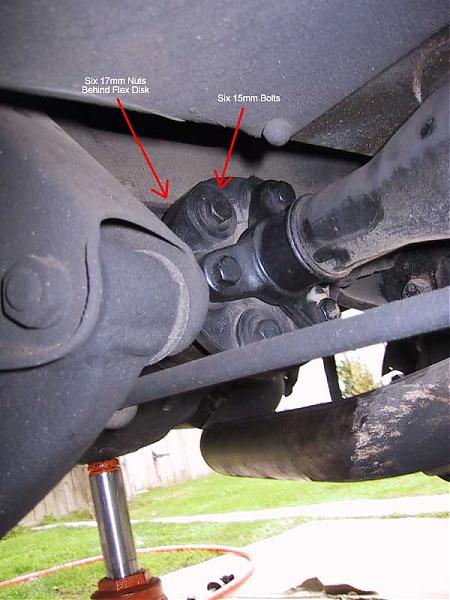
11. Here is a shot of myself removing the bolt of the flex disk with the differential out of the car.
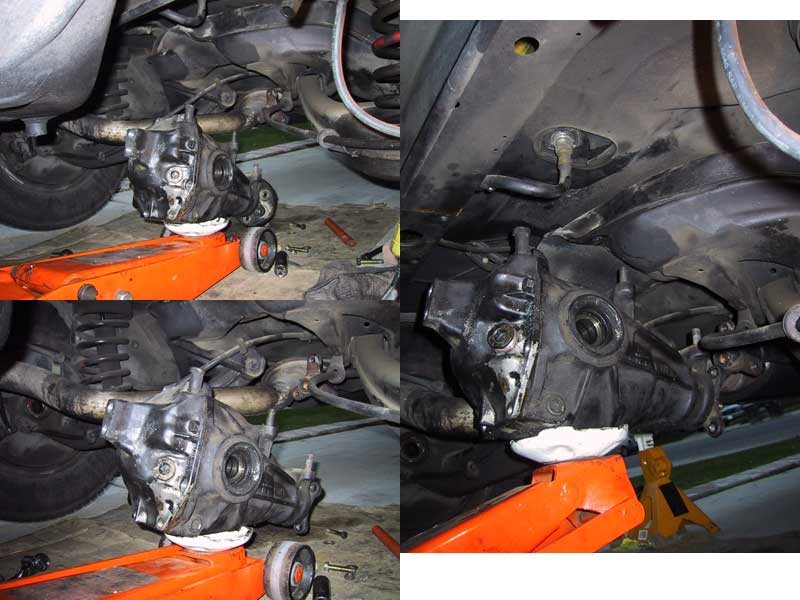
12. The differential is connected to the suspension sub-frame with four bolts/studs. The front bolts are in a limited space area.

13. The rear bolts are a bit easier to get at.
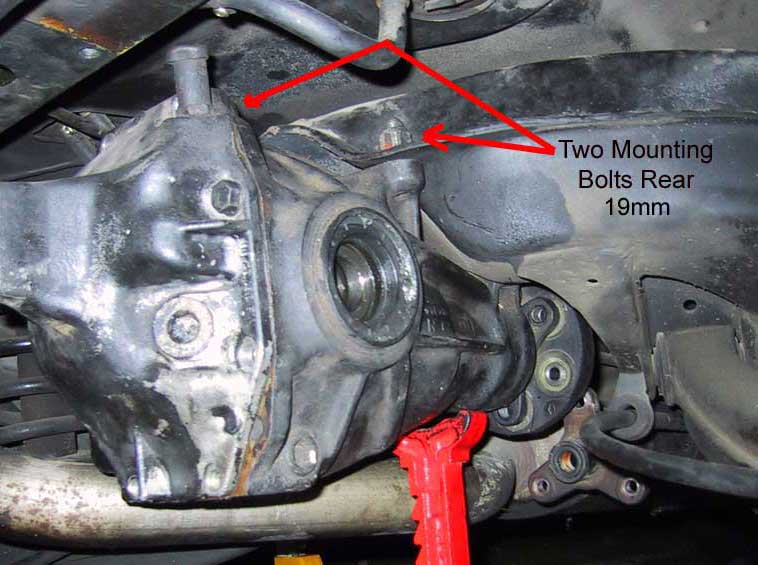
14. To get to them, I used a ½ inch drive 19mm deep socket, a swivel head ratchet and a cheater bar. My swivel head ratchet is actually a cheap Harbor Frieght 'stubby' set I purchased for 10 bucks.
15. Shot of the wrench on the rear bolts of the diff. I was fortunate enough to have a true California car.... No Rust! The bolts came off nicely.
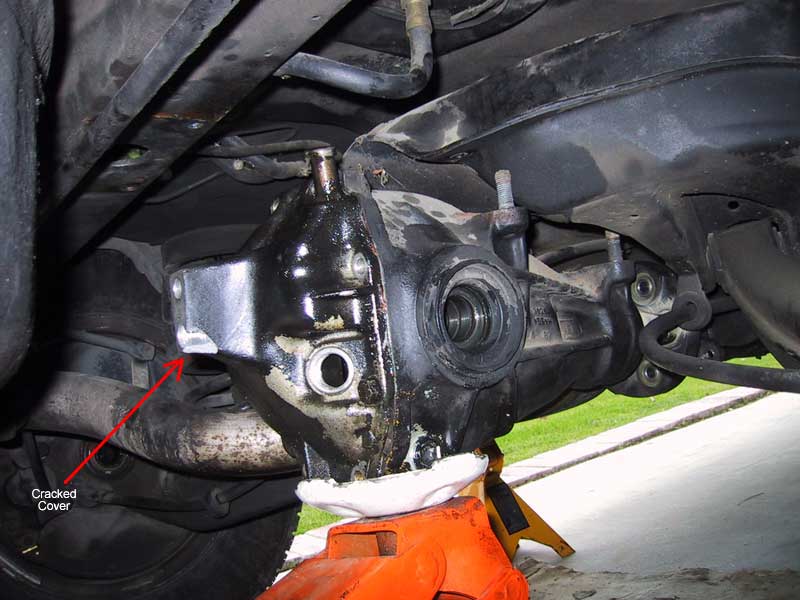
16. Down the differential goes. (notice the crack on the mount point. This cover actually came of the SD and I broke it while removing it from the car.. It was cross threaded and a b%$ch to get off!)
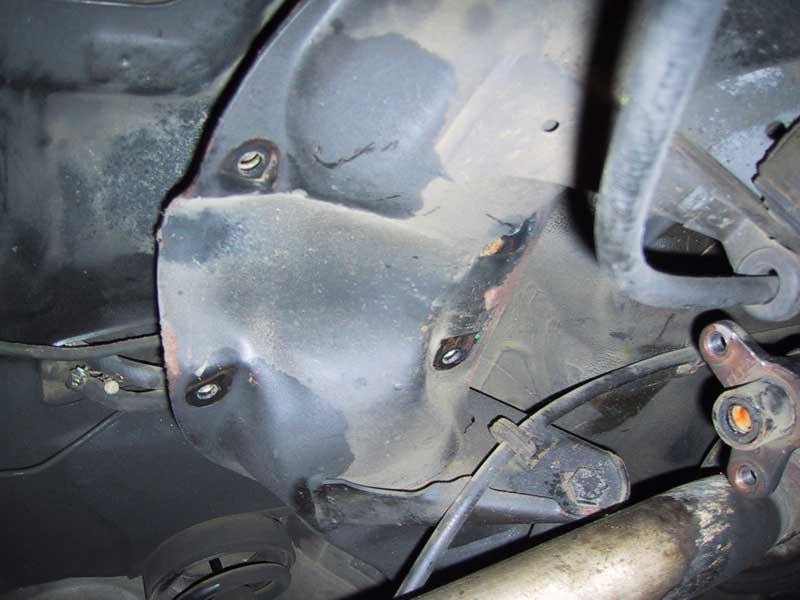
17. Shot of the Sub-Frame above where the differential goes and mounting points.
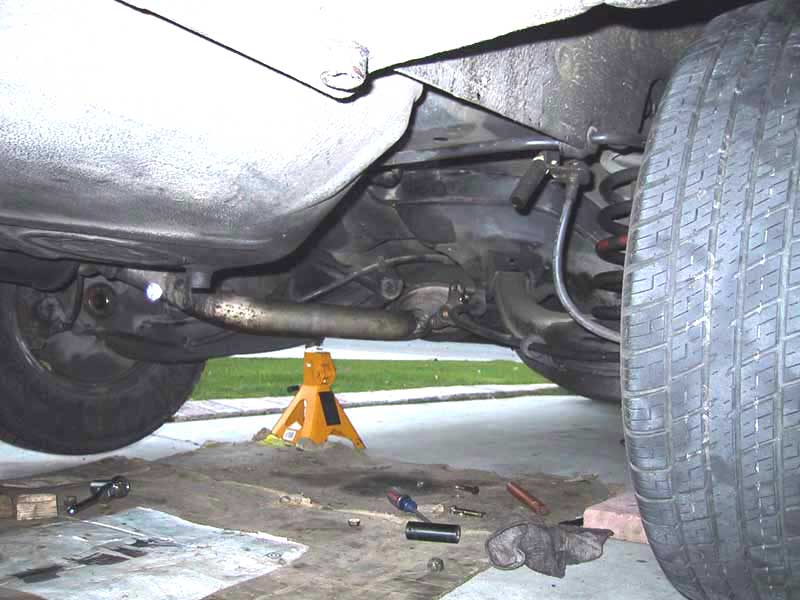
18. There is no axles or differential.
19. See pic, can you tell which differential is which?
What is the difference between the differential form the 1984 300SD and the 1983 300D?
Nothing! The housing is the same (PN#123 351 0101) and the Gears are the same (PN#123 353 0112 3.07).
(the one with the bolts on the four studs is the SD diff.)
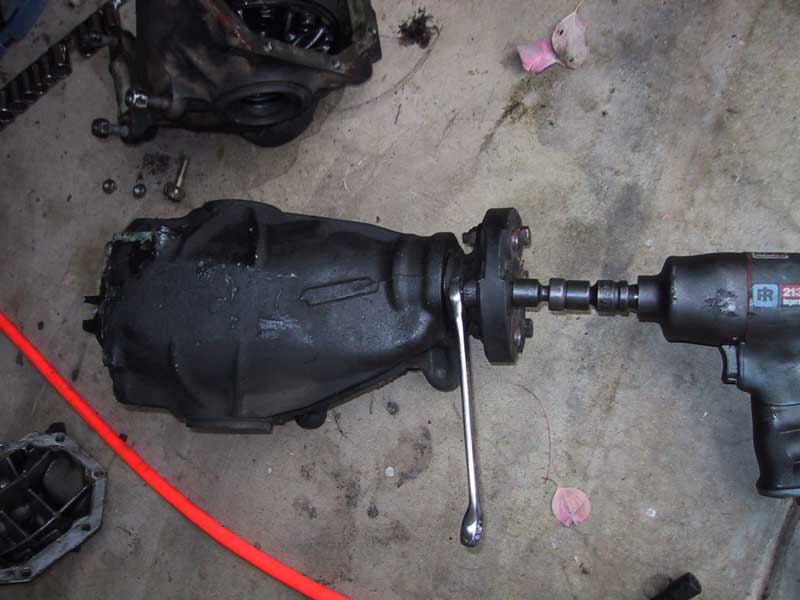
20. Up goes in the new(used) differential.
21. Tighten the four bolts "Guten Tight". There is no way you can get a torque wrench up there. So you will have to make sure it is on there tight!
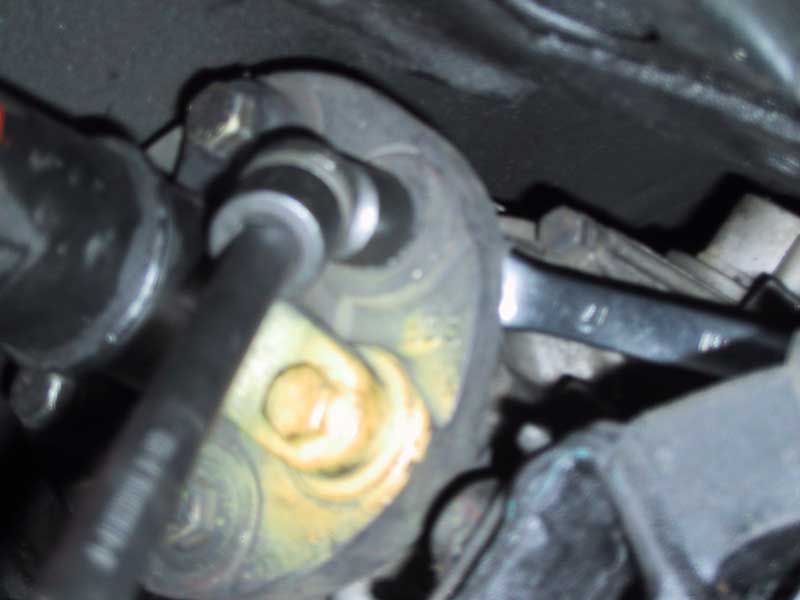
22. I am replacing the two flex disks. They are actually in OK condition with few minor surface cracks, but since one is out, I will replace them anyway because Diesel Giant scared the sh&$ out of me.
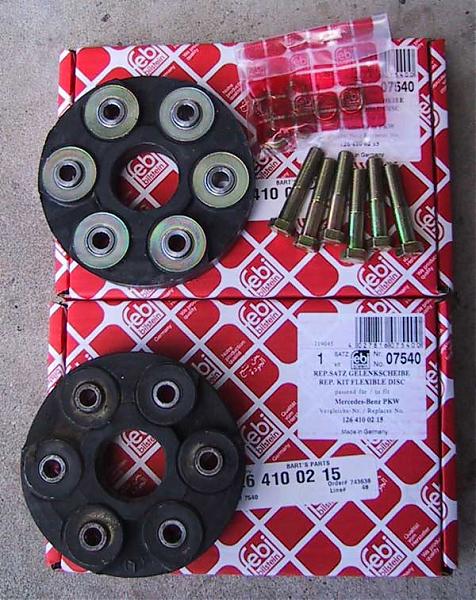
23. Check out this disk from the SD. Notice the cracks. That is bad news for potential damage!

24. Here is a shot of the new flex disk. Remember to torque the bolts down to 45nm.
25. I installed new differential axle seals. To get them out, I liked using a hook-like prybar from harbor freight. They worked extremely well. It required some pressure but not to the point I am killing myself. I paid under 10 bucks for a set of these.
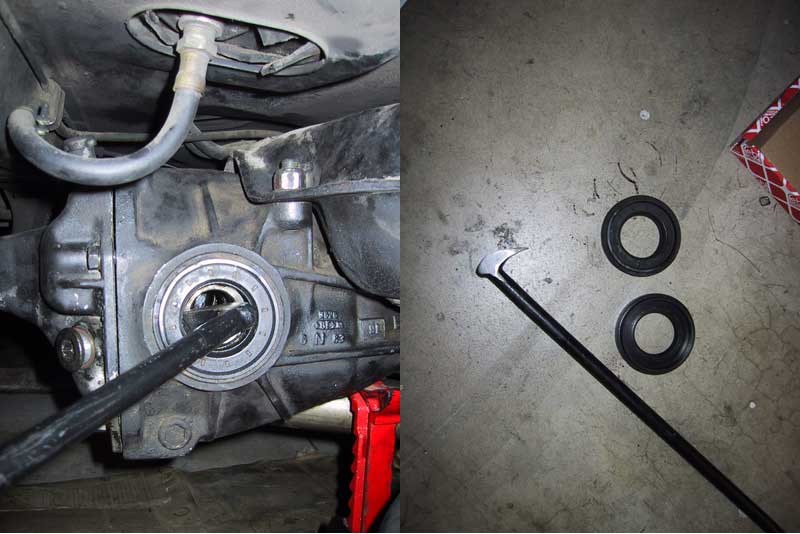
26. To install the seals, I like using a rubber mallet and a 3 lbs hammer. Put the mallet against the seal and tap with the hammer. Work your way tapping around it so the out edge of the seal is flush with the housing.

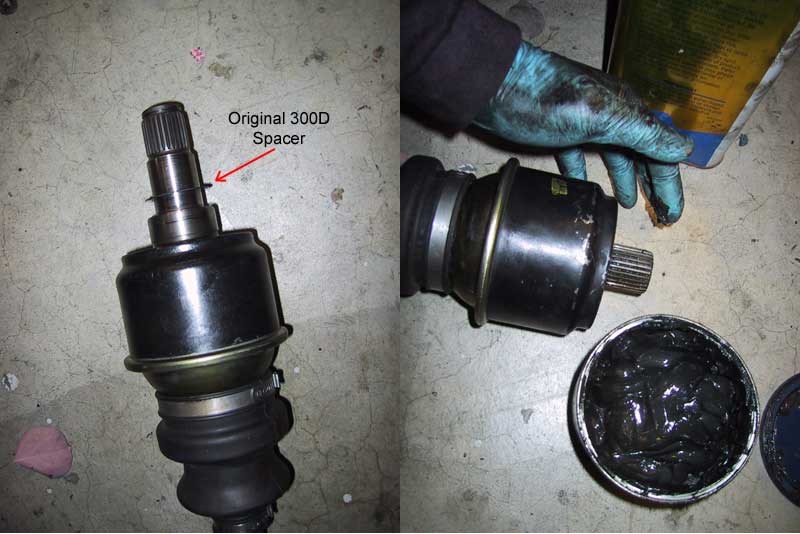
27. Once the seals are in place, install the axles. I used the original spacer and like to grease the 'wheel' ends of the splines so it can slide in the hub easily.
28. Slide the axles in the differential and hubs (reverse order of removal procedure)
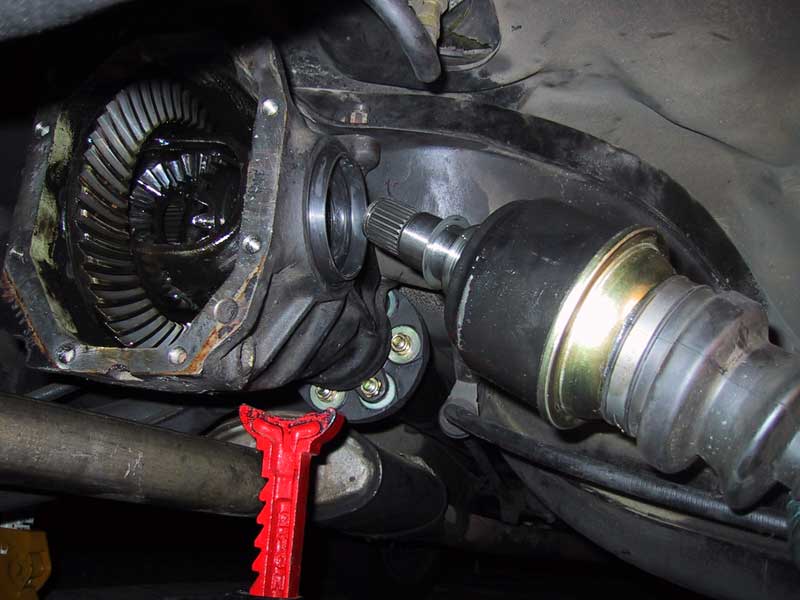
29. Install "C" clip. The spacing for the "C"clip was perfect!
After that reinstall the 13mm bolt on the hub.
Reinstall calipers with thread locker.
Reinstall differential cover and mount. Use a good silicone sealant for the cover and make sure you use thread locker on the mount to body bolts.
Reinstall tires and lower the car.
Add in differential fluid of choice and you are ready to go!
The result is this differential is SSOOOO much quieter then the original and it actually wasn't that bad and a fun project to do.
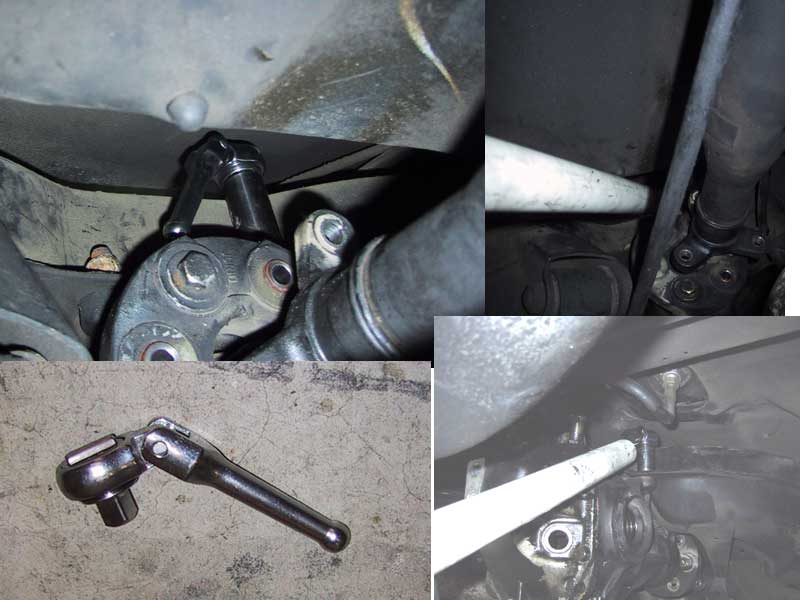
Since I had the drive shaft center bearing loosened, I went ahead and replaced the front Flex Disk.
1a. You may have to loosen the driveshaft sleeve nut just before the center bearing so you can slide the driveshaft forward.

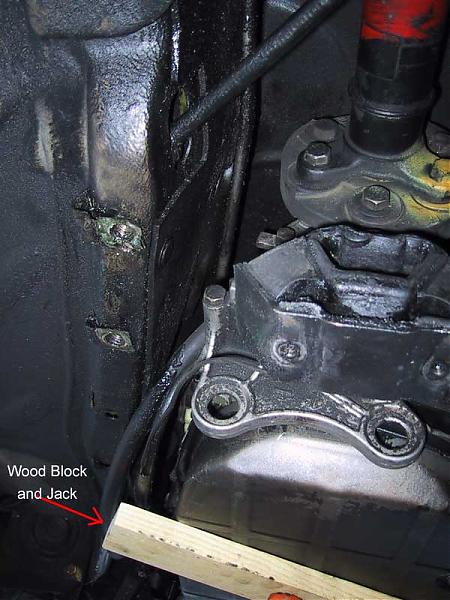
1b and 2. There isn't too much room to work on the Flex Disk. You will need to remove the transmission mount. First support the transmission by placing a block of wood between a jack the transmission fluid pan. Then remove the four 17mm mount bolts and 13mm bolt. Remember to mark the position of the driveshaft flange relative to the transmission flange.
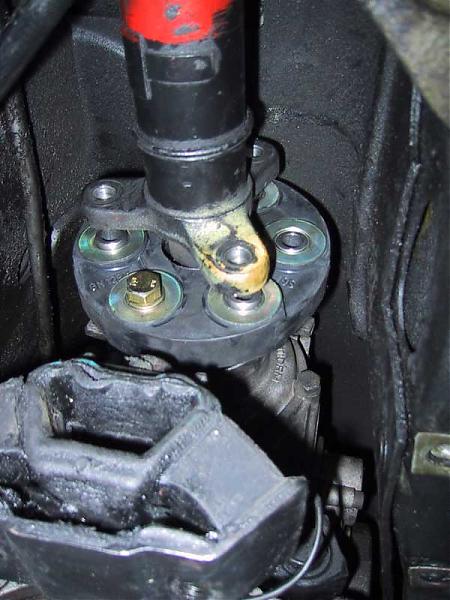
3. In order to get at the Flex Disk bolts, I used a 15mm swivel head socket and a 17mm box open end wrench. After removing all the bolts, use a prybar to separate the disk.
4. Install new flex disk with driveshaft flange in the same position as noted by the mark.
5. Reinstall all mounts and tighten driveshaft sleeve. Job is finished.
Discuss this DIY here.
-DeliveryValve
CategoryDiy