I made sure the seal was fully seated and square with the crank.
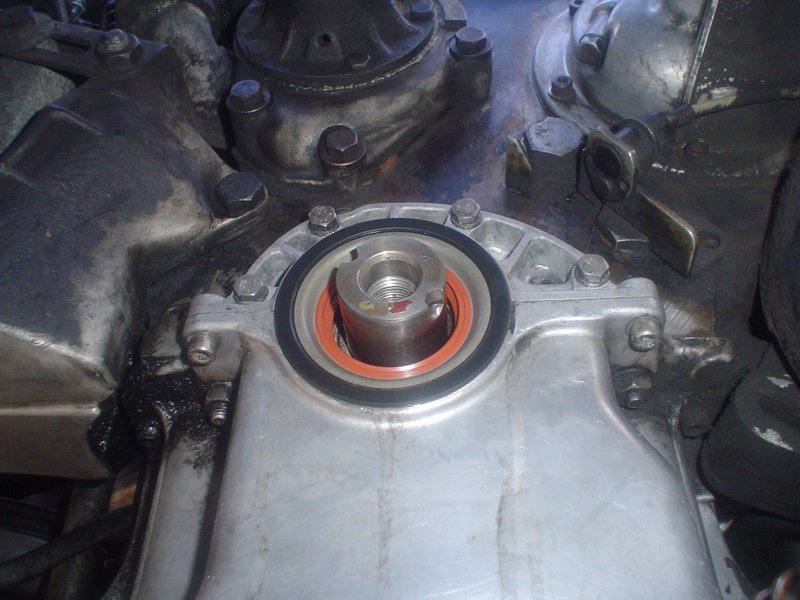
After the seal was on, I lightly greased the crank and tapped on a new spacer ring using part of the PVC union. I put a good amount of grease on the outside diameter of the spacer to help it slide into the seal without tearing it. This type of hammer without the claw at the other end is the way to go; you get more swinging room and if you need to pull nails, that's what a crowbar is for. I stopped tapping on the spacer when the PVC tool touched the seal as I didn't want to damage the seal lip. From there I tapped it in the rest of the way with a flatblade screwdriver.

The harmonic balancer gets placed back on the crank (I used a very faint amount of grease, but any large amount and it could possibly cause the balancer to rotate on the crank during operation). Position it with the punch marks matching and the bores for the pins as closely aligned as possible. The crank bolt can be used to press it into place. Remove one or two of the cupped washers if necessary to get enough threads to start the bolt. It is a good idea for the bolt to be as clean as possible and with a light amount of grease on the threads. Use a socket extension wedged between the balancer and the upper oil pan to keep the crank from turning. I have read of people heating the balancers in the oven at 250 degrees Fahrenheit to get them to slide onto the crank, but this seems overkill.
Tighten the balancer onto the crank until the bores for the pins are a good ways into each other. Chances are they will not be perfectly aligned with each other, so using an extension or block of wood, tap on one of the cutouts in the balancer (without the extension wedged and the crank free to turn) to get it to rotate on the crank so that the pin bores line up. It may take sharp blows to move it a good distance. When the bores look perfectly aligned, go back to pressing on the balancer some more and recheck. You want the bores to be perfectly aligned when the balancer is tightened fully on the crank. The slightest misalignment will cause the pins to not go into place without shaving off too much metal.
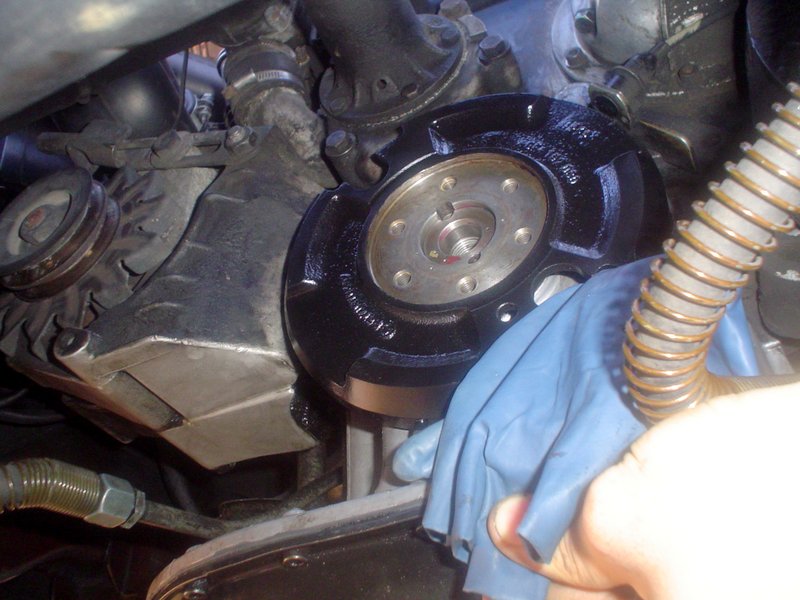
Once you are absolutely sure that the bores are perfectly lined up on both sides, carefully tap NEW pins into the bores. Take your time and make sure they go in straight. These are an interference fit and there will probably be small metal shavings that come out. Once they are fully tapped into place, they will set about 1mm above the balancer face.

Using a rotary tool, carefully grind the excess material off of the pins until they are flush with the balancer face. Be careful as you could realistically grind too much material off of the balancer very fast. Alternatively, you could shorten the pins before driving them in, but you would have to be careful to not mushroom the heads by hitting on them too hard.

__________________
Stop paying for animal enslavement, cruelty, and slaughter. Save your health and the planet. Go vegan! I did 18 years ago. https://challenge22.com/
DON'T MESS WITH MY MERCEDES!

1967 W110 Universal Wagon, Euro, Turbo Diesel, Tail Fins, 4 Speed Manual Column Shift, A/C
1980 W116 300SD Turbo Diesel, DB479 Walnut Brown, Sunroof, Highly Optioned, 350,000+ Miles