

|
|
|
|
|
|
|||||||
|
|
LinkBack | Thread Tools | Display Modes |
|
#1
 09-10-2008, 03:53 AM
|
|||
|
|||
|
How-to: Get the rear foglight(s) working on a US w123 (links to photos)
Hey all. A while back, I decided to try to wire the fog lights on my '81 300D (US model) to work more like a Euro model. Here's a link to that project: Fog light wiring modification (US wiring to Euro wiring)
I continued to mod my car, and decided that I'd might as well try to get the rear foglights working on it. Anyway. I was quite successful in getting the rear fog light working on my '81 300D, right down to the indicator light in the headlight switch. Here's how I did it! As usual: If you decide to take on this project on your own car, you are doing so at your own risk. Please look into your local laws to see if such a modification is legal in your area. Tools/supplies needed: -Electrical diagram -Phillips screwdriver (magnetic tip is REALLY handy here) -Flat head screwdriver -7mm nut driver -24mm socket w/ ratchet -Wire crimpers -Wire strippers (mechanized ones are a plus) -M4 x 6mm screws. Qty: 2 (good idea to have more, in case you drop/lose some) -M4 lock washers. Qty: 2 (good idea to have more, in case you drop/lose some) -Good quality electrical wire (I used 14-gauge). -Ring terminals. Qty: 3 Use correct size for M4 screws, and the wire you'll be using. -Electrical tape. -Soldering iron and solder. -Male and Female "bullet" electrical connectors (I got these from a junkyard 300TD) -Bulb socket for rear lighting bulb holder. Qty: 1 or 2, depending on how you want to do this (I got these from an abandoned 240D. You can also find these on ebay in a "brake light upgrade" package.) -A Sylvania 2721, Osram 6.5V 1.5A (or equiv.) bulb. (This is the same bulb as used in our instrument cluster lighting.) -Sylvania 7506, Osram 12v 21w, (or equiv.) bulb. Qty: 1 or 2, depending on how many rear fog lights you want to have. -Some patience, and perhaps a good friend to lend a helping hand. Step 1: Disconnect battery (no pic, sorry...) Step 2: Remove driver's side knee bolster. It is held in by 3 screws near the top, and 3 plastic screws on the bottom corners (no pic, sorry...) Step 3: Remove headlight switch. You'll need to remove the knob first - simply give it a solid tug, it should come off. Use a 24mm socket on the big nut that holds the switch in place. 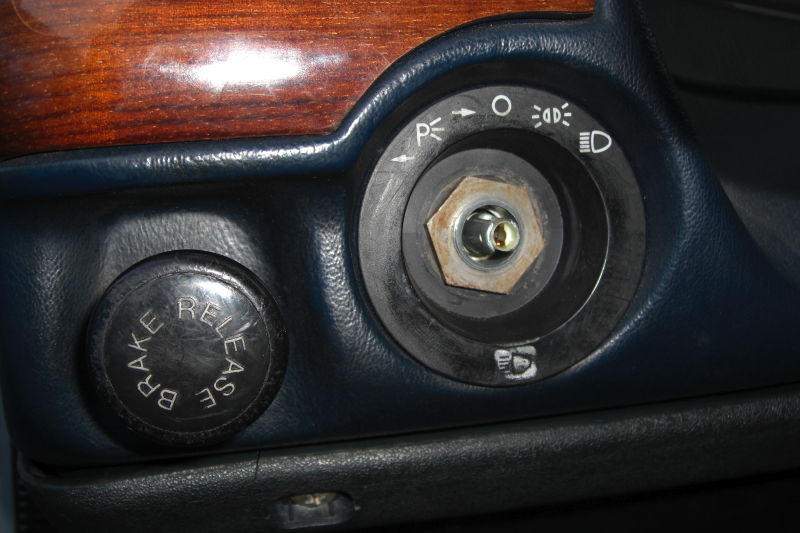 Step 4: Remove driver's side floor mat/carpeting and foot rest. 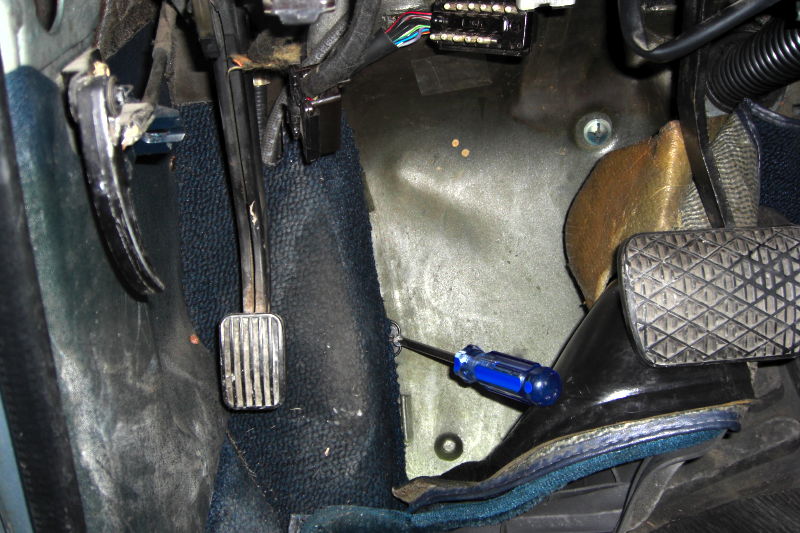 Step 5: Locate wire harness for the rear lights. Remove wire harness connector from its bracket by pulling it towards the rear of the vehicle until it stops, then pull it towards the passenger side to release it from the bracket. 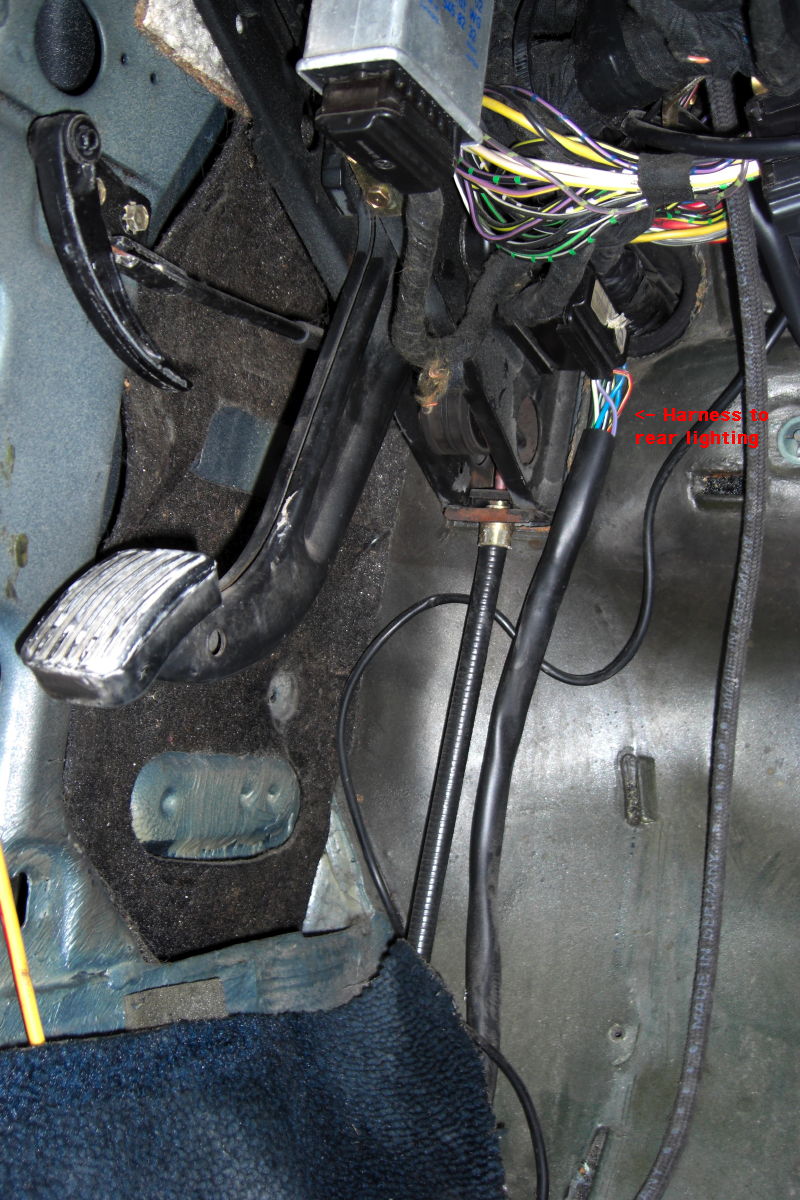 Step 6: Separate the two connectors. Use a flat head screwdriver to remove the caps from the connectors to expose the wires inside them. I will refer to the tail light side of the connector as "rear", and the headlight switch connector as "front". On the rear connector, we'll be removing the white/green wire from the male bullet connector (or pin) which it shares with a gray/purple wire in location #9. We'll solder the white/green wire to its own male bullet connector, and put it in location #11. Euro models have the wire for the rear foglights in location #11, so that's why I chose to relocate the white/green wire there.  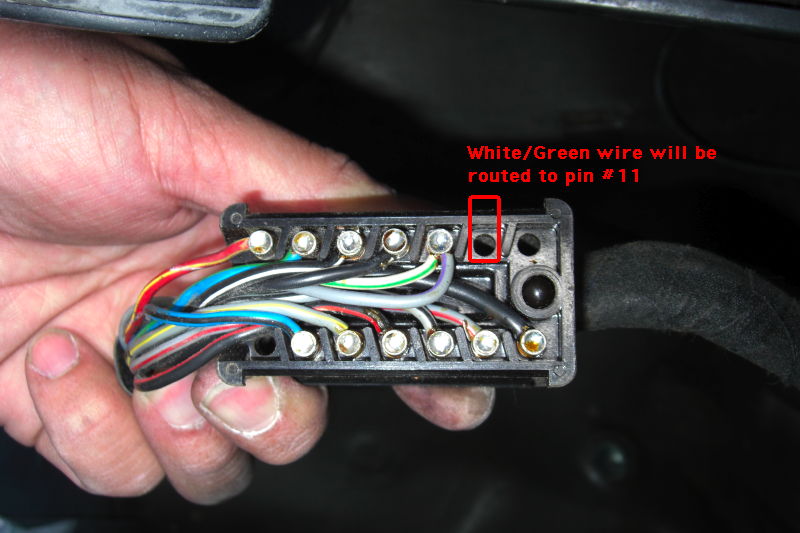 I used the pliers only to hold the bullet connector while I was desoldering the wires from it.  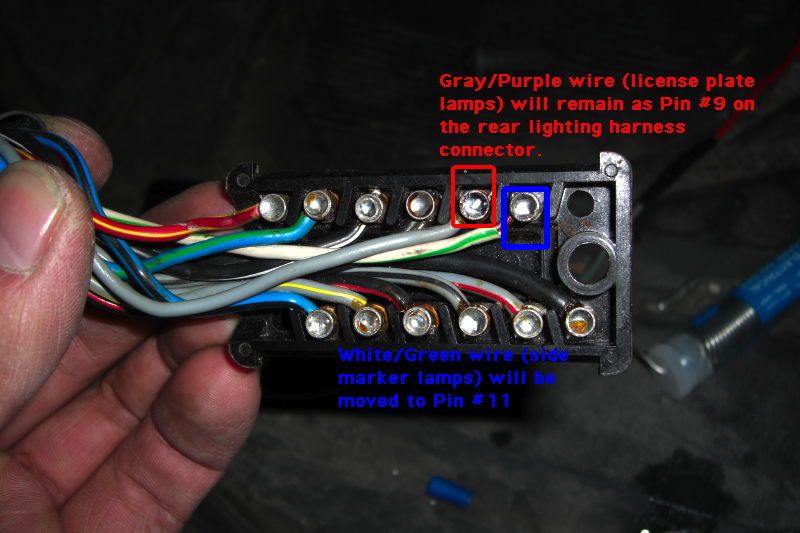 Step 7: Solder a female bullet connector (pin) to a new wire. This wire will run from the "front" half of the wire connector to the NS terminal of the headlight switch. Cut it to length, and use a ring terminal on the opposite end. Place the bullet connector in location #11 of the front connector. The wire I used was red.  Step 8: Run the new wire (from the previous step) to the headlight switch, and screw the ring terminal into the NS terminal. You may need to disconnect a wire or two on the headlight switch to gain access. 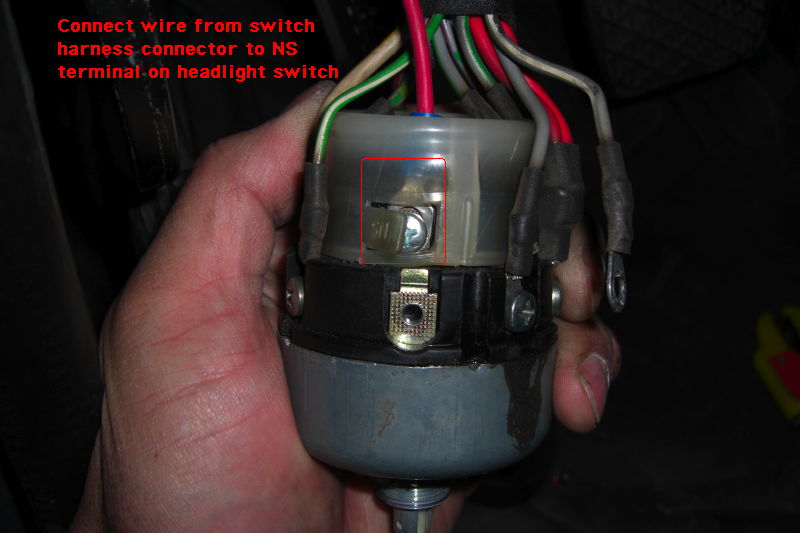 Step 9: Run a ground wire to the headlight switch, terminal 31. This will be the ground source for the indicator light. I used a brown wire to keep it consistent w/ the other ground wires on the car. I grounded the wire using the hold down bolt (use 7mm nut driver) for the warning buzzer. Secure the wires, as needed, to keep them away from the pedals, steering column, etc. 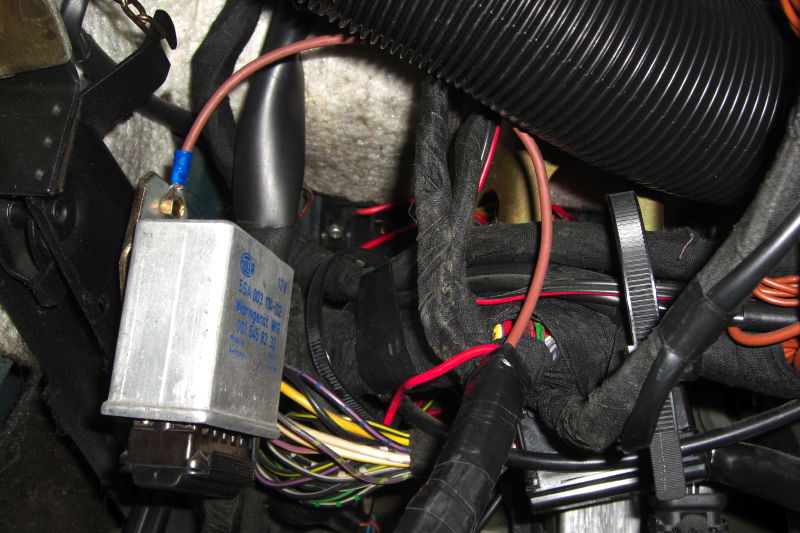 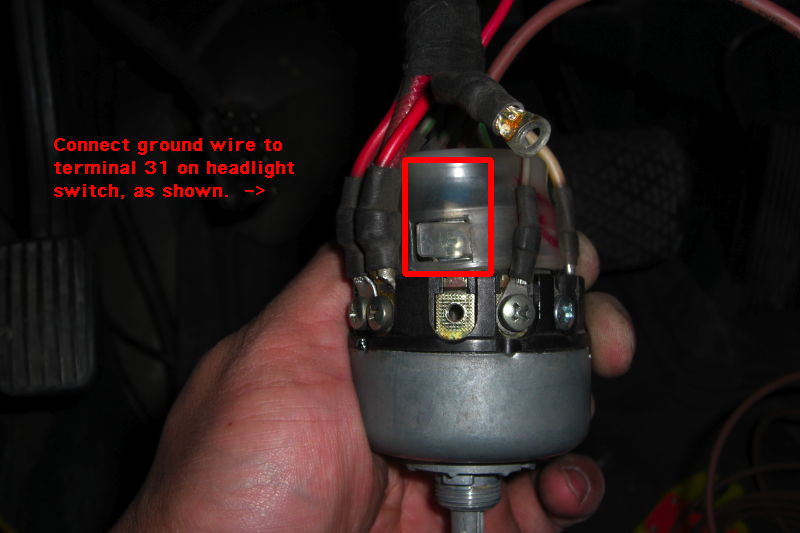 Step 10: Snap the covers back on to the two halves of the wiring connectors. Connect the two halves together, and place it back on its bracket. (sorry, no pic...) Step 11: Reinstall the headlight switch, knee bolster, and floor mats. Install the indicator bulb (Sylvania 2721 or Osram 6.5V 1.5A, or equivalent) in its socket on the headlight switch, then reinstall the headlight switch knob. You're done with the under dash wiring! 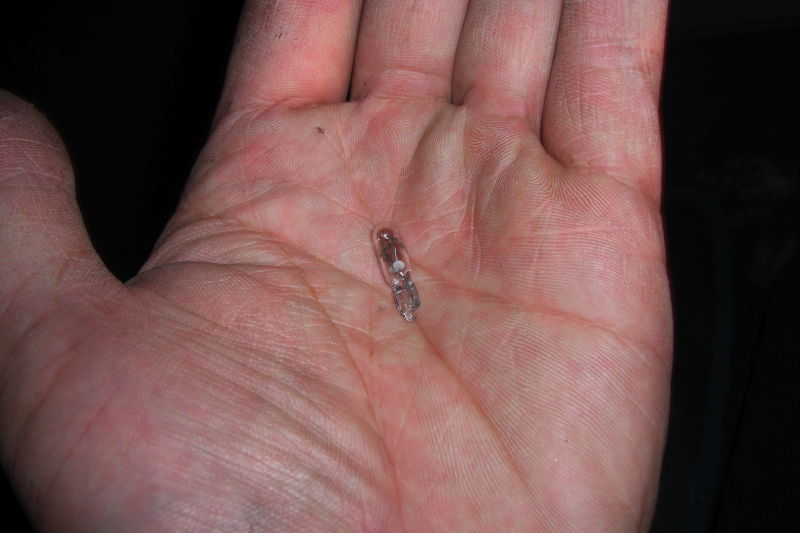 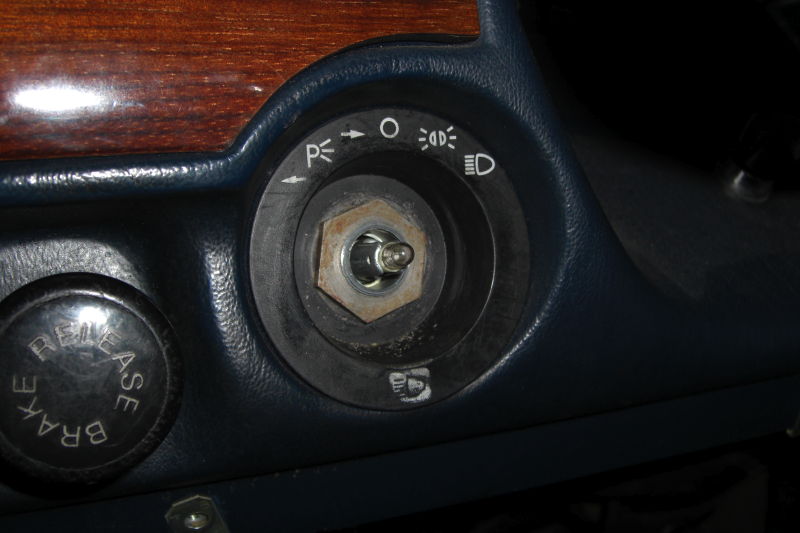 Step 12: Open trunk, and remove/unplug the left side tail light bulb holder. It is held in with two round plastic knobs. Carefully unsnap the metal bulb holder bracket from the plastic piece, to expose the bulb sockets and wiring. 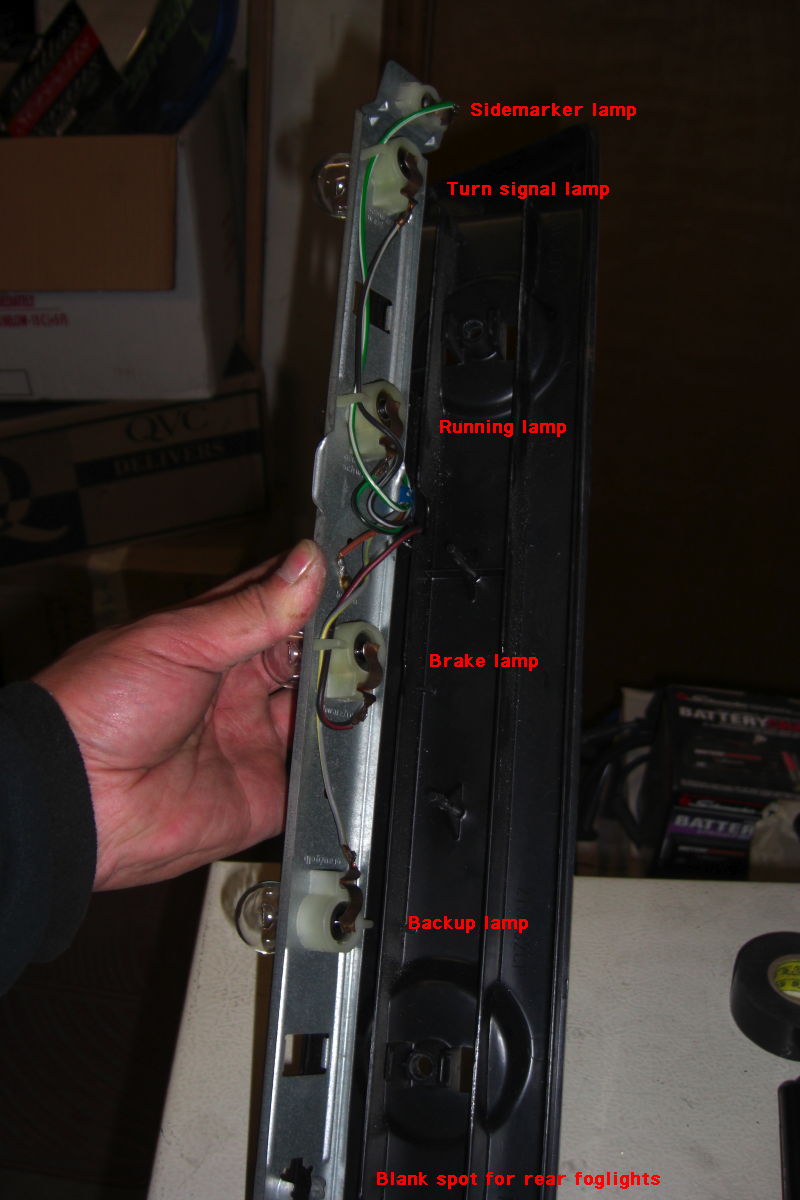 Step 13: Snap in a bulb socket in the empty rear fog light hole. Desolder the green/white wire from the sidemarker bulb socket, then run this towards the new bulb socket for the rear fog light. You might need to extend this wire, as mine was too short to reach the rear fog light socket. Solder the wire to the new rear fog light socket. 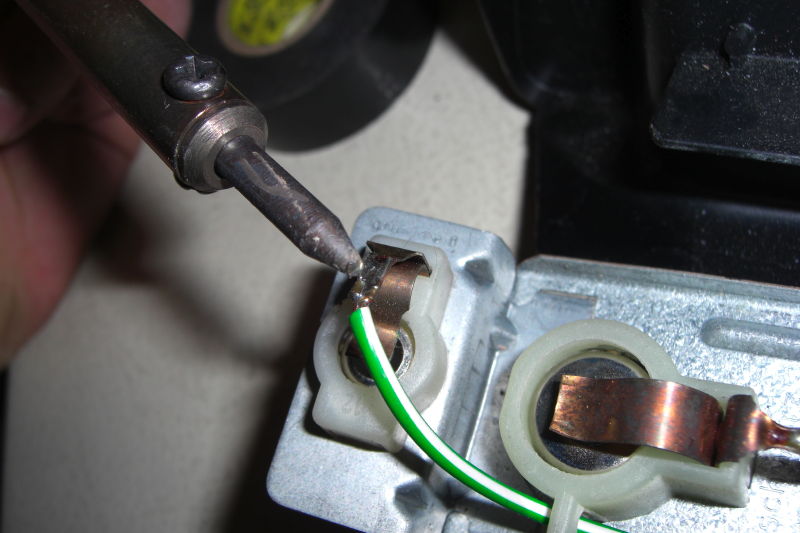 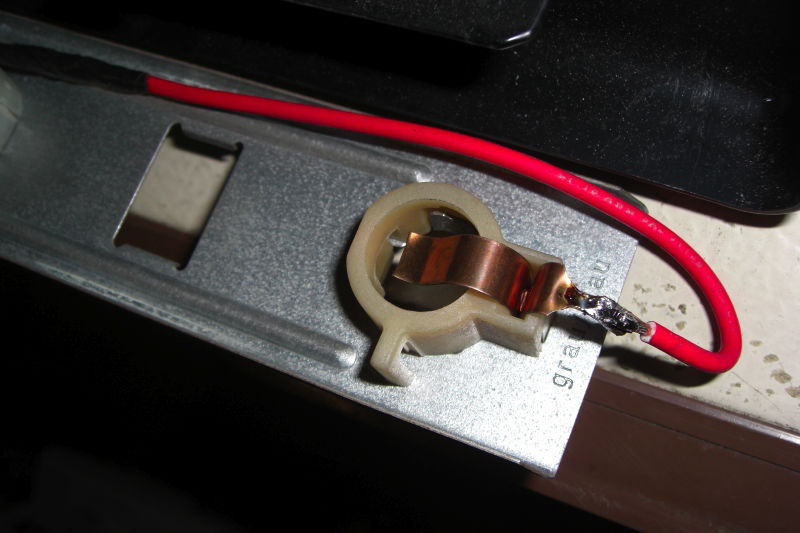 Step 14: If you want the sidemaker bulb to continue working (for legality or safety reasons), you will need to solder a jumper wire from the sidemarker bulb socket to the running light socket. Omit this step if you have Euro tail light lenses. I used a black/red wire for this. 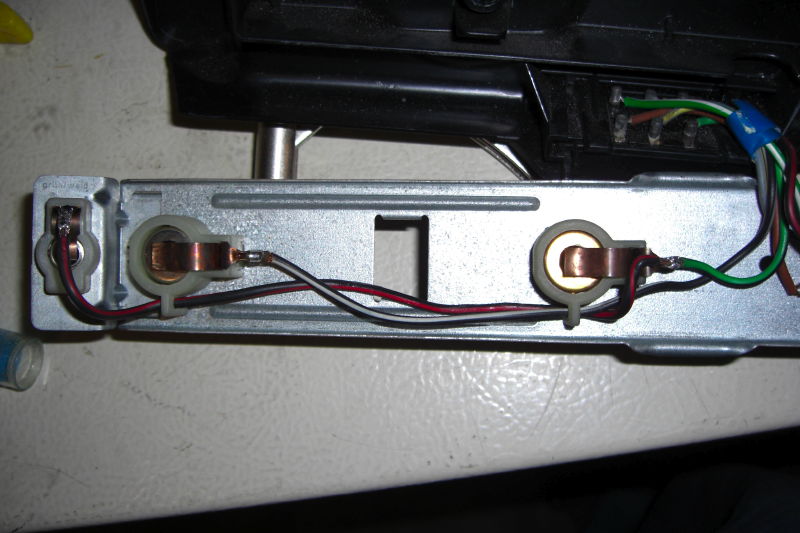 Step 15: Reassemble the two halves (metal/plastic) of the tail light bulb holder. Install a new bulb (Sylvania 7506, Osram 12v 21w, or equivalent) in the new rear fog light bulb socket. Reinstall on vehicle (sorry, no pic...) Step 16: Repeat Steps 12-15 on the right side. If you choose not to have a rear fog light on the right side, you MUST desolder the green/white wire from the sidemarker and isolate it. The green/white wire no longer serves as the sidemarker wire, it is now the rear fog light bulb wire. Step 17: Plug the battery back in, reset your radio/clock, and test the rear fog light for functionality! Note: I wanted to have two rear fog lights, but I accidentally broke the bulb holder for the right side. So for now, I'm just running the rear fog light on the left (driver's) side. 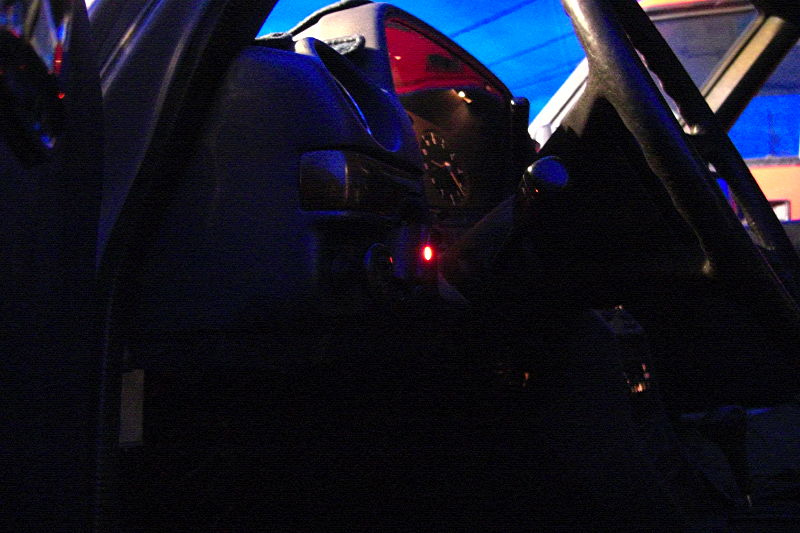  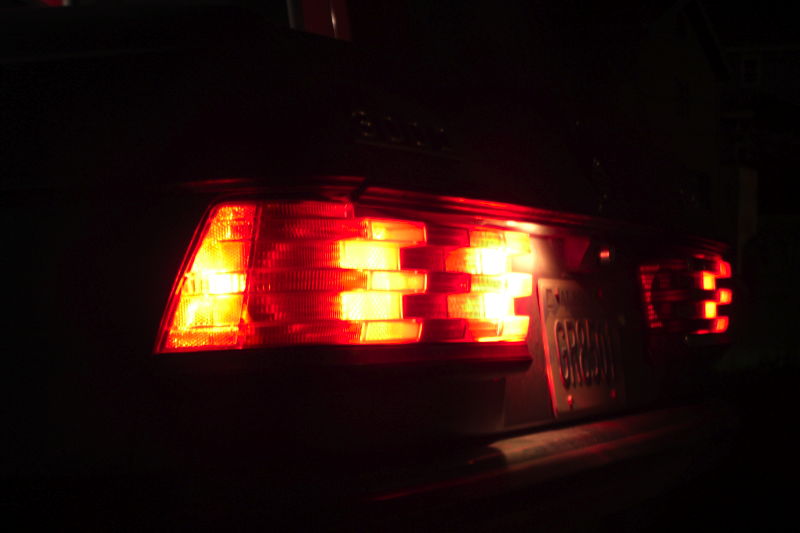 Another pic with the brake lights on (yes, I know one of my license plate lights is burned out, lol): 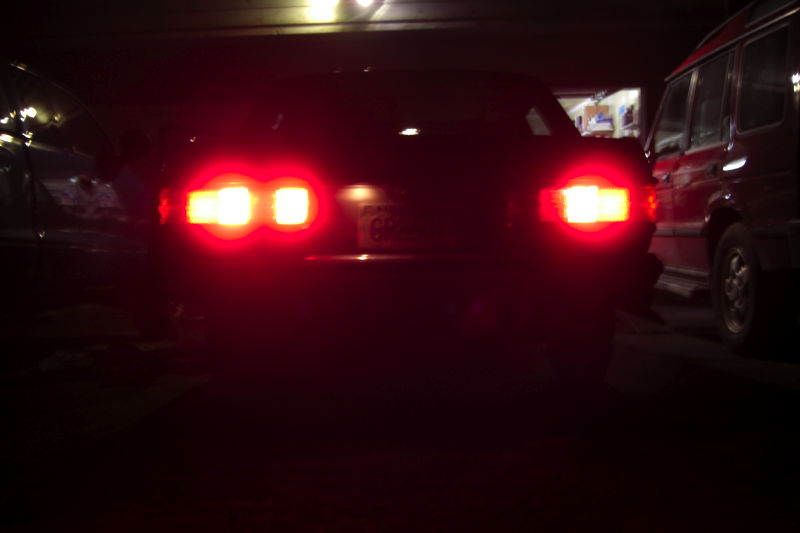 And the next day, I fixed the rear foglight on the other side: 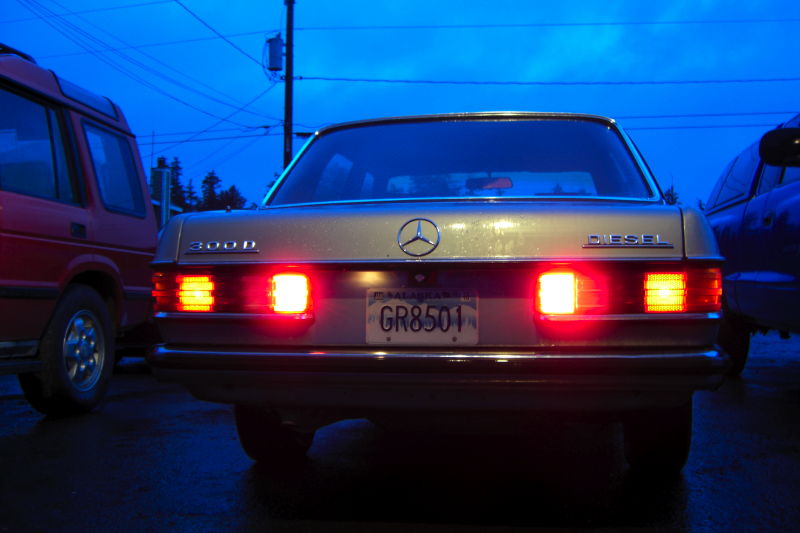 __________________________________ Darren Asuncion '81 300D Silver Blue metallic '04 MINI Cooper S, Indi Blue w/ White roof '94 Jeep Cherokee Sport, Flame Red 
|
| Bookmarks |
|
|


 Threaded Mode


