

|
|
|
|
|
|
#1
 01-10-2014, 01:06 AM
|
||||
|
||||
|
Fuel gauge issues? 1971 220D
1971 220D
The gauge only reads correct when full, other than that it's anyone's guess. Where should I start on this one??? 

|
|
#2
01-10-2014, 02:30 AM
|
||||
|
||||
|
If you haven't cleaned your sender, try this
Your wires in your sender are probably oxidized. I got a perfect condition sender out of a 250C with oxidized wires which caused erratic and unpredictable fuel indication, and did the following to clean it up and it has worked ever since.
Order a cork fuel sender gasket. They are about $3. You could always cut your own but I think that would be a pain. Once it arrives: Lift up your trunk mat, pop that little plastic cover off which covers the sender. Pull the plug and brush, blow, suck, scrape as much dirt away from the sender as you can then remove the nuts and washers & pull the sender out slowly. It has two drain holes, one is a vent in the top, the other is a labyrinthine plate in the bottom which prevents the needle from jumping when you're pulling those high G corners.  If you pull it too fast and you have a lot of fuel in the tank, you'll wind up with a stream of diesel that just keeps coming out the bottom so I've found it's best to pull it up most of the way and let it sit for a minute to drain, then pull it the rest. If you pull it too fast and you have a lot of fuel in the tank, you'll wind up with a stream of diesel that just keeps coming out the bottom so I've found it's best to pull it up most of the way and let it sit for a minute to drain, then pull it the rest.There is a little plastic-covered nut on the bottom, unscrew this. Then pull off the metal plate and you'll see the labyrinth plate under that. Don't twist it, just work it loose and pull it straight off. If it breaks, PM me, I have an extra sender that I rebuilt which you could buy (but I'd rather not sell.) You could also find them in a junkyard W115 or W123 sender; the labyrinth plate is the same. Once that is off, you'll be able to pull the main part of the sender out of the aluminum tube. Have some brake cleaner handy, you're going to need it. Once you get all the sludge off the sender, look closely at the silver colored wires and the copper leads on the float which touch them. The copper leads are made out of some metal akin to butterfly wings so be careful but you need to get some fine and very thin emery or sand paper in there and clean each lead. There are two leads per wire, you'll see. Be really careful and don't bend them away from the wire. If you can find a hemostat or some long, thin tweezer like things, put a little bend in them all to increase their pressure on the wire. Now to the wire itself. Start at the top and look for blueing or anything that is not silver. Extraordinarily carefully, brush the wire with emery cloth or something to remove any discoloring which is oxidation. Leaky trunks can drain into the tank if the seals are bad and then the water will oxidize the wire. Also humidity in your tank can do it. Anyway, make both wires nice and shiny. Check the thick copper wire for connectivity and clean the two points at the base of the sender with your emery cloth. Also clean the plate on the bottom of the float. Hit it all with some brake cleaner or liberal amount of WD40 to get rid of any grit the cloth may have left, then reassemble the sender. Make sure to clean that labyrinthine plate with some brake cleaner to ensure good drainage for accurate level. Attach the sender to the plug in the trunk and gently shake the sender to make sure the float is on the bottom (this is before you put it into the tank.) Go turn the car on to check and see if your refill light is working. If so, then you're good to go and can reinstall the sender. If not and it was formerly working then you boogered up the sender and the thick copper wire may need to be re-soldered. Or your bulb in the dash is burnt out. After you've got all that working, make sure you turn the car off, disconnect the wiring plug, put your new gasket on to replace the old one, (rub a bit of axle grease on both sides of the gasket before installing) then put the sender back into the tank. There is only one way it goes in properly as the five studs which hold down the sender are not evenly spaced apart so you may have to turn it a bit to find the right placement. Replace the washers and nuts then the harness plug and you should be able to check your fuel level accurately now. Phil Forrest
__________________
1972 220D "Trudy," named by a friend. "The 220D sounds good... I suspect it is the only car that you need a calendar for, rather than a stopwatch, when doing acceleration tests." Tom Abrahamsson
|
|
#3
01-10-2014, 05:44 AM
|
|||
|
|||
|
Phil's description is near perfect so there is very little to add. The sender is the best place to start. The method he described worked for me, with only one mod. I only had to remove sludge from the wires inside the sender. No sanding or abrasion was necessary. So if you find black or green goop inside your sender, you might just remove that to see if it fixes it. Using emery cloth on those wires must be a somewhat stressful exercise.
__________________
1968 220D, w115, /8, OM615, Automatic transmission. My 1987 300TD wagon was sold and my 2003 W210 E320 wagon was totaled (sheds tear).
|
|
#4
01-10-2014, 12:27 PM
|
||||
|
||||
|
Alrighty then, I will see when I can get a little time to do this one. Thanks!
|
|
#5
01-11-2014, 12:28 AM
|
|||
|
|||
|
Once working, I suspect that you will have a very accurate and repeatable gauge. At least that was my 20yr experience with our 220D.
__________________
1961 190Db retired 1968 220D/8 325,000 1983 300D 164,150
|
|
#6
01-11-2014, 02:26 PM
|
||||
|
||||
|
I think you'd be better off replacing the gas gauge with a diesel gauge, it might also help the car run a little better.
You know, someone had to say it. Don't talk about gas pedals not working, either. Those are closely related to muffler fluid issues.
__________________
Cheers! Scott McPhee 1987 300D
|
|
#7
01-13-2014, 04:24 PM
|
||||
|
||||
|
Quote:
Badum!
|
|
#8
01-13-2014, 04:40 PM
|
||||
|
||||
|
Quote:
. Thank you for taking me out of my misery . Oh, and check to make sure you don't have throttle levers under the hood. Those might complicate things as well.
__________________
"Senior Luna, your sense of humor is still loco... but we love it, anyway." -rickymay ____ "Your sense of humor is still loco... " -MBeige ____ "Señor Luna, your sense of humor is quite järjetön" -Delibes1982 300SD -- 211k, Texas car, tranny issues ____ 1979 240D 4-speed 234k -- turbo and tuned IP, third world taxi hot rod 2 Samuel 12:13: "David said to Nathan, I have sinned against the Lord. And Nathan said to David, The Lord also has put away your sin; you shall not die."
|
|
#9
01-13-2014, 06:23 PM
|
||||
|
||||
|
I wanted to say something about him having a gas gauge in a diesel car but resisted and instead posted the how-to.
Phil Forrest
__________________
1972 220D "Trudy," named by a friend. "The 220D sounds good... I suspect it is the only car that you need a calendar for, rather than a stopwatch, when doing acceleration tests." Tom Abrahamsson
|
|
#10
01-14-2014, 12:32 AM
|
|||
|
|||
|
Good for you Phil, the 220D folks need to stick together !!! Ha, Ha.......
__________________
1961 190Db retired 1968 220D/8 325,000 1983 300D 164,150
|
|
#11
04-01-2015, 04:17 AM
|
|||
|
|||
|
Pictures to go with Phil's DIY details
In case anyone comes searching for this later on, I've got some pics from when I just R&R'd my sender (1976 w115 240D). My sender/gauge were mostly working, but had generally only moved in quarter tank chunks for at least a decade or two now, and had been fluttering more and more lately.
Revealed under the rubber mat in the trunk, with white plastic cover still on: 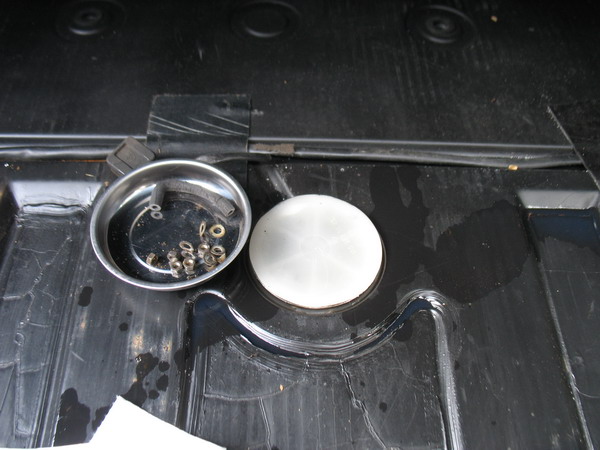 Sender removed (just had to undo the five small nuts). As noted above by Phil, expect the fuel inside to pee out. Also, you probably want to clean around the sender more than I did. It was a real pain to not get any sludge into the tank when I was installing the new gasket later. 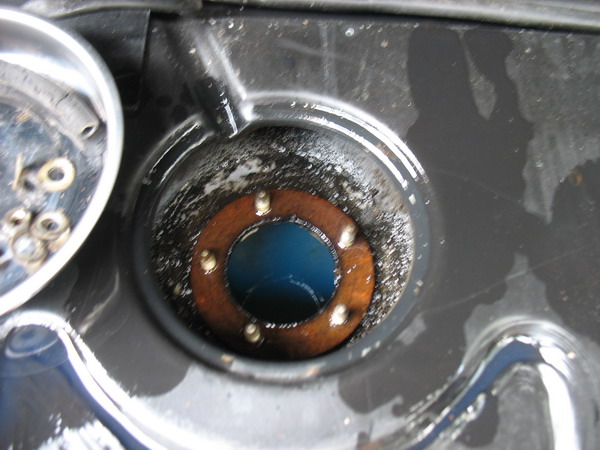 The top of the sender, slightly cleaned off to reveal the pin markings. 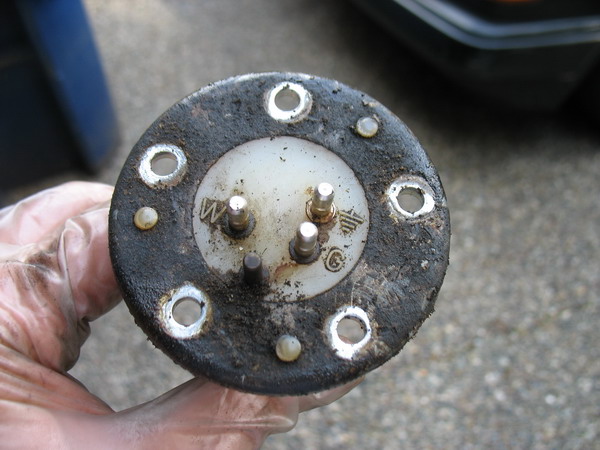 Side view of dirty sender unit. 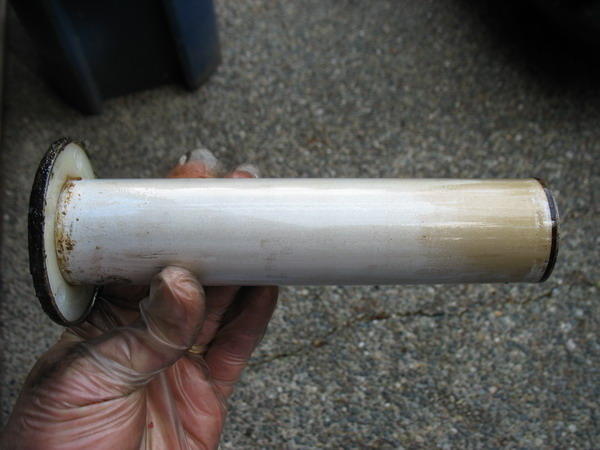 I was able to use a #8 security driver head to unscrew the small nut at the base of the unit to release the innards. 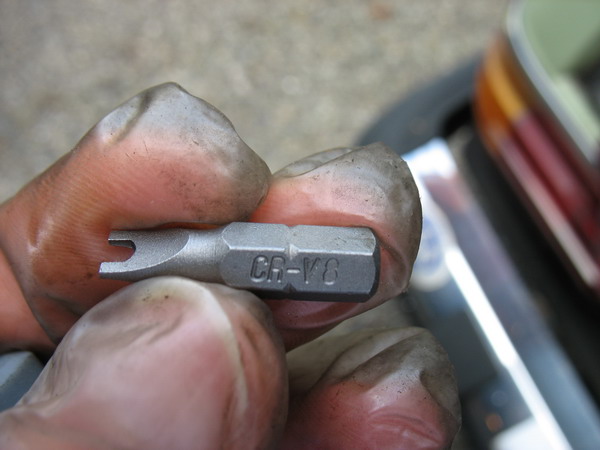 The maze-like drain under the bottom plate (mine was surprisingly clean): 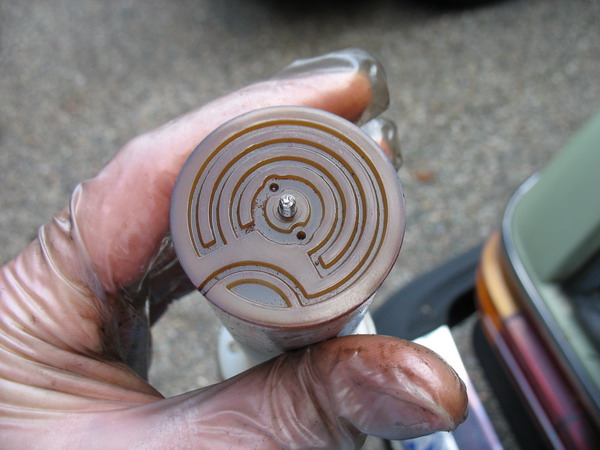 The inside of the removed metal plate, however, was a bit corroded, with the imprint of the maze plate clearly etched onto the metal: 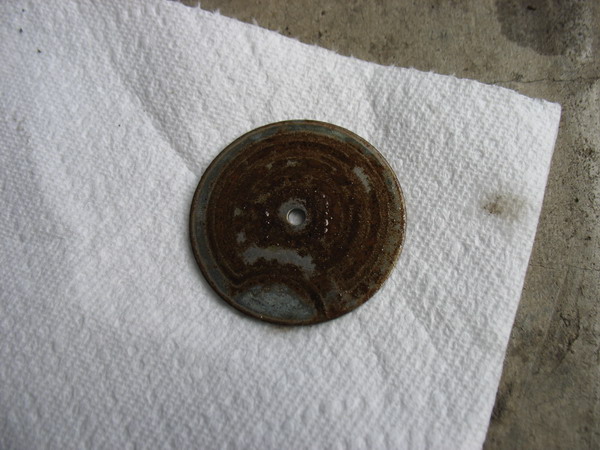 With the bottom nut removed, you can carefully pull the innards out from the top. Be very careful not to break the three thin wires. 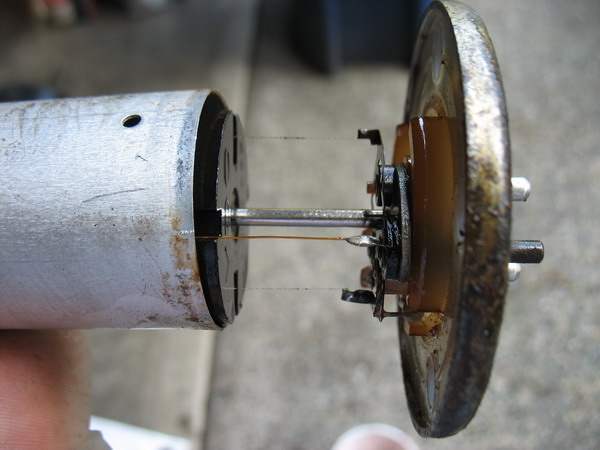 Here you can see the sludge built up at the bottom of my sender. Actually not too bad for not ever having been serviced that I am aware of (my mom's car originally, I've driven it since 1986). Guess the several years of running B99/B100 cleaned stuff out, since I am sure it must have gotten crappy fuel at some point. (It has lived in NY, NJ, CA, and WA.)  You can kind of see the sludge at the bottom of the canister part here. (Ignore the messy garage!)  And here is the base with the gunk cleaned off as best I could (mostly used brake cleaner spray plus a small, firm detailing brush):  The float and top cleaned as well, not that there was all that much on them:  The top again, now cleaned (didn't bother with the corrosion, since it is pretty much just cosmetic):  New gasket, old gasket, float mechanism, bottom plate, and small bottom nut: 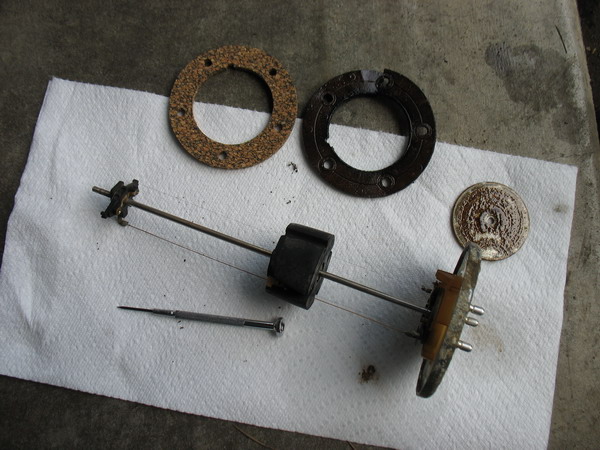 The maze plate, cleaned (not that there was a big difference): 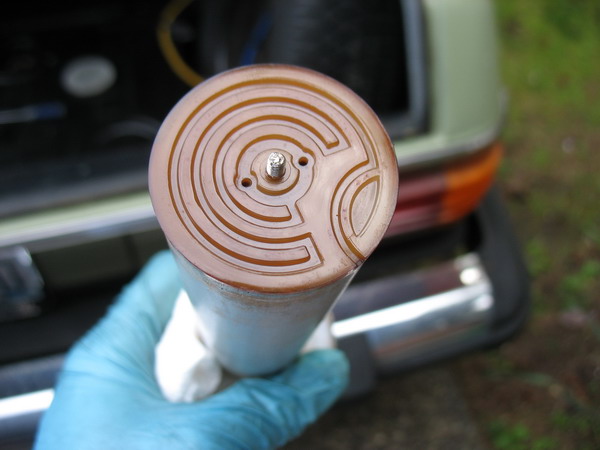 Don't forget to put the bottom plate and nut back on! Cheers, -Bruce
__________________
1976 240D [W115.117/616.916] (acq 11Jun76) 1990 MB 300D 2.5 Turbo [W124.128/602.962] (acq 4Sep15) 1991 SL250d (ex-300SL-24) [R129.061/OM602.962/722.6, was M104.981] (acq 25May12, converted to diesel) 1993 Jeep Cherokee [XJ] (acq 12Apr14) 1999 SLK23 AMG Sport [R170.447] (acq 12May21 **FOR SALE**) 2008 E320 CDI [W211.022/642.920] (acq 27Jan24) -- Deceased...  1993 300D 2.5 Turbo [W124.128/602.962] (totaled by Dominos driver 28Mar12) 2007 E320 CDI [W211.022/642.920] (totaled 18Dec23)
|
 |
| Bookmarks |
|
|


 Linear Mode


