

|
|
|
|
|
|
#1
 03-25-2017, 12:23 AM
|
||||
|
||||
|
Fixed AC center vent flap vacuum pod 300sd w126
Hi All,
I lost flow through my center vents on my 1982 300SD. I read SD Blue's text description of how to go in through the ACC panel above the radio and install the vacuum pod through the vent port. Thank you. I went ahead and did it and I decided to document it for people who would like to attempt this job. It took about five hours with cleanup. This included having to take apart the kick panel a second time to find the vacuum line I accidentally knocked off during reassembly. Ok, so lets do this. First you need to determine which pod is bad. Remove the passenger side kick panel and the panel on the tunnel. You will see the solenoid valves. This is a great place to test for pod leaks. 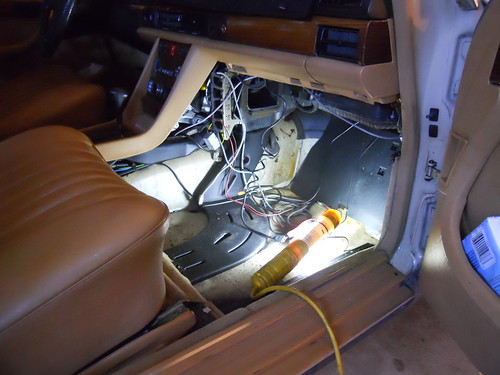 Get out your mityvac and start pumping down the lines on the solenoids leading to the pods. This diagram will help. 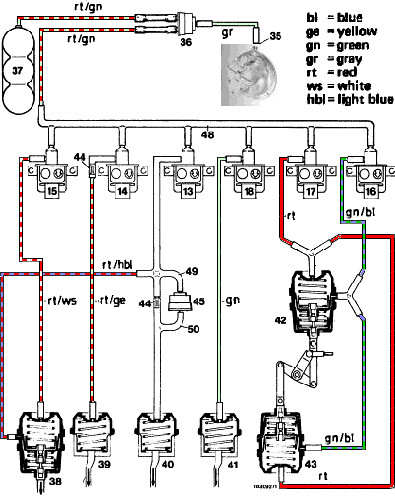 I determined that my valves were ok by powering them with a 12V power supply and pumping on them with the mityvac to see them open and close under vacuum. Vacuuming the lines on the solenoid outputs helps you isolate the problem pods. Most of mine were still good. The recirc double pod behind the glove box was bad and the center nozzle one was bad. 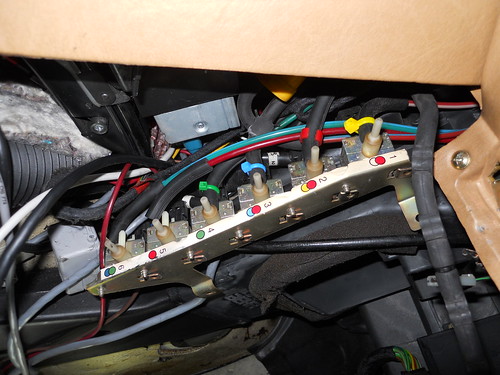 Just vacuum on the individual lines and see which ones hold vacuum. I isolated the problem to pod 40. This pod handles the "center nozzle". Thanks to SD Blue I learned that I could get to this pod without too much work. As he said, "remove passenger side kick panel, tunnel panel, ash tray, radio and ACC panel. " Good stuff. So I'll show that here. 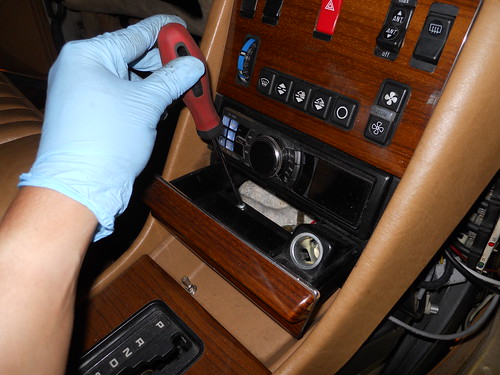 Ash tray comes out with two little screws underneath. My radio pulls with two hacksaw blades to press down the little locks. 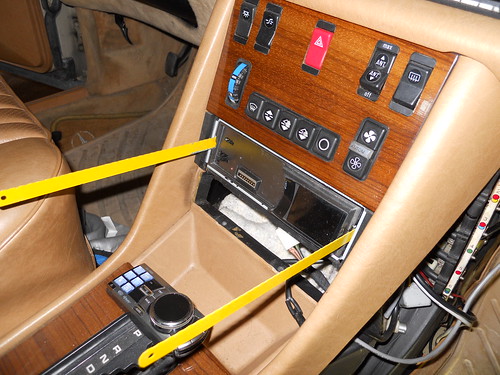 This exposes two little screws that hold the ACC panel in. 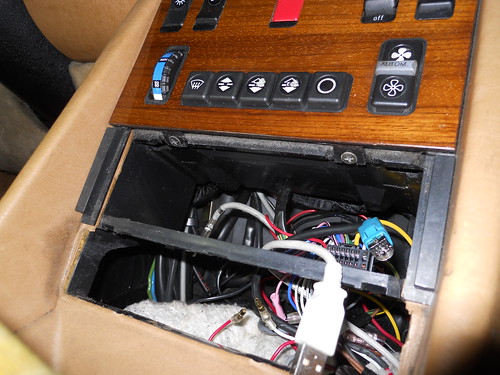 Pull the ACC panel slightly out and down at the same time after removing the two screws. 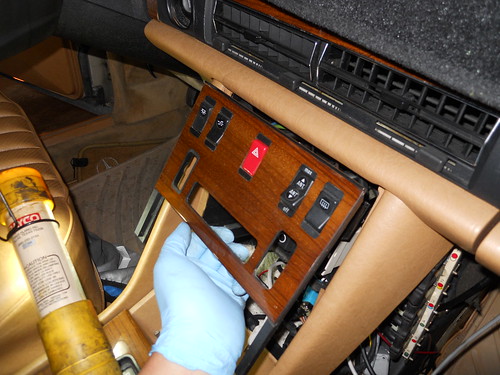 You should have something that looks like this. You can see the little pink pod in the upper right corner of the ACC cavity. At this point do as SD Blue suggests and stuff rags in the cavity below. You may drop things down there. 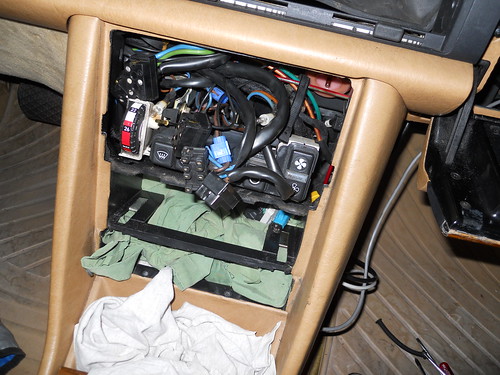 Here's a closer look at what you will have to pull out. 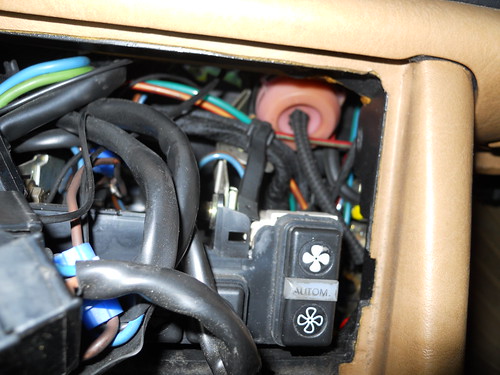 You'll need to pull a center vent louvre to get access to the pod. 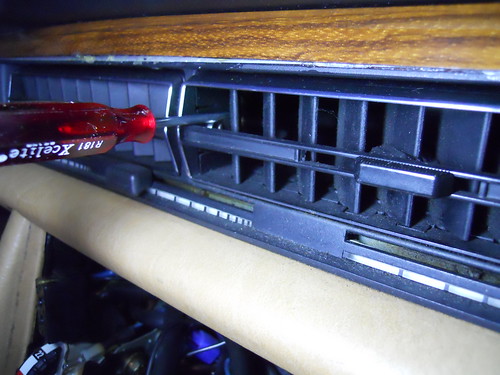 They release with little catches on each side. Make sure to aim the louvre down to get it out. It took me awhile to figure this out. I forced it and it popped into a dozen little fins and gears. I spent a few minutes piecing it back together. Release the pins. Aim it down before pulling. 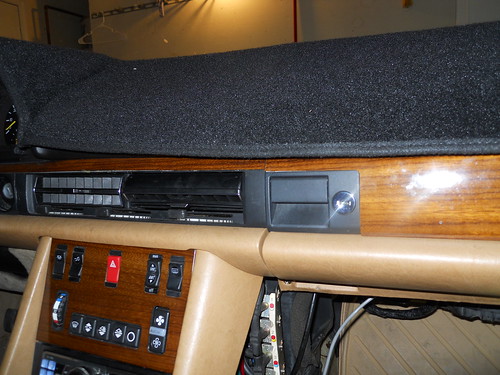 Carefully unroll the rubber duct around the center vent. You'll be able to get a straight shot at the pod with a 1/4" drive socket with a long extension through this hole. 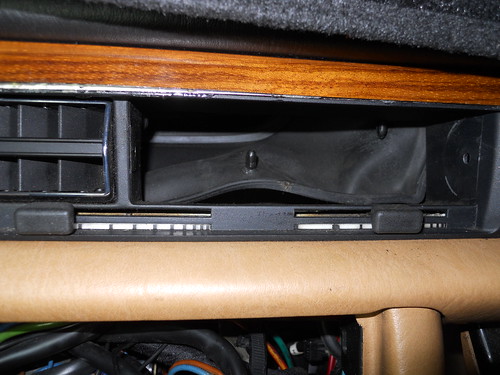 And this is what you'll see. There are four screws you need to remove. 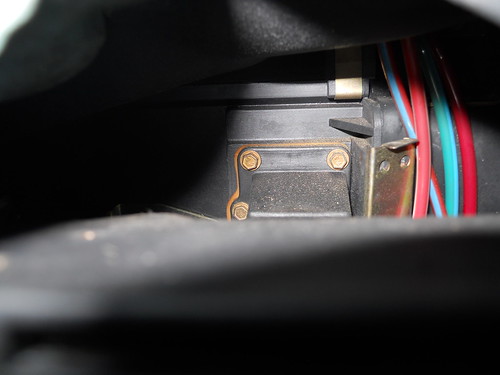 Ok. I lied. it isn't a perfectly straight shot. Some will have to be removed from the ACC hole too. They are indeed 5.5mm like SD Blue said. But I jimmy jacked them with a 7/32" socket. It fit well enough. I also used a wobble head socket. 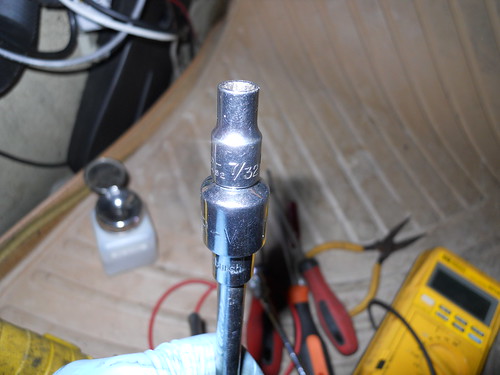 From under the dash you can see the hooked end of the pod on the flap. You'll need to free this with some kind of long nosed plier or screwdriver. I'm looking into a duct opening in the airbox in the passenger side foot well. 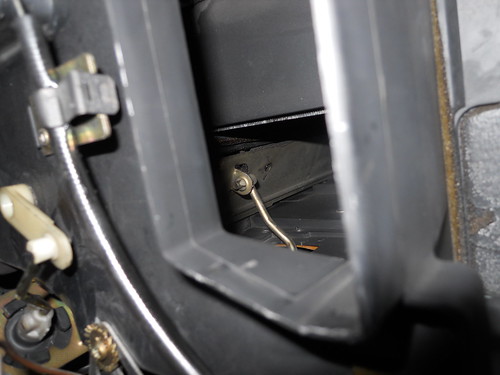 Ok, you freed the hook and how you need to wiggle the pod out. I snaked mine out this way. It was like a puzzle getting it rotated out. 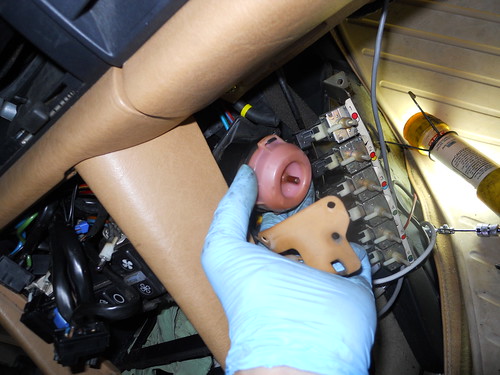 And here it is. You'll need to install your new pod in the rectangular shell. Do not lose the starlock washers. They are hard to source in 4mm shaft diameter. 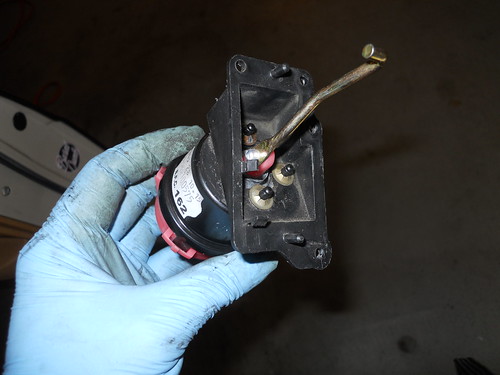 So now you have to reassemble. Reassembly is the reverse of assembly.  Not so fast. Getting that little hook on the flap is a doozy. I found it useful to use some small wood dowels to form a hook, hold the door closed and pull the pod's hook into the clip on the flap. Here are the tools I made/used. I just ran a nail through one of the dowels to make a hook. I used a flexible gooseneck light to illuminate the evaporator box from the inside so I could see what I was doing. It is a slim inspection light. Shown on the right. I just made a hook out of it and hung it over the lip of the opening. You will need all the hands you have to work the flap and pod lever into position. Also useful was putting my mityvac on the pod and moving the actuator to a friendly position where it was easy to slip the hook into the hole on the flap. That extra degree of adjustability made it possible to get it hooked in without too much fuss. Not so fast. Getting that little hook on the flap is a doozy. I found it useful to use some small wood dowels to form a hook, hold the door closed and pull the pod's hook into the clip on the flap. Here are the tools I made/used. I just ran a nail through one of the dowels to make a hook. I used a flexible gooseneck light to illuminate the evaporator box from the inside so I could see what I was doing. It is a slim inspection light. Shown on the right. I just made a hook out of it and hung it over the lip of the opening. You will need all the hands you have to work the flap and pod lever into position. Also useful was putting my mityvac on the pod and moving the actuator to a friendly position where it was easy to slip the hook into the hole on the flap. That extra degree of adjustability made it possible to get it hooked in without too much fuss.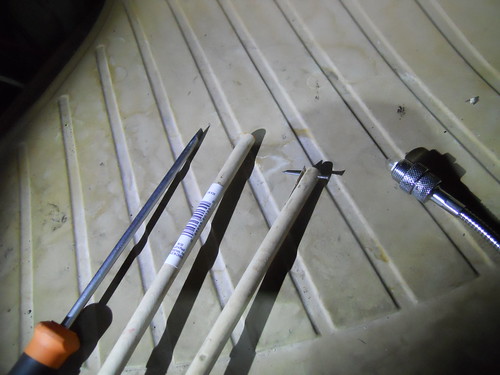 And that's pretty much it. Now put it all back together. Enjoy! Thank you SD Blue!!!
__________________
79 300TD Old Smokey AKA The Mistake (SOLD) 82 240D stick shift 335k miles (SOLD) 82 300SD 300k miles 85 300D Turbodiesel 170k miles 97 C280 147k miles Last edited by ykobayashi; 03-25-2017 at 03:10 PM. 
|
| Bookmarks |
|
|


 Threaded Mode


