

|
|
|
|
|
|
#1
 02-28-2009, 07:04 PM
|
||||
|
||||
|
87 300D recirc and defrost pod replacement
This post continues the work in - 87 300D center vent pod replacement
Don't worry, I'll stitch this all together shortly. Continuing with the pods, here's how I went about replacing the recirc and defrost pods. I'll start with the recirc pods: 1) Kinda tight working againt the bulkhead and windshield. The pods are bayonet mounted to the brackets and the actuator rods are a snap fit onto the bellcrank. The driver side pod first. The driver side pod is against a bracket that holds the vehicle speed sensor distribution block and some relays. Release this bracket by removing a nut that takes a 10mm socket at the bulkhead and a screw that takes an 8mm wrench on the steering column support - 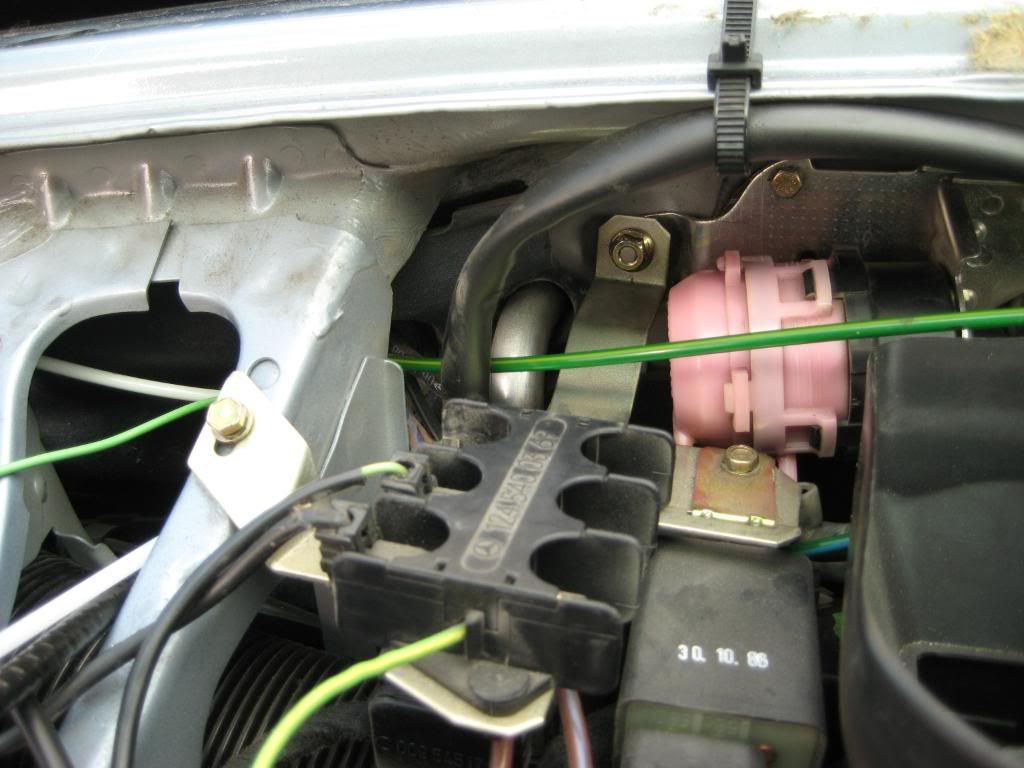 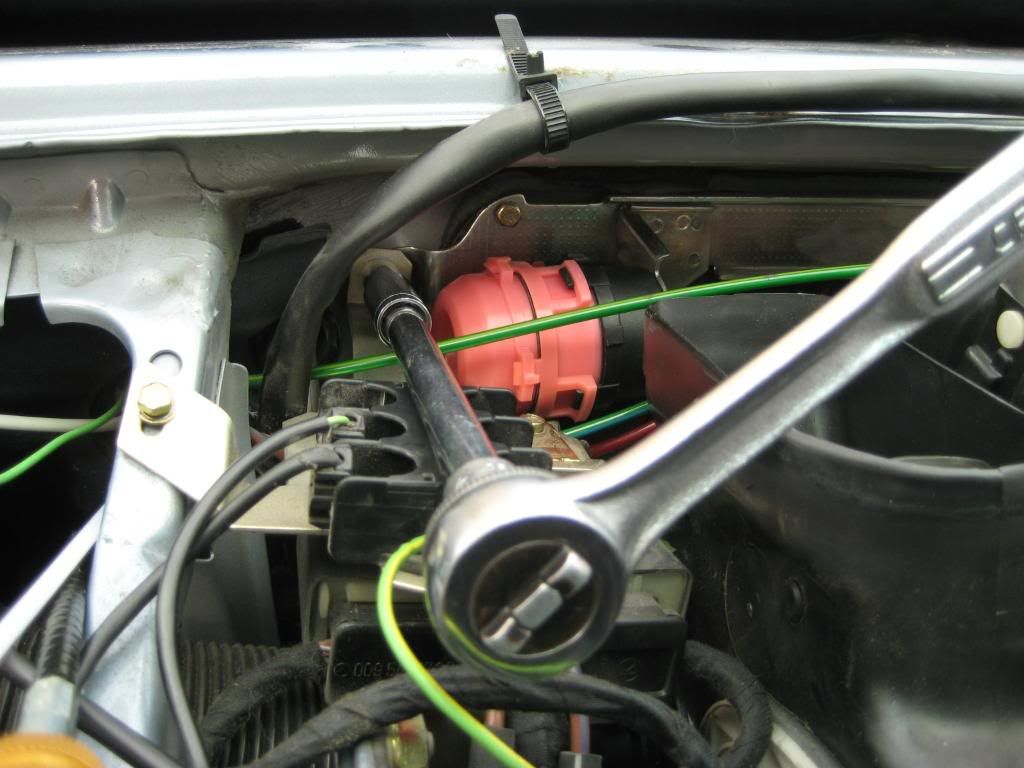 Slide the bracket down to allow the pod to slide towards the driver side. Woah! Check out the open end of the black plastic line that vents the underhood vacuum devices - 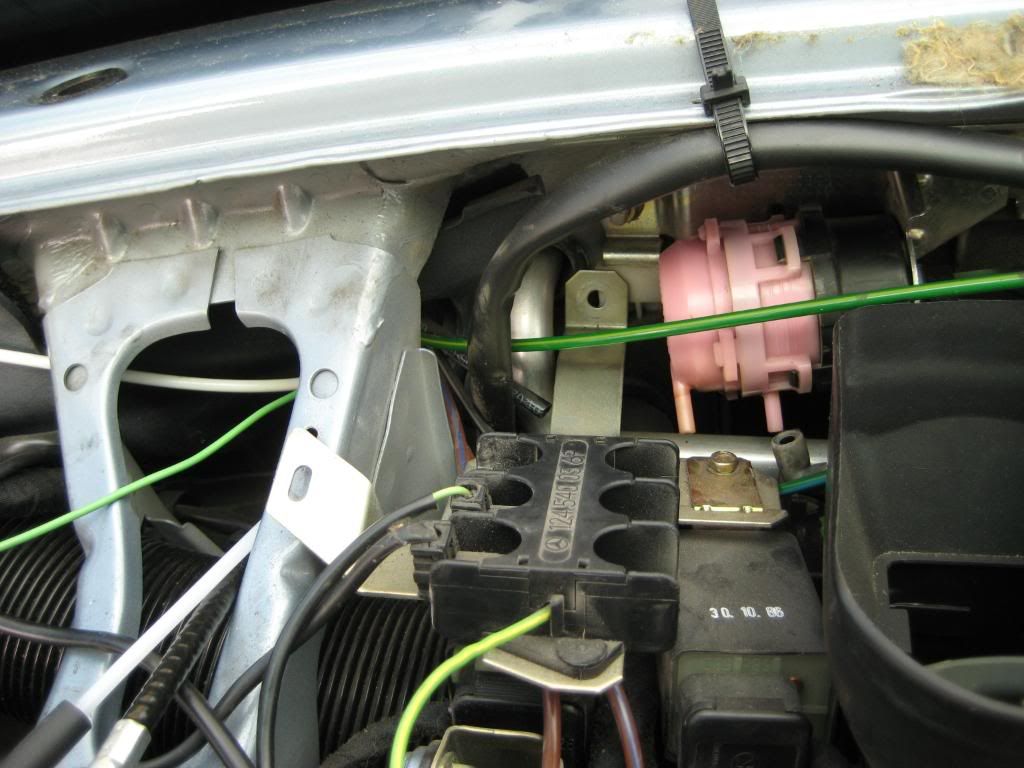 2) Remove the vacuum hoses attached to the pod. Note what color hose attaches to which nipple. 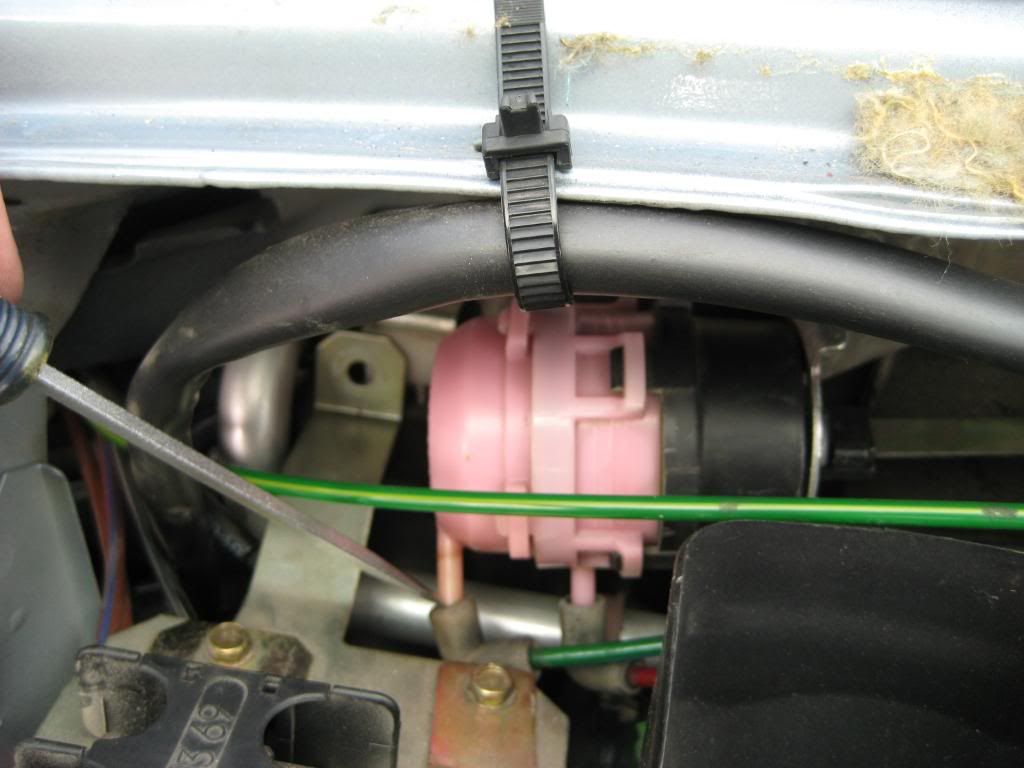  3) Pry the far end of the actuator rod off the bellcrank. Note the bend in the actuator rod sets the far end higher - 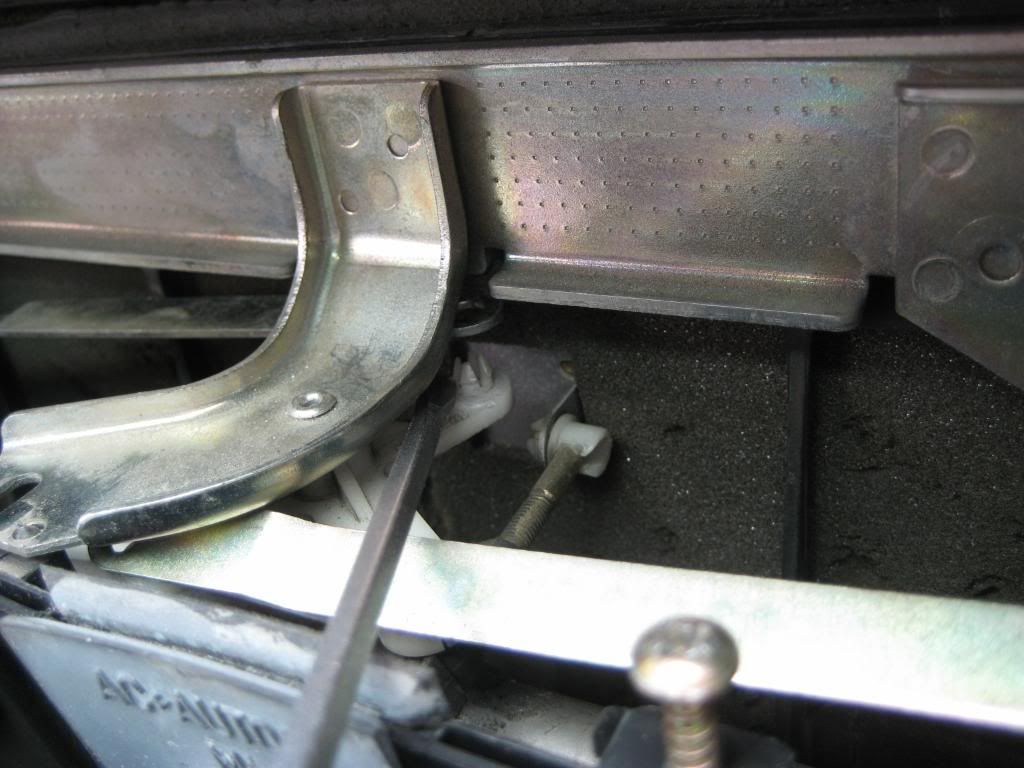 4) I thought I had a picture of a screwdriver releasing the locking tab in the bayonet mount. I can't find one and I'm not ripping off the dash just to take a picture so I'll talk through it. The locking tab is at about the 11 o'clock position viewing the pod from the passenger side. Press the tab into the pod so the pod can rotate. Rotate the pod CW as viewed from the passenger side to align the black plastic tabs with the slots in the bracket. The pod won't turn any further - 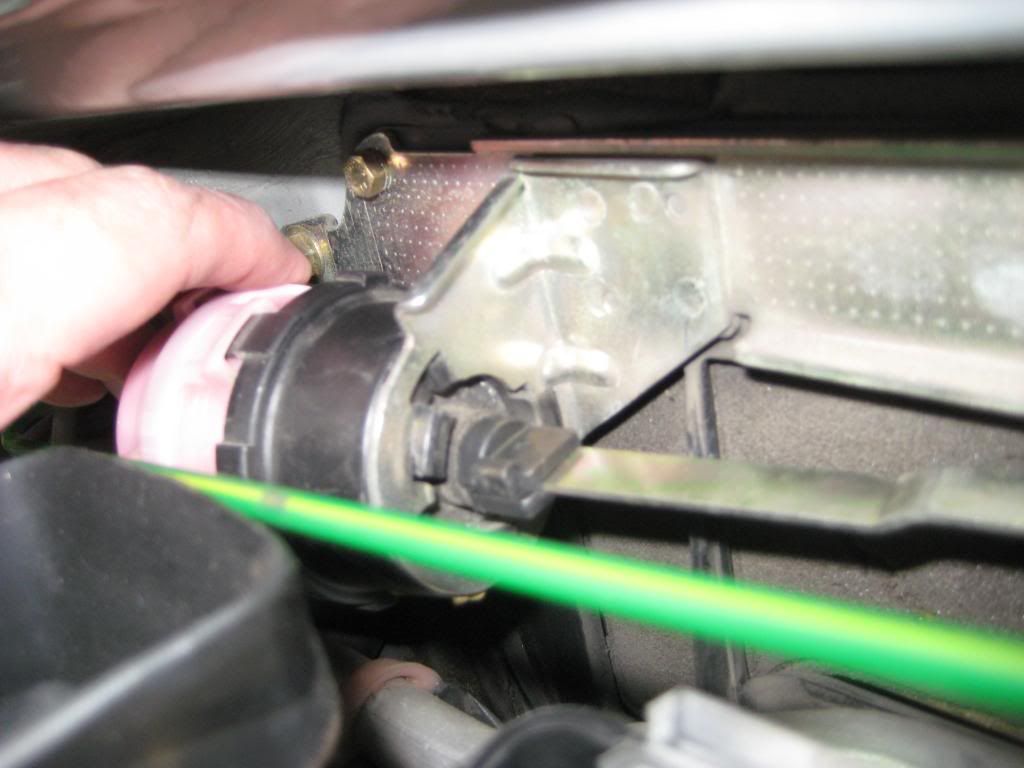 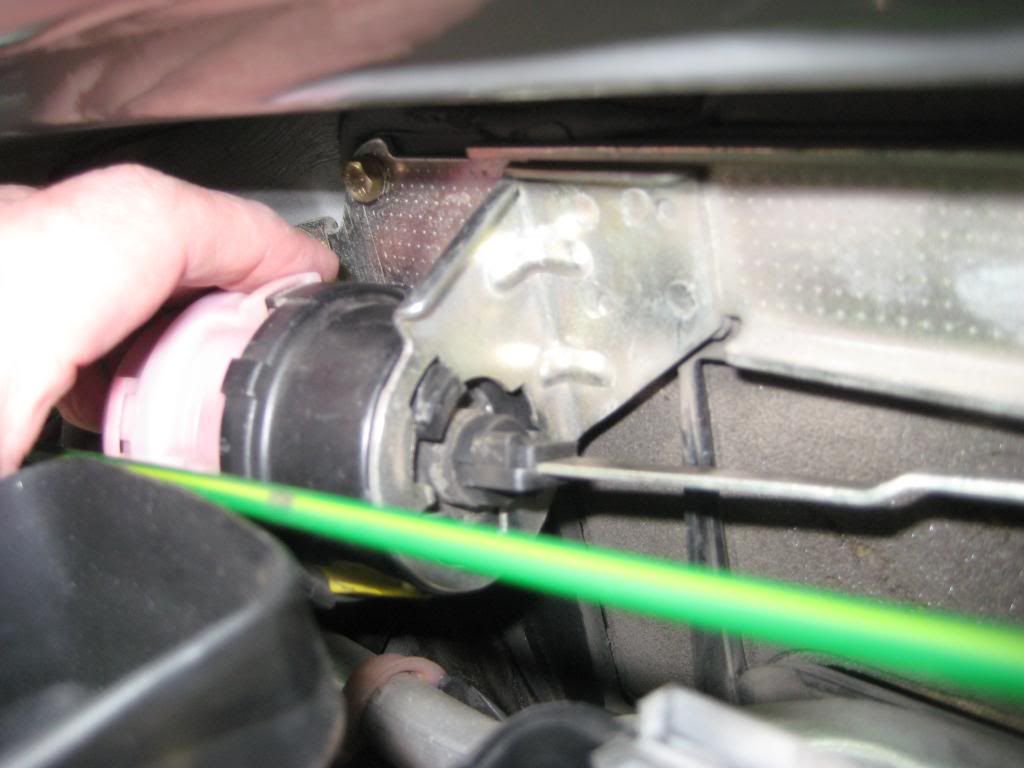 5) Pull the pod towards the driver side. A few acrobatics and it'll come free - 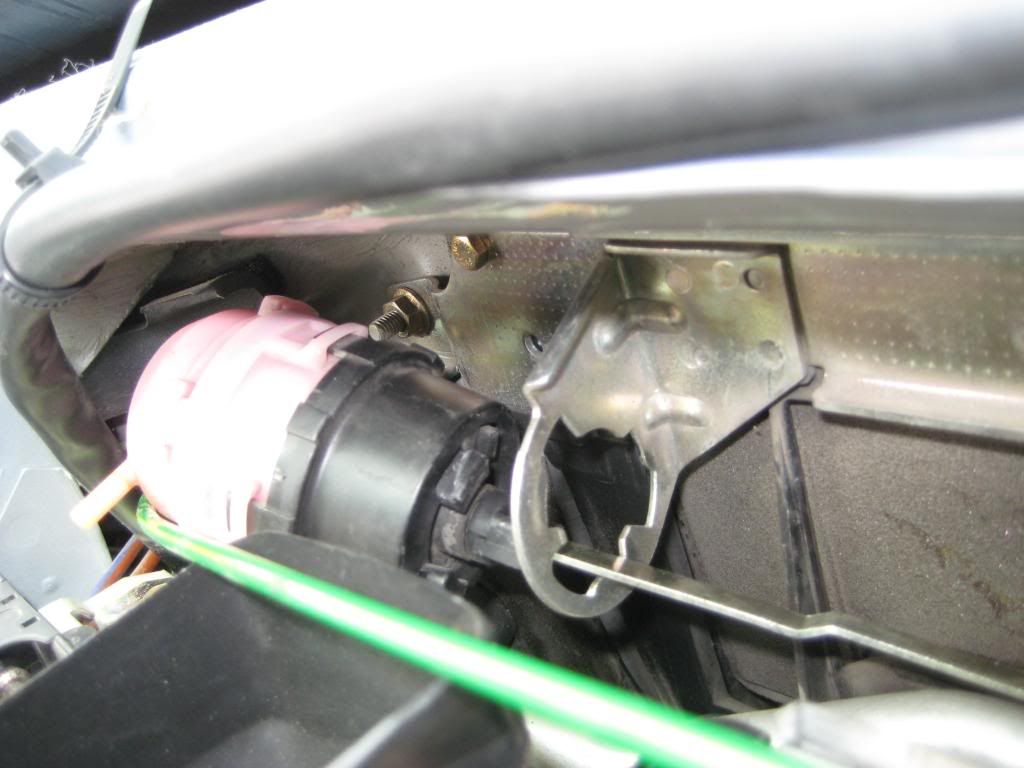 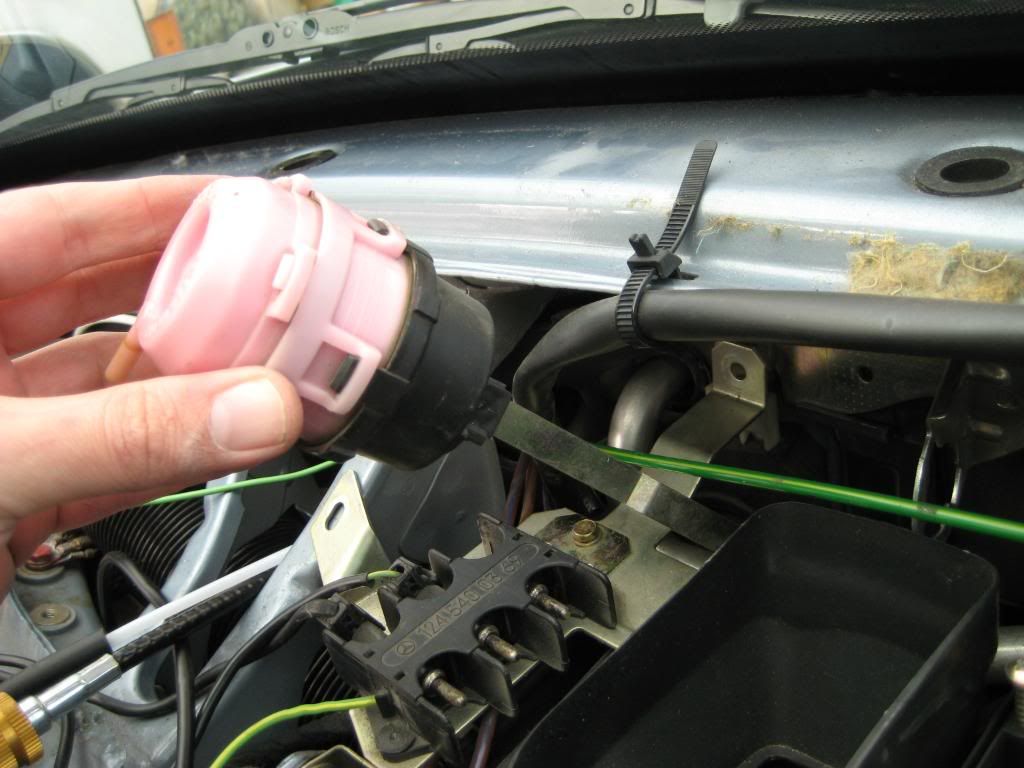 6) I'll move to the passenger side pod so nothing's fighting the bellcrank. Same deal, note which color hose attaches to which nipple and disconnect the hoses - 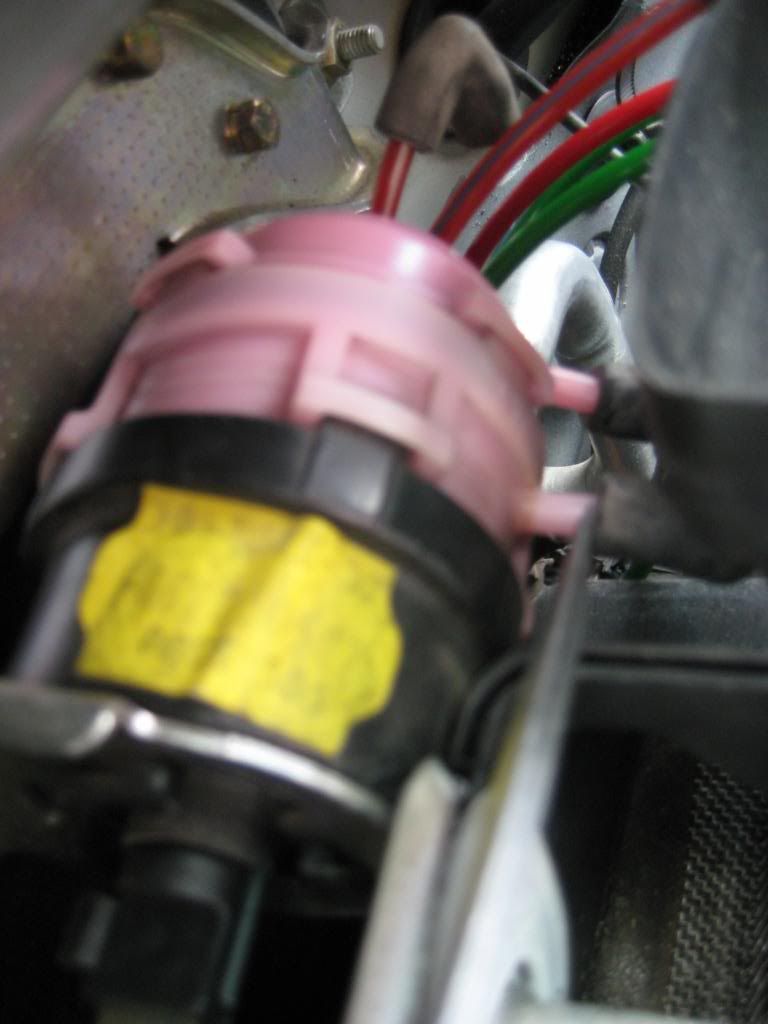 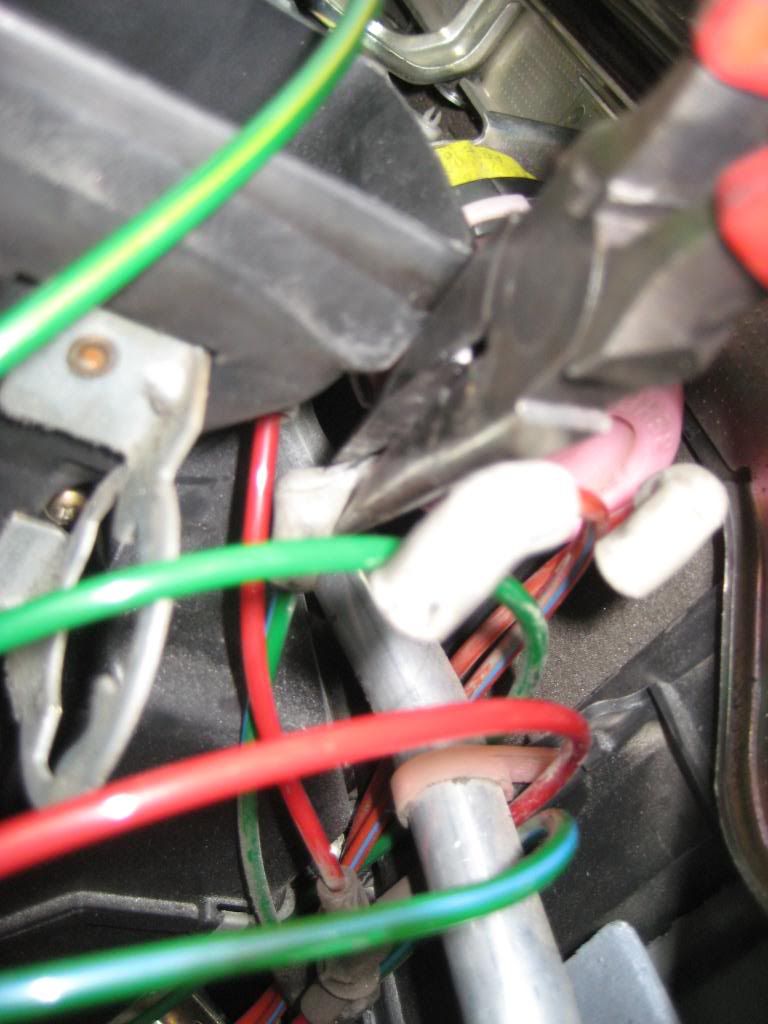 7) Pry the end of the actuator rod off the bellcrank. You might have to assist the bellcrack so the end of the actuator rod is somewhere you can see it. Note the bend in the actuator rod sets the far end higher - 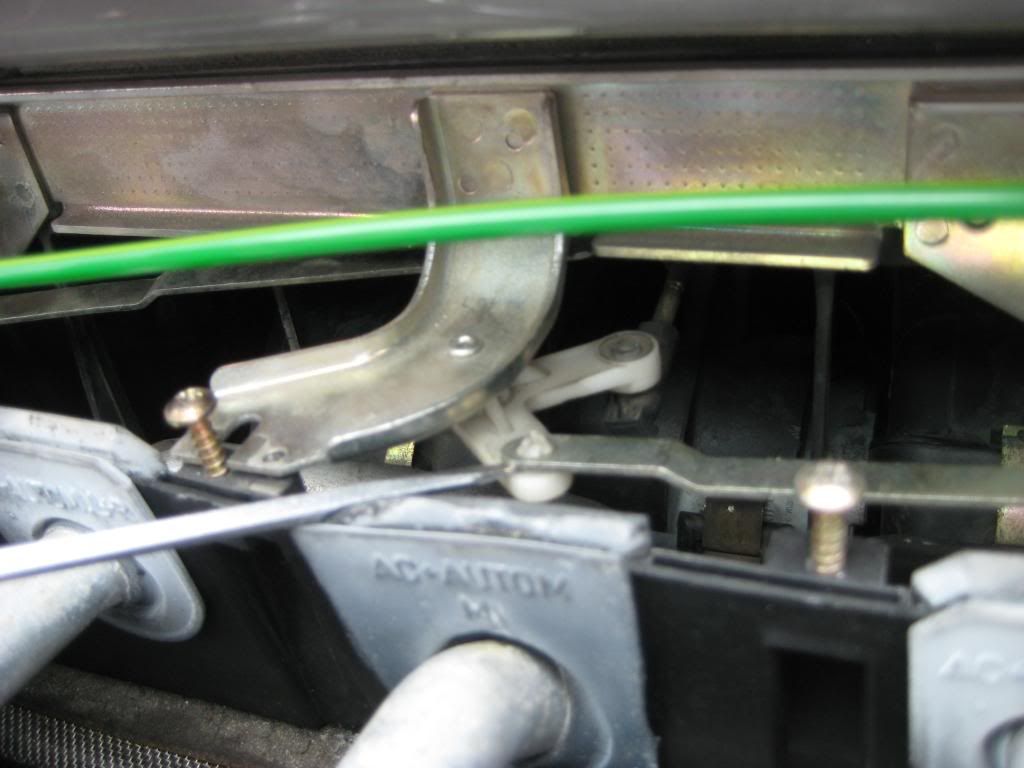 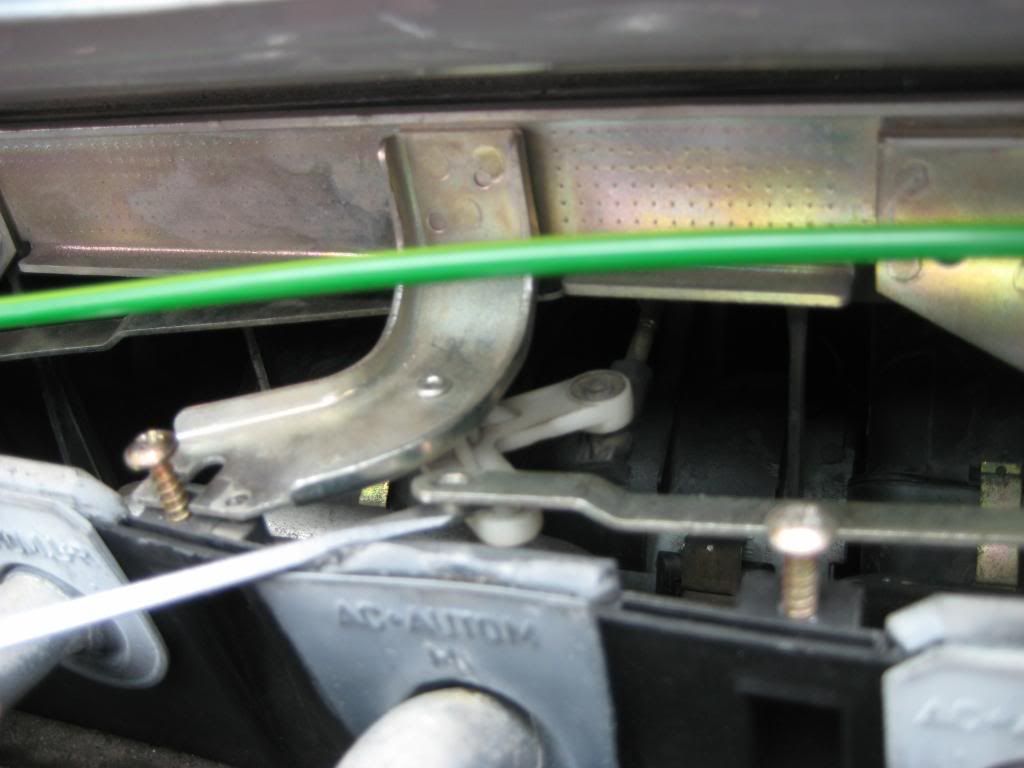 8) Push in the locking tab at the 5 o'clock position as viewed from the driver side then twist the pod CW as viewed from the driver side - 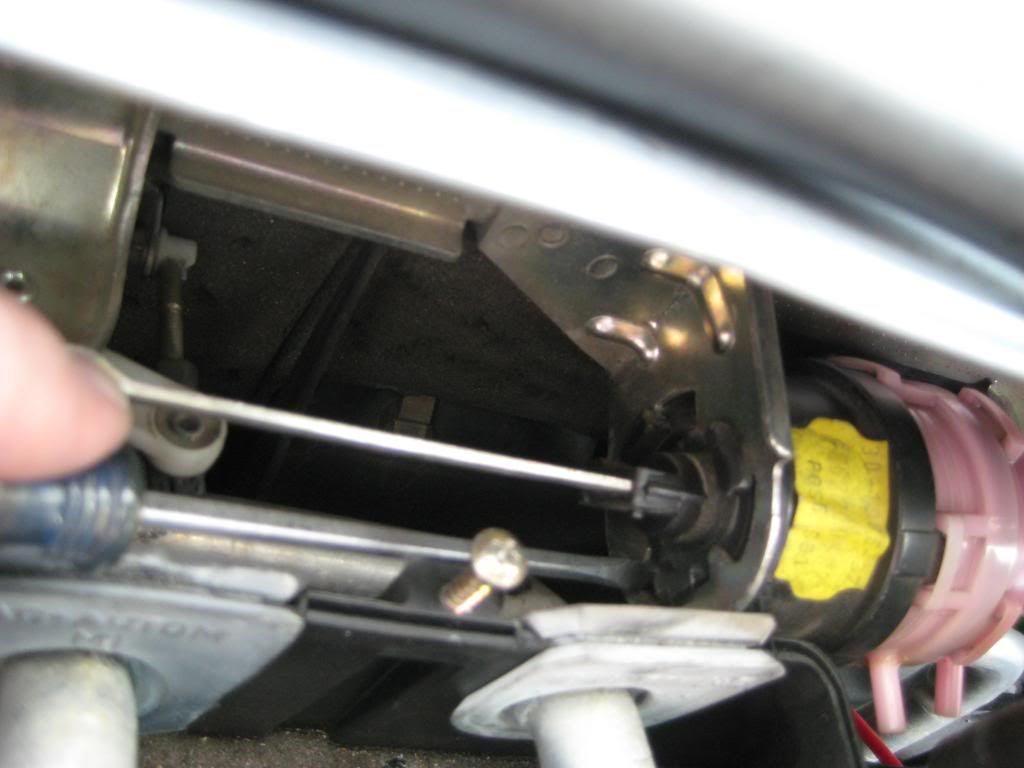 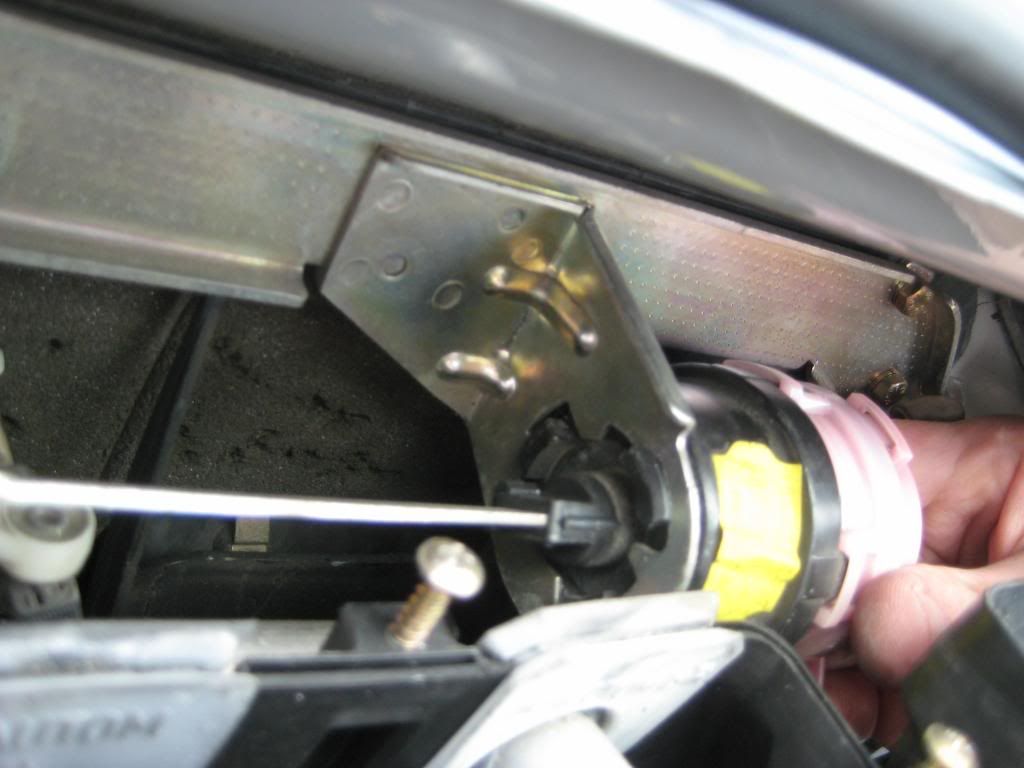 9) Remove the passenger side pod -  10) Haynes time, starting with the passenger side pod. Set the new pod in place. The pod tabs clock into the bracket only one way. The nipples are further guidance. Rotate the pod CCW as viewed from the driver side until the tabs contact the bracket and you hear/feel the locking tab snap into place. Don't trap hoses like I did in this picture - 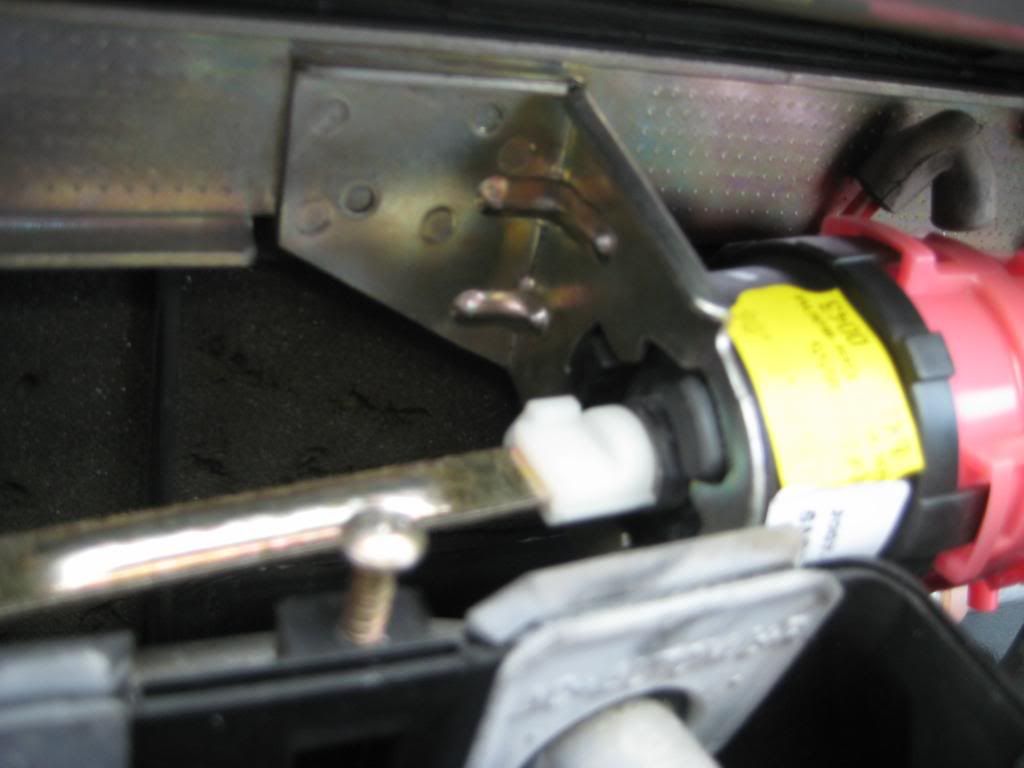 11) Get the hoses back in place - 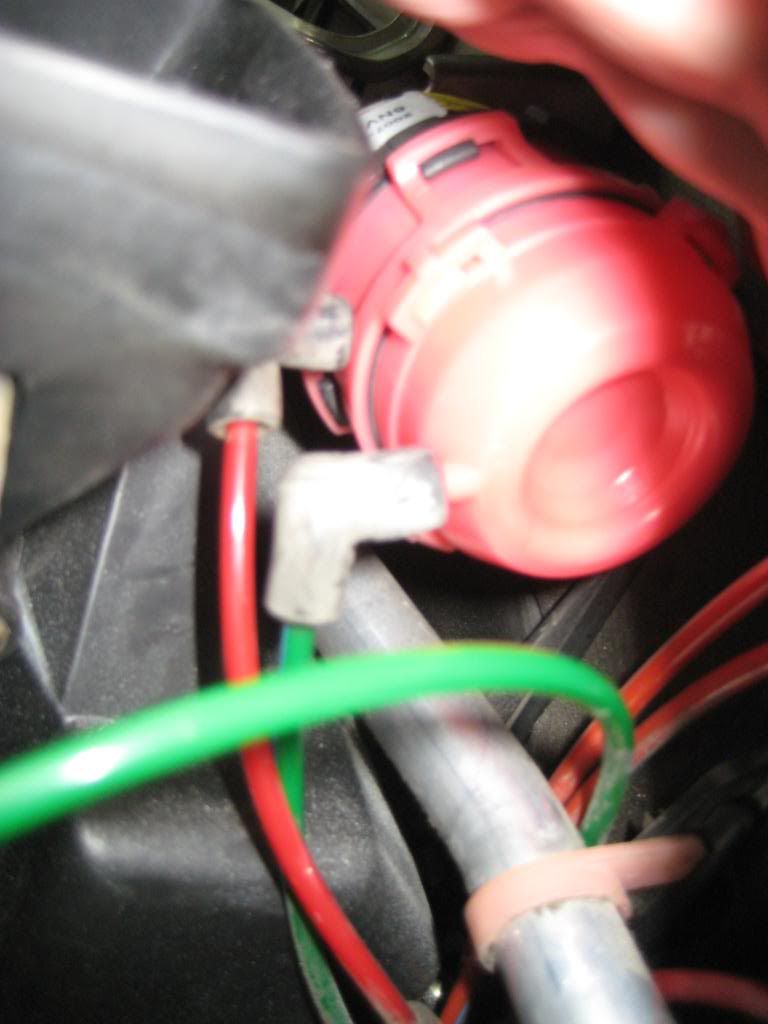 12) Press the actuator rod end onto the plastic clip in the bellcrank. I think the driver side pod is already on in this picture so I'm fighting that and the recirc flap return spring - 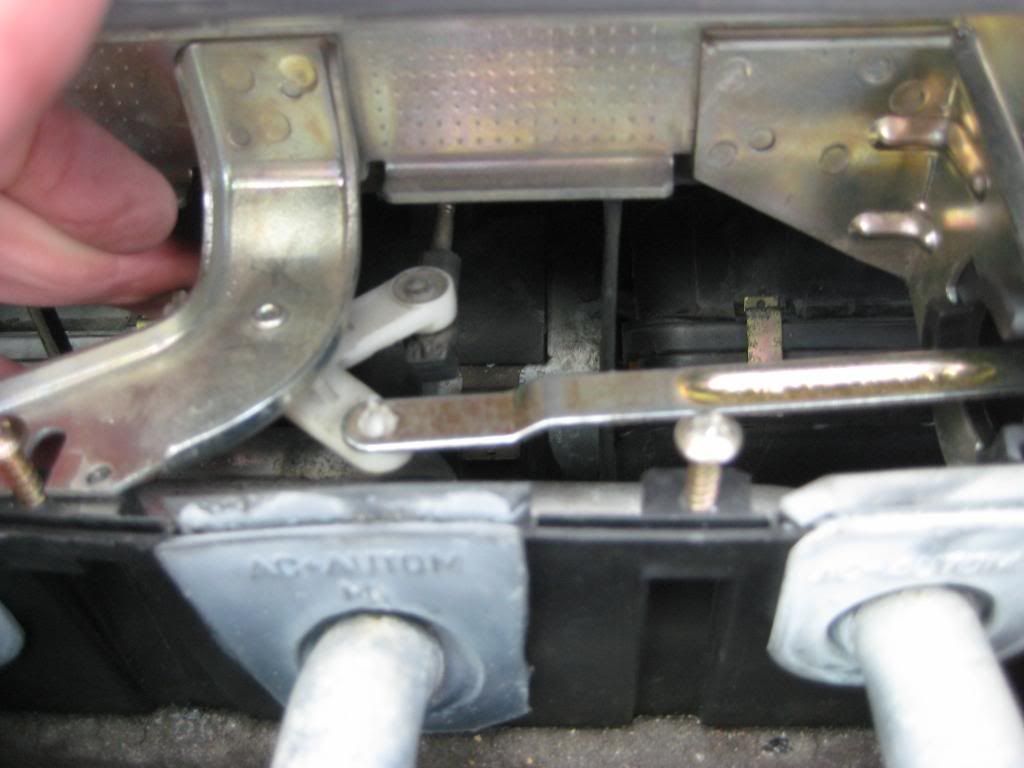 13) Back to the driver side pod. Same deal, maneuver the pod into place. Note that the actuator rod end has a propensity to snag a rib in the ricirc flap. Put down the camera and guide it with your free hand - 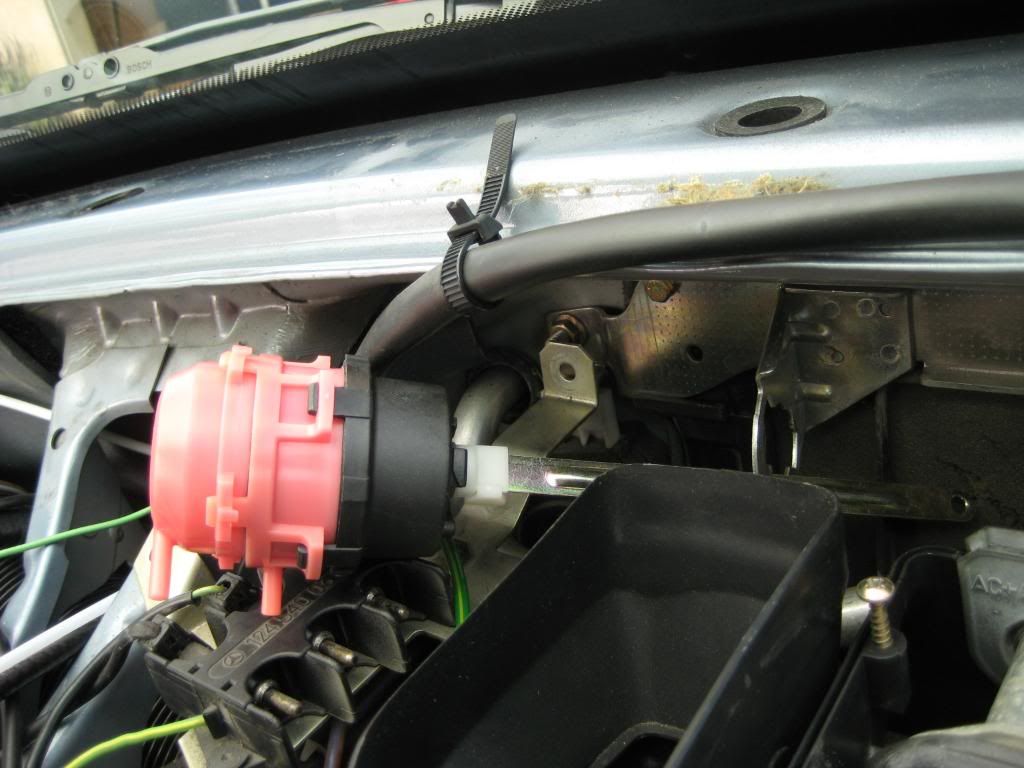 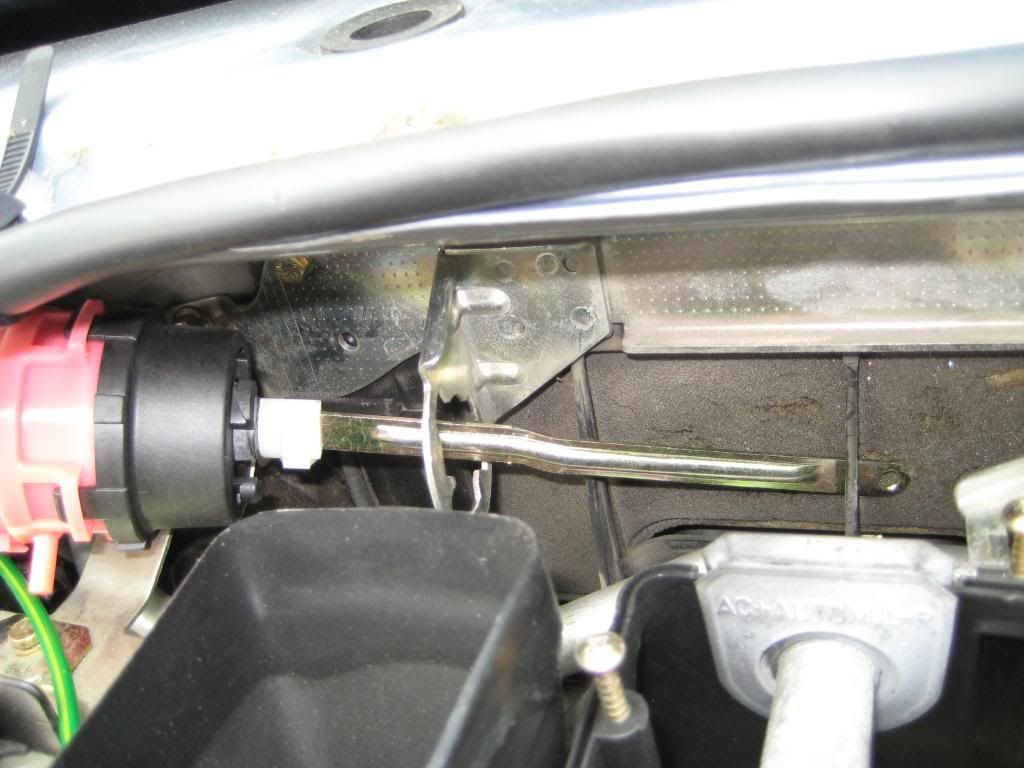 14) Align the pod tabs with the bracket slots then give the pod a CCW turn as viewed from the passenger side until the tabs contact the bracket and you hear/feel the locking tab snap into place - 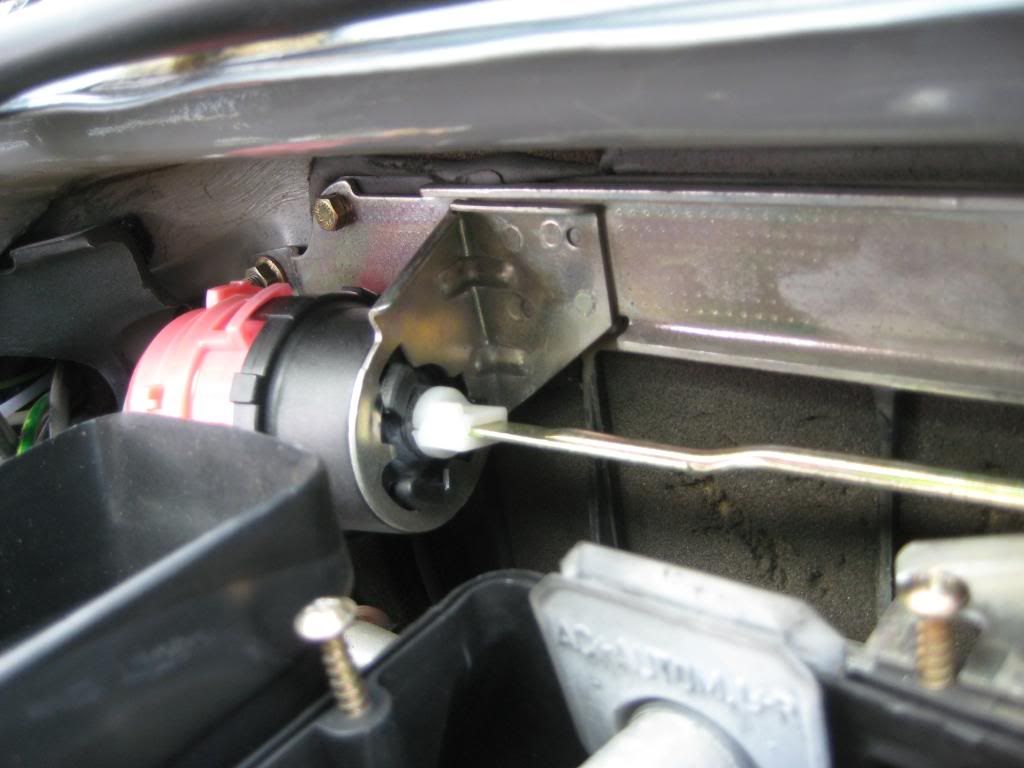  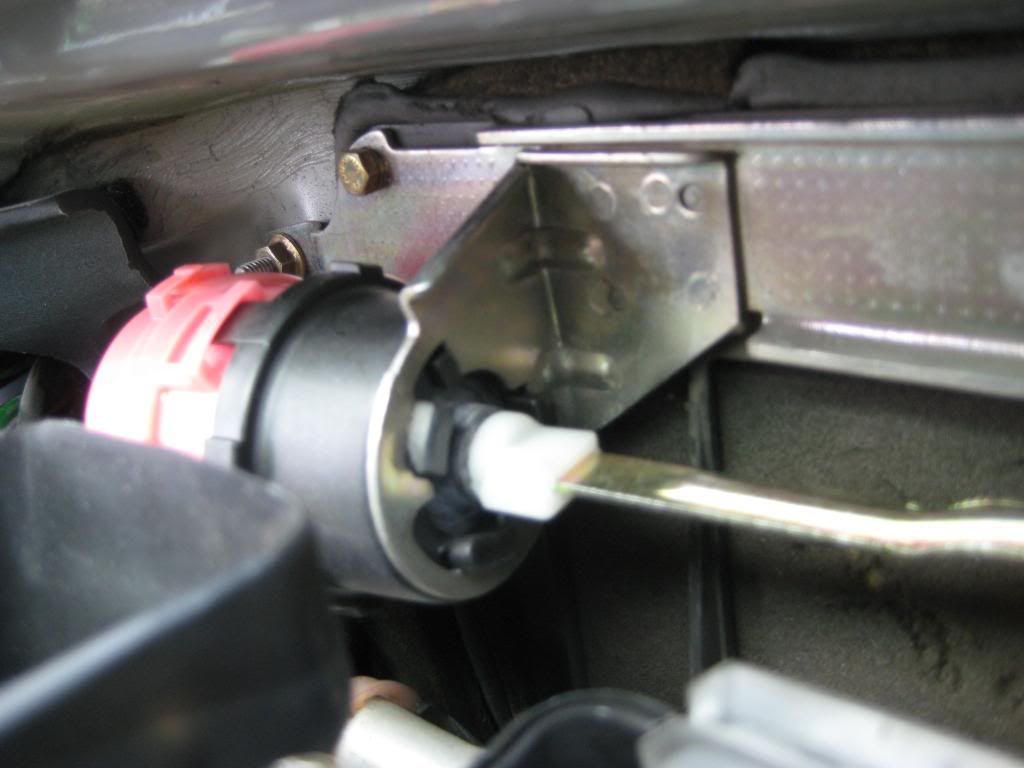 15) Press the actuator rod end onto the plastic clip in the bellcrank. These pictures don't show that I used pliers to press the actuator rod end onto the bellcrank. If you simply press down on the actuator rod end, you risk damaging the bellcrank -   16) Get the hoses back in place - 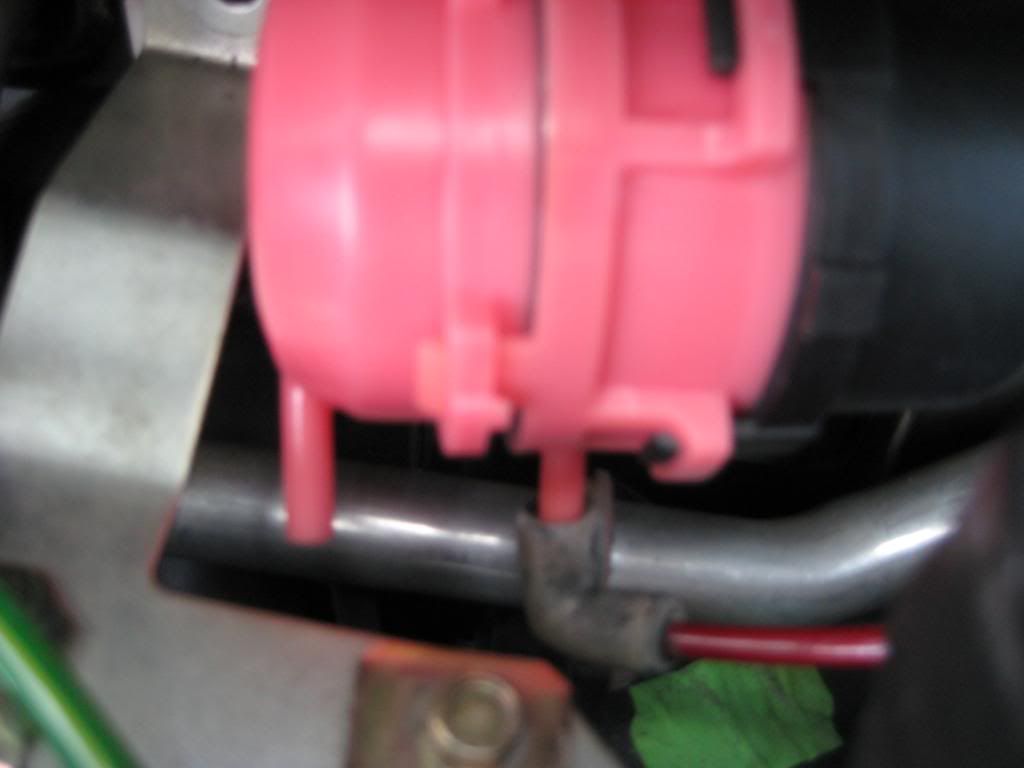 17) Put the vehicle speed sensor distribution bracket back in place - Sixto 87 300D Last edited by sixto; 02-28-2009 at 07:11 PM. 
|
|
#2
02-28-2009, 07:05 PM
|
||||
|
||||
|
Onto the defrost pod:
1) I had planned to do this with the dash in place but the energy level just ain't what it used to be. I took pictures during dash installation (install is a verb, not a noun!) to show that it's very accessible. Here you see the dash in place but glovebox liner out - 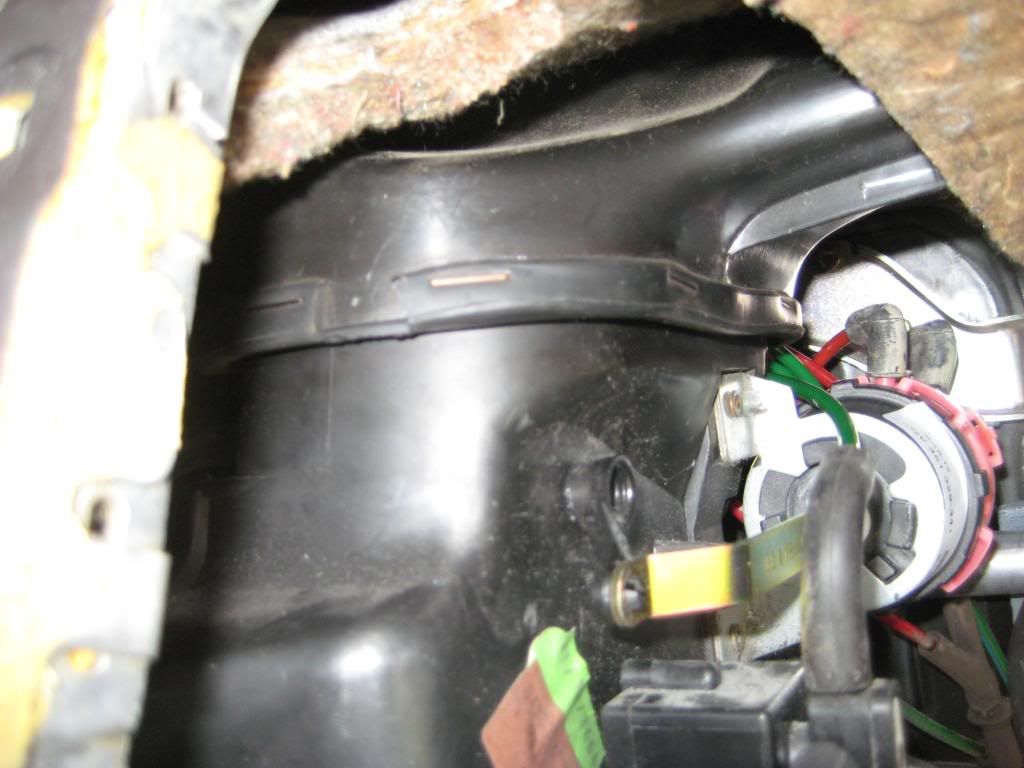 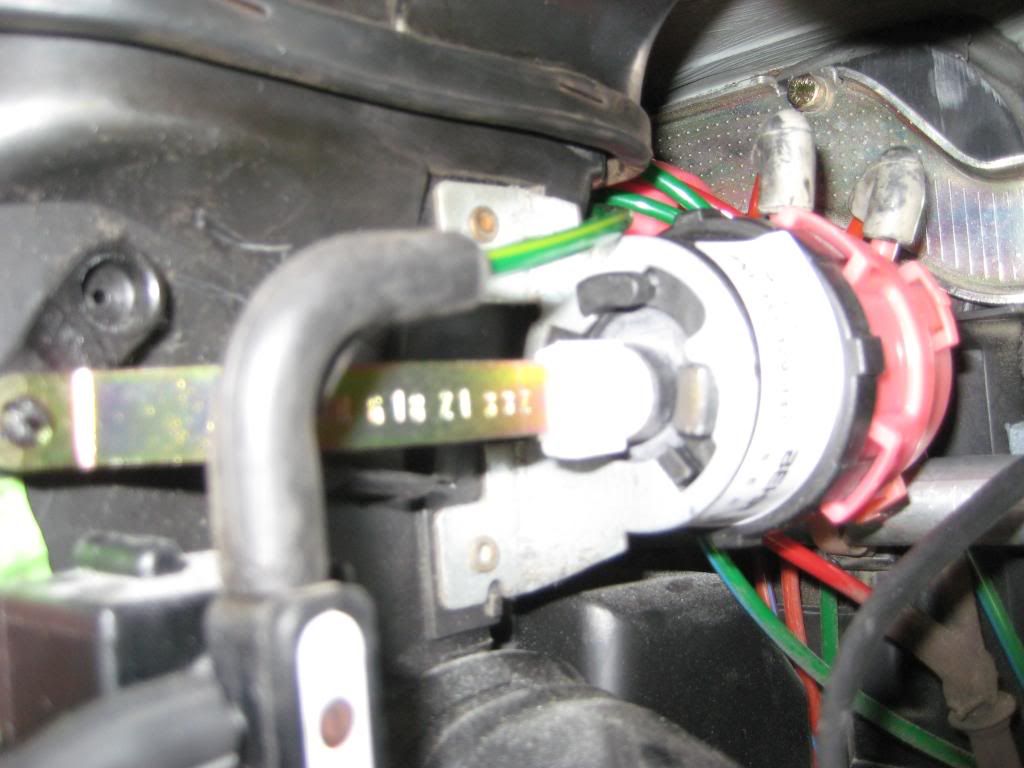 2) A better angle with the dash off - 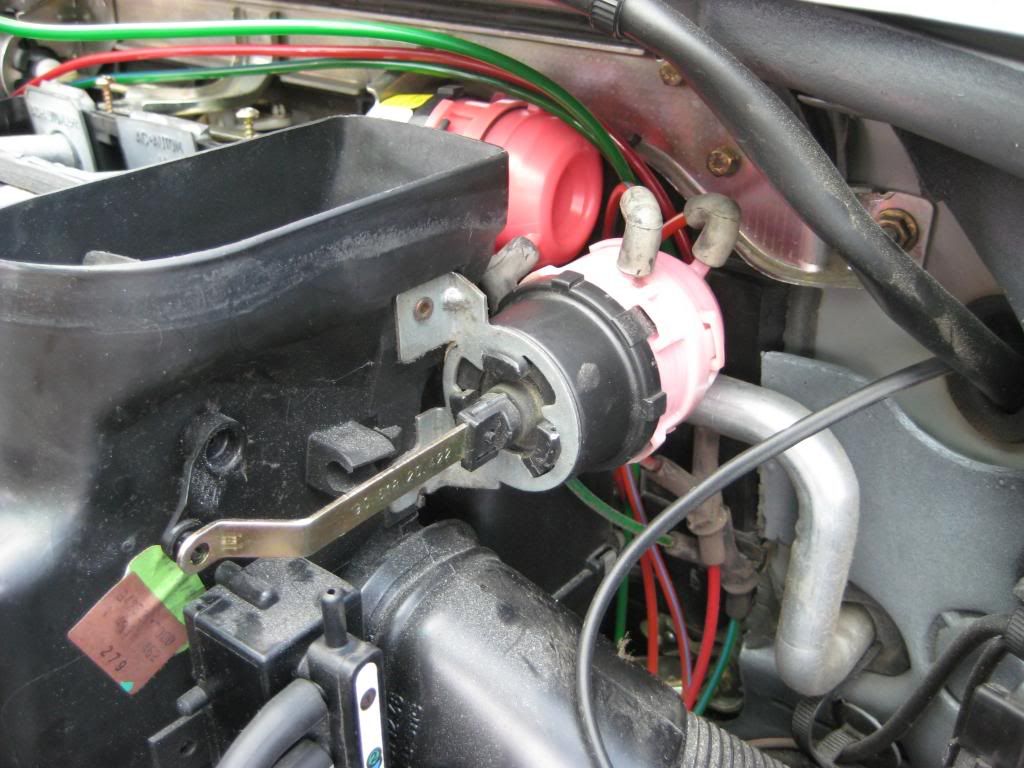 3) Let's mix things up and start by releasing the far end of the actuator rod from the plastic clip on the bellcrank. It's going on at the center of the picture but the camera decided to focus on the bulkhead to the right. There is a big bend in the actuator rod towards the bellcrank so it's unlikely you'll miss it. But you're relying on me for help so I shouldn't be so sure - 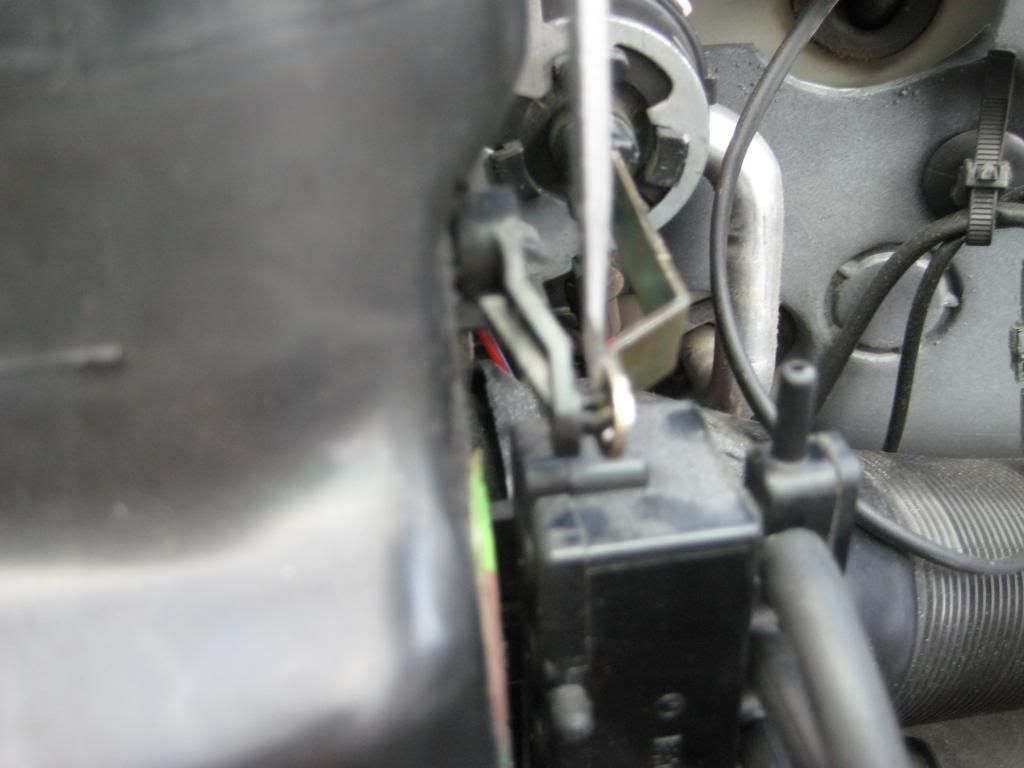 4) Note the position of the hoses then pull them off. Note that they're both red! One has a stripe and one doesn't or they have different stripes -  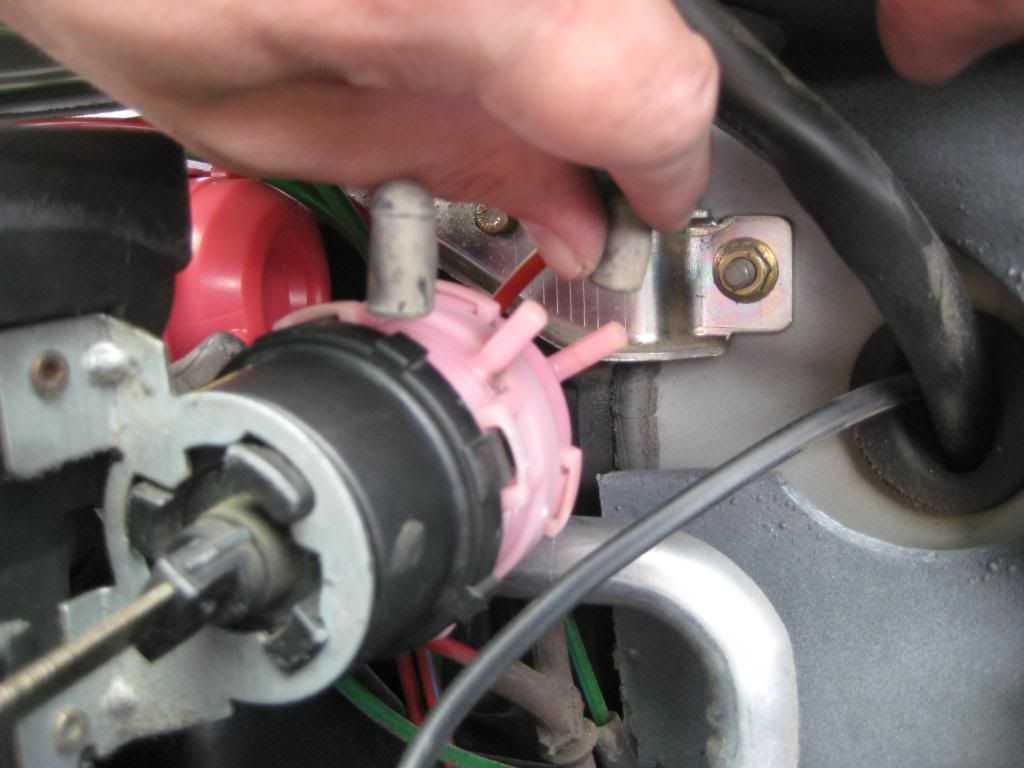 5) Push in the locking tab at the 5 o'clock position and turn the pod CW to align the tabs... zzz... with the slots... zzz... in the bracket... zzz... Yes, I was falling asleep. Note the hoses are still atached as I release the pod from the bracket - 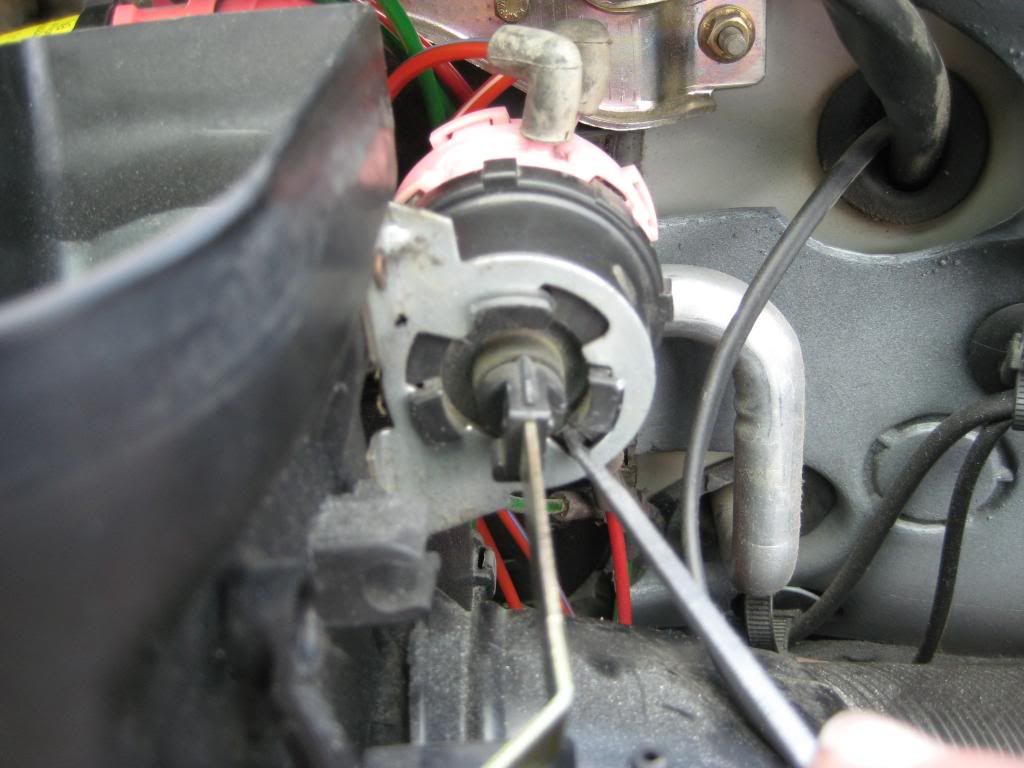 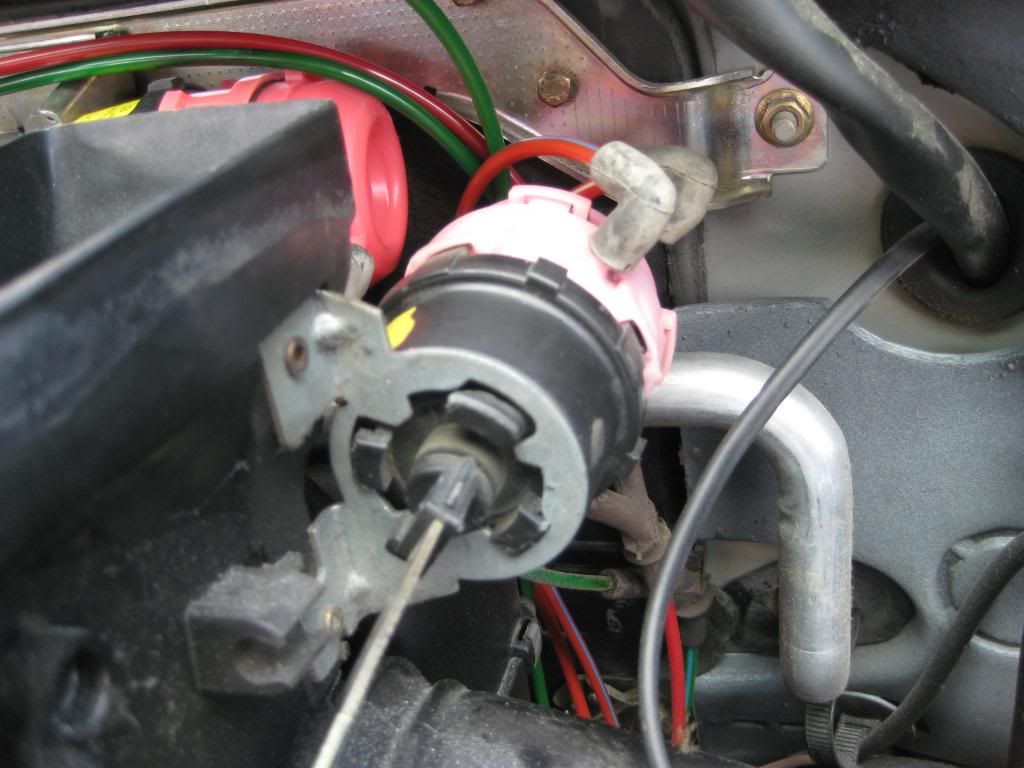 6) Pull the pod tabs clear of the bracket then turn hard starboard. Oops, I jumped the gun. That's the new pod going in rather than the old pod going out. Well, coming in directly from the right is an easy way to get the new pod in place - 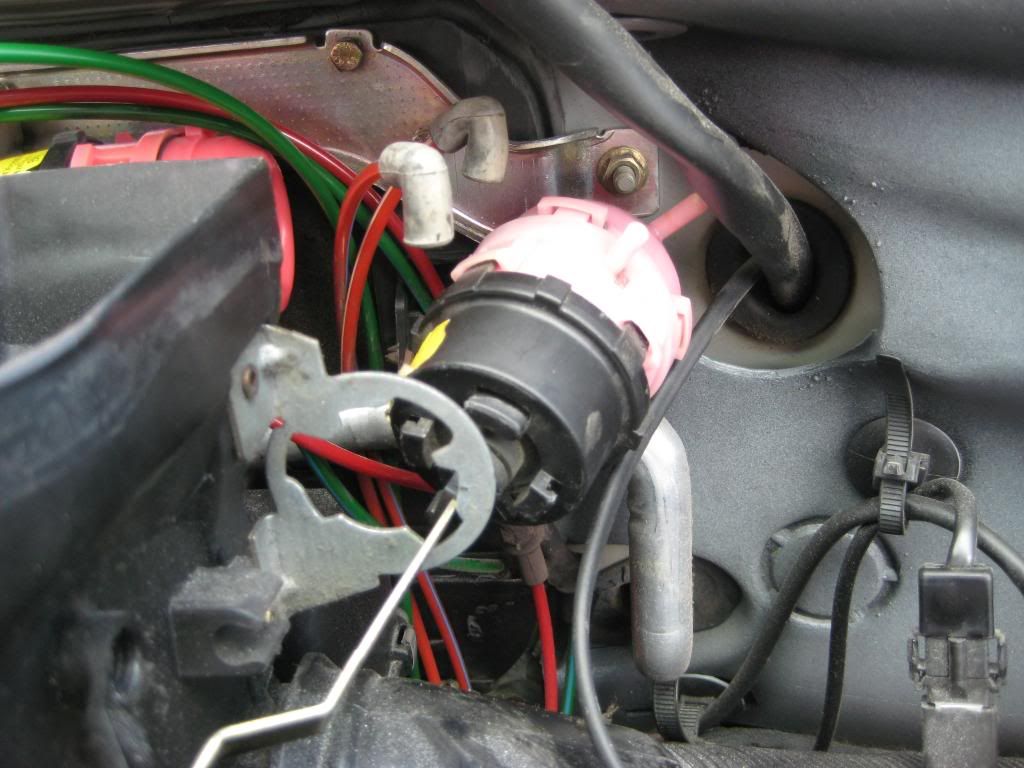 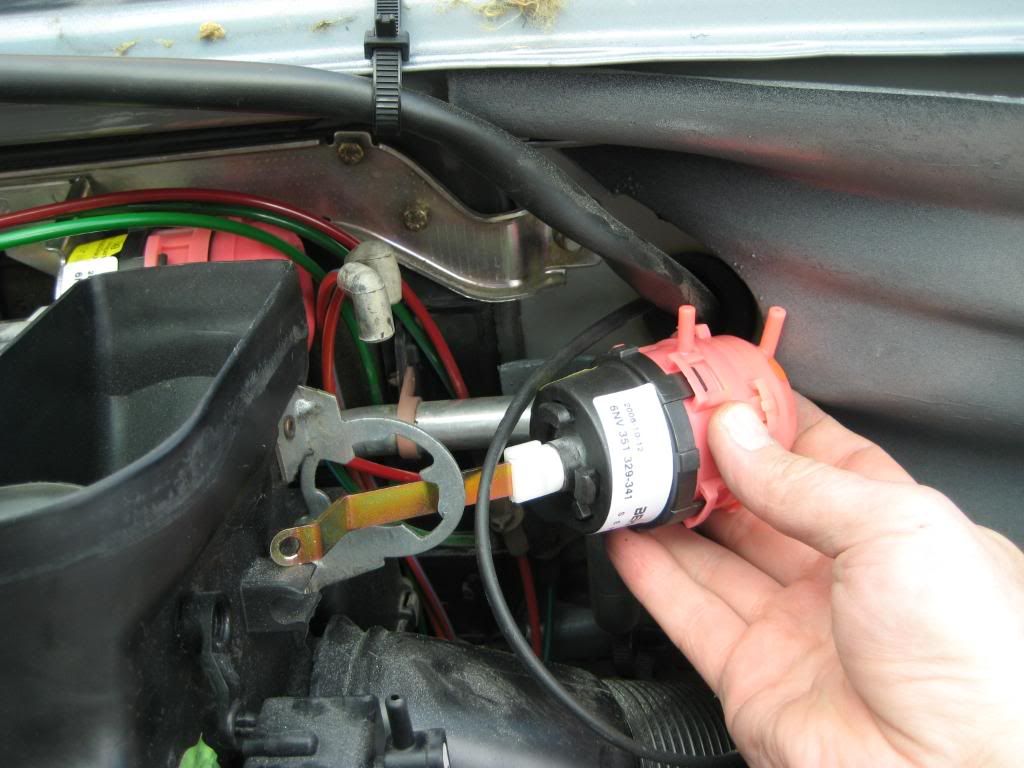 7) Set the new pod in place then align the tabs with the bracket (it only goes in one way) - 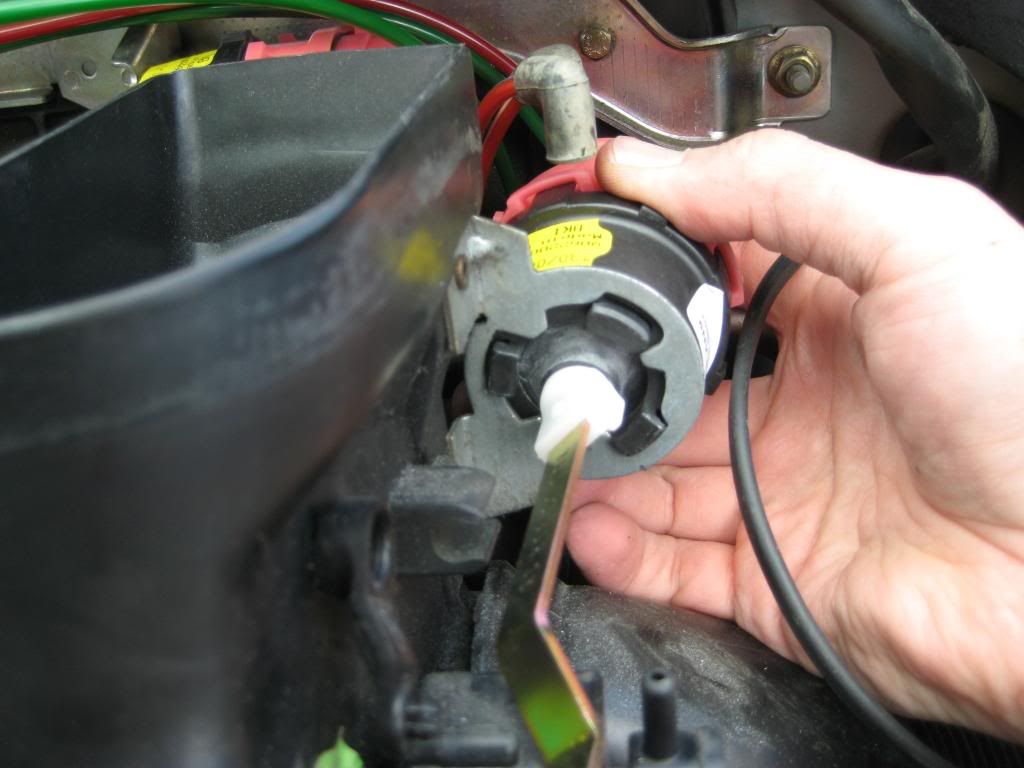 8) Turn the pod CCW until the tabs contact the bracket and you hear/feel the locking tab snap into place - 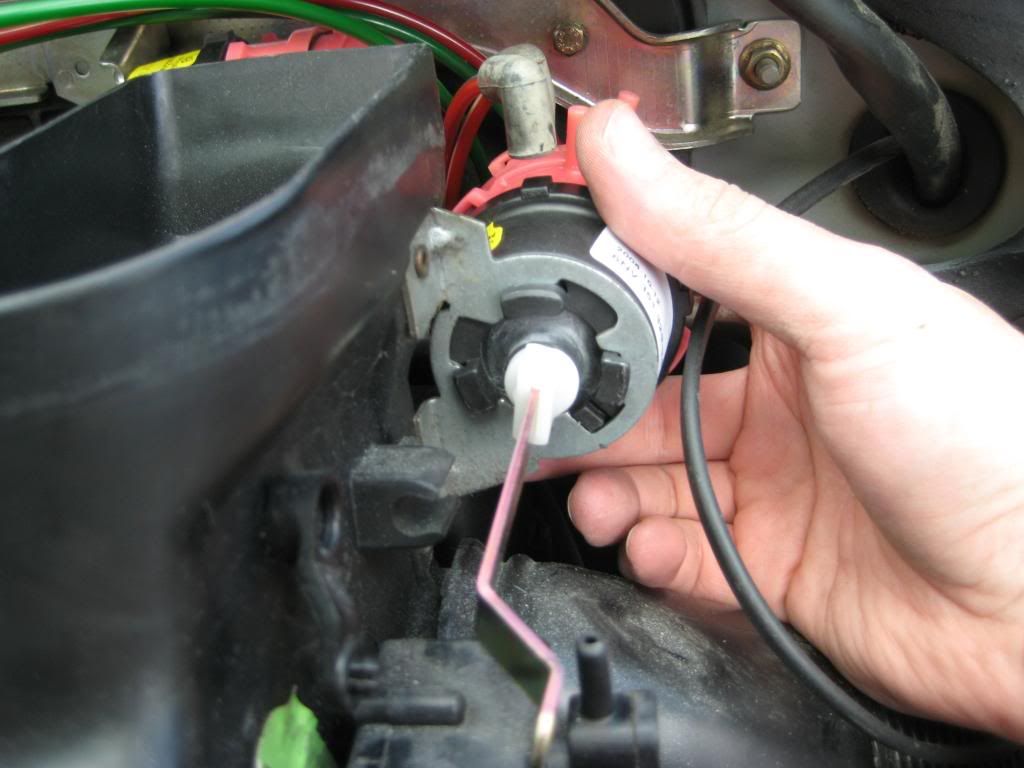 9) Rotate the actuator rod so the end is by the clip on the bellcrank and snap the rod onto the bellcrank - 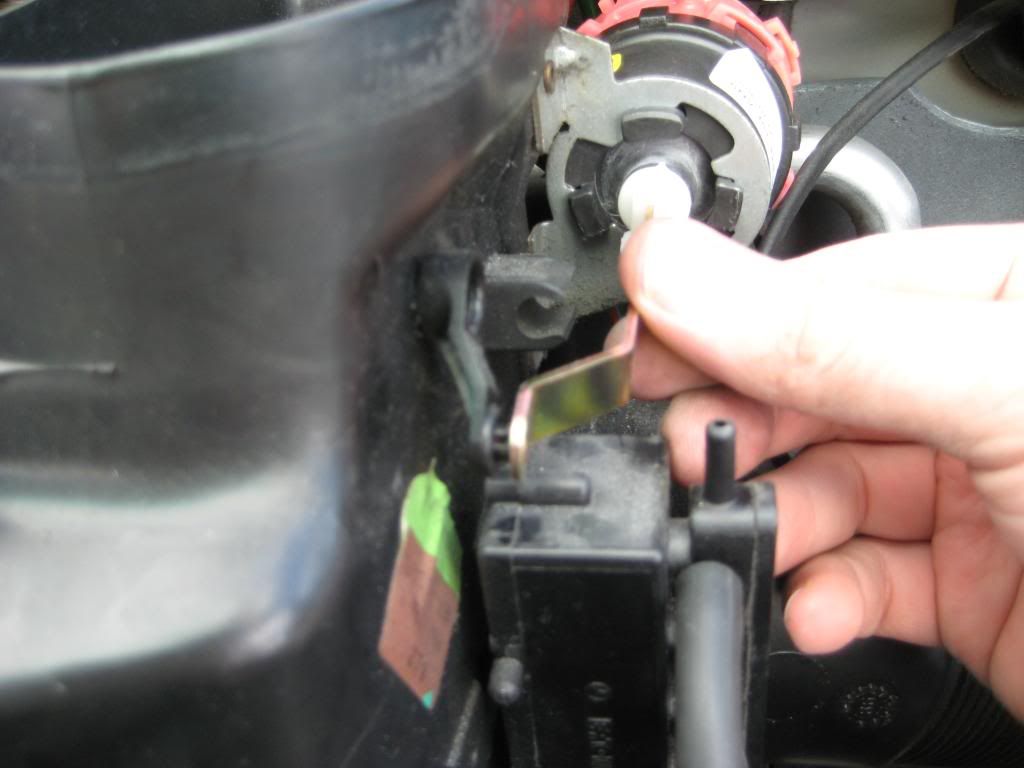 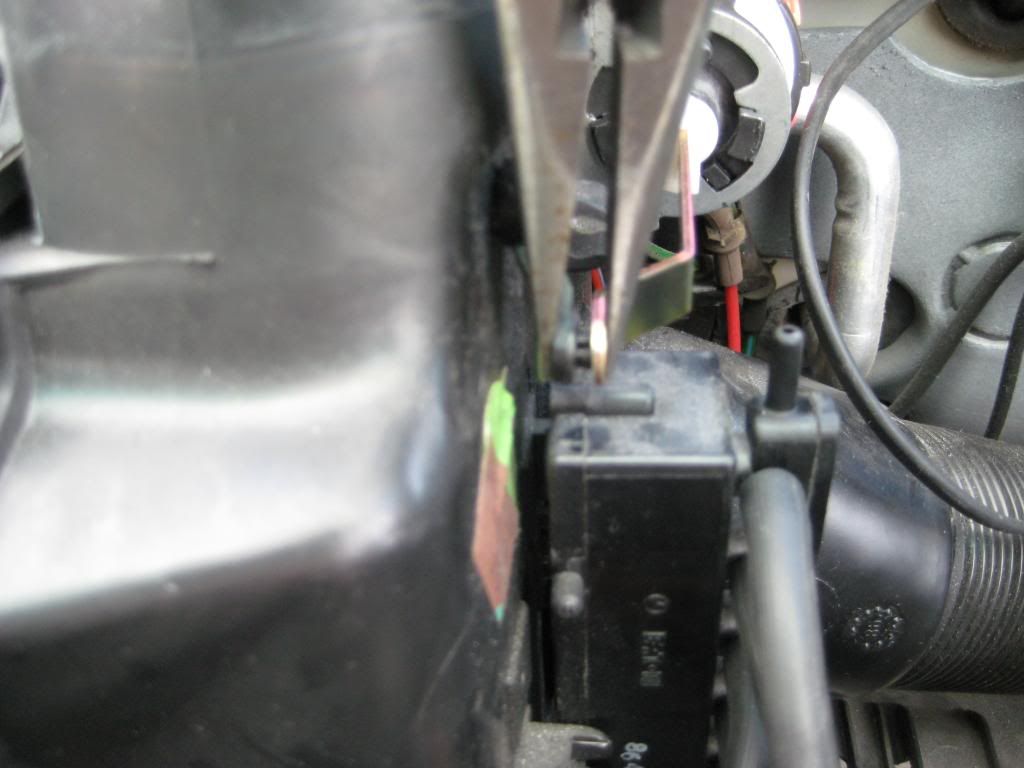  10) Put the hoses in place - 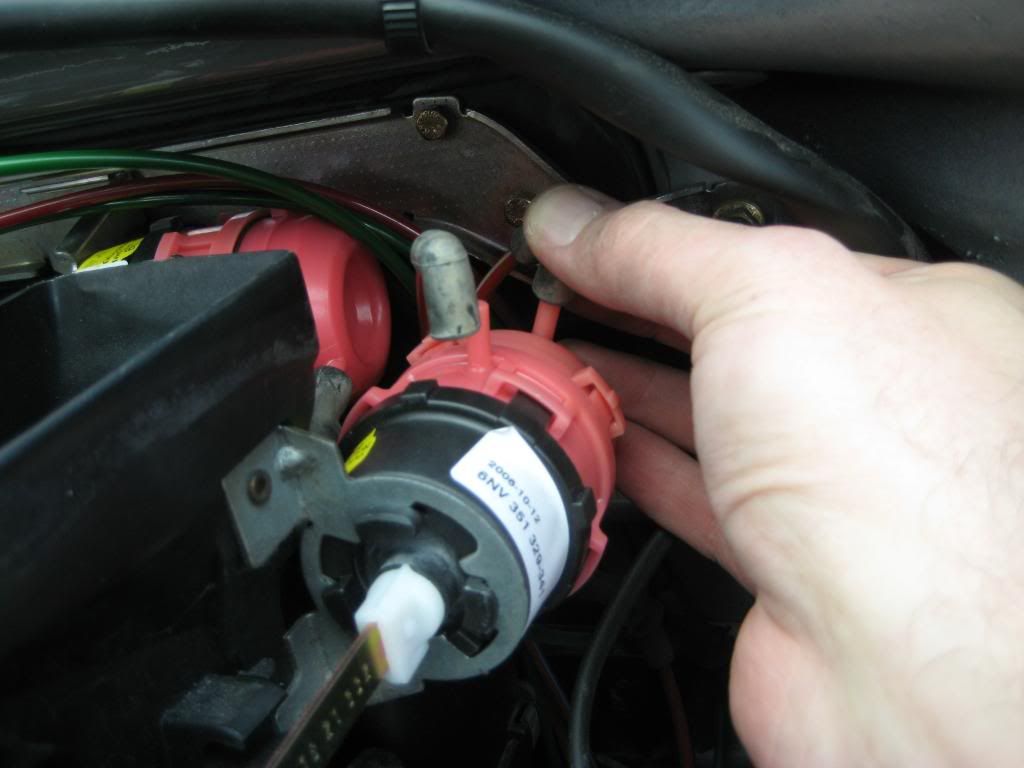 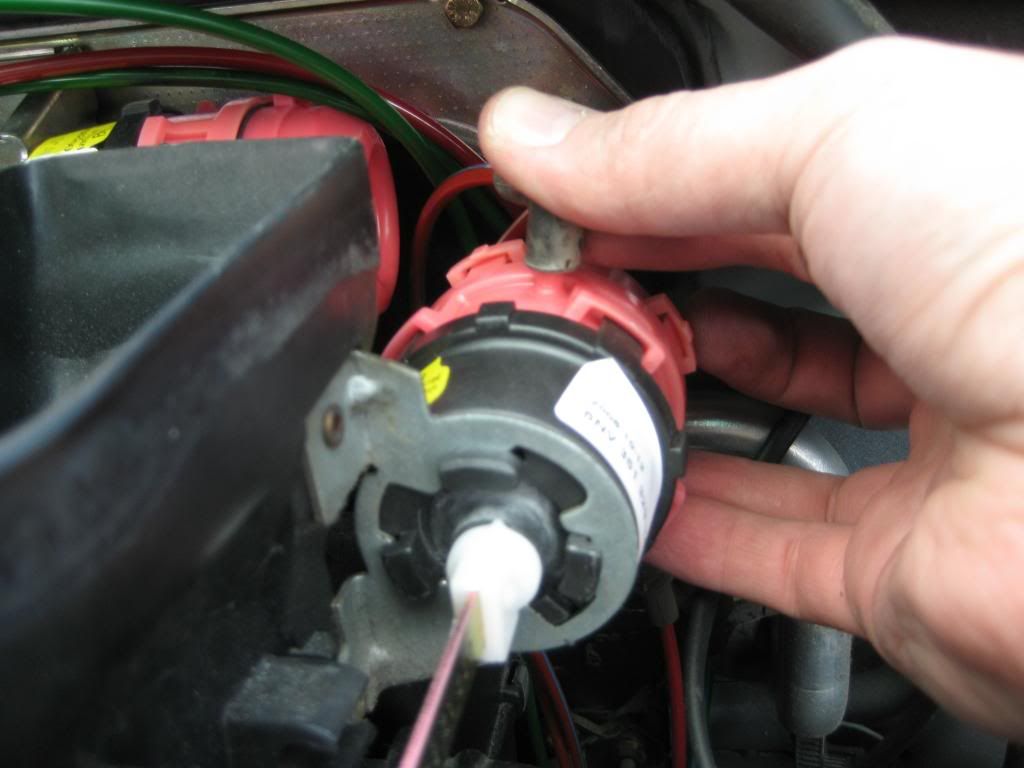 That should so it! Sixto 87 300D Last edited by sixto; 02-28-2009 at 07:14 PM.
|
|
#3
02-28-2009, 08:58 PM
|
|||
|
|||
|
Another excellent presentation Sixto.
Can we have permission to make this into a WIKI? It's perfect.
|
|
#5
02-28-2009, 10:30 PM
|
|||
|
|||
|
Quote:
|
|
#6
03-01-2009, 10:26 AM
|
|||
|
|||
|
Quote:
is the rod upside down in this second photo? you note the orientation in the step where you remove it, but it looks upside down in this step. thanks for the post, it's brilliant.
__________________
________________ punkinfair
|
|
#7
03-01-2009, 12:40 PM
|
||||
|
||||
|
Nicely done, Sixto, thanks again.
__________________
 "Buster" in the '95 Our all-Diesel family 1996 E300D (W210) . .338,000 miles Wife's car 2005 E320 CDI . . 113,000 miles My car Santa Rosa population 176,762 (2022) Total. . . . . . . . . . . . 627,762 "Oh lord won't you buy me a Mercedes Benz." -- Janis Joplin, October 1, 1970
|
|
#8
03-01-2009, 02:51 PM
|
||||
|
||||
|
Quote:
Sixto 87 300D
|
|
#9
04-15-2009, 03:32 PM
|
||||
|
||||
|
__________________
Bill Wood - Retired Webmaster My Personal Website 1998 Mercedes E430 2010 Toyota Sequoia My Photo Albums
|
|
#10
10-05-2009, 08:39 PM
|
|||
|
|||
|
thanks! i really learned a lot from this post, and also the noods will gonna like this post too...
__________________
discount auto parts
|
 |
| Bookmarks |
|
|


 Linear Mode


