

|
|
|
|
|
|
|
|
#1
 10-06-2003, 04:48 PM
|
|||
|
|||
|
Rear axle carrier (subframe) mounts / ball joints ('84 190D)
Hi,
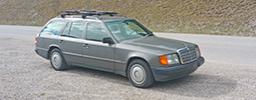
I recently bought a 1984 190D 2.2 5-spd (on eBay!). It's metallic light blue with black mb-tex interior. I have to get the car inspected before I can get license plates, and during the inspection, I was told that I need new rear axle carrier mount bushings (also called subframe mounts?). The bad one is located just to the front of the rear axle. Here is a picture of the general location:  Here is the 'good' one (on the left side of the car)  And here is the 'bad' one (on the right side of the car)  So, now that you've seen the pictures... First question: How hard is this part to replace, as a do-it-yourself job? If anyone has done it before, do you have any tips or advice? I've done a search and found some mention of this job on other cars, but not specifically on a 190. Second question: The people who did the inspection also told me I need new lower ball joints on the front of the car. I looked through the maintenance records for the car, and these were replaced 3 years ago, so I am surprised to hear that they need replacing so soon. What is a good test to determine if they are actually bad? I was working on the car on the weekend (idler arm repair kit) and had the car jacked up, and I couldn't tell what was wrong with them... Thanks for your help! Matt 

|
|
#2
10-06-2003, 07:37 PM
|
|||
|
|||
|
Matt:
The rear subframe bushing is a big PITA, but can be done if you have jack stands and a floor jack. You will also need to fabricate a puller to pull the bushing/mount out and pull a new one in. procedure is to jack up car, then loosen one side and drop the subframe down on that side, pull the bushings in, then reattach, then do the other side. If you have antilock brakes, you will need to remove the sensor on the diff. Take a good look, if one is bad the other is probably going, and there are two more on the front, also probably bad by now. Also take a good look at the links for the rear suspesion. Signs of rubber tearing or shreds of rubber indicate bad links, and they need replacing as well. Font ball joint badly worn will groan or creak when you turn the wheels, "knuckle" on rough pavement (dull clonking rattle), and will allow detectable up and down motion with the wheel off the ground -- use a prybar on the bottom of the tire. If it will move vertically and you can see the motion on the ball joint, replace it. Bad wheel bearings can show the same symptoms, except the wheel will move on the spindle instead of the ball joint moving. Peter
__________________
1972 220D ?? miles 1988 300E 200,012 1987 300D Turbo killed 9/25/07, 275,000 miles 1985 Volvo 740 GLE Turobodiesel 218,000 1972 280 SE 4.5 165, 000 - It runs!
|
|
#3
10-07-2003, 01:23 PM
|
|||
|
|||
|
Thanks for the advice!
I jacked the car up so that the wheel in question was about 3.5" off of the ground. I then stuck a four foot 2x4 underneath it (between the wheel and the floor) and pried upwards. The shocks / springs / car all moved, but there was zero movement in the ball joint. I also don't hear the other symptoms you describe (groaning / creaking / knuckling).I had a 190E with bad tie rod ends, and the wheel would easily wiggle horizontally with the car jacked up. I assume I would be looking for a similar type of movement / free play in the vertical direction if the ball joint is bad, and I don't see this at all. Unless there's something I've missed, I'm going to assume that the inspection facility is wrong on this one and see if I can get them to take it off of the report (they already listed some other things that don't need doing, just because 'these things usually go on old cars'). I ordered the parts to do the subframe mounts - I'll give it a try on the weekend and see how it goes. If I can't do it, I'll just take the parts somewhere and get a mechanic to do the work... Matt
|
|
#5
10-11-2003, 03:29 PM
|
|||
|
|||
|
Hi,
I replaced my subframe mounts last night. It wasn't nearly as bad as I was expecting (but, like all car repairs, it was still frustrating at times). I couldn't really find instructions on the internet that applied to my car specifically, and the Mercedes W201 manual relies on special tools, so I decided to make a set of instructions so that others can replace their subframe mounts as a do-it-yourself project. The instructions can be downloaded from http://www3.telus.net/cornblatt/mercedes/Mercedes%20190D%20subframe%20mount%20bushing%20instructions.pdf Edited 13 Mar 2006: My ISP accidentally deleted my webspace account, so the document isn't available at the above address anymore. The PDF file has been split into 2 parts. The two files are now at the following location: http://www.dot7design.com/mercedes/W201_190D_subframe1.pdf http://www.dot7design.com/mercedes/W201_190D_subframe2.pdf If that doesn't work, then send me a private message with your e-mail address and I can forward them to you by e-mail. The files are 5.7MB (there are many photos). Let me know if you find the instructions useful! The quotes to have this work done at a shop were as follows: Mercedes dealer: $479.32 for one side Independent shop: 5 hours at $65/hr plus $157 parts to do both sides. P.S. These instructions may apply to 124 cars as well (the replacement parts I bought had a part number starting with 124 instead of 201, so the parts are probably the same for both types of car)
__________________
 1989 250TD Wagon 5-speed, 160,000mi ::: Dark gray metallic / black cloth 1984 190D-2.2 5-speed, 287,000mi ::: Silver-blue metallic / black MB-tex ::: SOLD 
Last edited by cornblatt; 05-15-2007 at 12:15 AM. Reason: Updated due to bad web link
|
|
#6
10-11-2003, 03:35 PM
|
||||
|
||||
|
Matt
The PDF download of instructions are excellent! Thank you! I would offer one bit of caution regarding Vaseline, since it is petroleum based, it will eat into rubber. May I suggest using a silicone based product instead, such as SiliGlyde or other product. Thanks, Haasman
__________________
'03 E320 Wagon-Sold '95 E320 Wagon-Went to Ex '93 190E 2.6-Wrecked '91 300E-Went to Ex '65 911 Coupe (#302580)
|
|
#7
10-15-2003, 03:02 PM
|
|||
|
|||
|
Thank you for the tip!
I have updated the instructions to include this information so that others don't make the same mistake I did! Matt
__________________
1989 250TD Wagon 5-speed, 160,000mi ::: Dark gray metallic / black cloth 1984 190D-2.2 5-speed, 287,000mi ::: Silver-blue metallic / black MB-tex ::: SOLD
|
|
#8
10-16-2003, 12:54 PM
|
||||
|
||||
|
Matt
I would like to offer one other piece of advice regarding supporting the car using building block materials. After re-reading your excelent article (PDF) it reminded me of a past incident where a neighbor's car fell (luckily not on top of him) while supporting with a cinder block. Although these blocks can take a lot of weight, their design use application is distributed. Having a concentrated weight on a relatively small surface area of a brittle block will cause this block to crack and shatter. Again, thanks for your excellent instructions. This site should post them in the DIY section. Haasman
__________________
'03 E320 Wagon-Sold '95 E320 Wagon-Went to Ex '93 190E 2.6-Wrecked '91 300E-Went to Ex '65 911 Coupe (#302580)
|
|
#9
03-10-2004, 07:31 AM
|
|||
|
|||
|
Did you also change the rear rear subframe bushings. If so any problems? They look much easier. Going to do mine this weekend.
__________________
1987 190 Euro
|
|
#10
03-10-2004, 10:35 AM
|
|||
|
|||
|
No, I didn't do the rear-rear bushings, but the procedure looked similar to the front-rear ones. Let me know how it turns out!
__________________
1989 250TD Wagon 5-speed, 160,000mi ::: Dark gray metallic / black cloth 1984 190D-2.2 5-speed, 287,000mi ::: Silver-blue metallic / black MB-tex ::: SOLD
|
|
#11
03-10-2004, 10:47 AM
|
|||
|
|||
|
I forgot to say thank you for posting such a great PDF on the bushing R&R. It is so much better than the Mercedes CD-rom.
__________________
1987 190 Euro
|
|
#12
12-08-2006, 05:30 AM
|
|||
|
|||
|
Those instructions are entertaining reading even if you're not replacing your bushings!
__________________
190E's: 2.5-16v 1990 90,000m Astral Silver 2.0E 8v 1986 107,000m Black 2nd owner http://www.maylane.demon.co.uk/190esmall.jpghttp://www.maylane.demon.co.uk/190esmall2.jpg
|
|
#13
09-08-2012, 11:23 AM
|
||||
|
||||
|
Make it a Wiki
This should be a DIY Wiki!
I found this today and it has been far away the most informative, well written instructions on subframe mounts for W201. Could a moderator please add this to the Wiki so it will be easier to access? Thanks Matt for the great work.
__________________
Spencer 87 2.5L 190D Turbo 5-speed - 102k (Daily Driver) 82 300D Turbo - 145k - Light Ivory (near mint) Gone: 85 300D Federal - mileage unknown
|
|
#15
10-20-2022, 11:54 AM
|
|||
|
|||
|
I've put the instructions at this dropbox link:
https://www.dropbox.com/s/49vjcktspeuhuzm/Mercedes%20190D%20subframe%20mount%20bushing%20instructions.pdf?dl=0 If that disappears or doesn't work, send me a private message with your email address and I can send the file via email.
__________________
1989 250TD Wagon 5-speed, 160,000mi ::: Dark gray metallic / black cloth 1984 190D-2.2 5-speed, 287,000mi ::: Silver-blue metallic / black MB-tex ::: SOLD
|
 |
| Bookmarks |
|
|


 Hybrid Mode


