

|
|
|
|
|
|
#1
 09-01-2025, 03:32 PM
|
|||
|
|||
|
W126 Valve Cover Gasket Replacement (1989 560SEC)
The repair is done and the oil leak resolved. I found the problem one day when, after driving one mile and coming to a stop, I could see smoke lightly rolling out from under the hood of my car. Oil was burning near the rear two spark plugs, on the driver's side of the car. Oil also dripped onto the Power Steering pump and nearby tie-rod & steering parts. I reached out to several mechanics on justanswer.com to get this procedure.
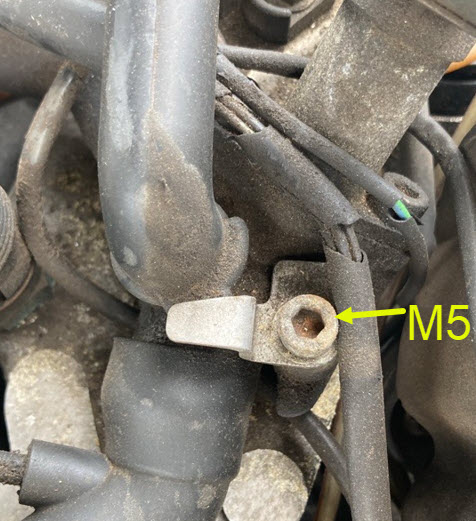
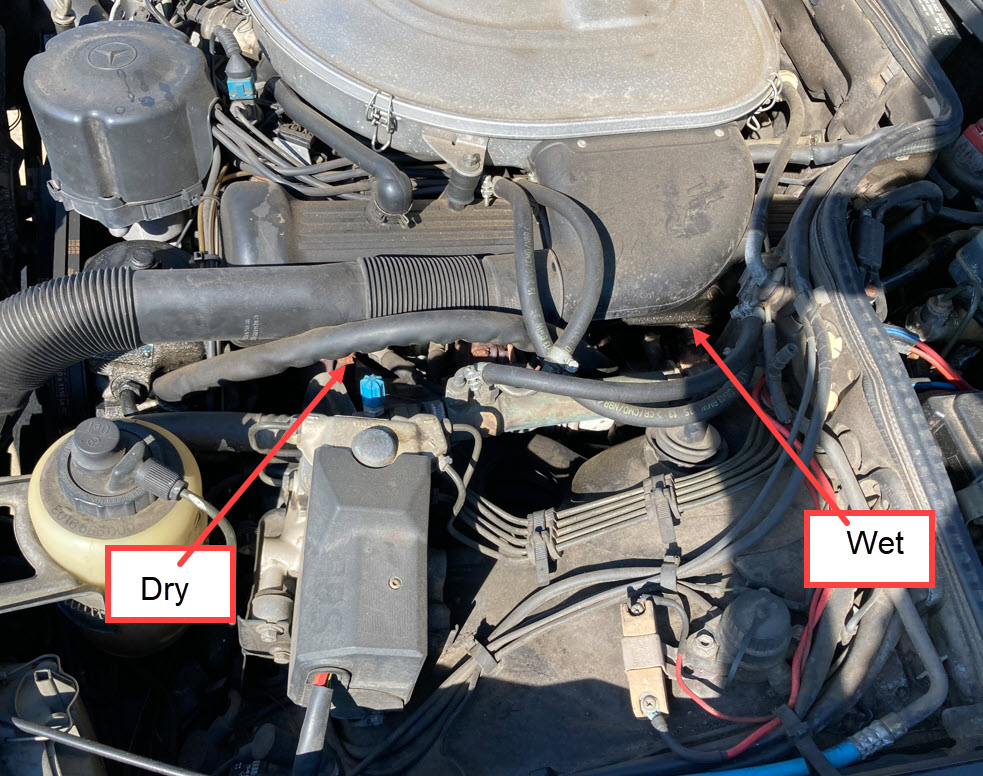    * First step is to remove the Air Cleaner and get access to the Fuel Distributor (see yellow box).  * Now we need to depressurize the fuel system. One mechanic told me I could simply disconnect the Fuel Pump Relay and then run the car until it died. However, I had already disconnected one fuel line and I did not want to put anything back together. So, what I did was loosen the nut at fitting 1, soaking the gas with a rag. Then I loosened the nut at fitting 2, but the pressure never seemed to want to dissipate. I remembered that my gas tank always blows out air when I remove the cap, so I removed the cap hoping it would help depressurize the system. After I removed the cap I was away from the car for about 15 minutes and then when I returned the system was depressurized. So now I have fitting 1 removed from the Fuel Distributor and fitting 2 removed from the Fuel Pressure Regulator: 
|
|
#5
09-01-2025, 03:57 PM
|
|||
|
|||
|
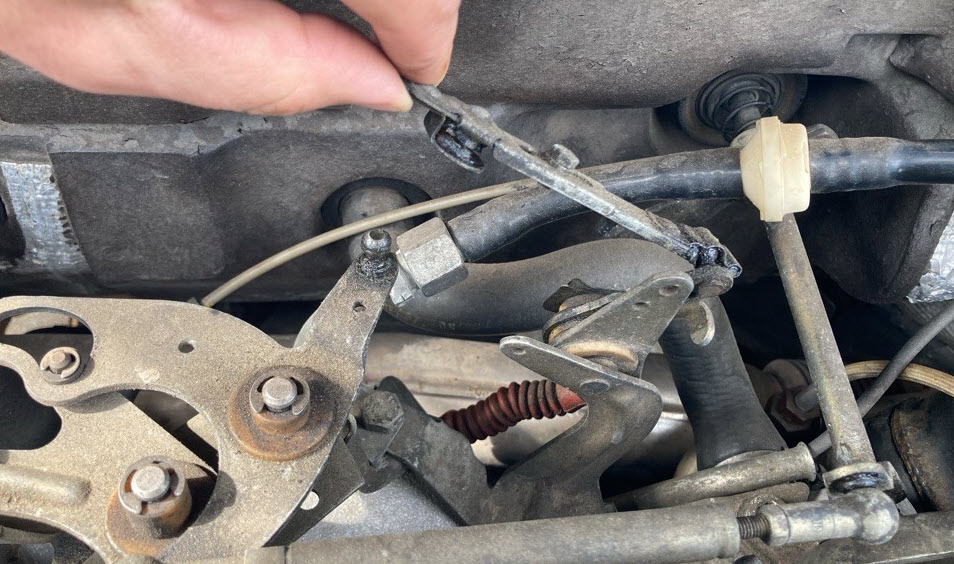
Next I had to remove this vacuum line that goes to the Brake Booster, but for good access I had to disconnect this linkage that is part of the throttle or cruise control system (not sure). I disconnected this vacuum line at the metal ferrule fitting, using 19mm and 17mm wrenches. I did not want to disconnect any of the barbed fitting connections, fearing they would not go back together without needing new parts/hoses.
|
|
#6
09-01-2025, 04:03 PM
|
|||
|
|||
|
Now remove the four screws that hold the Valve Cover in place. Be careful and ensure the washers come out with the screw - these are probably critical for sealing, and they may need replacement (or black RTV). Also, this tube fell out as I lifted the Valve Cover. Just snap the bibs into these holes as shown in the image.

|
|
#7
09-01-2025, 04:11 PM
|
|||
|
|||
|
I had a recommendation to use black RTV with the new Gasket. If your Valve Cover is not warped, you probably don't need it. I highly recommend, before you even open the tube of RTV, is to install the Gasket onto the Valve Cover. My Gasket would not stay on. The Gasket was a touch too small and it kept popping off. Unfortunately, I put RTV on the outside lip of the Valve Cover (not on the inside, so it would be easy to remove in the future). So now I have RTV getting smeared everywhere while I chase the Gasket. The Gasket has one flat side and the opposite side has several curves. Install the curves first, so the flat side gets stretched. When the curves are stretched, they pop off. Eventually, the RTV started to cure and the Gasket was sticking in place long enough to install the Valve Cover.

|
|
#8
09-01-2025, 04:15 PM
|
|||
|
|||
|
That's it. Installation is the reverse of removal. Valve Cover Screws get torqued to 3 N-m [27 in-lb].
* The oil leak was not between the Cylinder Head and the Gasket. Rather, the oil went around the U-Channel geometry, flowing between the Gasket and the Valve Cover. This is one argument for using RTV, to elongate the seal life. I would not put any RTV between the Gasket and Cylinder Head. 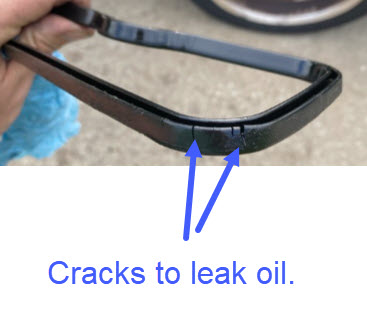
|
 |
| Bookmarks |
|
|


 Linear Mode


