|
I must say this was a very informative post regarding the head gasket replacement on the E320. Just a couple of notes here to add, as I just did this on my 94 E320.
1. Yes the part about the vacuum hoses under the intake manifold, definitely order them before starting the job, they are available here on the fastlane parts list, they are listed as "breather tubes". The clamps that secure these lines under the intake are pain in the A** to remove as well, this took longer than a lot of the other disassmbley in order to remove the head. I completely agree, just cut these tubes in half and save yourself an hour or so trying to disconnect them while trying not to break the connections at the intake manifold. I ended up changing the squeeze clamps when I replaced the tubes (hoses) with regular hose clamps with a screw to tighten that I could access from the top of the intake manifold.
2. The EGR tube is also quite a pain in the butt, just make sure you remove the retaining bolts at the left side of the head (it connects to the black bracket used to lift the head), the next retaining bolt is at the oil filter assembly and the last bolt it at the throttle actuator I believe. I discovered all these bolts as I began to slowly lift the head off the engine block.
3. The rear head bolt on the left side of the head cannot be inserted without installing it into the head before lowering the head onto the engine block. I ended up inserting the bolt and then holding it up with some duct tape so it would not portrude out of the bottom of the head as I positioned the head onto the block. Trust me on this one, you cannot get the bolt into the head if you lower the head onto the block first, the firewall will prevent it.
4. Remove the air filter box, this will make the process of re-installing the chain tensioner much, much easier.
5. Last but not least, I know it says in this post on the first part you can leave the accesory belt in place, but in the end you end up loosening it anyway to remove the air pump. Loosening the belt and removing the air pump and its plumbing is much easier to do than trying to remove the air pump plumbing with the air pump in place and the belt still in place.
In the end all turned out well for me and the engine fired up immediately on the first try. I was very cautious and a bit nervous and triple checked that I had the cam gears aligned properly as well as manually turning the engine through 2 revolutions before I even thought of turning the key, the last thing I wanted to hear was valves hitting pistons. I must say overall this was a very, very good post. Just wanted to add a couple of my own observations when doing this job in order to make this a bit easier for the next one of us that decides to tackle this job.
__________________
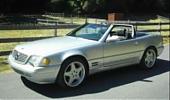
 1999 SL500 87K
1994 E320 112K
1998 Ford Ranger - the daily driver 274K and no major repairs (an indestructible truck)
1978 Pontiac Trans Am 110K
1977 Pontiac Trans Am 130K
1999 SL500 87K (the garage queen, only out in the summer)
|