Quote:
Originally Posted by sunedog

99 ML 320 with machine gun lock on front passenger door. I have the new actuator in hand but I'm having trouble removing the old one because I can't figure out how to remove the lock cylinder. There are plenty of write-ups on how to R&R the actuator, but I can't find any detail on removing the lock cylinder other than what is quoted below.
There's even a MB factory video on youtube showing how to do it. Unfortunately, the vid is 23 seconds long and provides no detail. I tried doing what the lab coat guy does so effortlessly in the vid, but no luck in removing the cylinder. https://www.youtube.com/watch?v=Am97MVCc4T4
My main problem is I can't see what I'm trying to unscrew. My eyes aren't good and I can't focus if I peer through the approx .25" access hole for the allen wrench. Anyone have a picture of the lock cylinder out of the door so I can see what I'm trying to loosen? |
OK. I went back and tried again and was successful this time. I took everything apart and was able to shine a small LED flashlight up into the corner of the door and could barely see the 4mm set screw I needed to loosen. Put the key in the cylinder and wiggled it as I unscrewed the set screw 4 or 5 turns.
Here is a shot of the inside of the door showing the door handle bracket from the inside. The set screw can be seen on the far right. You couldn't see any of this until the actuator was removed.
[IMG]
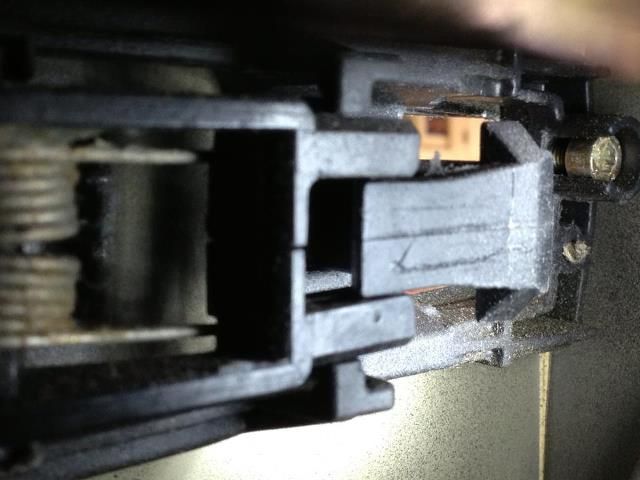
[/IMG]
After the key cylinder is out, you do not have to take any of the rest of the door handle off. The reason you even have to take the cylinder out is the shaft on the back of the cylinder with the tab fits into a slot in the door lock actuator. That shaft and tab prevent you from being able to remove the actuator until they are disengaged.
The one point I disagree with dickiegoodman on is this statement: "The reason you have to remove lock tumbler is there is a phillips screw behind it that is the last fastener holding the door lock actuator to the door." On mine, the only things attaching the door actuator to the car are the two screws in the door edge. The lock cylinder had to come out to remove the shaft and tab from the actuator, but there was no additional fastener as he indicated.
Here's a shot of the cylinder on my bench. You can see the shaft and tab. You can also see the threaded hole on the right into which the 4mm screw enters.
[IMG]
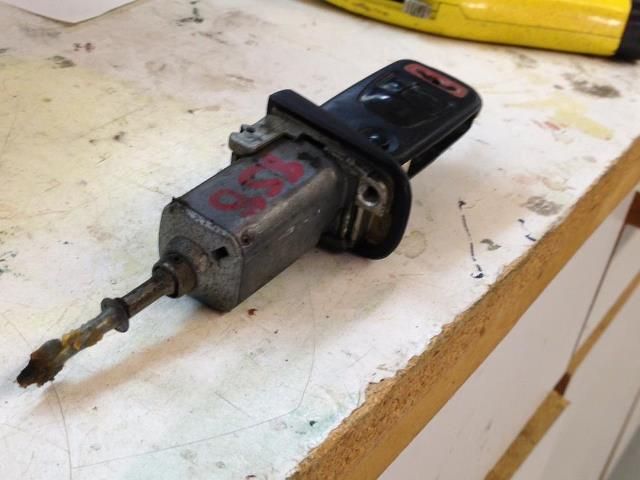
[/IMG]
A couple of notes from my experience:
1. you'll need a 4mm (or 5/32") hex key that is about 5" long. My original one was 4.25" long and it wouldn't reach. Picked up a new extra long set from Northern Tool for $19.99 and the 4mm key was about 5.5" long.
2. I did have to loosen the two screws securing the top of the air bag to the door in order to R&R the cable from the actuator to the inside door handle. That allowed it to pivot away from the door about and inch. Most of the write-ups indicated you would be able to remove the cable and thread the new one in without messing with the air bag. But that wouldn't work on mine. I did not disconnect the negative battery terminal, but I probably should have.
3. I totally concur with everyone who says you need to drill out both window channel rivets on the bottom and only one on the top. Take out the one nearest the rear of the car on the top. The window channel can then be moved quite a bit to create room to R&R the actuator assembly (which is much larger than I anticipated.)
Today was the third time I worked on this so I got pretty good at taking everything part and putting it back together. (Even though I was unsuccessful in getting the broken actuator out the previous two times, I still had to put everything back together to drive the car.) From start to finish today, it only took 45 minutes.