

|
|
|
|
|
|
#1
 07-04-2006, 04:51 AM
|
||||
|
||||
|
power seat problem
While doing my padding project on my passenger seat. I attemped to repair the one adjust that I had fixed earlier. It is the adjuster that makes the front of the seat go up and down.
I fixed it earlier by dissassembling the gear section and plugging the cable into it better than before. I tried this same thing and it didn't work. I had to take the seat in and out of the car multiple times to test it. The last time I decided to replace the cable all together. I figured that would work. Apparently not. Same thing. When I press the button I hear the motor whirr but the seat does not move. In one of the multiple removals I tested the gears by connecting the cable to a drill and running it. The seat moved properly. I am assuming the problem is on the motor side but I have no idea what to do. Kris
__________________
Cruise Control not working? Send me PM or email (jamesdean59@gmail.com). I might be able to help out. Check here for compatibility, diagnostics, and availability! (4/11/2020: Hi Everyone! I am still taking orders and replying to emails/PMs/etc, I appreciate your patience in these crazy times. Stay safe and healthy!) 82 300SD 145k 89 420SEL 210k 89 560SEL 118k 90 300SE 262k RIP 5/25/2010 90 560SEL 154k 91 300D 2.5 Turbo. 241k 93 190E 3.0 235k 93 300E 195k 
|
|
#2
07-04-2006, 09:26 AM
|
|||
|
|||
|
300sd seat repair - keep me in the loop
Hi
I would be most interested in receiving news on how this job went. I need to do the same job on my 83 300sd and I am thinking of getting a shop to do it as the padding job seems a lot more complex with the power seats. All of the instructions I have seen are for the manual seats on the 123 chassis and the removal of the whole power adjuster mess under the seats on the 126 chassis sounds complex. I've seen quotes that the Phillips screws holding the rails on are hard to remove and easy to strip. How difficult did you find it to get all of the hardware off the bottom on the seats? (Unlike many of the folks on this site, I am NOT a hard core mechanic with a professionally equipped auto repair bay in my backyard!) As to your adjuster problem, can I suggest you pick up a small 12v battery that will deliver a couple of amps at a surplus store and apply jumpers directly to the motor terminals? That will allow you to see exactly what is working - and what is not - with the seat upside down, out of the car.
|
|
#3
07-04-2006, 01:54 PM
|
||||
|
||||
|
The Padding Project on Power Seats:
This project is not at all difficult. You will need a few things to do this: 1) a #3 Philips head screw driver 2) some padding (I used carpet padding) 3) some 22ga picture wire (to make a grid to hold the padding in place 4) some electrical tape (to help secure the grid to the springs so that it doesnt go all over the place) ---- Step 1) Remove the Seat Step 2) Put the seat on a suitable work space. Step 3) There are three sets of large philips head screws that secure the rails to the bottom of the chair. In order to remove these you will need to be able to move the bottom of the chair up and down. This can be achieved by either powering up the chair [I am not sure specifically which pins are responsibe for what] or by attaching a drill to the end of the cable that runs to the gears. The cable that is responsible for adjusting this is the cable nearest the electical connector. You will need to remove the metal plate that holds all three cables into the motor. Once that is done u may slide the metal plate and remove the cable. Then put the end of the cable into your drill and run it until the first set of screws is visible. Be gentle with the cable do not run your drill too hard on it and do not apply too muc force on it when you put it into the drill. There is a set of screws at the top, in the middle (it will appear in a hole next to a green painted bolt) and one at the bottom. Step 4) Now that you have the power motors off the bottom of the seat you can begin to stuff your seat with the padding of your choosing. I used carpet padding because we had just installed carpet and there was plenty left over. 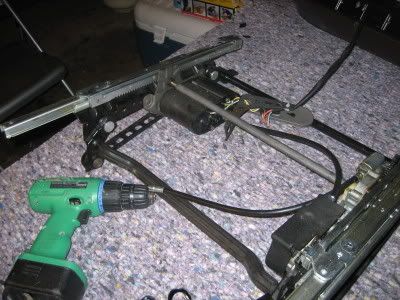 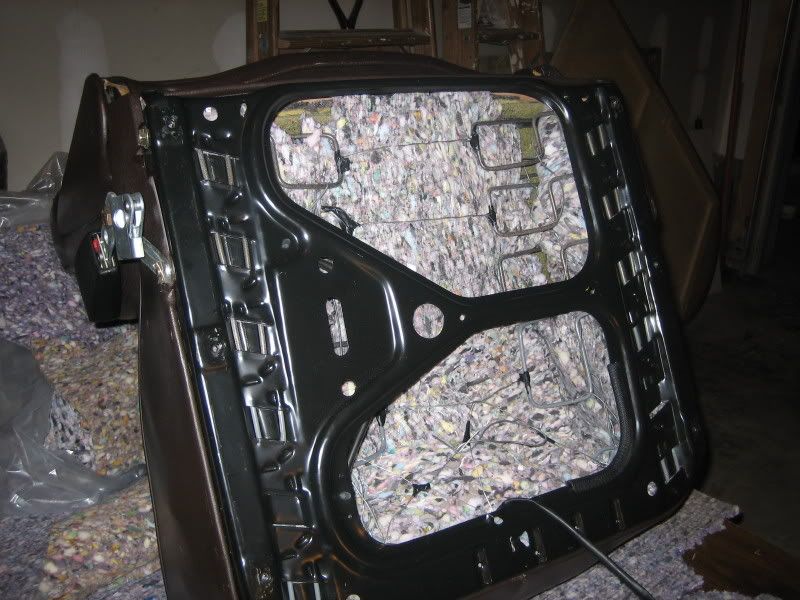 Step 5) Once you have padded you seat to your comfort you can secure the padding by making a wire grid with the 22ga. picture wire. I don't reccommend anything thicker than 22ga. It becomes difficult to work with and doesn't get quite as tight as 22ga. I ran out of 22ga and was forced to use 16ga on 1 line of my grid. It wasn't easy.  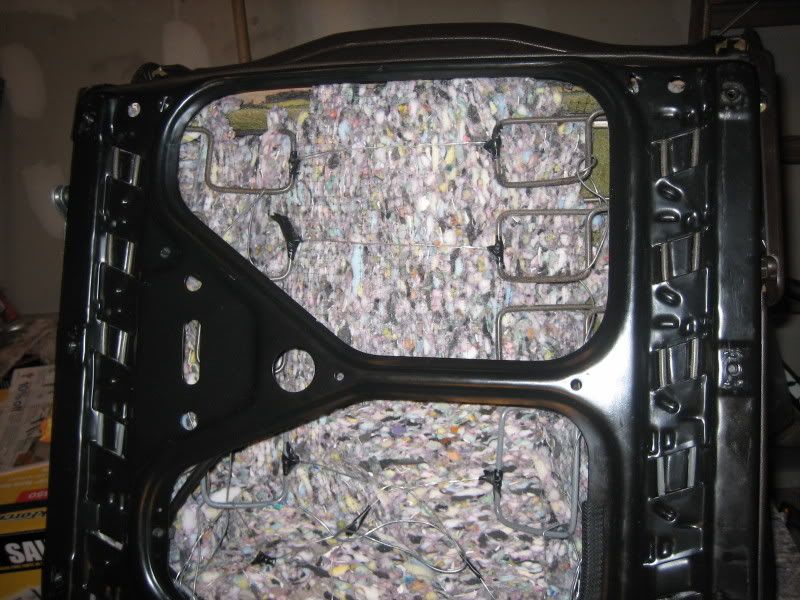 Step 6) Reinstall your power motor apparatus in the same fashion that you removed it. Step 7) Remount the seat in you benz and enjoy. This same process can be repeated for the back bench seat too. Only skip the motor-removal part as it does not have one. 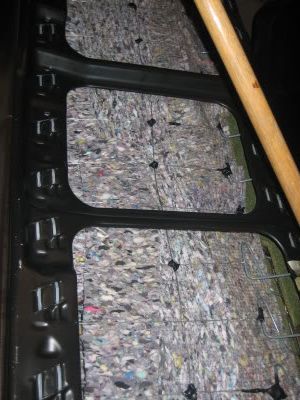 Now you can enjoy a firmer ride in your "new" seats. kris
__________________
Cruise Control not working? Send me PM or email (jamesdean59@gmail.com). I might be able to help out. Check here for compatibility, diagnostics, and availability! (4/11/2020: Hi Everyone! I am still taking orders and replying to emails/PMs/etc, I appreciate your patience in these crazy times. Stay safe and healthy!) 82 300SD 145k 89 420SEL 210k 89 560SEL 118k 90 300SE 262k RIP 5/25/2010 90 560SEL 154k 91 300D 2.5 Turbo. 241k 93 190E 3.0 235k 93 300E 195k
|
 |
| Bookmarks |
|
|


 Linear Mode


