

|
|
|
|
|
|
#1
 02-10-2011, 05:54 PM
|
|||
|
|||
|
Torsion Bar Bushings R&R
Did the torsion bar bushings on my 84 300D today. The results are very nice as the front end feels more solid and the steering is firmer.
As a review I say that it is not a difficult task but requires the mechanic to remain patient. The task takes about 2 hours give or take 15 to 30 minutes, and is a one man job though would be a little faster and easier with two. You with need a 1/4 and 3/8 swivel, some extensions for both in both sizes, 13mm sockets for both sizes, a pry bar or something to leverage the torsion bar, 10mm sockets, a 12 inch 1/2 inch drive extension or flat-ended round bar, a screw driver, and a hammer.(The screw driver is to manipulate the bushings once back in their proper location. You can use it to rotate the bushing by sticking it in the holes of the bushing. Just be gentle with them so as not to mar anything) I found that removing or loosening the brake booster is not necessary but is definitely the more difficult side. I found that using PB Blaster helped significantly on allowing bushing to come out of the tight space under the booster. Make sure to clean any lube from the torsion bar and chassis after doing this because you don't want any oil on the new bushing(s). Then push and wiggle the bushing until you have to use a pry bar then continue until it is out. This requires the patience I spoke about. The bushing bracket bolts are 13mm. I also found that it is not necessary to remove the top bolt for the bushing bracket under the booster. Just get it loose by threading it as far to the end of the stud without it coming off. The bottom one has to go. As to getting the bushing back in on the booster side I suggest loosening the bracket or removing it on the battery tray side. Get the installation on the booster side started then use a 1/2 inch extension or flat ended bar to hit it back in with a hammer if you cannot push it in with your finger while moving the torsion bar. Be careful here and make sure not to pinch the bushing or "clip" it so as to damage it. Additionally I found that jacking up the car on that side helps you do things the 3rd hand you do not have cannot. The installation requires the remainder of the patience of which I spoke. The battery tray side is easy. Just use your brain and a pry bar. Remove the battery, remove the battery tray. The 4 bolts are 10mm. Then remove the 2 13mm bolts holding the bushing bracket. Before removing the bracket note the way it is secured because it goes on only one way. You'll understand when you look at it. Use a pry bar to relieve tension on the bushing and remove the bushing. Replace is the reverse of install. Lastly enjoy the final results. It's definitely an inexpensive job and worth doing. Bushings are found only at the dealership, thats the only place I found them, and run about $7. And the more I restore these old Benz the more impressed I am with them. They are great cars that run smooth and pleasant. 
|
|
#2
02-10-2011, 06:27 PM
|
||||
|
||||
|
any pics of this job to add to a Wiki?
__________________
John HAUL AWAY, OR CRUSHED CARS!!! HELP ME keep the cars out of the crusher! A/C Thread "as I ride with my a/c on... I have fond memories of sweaty oily saturdays and spewing R12 into the air. THANKS for all you do! My drivers: 1987 190D 2.5Turbo 1987 560SL convertible 1987 190D 2.5-5SPEED!!!  1987 300TD 2005 Dodge Sprinter 2500 158"WB 1994GMC 2500 6.5Turbo truck... I had to put the ladder somewhere!
|
|
#6
02-10-2011, 08:26 PM
|
||||
|
||||
|
Quote:
     Thought I'd submit some from when we did the bushings AND bar. 
__________________
-diesel is not just a fuel, its a way of life-  '15 GLK250 Bluetec 118k - mine - (OC-123,800) '17 Metris(VITO!) - 37k - wifes (OC-41k) '09 Sprinter 3500 Winnebago View - 62k (OC - 67k) '13 ML350 Bluetec - 95k - dad's (OC-98k) '01 SL500 - 103k(km) - dad's (OC-110,000km) '16 E400 4matic Sedan - 148k - Brothers (OC-155k)
|
|
#7
02-10-2011, 09:09 PM
|
|||
|
|||
|
For those that do not know, those pics are for a w124. I didn't take pics. I suppose I could. Perhaps I'll pull things apart this weekend and get some.
|
|
#8
02-10-2011, 09:12 PM
|
|||
|
|||
|
That is a good write up on the bushing replacement. they can also be found after market. think World pak has them. I do know the wagon (TD) are dealer only bushings, about $30 ea because the bar is thicker.
The OP has a W123 and the pictures posted is of a W126. same set up but more stuff to remove to get to them. Charlie
__________________
there were three HP ratings on the OM616... 1) Not much power 2) Even less power 3) Not nearly enough power!! 240D w/auto Anyone that thinks a 240D is slow drives too fast. 80 240D Naturally Exasperated, 4-Spd 388k DD 150mph spedo 3:58 Diff We are advised to NOT judge ALL Muslims by the actions of a few lunatics, but we are encouraged to judge ALL gun owners by the actions of a few lunatics. Funny how that works
|
|
#9
02-10-2011, 09:29 PM
|
||||
|
||||
|
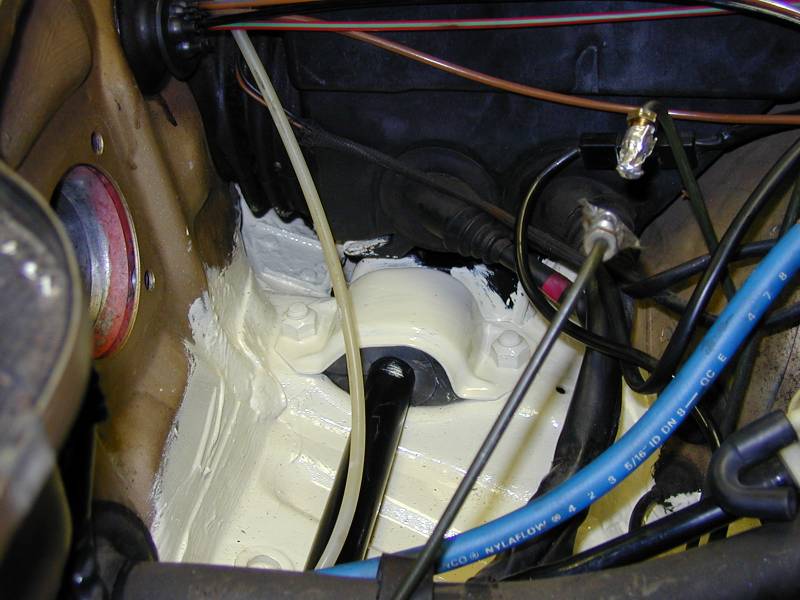
When changing the Bushings you may find you need at the very least to do some surface Rust removal, rust treatment and repainting.
If I had not removed the Brake Booster I would not have had enough room to deal with the Rust. I thank Caesium for posting the Mercedes part number for 300D Sway Bar Bushings : 123 323 05 85 because the place I bought from did not show this part until I searched with the Part number and they turned out to be less than $4 each.
__________________
84 300D, 82 Volvo 244Gl Diesel
|
|
#10
02-10-2011, 10:52 PM
|
|||
|
|||
|
Noted. I had no rust under the booster. A little under the battery tray but I saved that for another day.
|
|
#11
02-10-2011, 10:58 PM
|
||||
|
||||
|
Quote:
W124's have the torsion bar down in front below the radiator support, not even close to how it is on a W126/W123.
__________________
-diesel is not just a fuel, its a way of life- '15 GLK250 Bluetec 118k - mine - (OC-123,800) '17 Metris(VITO!) - 37k - wifes (OC-41k) '09 Sprinter 3500 Winnebago View - 62k (OC - 67k) '13 ML350 Bluetec - 95k - dad's (OC-98k) '01 SL500 - 103k(km) - dad's (OC-110,000km) '16 E400 4matic Sedan - 148k - Brothers (OC-155k)
|
|
#12
02-11-2011, 10:18 AM
|
|||
|
|||
|
Quote:
|
|
#13
02-11-2011, 01:38 PM
|
||||
|
||||
|
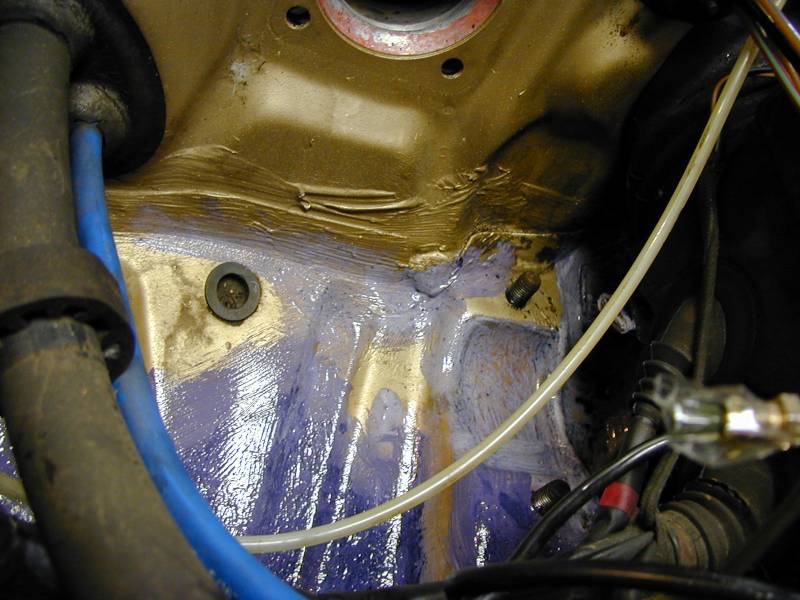
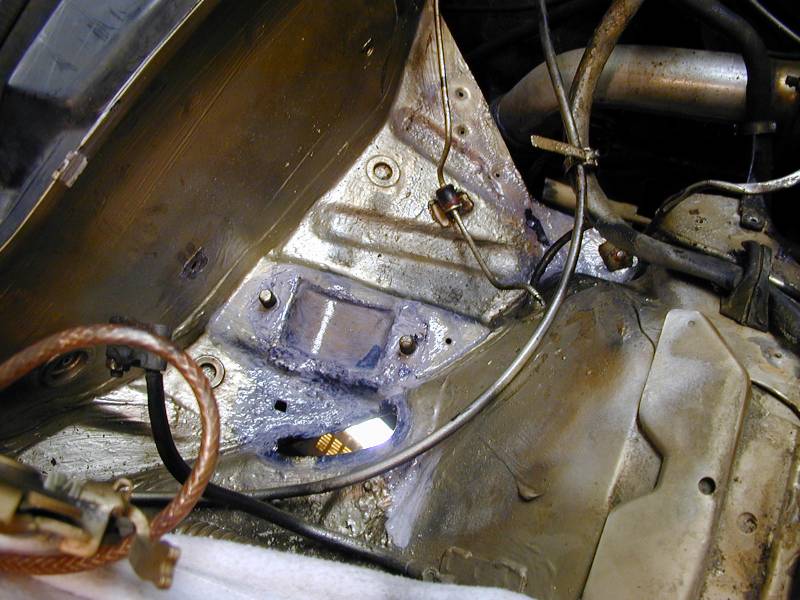
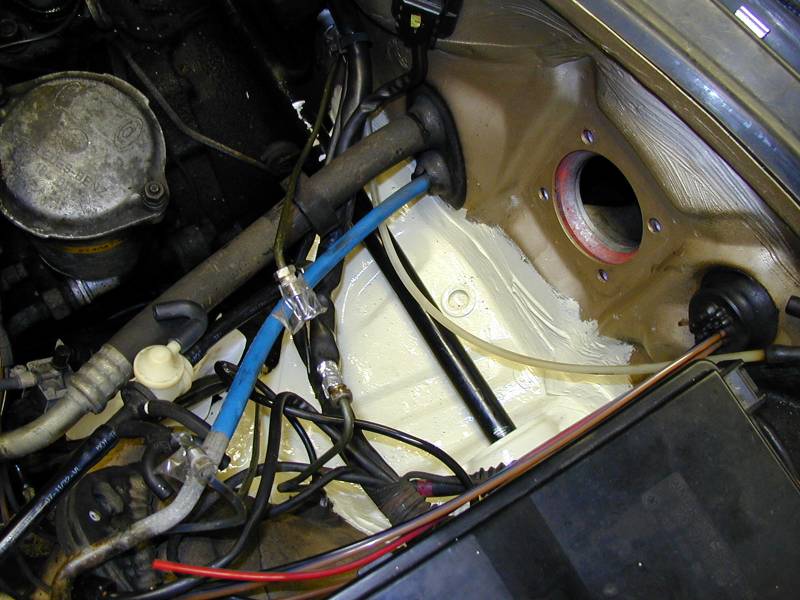
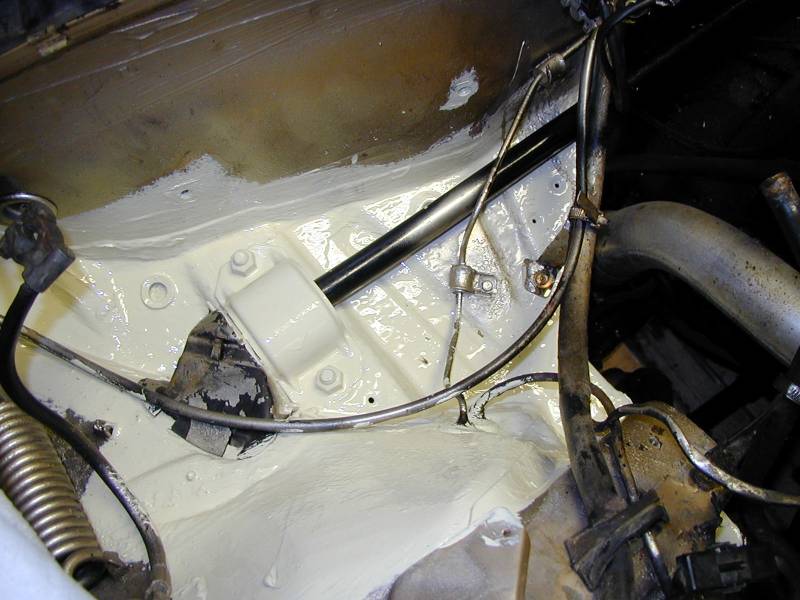
W123 pictures of that area
Here are some pictures of my car - some showing that general area!
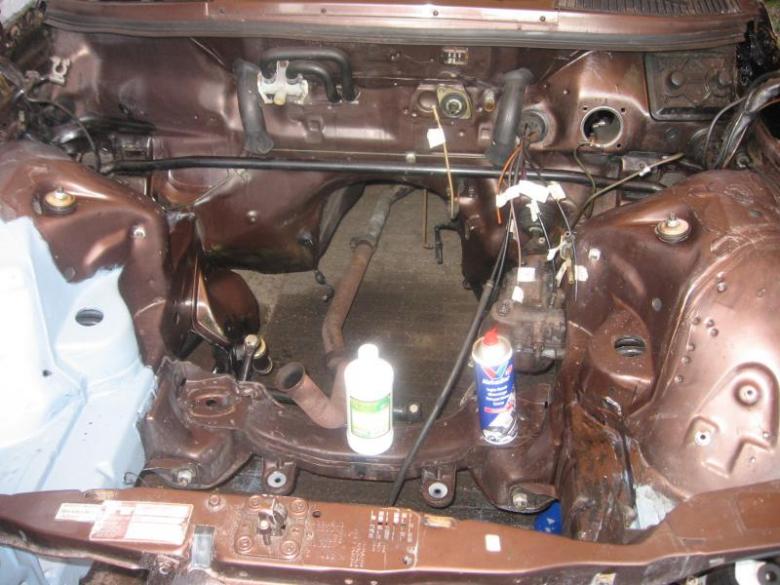   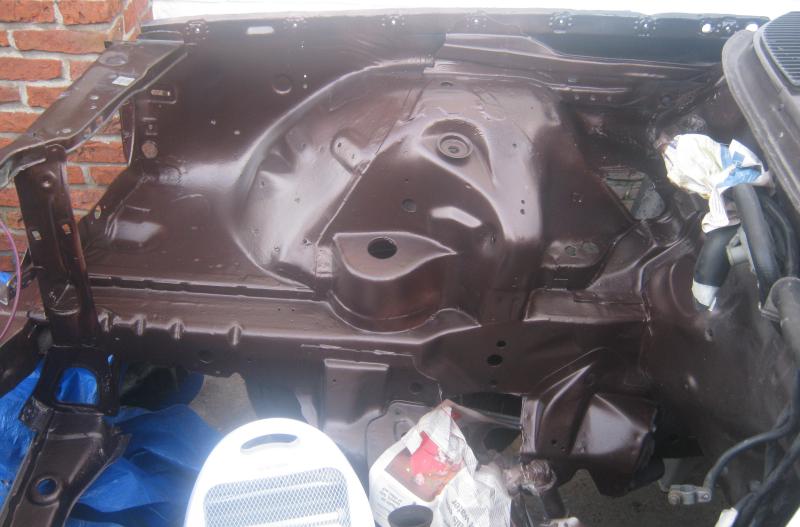 They are all out of this thread:- W123 Engine bay paint advice req'd
__________________
1992 W201 190E 1.8 171,000 km - Daily driver 1981 W123 300D ~ 100,000 miles / 160,000 km - project car stripped to the bone 1965 Land Rover Series 2a Station Wagon CIS recovery therapy! 1961 Volvo PV544 Bare metal rat rod-ish thing I'm here to chat about cars and to help others - I'm not here "to always be right" like an internet warrior  Don't leave that there - I'll take it to bits!
|
|
#14
02-11-2011, 04:06 PM
|
||||
|
||||
|
Quote:
__________________
http://superturbodiesel.com/images/sig.04.10.jpg 1995 E420 Schwarz 1995 E300 Weiss #1987 300D Sturmmachine #1991 300D Nearly Perfect #1994 E320 Cabriolet #1995 E320 Touring #1985 300D Sedan OBK #42
|
 |
| Bookmarks |
|
|


 Linear Mode


